37
37
1
0
Using iTunes™ with your Gmini™ XS100
Using iTunes™ with your Gmini™ XS100
The easiest way to transfer music fi les between a Macintosh
®
computer and your Gmini XS100 is to
use the Macintosh Finder™ to drag and drop the fi les to and from your Macintosh
®
.
However, for Macintosh
®
users who do want to use the Gmini XS100 with iTunes
®
, Archos has
developed a special i-Tunes
®
plug-in. You will fi nd it in the folder /Data/i-Tunes Plug-in on the
Gmini XS100 hard disk or from the Archos website. In this folder you will fi nd a .sit compressed fi le.
Uncompress it and open the folder for your operating system. You will fi nd a JPEG image illustrating where you
need to copy the plug-in to. Once this is done, iTunes™ will recognize the Gmini XS100 as a ‘Device’. Currently
there is no plug-in for the PC version of iTunes™.
To make your user experience easy as possible, please keep in mind the following.
1) Music purchased at Apple’s on-line music store are copy protected with a proprietary encryption system. The
ARCHOS device will not be able to play this purchased music or fi les in AAC format which you might have created.
It will happily play MP3 format fi les without problem.
2) When you create your Playlists with iTunes
®
(you can only create Playlists from songs that have been copied
to your Gmini XS100), your Macintosh
®
will save these Playlists to the root directory of your Gmini. It will not
save them to the Gmini Playlists directory. It would be best to use the Gmini itself to make Playlists and then
save these Playlists in your Playlists folder.
3) When you drag and drop MP3 fi les from your iTunes
®
library to your Gmini, the i-Tunes
®
program will look at
the ID3 tag information of the MP3 fi le, and create a folder on the root of your Gmini using the name of the
Artist as the folder name. Then it will take the Album name ID3 tag, and create a subfolder with that album as
its name. Finally, it will take the MP3 song itself and place it into that album subfolder. Thus, although it is a
clean structure of artists and albums, i-Tunes
®
does not follow the Gmini convention of placing the music into
the Music folder fi rst.
38
38
1
1
Updating the Gmini™ XS100 Firmware
Updating the Gmini™ XS100 Firmware
Archos periodically updates the fi rmware or Operating System (OS) and makes it available for free download
on the ARCHOS website (www.archos.com). Updates to the Operating System include new features, feature
improvements, and bug fi xes. You should check to make sure that you are running the most recent version of the
OS. To see the current version of the software your device is running, go to Setup > System and look at the line
OS Version . You will fi nd the most recent version of the OS and its version number at the Archos website (www.
archos.com) under the category Software .
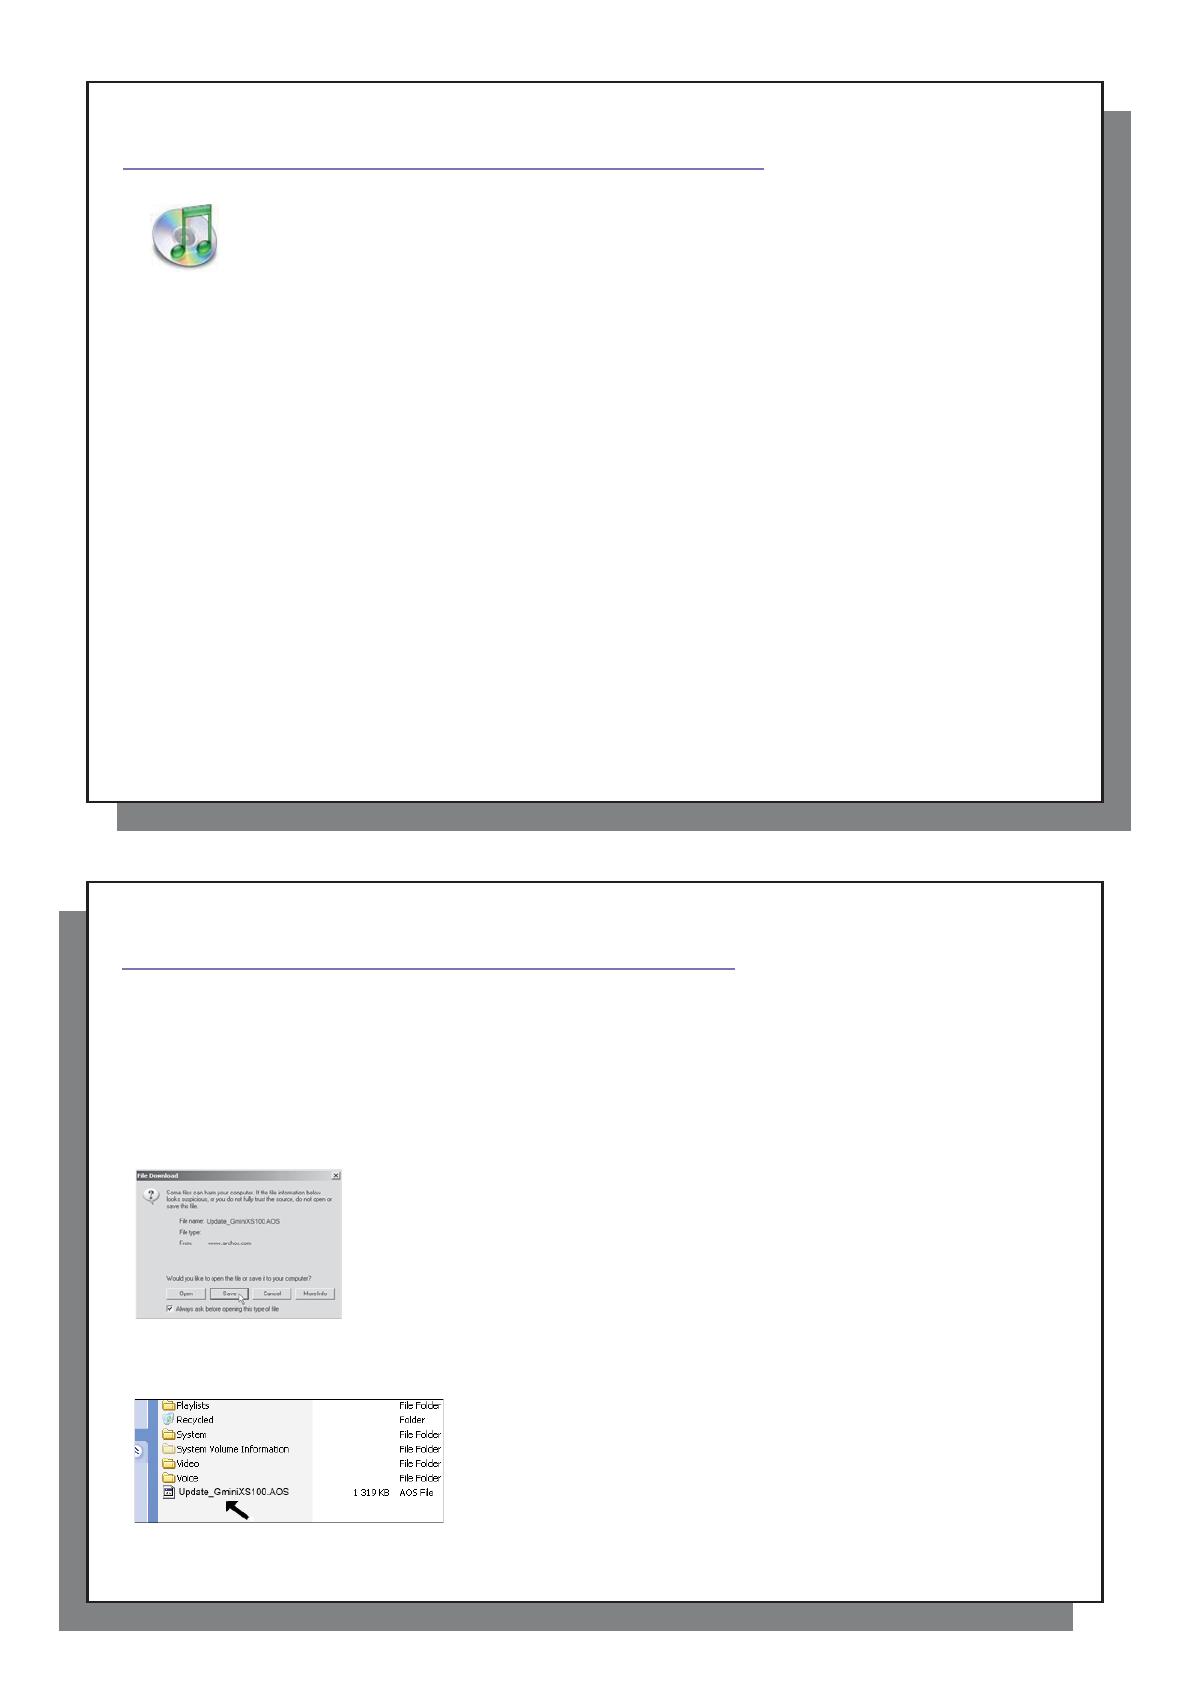
11.1 Download the Update_GminiXS100.AOS fi le
11.1 Download the Update_GminiXS100.AOS fi le
When you click on the link to download the new OS fi le (the fi le name is Update_
GminiXS100.AOS), your browser may warn you that the contents of the download
may harm your computer. This is because the Windows
®
system does not know what
an .AOS fi le is. Be assured that Archos has made every effort to ensure that the fi le
does not contain viruses. Click on the option Save to download this fi le to a convenient
place, such as My Documents , in order to later copy this fi le to your Gmini XS100. If
your Gmini is connected to your PC, you can even save it directly to the Gmini.
You will also fi nd next to the fi rmware download, a text fi le which details the list of
changes from the previous version of the OS.
11.2 Copy to Gmini™ root and Update
11.2 Copy to Gmini™ root and Update
Connect your Gmini to your computer (See the chapter on connecting to
the computer for help), and then copy the Update_GminiXS100.AOS fi le
to the root directory of the Gmini. The root directory is the top most level
of the directory hierarchy. Just drag this.AOS fi le onto the Gmini XS100
Hard disk in your fi le manager and it will place it in the top most directory
(outside any folder). If there is already an older version of the Update_
GminiXS100.AOS fi le on your Gmini, Windows
®
will ask if you want to
overwrite the current fi le. Click on Yes. Once this fi le is copied, safely disconnect Gmini XS100 from the computer.
Refer to the disconnection procedure in the connection chapter if you are unsure of how to do this.