Page is loading ...

User Manual
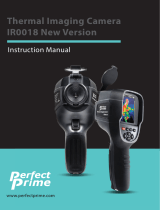
NI IR2010
Thermal Imaging Camera
Supplier:
Nieaf-Smitt B.V.
Vrieslantlaan 6
3526 AA Utrecht Holland
P.O. Box 7023 3502 KA Utrecht
Tel. : 030 288 13 11 (general)
Fax. : 030 289 88 16
Tel. : 030-285 02 85 (helpdesk)
e-mail : [email protected]
Specifications of the equipment: NI IR2010
Specifications of the manual: Date : 09-04-2010
Number : 561144163
Version : 001

2 Rev 001
© Copyright 2010
All rights reserved. Nothing from this edition may be multiplied, or made
public in any form or manner, either electronically, mechanically, by
photocopying, recording, or in any manner, without prior written consent
form Nieaf-Smitt bv.
Nieaf-Smitt bv reserves the right to change parts at any given moment,
without prior or direct notification to the client. The contents of this user
manual may also be changed without prior warning.
No part of this publication may be seen as part of a contract for the
equipment, unless specifically referenced and included in such contract.
This user manual is compiled with all possible care, but Nieaf-Smitt bv can
not accept any responsibility for possible errors in this user manual or any
consequences resulting from that.

3 Rev 001
Preface
This manual describes the NI IR2010. The information in this manual is
important for proper and safe functioning of the equipment. If you are not
familiar with operating this equipment then read this user manual from the
beginning to the end thoroughly. After that you can use this manual for
reference. You can find the information rapidly using the table of contents.
In this user manual, the following marking conventions are used to focus
attention on certain subjects or actions
TIP:
gives you suggestions and advice to perform certain tasks
easier or handier.
ATTENTION:
A remark with additional information; draws your attention to
possible problems.
CAUTION:
The camera may be damaged, if you do not carefully execute
the procedures.
WARNING FOR DANGER:
You can (seriously) hurt yourself or seriously damage the
product, if you do not carefully execute the procedures
Warranty
Nieaf-Smitt B.V. guarantees the tester for a period of 12 months. The period of
warranty will be effective at the day of delivery. The liability is recorded in the
terms of delivery (FME).

4 Rev 001
CONTENTS
1. General safety regulations ................................................................6
2. General ................................................................................................8
2.1 Intended use.................................................................................................... 8
2.2 Target group.................................................................................................... 9
2.3 Operation ......................................................................................................... 9
2.4 Specifications................................................................................................ 10
2.5 Safety precautions ........................................................................................ 12
2.6 Certification ................................................................................................... 12
3. Contents of the case ........................................................................13
4. Getting started..................................................................................14
4.1 Charging the internal battery ....................................................................... 14
4.2 Switching the camera on/off ........................................................................ 14
4.3 Configuration of the camera ........................................................................ 14
4.3.1 Menu structure........................................................................................ 15
4.3.2 Infrared settings ..................................................................................... 16
4.3.3 Measurement options ............................................................................ 17
4.3.4 Camera settings...................................................................................... 18
4.3.5 Audio settings......................................................................................... 19
4.3.6 Image browser ........................................................................................ 20
4.3.7 Date & Time settings .............................................................................. 20
4.3.8 Language selection ................................................................................ 21
4.4 Focussing ...................................................................................................... 22
4.5 Saving an image............................................................................................ 23
5. Getting started..................................................................................24
5.1 Temperature measurement .......................................................................... 24
5.2 Thermal and visible image blending. (Image fusion) ................................. 25
5.3 Image alignment............................................................................................ 26
6. Adding captions when saving images ...........................................27
6.1 Voice message .............................................................................................. 27
6.2 Text captions................................................................................................. 28
7. Frequently asked questions............................................................29
7.1 What Temperature Measurement Options are there?................................ 29
7.2 . How do I select and move cursors? .......................................................... 29
7.3 What is area analysis?.................................................................................. 30
7.4 What is tracking? .......................................................................................... 31
7.5 What are Isotherms and how do I select them? ......................................... 32
7.6 Why use Auto/Manual temperature range and span adjustment?............ 33
7.7 What is a temperature profile?..................................................................... 34
7.8 How do I turn the visible camera on and off?............................................. 35
7.9 How do I blend thermal and visible images (image fusion)? .................... 36
7.10 How do I align the thermal and visible images?....................................... 37
7.11 How does illumination work? .................................................................... 38
7.12 How do I save an image? ........................................................................... 39
7.13 How does the voice and text caption recording work? ........................... 40
7.14 How do I set alarms? .................................................................................. 43
7.15 How do I change the screen colours?....................................................... 45

5 Rev 001
7.16 What is emissivity?.................................................................................... 46
7.17 What is reflected Temperature?................................................................. 47
7.18 What is integration used for?..................................................................... 48
7.19 Do I need to turn Interpolation off? ........................................................... 49
7.20 Can I reduce camera battery power consumption? ................................. 50
7.21 What does Camera Reset do?.................................................................... 51
7.22 How do I automatically make multiple images?....................................... 52
8. Maintenance......................................................................................53
8.1 Calibration and Repair.................................................................................. 53
8.2 Cleaning the camera ..................................................................................... 53
8.3 Replacing the batteries................................................................................. 53
Bijlagen:
Appendix 1 Emissivity table in the Camera.............................................................. 54
Appendix 2 Complete iconlist .................................................................................. 55
Appendix 3 Declaration of Conformity ..................................................................... 56
Appendix 4 Accessories .......................................................................................... 57

6 Rev 001
1. General safety regulations
WARNING DANGER:
Read, before you perform any action in connection with the
camera, this user manual carefully. Nieaf-Smitt B.V. is not
liable for injuries, (financial) damage and/or excessive wear
resulting from incorrectly performed maintenance, incorrect
use of or modifications to the camera.
ATTENTION:
Under certain circumstances, in almost every electronic
memory data are lost or changed. Therefore Nieaf-Smitt BV
accepts no financial responsibility for losses or claims by
lost or otherwise unusable information resulting from abuse,
misuse, failure, neglect of the user manual and procedures or
other related causes.
It is not allowed to remove, to skirt or to tide over the
enclosure or safeties of the camera, during operation.
It’s forbidden to place and/or to use the camera in a room
where there is a risk of explosion.
If the tester is used by a third party, you being the owner are
responsible, unless otherwise specified.

7 Rev 001
ATTENTION:
Nieaf-Smitt B.V. reserves the right to, without prior notice ,
update the software in the camera, which is returned for
either reparation or other reasons.
Repair can only be done by Nieaf-Smitt BV.
WARNING DANGER:
It’s forbidden to execute measurements if strong electrostatic
or electromagnetic fields are present
ATTENTION:
Provide a clean and save workplace which has sufficient
lighting.
TIP:
Contact Nieaf-Smitt B.V. if you require information
concerning training for the camera. Training at Nieaf-Smitt or
at customers can be arranged
Nieaf-Smitt bv Vrieslantlaan 6
3526AA Utrecht Holland
Postbus 7023 3502KA Utrecht
Tel.: 0031 30 – 2881311 (general)
Tel.: 0031 30 – 2850285 (helpdesk)

8 Rev 001
2. General
Thermal imaging cameras visualize and measure the thermal heat, which is
issued by objects, in order to detect problems in a wide range of mechanical
and electrical systems on a fast, accurate and highly effective manner. They
identify sources of excessive friction, faulty switching, providing crucial
information for many applications, including measuring heat loss from buildings
and identify potential blockages in heating.
All this information is accessible without making contact with the measuring
object. Since "irregular" thermal issues can be an indication for potential
inefficiencies or errors, measurements can often be implemented in time for
production loss, equipment failure and fire prevention.
Nieaf-Smitt forefront in adapting of radiometry and thermal systems for many
more applications, so the technology can be used daily by inspectors and
maintenance engineers, as ordinary tools like a screwdriver.
2.1 Intended use
Nieaf-Smitt products and solutions are used in many industries, including retail,
banking, recreation, security, transportation and healthcare.
Many professionals in many industries, rely on the systems of daily Nieaf-Smitt
for a wide range of thermal requirements, including:
Electric
Checking for loose / tight connections
Congested components
Disproportionate stress distribution
Faulty / fatigued components
Mechanical
Monitoring the condition of bearings
Poor motor shaft alignment
Faulty electrical connections
Domestic and industrial plumbing and heating
Floor heating control, without an equal area to break.
Detect cracked pipes
Monitoring efficiency of boilers and radiators
Food production
Monitoring temperature of food production on a tape
Monitoring the optimal operation of storage
Medical / health
Scanning of individuals at a high temperature as an indicator of virus
Control of blood flow to limbs
Emergency / Security
Monitoring of heat traces of recently displaced vehicles
Body temperature in low visibility

9 Rev 001
2.2 Target group
The group which covers this manual are been technically competent
persons and competent persons.
People with certain knowledge and skills for the camera to operate in
sectors including the following:
- Preventive maintenance, electrical and mechanical
- Domestic and industrial controls
- HVAC inspection and frozen
- Troubleshooting and fault detection
2.3 Operation
Thermal cameras visualize the temperature radiated by the measured object.
This thermal image is shown through a display. There is also a normal image or
a combination of thermal and normal image (image fusion). The recordings can
be stored on a micro SD card. These images can be processed through a
computer.

10 Rev 001
2.4 Specifications
Performance
Temperature range : -10°C to +350°C
Field of view (FOV) : 20°x 20°
Spectral Response : 8µm to 12 µm
Sensitivity : ≤0.3°C @ 30°C
Detector : 47 x 47 pixel array
Frame rate : 8Hz
Focus Range : 0.5m to infinity
Image storage
Number : Up to 1000 images on SD card supplied
Medium : Micro SD Card
Display
3½” colour LCD with LED Backlight. 8 colour palettes. Mixed thermal and
visible images.
Laser pointer
A built in Class 2 laser is supplied to highlight the centre of the thermal image.
(Aligned at 2 metres)
Beam Divergence : <0.2mrad
Maximum Output : <1mW
Measurement
Temperature range: : -10°C to +350°C
Radiometry : Two moveable temperature measurement
cursors
Temperature difference measurement
Emissivity Correction : User selectable 0.10 to 1.00 in steps of
0.01 with reflected ambient temperature
compensation
Accuracy : The greater of ±2°C or ±2% of reading in °C
Imager power supply
Battery : Lithium-ion field rechargeable.
Operation time : Up to 6 hours continuous operation
AC operation : AC adaptor supplied, 12Vdc – 1,25A
Mechanical
Housing : Impact Resistant Plastic with over
moulded soft plastic and detachable
handle
Dimensions : 130mmx95mmx90mm (excluding handle)
Weight : 0.70kg
Mounting : Handheld & tripod mounting 1/4" BSW

11 Rev 001
Settings and controls
- On/Off soft power control
- User selectable span control
- User selectable level control
- Auto adjust span and level
- Laser trigger switch
- Readout in °C or °F
- User selectable image integration
- User selectable emissivity setting
- User selectable reflected temperature
- Two moveable temperature measurement cursors
- Area analysis
- X-Y profiles
- Isotherms
- Text annotation
- Voice annotation
- Image capture, time and date
- Visual/audio alarm high and low
Features
- Real-time image and temperature measurement display
- Visible/thermal/mixed image fusion (100%, 75%, 50%, 25%, 0%)
- Picture In Picture (PIP)
- Simple operation
- Multiple temperature measurement
- Image browser
- Battery Charge indicator
- Lightweight
- Laser Pointer
- Auto hot/cold seeker
- Languages
Computer requirements (for PC software)
PC: IBM compatible PC with a minimum of: 300MHz processor, MS Windows
XP 128MB RAM. 16 bit colour graphics with 1024x768 capability.
Environment
Temp. operating range : -5°C to +45°C
Humidity : 10% to 90% non condensing
Temp. storage range : -20°C to +60°C
CE Mark (Europe)
IP rating : IP54
Operating temp for stated accuracy : 23 ºC

12 Rev 001
2.5 Safety precautions
The equipment described in this document uses a Class 2 laser. Under no
account should anyone look directly into the laser beam or the laser beam exit
aperture, irreversible damage to the eye may occur. The laser should not be
operated when there are personnel in the imager’s field of view.
Caution – use of controls or adjustments or performance of procedures other
than those specified in this document may result in hazardous laser radiation
exposure.
2.6 Certification
The tester complies with the relevant European directives. During the design of
the camera directives have been taken into account, in order to comply to the
fundamental demands of the directives. On the basis of this data the CE-mark
has been mounted on the camera. The directives and the standards mentioned
are enumerated in the EC-Declaration of Conformity. (see appendix. 3)

13 Rev 001
3. Contents of the case
1. The carrying case
2. Camera
3. PSU and International adaptors.
4. CD – user manual and software.
5. USB cable (camera to PC).
6. Handle.
7. Quick start guide, certificate of conformity, calibration card (full manual
added to CD).
2.
3. 5.
4.
6.
1.
7.

14 Rev 001
4. Getting started
4.1 Charging the internal battery
The camera’s built in battery is charged via the charging port. A fully
charged battery will last approximately 6 hours. A red LED indicates
charging which turns to green when the battery is charged.
4.2 Switching the camera on/off
Press the on/off button to switch the camera on.
After startup the Nieaf-Smitt logo is displayed. Then the displays goes black and
the camera starts up. This takes several seconds.
4.3 Configuration of the camera
After switching the camera on for the first time it needs to be configurated. This
will be explained in the underlying paragraphs.
options chosen by the user. A yellow box around the icon for Hotkey1 or
Hotkey 2 indicates that this option is selected and this defines the operation of
the navigation and toggle buttons. In normal imaging mode, Hotkey 3 may be
used to freeze the image; pressing it again returns the camera to live operation.
Hotkey 4 is used to enter and exit the menu. See appendix 2 for a full icon list.
NOTE:
When the camera is connected to a
PC via the USB cable the camera
will charge but extremely slowly.
NOTE
Press and hold for a few seconds
to switch the camera off.
NOTE
It take a few seconds before the
camera is fully started up.

15 Rev 001
4.3.1 Menu structure
a. Select the menu by pressing Hotkey 4 .
b. Navigate through the menu using the navigation buttons and
press Hotkey 3 to select the required option. The highlighted
item will have a yellow box around it.
c. Use the up/down buttons to move in the selected list and select
the required item.
d. Use the left/right buttons to change values and options for the
specific item.
e. Press Hotkey 4 to exit or Hotkey 1 to go back to the
previous menu.
Measurement
options
Inrared
settings
Image
browser Date & Time
settings
Audio
settings
Language
selection
Camera
settings
Hotkey 1 Hotkey 2 Hotkey 3 Hotkey 4
Fi
g
1.
Centre toggle button
Up/Down, Left/Right
navigation buttons.

16 Rev 001
4.3.2 Infrared settings
See chapter “frequently asked questions” for more details of each item.
• Emissivity
Set emissivity value between 0.10 and 1.00 for measuring temperature.
Pressing Hotkey 3 (ε Table) gives a table of emissivity values of common
materials from which a selection can be made.
• Palette
Display in image using different colour palettes.
1. Ironbow 5. High Contrast
2. Rainbow 6. Rainbow 16
3. Isotherm Style 7. Black Hot
4. Hot Metal 8. White Hot
• Reflected Temp
Usually set to the ambient temperature.
Applies only when emissivity of less than 1 is selected.
• Temp units
Choose between °C and °F.
• Integration
Choose an integration period from 1 (fast) to 9 (slow).
This determines the trade off between display speed and noise.
• Interpolation
Choose Off or On.
This shows or hides the thermal image pixelation.
With this the interpolation of the thermal image can be switched on or off. If
this is switched off, the shown thermal image will be displayed with the
resolution of the thermal sensor.

17 Rev 001
4.3.3 Measurement options
This menu enables the selection of options for temperature
measurements. The symbols shown below indicate the icons shown for
Hotkey 1 when the various options are selected. See frequently asked
questions for more details of each item.
• Cursors
Choose between one or two cursors. When two cursors
are selected, the temperatures at both cursors and the
temperature difference between them will be displayed. When
one of the cursors is selected by Hotkey 1, it can be moved
around on the display by the navigation buttons.
• Cursor Tracking
Select “High”, “Low”, or “High & Low” in order to track and
measure the hottest point, the coldest point, or both hottest and
coldest points in the image.
• Area analysis
If this option is turned on, the highest, lowest, and average
temperatures within the designated area will be displayed. Three
different area size boxes can be selected via Hotkey 1.
• Isotherm
Select “High”, “Low”, or “High & Low” in order to highlight
areas of the scene with temperatures within one or two temperature
bands. The temperature bands are adjustable by means of Hotkey 1
and the navigation keys.
NOTE:
The above three items are mutually exclusive, i.e. when
one is turned on the other two are disabled.

18 Rev 001
• Temperature profile
Select “Horizontal” or “Vertical” to enable a histogram of
temperature values along a horizontal or vertical cross section to be
displayed on the right hand side of the display. The position of the
cross section is indicated by small arrows at the left and right or top and
bottom of the image and can be adjusted by means of Hotkey 1 and the
navigation buttons.
• Temperature alarms
Select “High”, “Low”, or “High & Low”. Visual and audio
alarms will be triggered if either cursor or a point within the designated
area is higher or lower than a set temperature. The high and low set
temperatures may be adjusted by means of Hotkey 1 and the
navigation buttons.
4.3.4 Camera settings
See chapter “frequently asked questions” for more details.
• LCD brightness
Select from 1 (low) to 9 (high) to control the screen brightness to save
battery power.
• Caption mode
Select “On” to enable the addition of a text caption when saving an image.
Options will then be displayed when saving an image, to be selected by
means of Hotkey 2 and hotkey 3.
• Auto off
Select “5 Mins”, “10 Mins”, “20 Mins” to allow the camera to switch itself off
after a defined period of inactivity in order to save power. There is also an
“Always On” option.

19 Rev 001
• Camera reset
Select with Hotkey 3 to restore the factory settings.
• Sequence Record
Select the time interval in which the camera automatically captures an image.
Set of 10 s, 1 hours or ... exceeded a temperature alarm.
• Sequence Captures
Set here how many times the above setting should be performed.
4.3.5 Audio settings
See chapter “frequently asked questions” for more details of each item.
• Imager sounds
Select “Off” to mute all audible outputs.
• Voice annotation
Select “Session”
to add a voice message at the start of a set of images
(A session ends when the imager is switched off).
Select “Individual”
to add a voice message to each saved image.
Select “Combined”
to add a common voice message at the start of a set of images
and add additional comments for each image.
• Voice playback
Select “speaker” or “headset” for the desired method of audible outputs.
• Volume
Select the volume of the audible outputs from 1 to 9.
If session is selected the voice message is recorded in the audio settings
by pressing Hotkey 3. Recording is stopped by pressing Hotkey 3 again.
Hotkey 1 can be used to play back the recorded message. Hotkey 3 can
be used to re-record if necessary.

20 Rev 001
4.3.6 Image browser
The saved images are shown on the screen with the most recently saved
image first.
Select the desired image by means of the navigation keys.
To display the selected image press Hotkey 3.
To delete the selected image press Hotkey 2, to confirm deletion press
Hotkey 3.
When a stored image is displayed, press Hotkey 3 to return to live imaging.
4.3.7 Date & Time settings
a) Use the left/right buttons to navigate in this menu, the item that
can be changed is highlighted in red. In the picture above the day (DD)
14 is highlighted.
b) Use the up/down buttons to change the value.
c) The date formats can be changed by pressing Hotkey 2 to cycle through
DD-MM-YYYY, MM-DD-YYYY and YYYY-MM-DD options. Pressing
Hotkey 4 will select the option on the display.
/