Page is loading ...

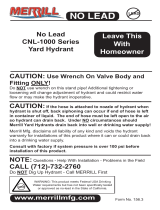
UNDER NO CIRCUMSTANCES SHOULD MERRILL YARD HYDRANTS
DRAIN BACK INTO WELL OR DRINKING WATER SUPPLY!
Installing, adjusting and maintaining MERRILL EMNL-5000 No Lead Series Yard Hydrant.
INSTALLATION:
1. First be sure water line on which hydrant is to be installed has been thoroughly ushed to
wash out foreign particles. Merrill will not warrant or accept any responsibility if the water line
is not ushed out prior to attachment of hydrant.
2. Be sure the hydrant is installed with provision for drainage below the frost line.
a. If hydrant is installed in a pit, the pit must have an open bottom or some form of drainage.
b. If hydrant is buried in the ground, a few tile can be laid in gravel or coarse material to form
a eld system for the drain.
c. If hydrant is buried in the ground and no tile are used, be sure to put a quantity of gravel,
crushed rock or some coarse material, not sand, around the drain of the hydrant. This will
permit faster and better drainage.
3. IMPORTANT - If hydrant is buried in the ground, it is a good idea to put a brick or large stone
under the hydrant, because when the hydrant drains and this subsoil becomes wet, it will
allow the hydrant to settle and thus put a strain on the pipe to which it is connected. A brick or
stone would carry this weight.
4. To connect the hydrant to the water line, just turn it onto the male thread connection for
which it is intended. Merrill has hydrant ells and tee ttings available for connection to
exible poly pipe.
5. IMPORTANT - Before backlling the trench, turn on the water. Then turn on the hydrant by
raising the handle to let the water ow. If the hydrant is not working properly, refer to
Adjustment section. Merrill will not accept any responsibility for digging up the hydrant if
installer fails to ush out the water line before attaching hydrant to water line AND to
check hydrant for proper operation before backlling the trench.
WARNING: If the ground freezes at or below the bottom of this hydrant, your warranty is
void and damage due to improper installation or act of nature is not covered by manufacturer.
ADJUSTMENT:
1. Adjusting the plunger in the lower valve body.
a. To lower the plunger assembly, rst turn o the water pressure. Then loosen the C-5
1/4" Stainless Steel hex head bolt using a 11 millimeter wrench, Raise the handle up all the way,
tighten the 1/4" hex head bolt and lower the handle until the plunger bottoms out. Then loosen
the 1/4" hex head bolt, lower the handle until the handle end is 2" from closing against the head
casing, then hold the handle at this point and re-tighten the hex bolt. The water pressure can
now be turned on.
b. To determine if the water is draining out the stand pipe, turn the hydrant on and let the
water ow. Then push down the handle to close the hydrant with a cup of water covering
the nozzle. If the water in the cup siphons back through the hydrant, the plunger is in the
correct position. If the water does not siphon out of the cup, then adjust the plunger in the
same way as stated in (a). Then check to see if the water siphons out of the cup
after adjustment.
MAINTENANCE:
1. In maintenance, nothing is needed - But, a few drops of oil occasionally on the cam of the
lever will prolong its life.
2. To replace the plunger, NO NEED DIGGING UP HYDRANT - First turn o water pressure,
then remove the handle and draw straps, loosen the packing nut, unscrew the packing
gland, and pull up the inside rod with plunger for easy service, or simply unscrew head casting
from stand pipe and remove rod and plunger.
For any questions CALL MERRILL (712) 732-2760
INSTALLATION INSTRUCTIONS
Merrill Mfg. disclaims all liability of any kind and voids the hydrant warranty for installations of
this product where it can or could drain back into a drinking water supply.
/


