Section I - General
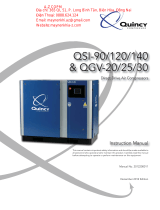
Quincy Compressor-QSI
®
1
Royal Blue Warranty
Drive Coupling Elements - Five years (60 months)
from date of start up (not to exceed 66 months
from date of shipment), including parts and labor.
(Machine must be installed and operated in
accordance with the Operator’s Manual.)
Variable Speed Drives (if applicable) - Five years
(60 months) from date of start up (not to exceed
66 months from date of shipment), including parts
& labor for the first year (12 months), parts only for
the remainder of the warranty period. Unit must be
installed indoors in a well ventilated environment &
a line reactor purchase (from Quincy Compressor) is
required.
Remanufactured Airend - Twelve (12) months from
date of shipment from the factory.
Parts - Ninety
(90) days from date of Distributor sale
or one (1) year from date of factory shipment.
With respect to products not manufactured by
Seller, Seller will, if practical, pass along the
warranty of the original manufacturer.
The terms of coverage for the Royal Blue Warranty
are listed below. Failure to follow the terms will
invalidate the Royal Blue Warranty.
AUTHORIZED START-UP REQUIRED:
A properly completed start-up report and the Royal
Blue Warranty registration form must be submitted
by an authorized Quincy distributor to the Quincy
Compressor Bay Minette office within thirty (30)
days of start-up. Start-up reports must be submitted
on Q-Serv.
GENUINE PARTS AND FLUIDS
The compressor must be maintained with
QuinSyn-PG (8,000 hours maximum), QuinSyn-
XP (12,000 hours maximum), QuinSyn-Plus (8,000
hours maximum) or QuinSyn-F fluid (4,000 hours
maximum). Maximum fluid change intervals are
noted per fluid. Actual fluid change interval is to be
determined by fluid sampling report, not to exceed
maximum fluid change interval. Fluid samples must
be taken every 2,000 hours or as directed by the
analysis report.
Seller warrants products of its own manufacture
against defects in workmanship and materials under
normal use and service, as follows:
Packaged Compressors - Twelve (12) months from
date of start-up or eighteen (18) months from date
of shipment from the factory, whichever occurs first.
Airend on Packaged Compressors (for service
at full-load pressure at or below 150 psig) - Ten
years (120 months) from date of startup (not to
exceed 126 months from date of shipment from the
factory).
Airend on Packaged Compressors (for service at
full-load pressure above 150 psig) - Twelve (12)
months from date of start-up or twenty-four (24)
months from date of shipment from the factory,
whichever occurs first. Five (5) and ten (10) year
Extended Airend Warranties are available on 150
psig full-load pressure airends.
Air/fluid Reservoir Tanks - Five years (60 months)
from date of start up (not to exceed 66 months
from date of shipment), including parts and labor.
In the event of a reservoir tank failure, the parts and
labor coverage is limited to the reservoir tank itself
and does not cover the separator element(s) or loss
of fluid.
Air and Fluid Heat Exchangers - Five years (60
months) from date of start up (not to exceed 66
months from date of shipment), including parts and
labor for the first twelve (12) months, parts only
after twelve (12) months. In the event of a heat
exchanger failure, the parts and labor coverage is
limited to the heat exchanger itself and does not
cover the loss of fluid.
Drive Motors - Five years (60 months) from date
of start up (not to exceed 66 months from date of
shipment), including parts and labor. Royal Blue
warranty does not cover medium voltage (above
575 volt, 3 phase) or customer specified motors.
Before any motor repairs or replacements are
performed, the factory must be contacted at the
time of failure in order to approve any further
action.
Updated Warranty 10/01/2008.