Printing guide
Page 1 of 5
Printing guide
Get the most from the printer by properly loading the trays, and setting the types and sizes for media.
Loading paper
General guidelines
Do not overload the media sources.
Make sure the stack height does not exceed the maximum height indicated by the labels on the guides.
Overloading may cause jams.
Never mix media types within a tray.
Loading standard 250-sheet tray
Do not remove a tray while a job is printing or while the control panel indicator light is blinking. Doing so may
cause a jam.
1 Remove the tray.
Note: To load legal or folio size paper, extend the length of the paper tray. See “Extending the tray for legal
or folio size paper” for instructions.
Printing guide
Page 2 of 5
2 Squeeze the side guide tab, and slide the guide to outside of the tray.
3 Squeeze the rear guide tab, and slide the guide to the correct position for the size media you are loading.
4 Flex the sheets back and forth to loosen them, then fan them. Do not fold or crease the print media.
Straighten the edges on a level surface.
5 Load print media in the tray.
Note: Load letterhead paper with the design side facing down. The top edge of the sheet with the logo
should be placed at the front of the tray.
Make sure the print media is below the max fill tabs on the side guides. Overloading may cause jams.
Printing guide
Page 3 of 5
6 Squeeze the side guide tab, and slide the guide until it lightly rests against the edge of the media.
7 Insert the tray.
8 Extend the paper support on the output bin.
Printing guide
Page 4 of 5
Extending the tray for legal or folio size paper
To load legal or folio size paper, extend the paper tray. You may also attach an optional dust cover on the back of
the printer to protect the tray while it is extended.
1 Press down on the latch at the back of the tray.
2 Expand the tray until the extender locks into place.
Attaching the dust cover
The dust cover helps protect the paper tray from the environment. It also keeps the tray from being knocked out
of position while it is extended.
Note: This feature may not be available for all models.
Attach an optional dust cover to the back of the printer by aligning the tabs on the cover to the holes on the printer,
then snap the cover into place.
Printing guide
Page 5 of 5
Setting the Paper Type and Paper Size
After setting the Paper Type and Paper Size to the correct values for the type and size used in the trays, then any
trays containing the same size and type are automatically linked by the printer.
Note: If the size of the media you are loading is the same size of the media previously loaded, do not
change the Paper Size setting.
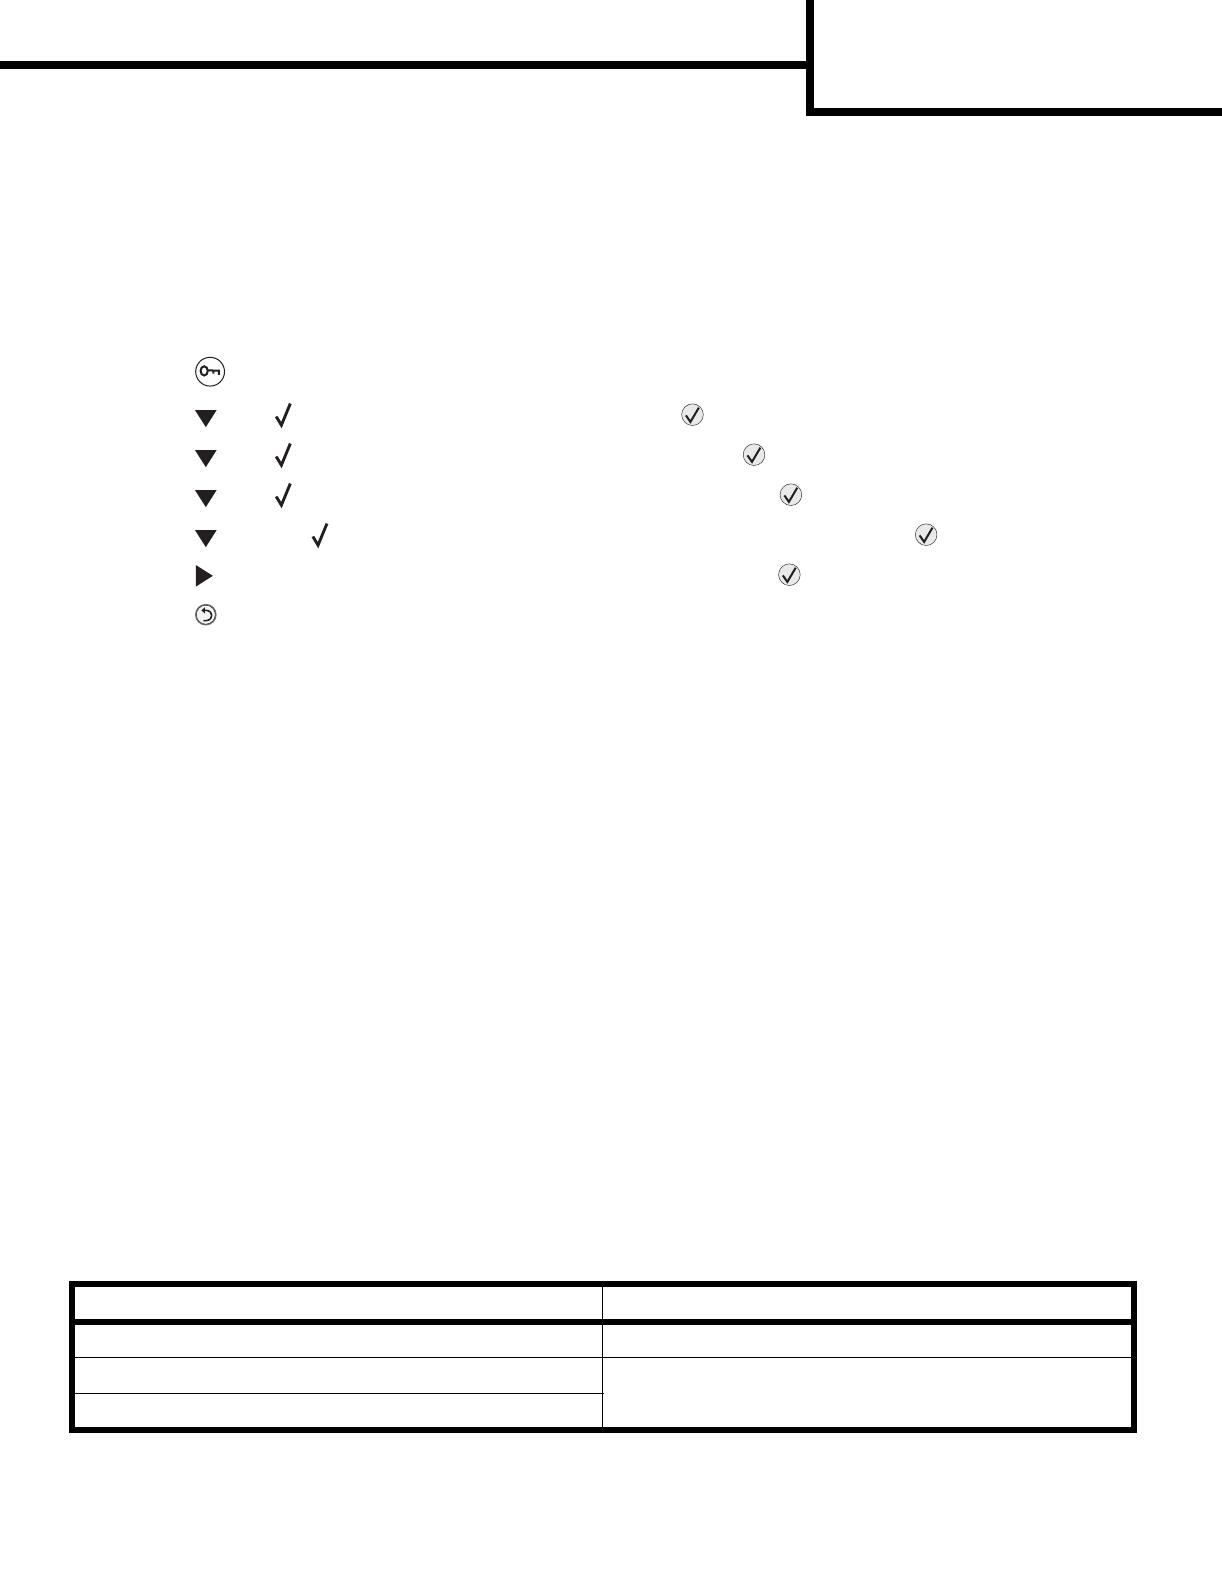
To set the paper type or size:
1 Press on the control panel.
2 Press until Paper Menu appears, and then press .
3 Press until Paper Size/Type appears, and then press .
4 Press until Tray <x> Size/Type appears, and then press .
5 Press until the appears next to the media size you loaded, and then press .
6 Press until the media type you loaded appears, and then press .
7 Press repeatedly to return to the Ready state.
Printing on specialty media
Print media is paper, card stock, transparencies, labels, and envelopes. The last four are sometimes referred to
as specialty media. Follow these instructions to print on specialty media.
1 Load the print media as specified for the tray being used. See “Loading paper” on page 1 for help.
2 From the printer control panel, set the Paper Type and Paper Size according to the media you loaded. For
more information, see the User’s Guide on the Software and Documentation CD that shipped with the
printer.
3 From the computer software application, set the paper type, size, and source according to the media you
loaded.
a From a word processor, spreadsheet, browser, or other application, select File
Æ Print.
b Click Properties (or Options, Printer, or Setup, depending on the application) to view the printer driver
settings.
c Select the tray containing the specialty media from the Form Source list box.
d Select the media type (transparencies, envelopes, and so on) from the Media Type list box.
e Select the size of the specialty media from the Form Type list box.
4Click OK, and then send the print job as usual.
For more information
For information on See
Print media Media Guide available in the Help Menu
Loading the manual feeder User’s Guide on the Software and Documentation CD
Loading the 550-sheet drawer
Supplies guide
Page 1 of 1
Supplies guide
The following table lists the part numbers for ordering supply items:
For information about conserving supplies, see the User’s Guide on the Software and Documentation CD.
Part number Description Average cartridge yield
World Wide
E250X22G Photoconductor kit Up to 30,000 standard pages
1
For the USA and Canada
3
E450A21A Print Cartridge 6,000 standard pages
2
E450H21A High Yield Print Cartridge 11,000 standard pages
2
E450A11A Return Program Print Cartridge 6,000 standard pages
2
E450H11A High Yield Return Program Print Cartridge 11,000 standard pages
2
For Europe, the Middle East, and Africa
4
E450A21E Print Cartridge 6,000 standard pages
2
E450H21E High Yield Print Cartridge 11,000 standard pages
2
E450A11E Return Program Print Cartridge 6,000 standard pages
2
E450H11E High Yield Return Program Print Cartridge 11,000 standard pages
2
For the Asia Pacific Region
5
E450A21P Print Cartridge 6,000 standard pages
2
E450H21P High Yield Print Cartridge 11,000 standard pages
2
E450A11P Return Program Print Cartridge 6,000 standard pages
2
E450H11P High Yield Return Program Print Cartridge 11,000 standard pages
2
For Latin America
6
E450A21L Print Cartridge 6,000 standard pages
2
E450H21L High Yield Print Cartridge 11,000 standard pages
2
E450A11L Return Program Print Cartridge 6,000 standard pages
2
E450H11L High Yield Return Program Print Cartridge 11,000 standard pages
2
1
Approximately 5% coverage.
2
Declared yield value in accordance with ISO/IEC 19752.
3
Designed for use only in the USA and Canada.
4
Designed for use only in Europe, Middle East, and Africa.
5
Designed for use only in Asia Pacific Region, Australia, and New Zealand.
6
Designed for use only in Latin America.
Print media guide
Page 1 of 2
Print media guide
The printer supports the following print media sizes. Select custom sizes up to the maximum specified for the
Universal setting.
Legend: — supported — unsupported
Media size Dimensions 250-sheet tray Manual feeder Optional 550-sheet drawer
A4 210 x 297 mm
(8.27 x 11.7 in.)
✓✓
A5* 148 x 210 mm
(5.83 x 8.27 in.)
✓✓
A6 105 x 148 mm
( 4.13 x 5.83 in.)
✓✓
JIS B5 182 x 257 mm
(7.17 x 10.1 in.)
✓✓
Letter 215.9 x 279.4 mm
(8.5 x 11 in.)
✓✓
Legal 215.9 x 355.6 mm
(8.5 x 14 in.)
✓✓
Executive 184.2 x 266.7 mm
(7.25 x 10.5 in.)
✓✓
Folio 216 x 330 mm
(8.5 x 13 in.)
✓✓
Statement 139.7 x 215.9 mm
(5.5 x 8.5 in.)
✓✓
Universal* 98.4 x 89.0 mm to
297.0 x 431.8 mm
(3.9 x 3.5 in. to 11.7 x 17.0 in.)
✓✓
7 ¾ Envelope
(Monarch)
98.4 x 190.5 mm
(3.875 x 7.5 in.)
✘✓
Com 9
Envelope
98.4 x 225.4 mm
(3.88 x 8.88 in.)
✘✓
Com 10
Envelope
104.8 x 241.3 mm
(4.12 x 9.5 in.)
✘✓
DL Envelope 110 x 220 mm
(4.33 x 8.66 in.)
✘✓
C5 Envelope 162 x 229 mm
(6.38 x 9.01 in.)
✘✓
B5 Envelope 176 x 250 mm
(6.93 x 9.84 in.)
✘✓
* Universal size ranges:
250-sheet tray: 89–216 x 210–356 mm (3.5–8.5 x 8.27–14.0 in.)
550-sheet drawer: 148–216 x 210–356 mm (5.83–8.5 x 8.27–14.0 in.)
Manual feeder: 76–216 x 127–356 mm (3.0–8.5 x 5.0–14.0 in.) (includes 3 x 5 in. cards)
Print media guide
Page 2 of 2
Storing print media
Use the following guidelines for proper print media storage. These help avoid media feeding problems and uneven
print quality:
For best results, store media in an environment where the temperature is approximately 21°C (70°F) and
the relative humidity is 40%.
Most label manufacturers recommend printing in a temperature range of 18 to 24°C (65 to 75°F) with a
relative humidity of 40 to 60%.
Store cartons of media on a pallet or shelf, rather than directly on the floor.
When storing individual packages of media out of the original carton, make sure they rest on a flat surface
so the edges do not buckle or curl.
Do not place anything on top of the media packages.
Store paper in its original wrapper until you load it into the printer.
Avoiding jams
The following hints can help avoid jams:
Use only recommended paper or specialty media (referred to as print media).
Do not overload the print media sources. Make sure the stack height does not exceed the maximum height
indicated by the stack line on the labels in the sources.
Do not load wrinkled, creased, damp, or curled print media.
Flex, fan, and straighten print media before you load it. If jams do occur with print media, try feeding one
sheet at a time through the manual feeder.
Do not use print media that you have cut or trimmed yourself.
Do not mix media sizes, weights, or types in the same print media source.
Make sure the recommended print side is loaded in the source according to your simplex or duplex needs.
Keep media stored in an acceptable environment. See “Storing print media”.
Do not move or remove trays during a print job.
Push all trays in firmly after loading them.
Make sure the guides in the trays are properly positioned for the size of print media you have loaded. Make
sure the guides are not placed too tightly against the stack of print media.
Make sure all cables that connect to the printer are correctly attached. See the Setup sheet for more
information.
If a jam occurs, clear the entire media path. See the User’s Guide on the Software and Documentation CD
for information on the media path.
Print defects guide
Page 1 of 1
Print defects guide
Note: If the defect appears on the printed side of a single-sided print
job, replace the toner cartridge before replacing the fuser.
Replace the fuser
Replace the
transfer roller
Match a set of repeating defects on a print job to the marks on one of the vertical lines. The line that best
matches the defects on the print job indicates which particular part may be causing the defect.
For example, the distance between these two marks represents
a repeating defect that occurs every 38.2 mm (1.5 in.), which
means the charge rollers may need to be replaced.
95.5 mm
(3.76 in.)
51.7 mm
(2.04 in.)
Replace the
charge rollers
38.2 mm
(1.5 in.)
79.8 mm
(3.14 in.)
Replace the toner cartridge
47.8 mm
(1.88 in.)
96.8 mm
(3.81 in.)
Developer roll
defect
Photoconductor
defect
Backup roller
defect
Fuser belt
defect
Menu map
Page 1 of 3
Menu map
A number of menus are available on the control panel to make it easy to change printer settings. The following
menu map shows the menus and menu items available. For more information about menu items, see the Menus
and Messages Guide on the Software and Documentation CD. Some menu items may not be available based on
the printer model or options installed.
Help
Printing Guide
Supplies Guide
Media Guide
Print Defects
Menu Map
Information Guide
Connection Guide
Moving Guide
Paper Menu
Default Source
Paper Size/Type
Substitute Size
Paper Texture
Paper Weight
Paper Loading
Custom Types
Universal Setup
Reports
Menu Settings Page
Device Statistics
Network Setup Page
Profiles List
Print Fonts
Print Demo
Security
Job Expiration
Settings
Setup Menu
Finishing Menu
Quality Menu
Utilities Menu
PostScript Menu
PCL Emul Menu
Network/Ports
TCP/IP
Standard Network
Standard USB
AppleTalk
Menu map
Page 2 of 3
Understanding the control panel
The control panel consists of these items:
A 4-line, liquid crystal display (LCD) that can show both graphics and text.
Eight buttons: Back, Menu, Stop, Select, , , , and .
Indicator light
Button or control panel
item
Function
1 Back Press the Back button to return to the last screen you viewed.
Note: Changes made on a screen will not be applied if you press the Back button.
2 Menu Press the Menu button to open the menu index.
Note: The printer must be in the Ready state to access the menu index. A message
indicating the menus are unavailable will appear if the printer is not ready.
3 Stop Press the Stop button to stop the mechanical operation of the printer. After pressing Stop,
the message Stopping appears. When the printer has stopped, the status line in the
control panel will show Stopped, and a list of options will appear.
2
3
4
5
66
7
1
Menu map
Page 3 of 3
For more information on the control panel, see the User’s Guide on the Software and Documentation CD.
4 Indicator light A two-toned LED is used on the control panel, one color being green and the other being
red. The lights indicate whether the printer power is on, the printer is busy, idle, processing a
job, or requires operator intervention.
5 and 6 Navigation
buttons
The Up or Down buttons are used to move up and down lists.
When navigating through a list using the Up or Down button, the cursor moves
one line at a time. Pressing the Down button at the bottom of the screen changes
the screen to the next whole page.
The Left or Right buttons are used to move within a screen such as moving from
one menu index item to another. They are also used to scroll through text that will
not fit on the screen.
The Select button is used to initiate action on a selection. Press Select when the
cursor appears next to the selection you want such as following a link, submitting
a configuration item, or when you want to start or cancel a job.
7 Display The display shows messages and graphics describing the current state of the printer and
indicating possible printer problems you must resolve.
The top line of the display is the header line. If applicable, it will contain the graphic
indicating the Back button can be used. It will also display the current status and the
Supplies (Warnings) status. If multiple warnings are present, each warning will be
separated by a comma.
The other three lines of the display are the body of the screen. This is where you view
printer status, supplies messages, show-me screens, and make selections.
Button or control panel
item
Function
Status Indicates
Off Power is off.
Solid green Printer is on, but idle.
Flashing green Printer is warming up, processing data, or printing a job.
Solid red Operator intervention is required.
Information guide
Page 1 of 1
Information guide
There are numerous publications available to help you
understand the printer and its functions.
Help Menu pages
There are Help Menu pages resident in the printer.
Select to print each individually, or select Print All
to print all of them.
Setup sheet
The Setup sheet packaged with the printer provides
information about setting up the printer and its options.
Software and Documentation CD
The Software and Documentation CD which was
shipped with your printer contains a User’s Guide,
Setup sheet, Menus and Messages Guide, and a copy
of the Help Menu pages.
The User’s Guide provides information about loading
media, ordering supplies, troubleshooting, clearing
jams, and removing options. It also includes
administrative support information.
The Menus and Messages Guide provides information
to change the printer settings. It describes the menus
available, the menu items under each menu, and the
values available.
Lexmark’s Web site
Copies of the User’s Guide, Setup sheet, Menus and
Messages Guide, and Help Menu pages are available
on the Lexmark Web site at www.lexmark.com.
Other languages
The User’s Guide, Menus and Messages Guide, and
Help Menu pages are also available in other
languages on the Software and Documentation CD.
Menu Item: Use it to:
Printing Guide Load media into the printer.
Supplies Guide Order supplies.
Media Guide See what types of media are
supported by the printer.
Print Defects Prints the Print Defect sheet.
Menu Map View all menus and menu
items available.
Information Guide
(this page)
Locate additional
information.
Connection Guide Connect the printer as a
local or network printer.
Moving Guide Safely move the printer.
Connection guide
Page 1 of 2
Connection guide
Note: For local printing, you must install the printer software (drivers) before connecting the USB cable.
Installing printer and software for local printing using Windows
1 Launch the Software and Documentation CD that shipped with the printer.
2Click Install Printer and Software.
Note: Some Windows operating systems require that you have administrative access to install printer
software (drivers) on the computer.
3Click Agree to accept the license agreement.
4 Select Suggested, and then click Next.
The Suggested option is the default installation for local setup. If you need to install utilities, change
settings, or customize device drivers, select Custom. Follow the instructions on the computer screen.
5 Select Local Attach, and click Finish.
Note: It may take a few minutes for the drivers to completely load.
6 Close the drivers CD installer application.
7 Connect the USB or parallel cable. If using USB, be sure to match the USB symbol on the cable to the USB
symbol on the printer.
Note: Windows 98 SE, Windows Me, Windows 2000, Windows XP, and Windows Server 2003 operating
systems support USB connections. Some UNIX, Linux, and Macintosh computers also support
USB connections. See the computer operating system documentation to see if your system
supports USB.
8 Plug one end of the printer power cord into the socket at the back of the printer and the other end into a
properly grounded outlet.
9 Turn on the printer.
Plugging in the USB cable and turning on the printer prompts the Windows operating system to run the plug
and play screens to install the printer as a new hardware device. The installation of printer software (drivers)
done in step 1 should satisfy the plug and play requirements. When plug and play is finished, a printer
object will appear in your Printers folder.
Note: After the printer completes its internal tests, the Ready message indicates that the printer is ready
to receive jobs. If you see a message other than Ready on the display, see the Software and
Documentation CD for instructions on clearing the message.
10 Send a test page to print.
Using a parallel cable
For instructions, see the Setup Sheet that shipped with the printer.
Local printing with Mac or UNIX/Linux
For detailed instructions, see the documentation that came with your operating system.
Connection guide
Page 2 of 2
Installing printer and software for network printing using Windows
1 Make sure the printer is turned off and unplugged from the wall outlet.
2 Connect the printer to a LAN drop or hub using an ethernet cable that is compatible with your network.
3 Plug one end of the printer power cord into the socket at the back of the printer and the other end into a
properly grounded outlet.
4 Turn on the printer.
Note: After the printer completes its internal tests, the Ready message indicates that the printer is ready
to receive jobs. If you see a message other than Ready on the display, see the Software and
Documentation CD for instructions on clearing the message.
5 Go to a computer on the same network, and launch the drivers CD that shipped with the printer.
6Click Install Printer and Software.
7Click Agree to accept the license agreement.
8 Select Suggested, and then click Next.
9 Select Network Attach, and then click Next.
10 Select your printer model from the list, and then click Next.
11 Select your printer port from the list, and then click Finish to complete the installation. A printer object is
created in the Printers folder on the computer.
If your printer port is not listed, click Add Port. Enter the information requested to create a new printer port.
Select the option to create an Enhanced TCP/IP Network Port. Other port options will not give you full
functionality.
12 Send a test page to print.
Network printing using Mac, UNIX/Linux, or NetWare
For information about this support, see the User’s Guide on the Software and Documentation CD that shipped
with the printer.
You can find some additional information on the Software and Documentation CD that shipped with the printer.
Launch the CD, and click View Documentation.
Moving the printer
Page 1 of 1
Moving the printer
Follow these guidelines to move the printer to another location.
Always turn off the printer using the power switch before moving it.
Disconnect the power cord from the wall before disconnecting it from the printer.
Disconnect all cords and cables from the printer before moving it.
Remove the optional tray before moving the printer.
Note: Damage to the printer caused by improper moving is not covered by the printer warranty.
Moving the printer and options to another location
If the printer must be moved over an uneven surface, it should first be lifted away from these options prior to
moving.
The printer and options can be safely moved to another location by following these precautions:
Keep the printer in an upright position.
Any cart used to move the printer must have a surface able to support the full footprint of the printer. Any
cart used to move the options must have a surface able to support the dimensions of the options.
Severe jarring movements may cause damage to the printer and options, and must be avoided.
CAUTION: Follow these guidelines to avoid injuring yourself or damaging the printer:
  • Page 1 1
  • Page 2 2
  • Page 3 3
  • Page 4 4
  • Page 5 5
  • Page 6 6
  • Page 7 7
  • Page 8 8
  • Page 9 9
  • Page 10 10
  • Page 11 11
  • Page 12 12
  • Page 13 13
  • Page 14 14
  • Page 15 15
  • Page 16 16

Ask a question and I''ll find the answer in the document

Finding information in a document is now easier with AI