Igenix IG5005 Instructions For Use Manual
- Category
- Space heaters
- Type
- Instructions For Use Manual
Igenix IG5005 is a 500W convector heater designed for indoor use. It features adjustable thermostat control for customized warmth, allowing you to maintain a comfortable room temperature. The heater includes safety features like overheat protection and a tip-over switch for peace of mind. It can be easily wall-mounted with the included bracket or used as a freestanding unit. With its compact design, it's ideal for small to medium-sized rooms, providing efficient and targeted heating.
Igenix IG5005 is a 500W convector heater designed for indoor use. It features adjustable thermostat control for customized warmth, allowing you to maintain a comfortable room temperature. The heater includes safety features like overheat protection and a tip-over switch for peace of mind. It can be easily wall-mounted with the included bracket or used as a freestanding unit. With its compact design, it's ideal for small to medium-sized rooms, providing efficient and targeted heating.


-
 1
1
-
 2
2
-
 3
3
-
 4
4
-
 5
5
-
 6
6


Igenix IG5005 Instructions For Use Manual
- Category
- Space heaters
- Type
- Instructions For Use Manual
Igenix IG5005 is a 500W convector heater designed for indoor use. It features adjustable thermostat control for customized warmth, allowing you to maintain a comfortable room temperature. The heater includes safety features like overheat protection and a tip-over switch for peace of mind. It can be easily wall-mounted with the included bracket or used as a freestanding unit. With its compact design, it's ideal for small to medium-sized rooms, providing efficient and targeted heating.
Ask a question and I''ll find the answer in the document
Finding information in a document is now easier with AI
Related papers
-
Igenix IG9010 Instructions For Use Manual
-
Igenix IG5200 Troubleshooting guide
-
Igenix IG9030 Operating instructions
-
Igenix IG0500 Troubleshooting guide
-
Igenix IG9020 Instructions For Use Manual
-
-
Igenix IG9508 Troubleshooting guide
-
-
-
Other documents
-
Mellerware 35100 User manual
-
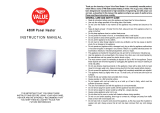 Argos Simple Value 0.45kW Panel Heater User manual
-
Argoclima Astro Orange Operating instructions
-
Challenge E0111R User manual
-
Bionaire B298 User manual
-
United UHC-862 Operating instructions
-
Prem-i-air PCH0501 User manual
-
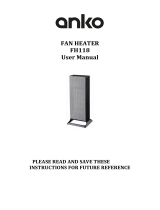 ANKO FH118 User manual
-
Lenoxx H500 User manual
-

