Extron DP DA2 User manual

Category
Audio amplifiers
Type
User manual

Extron electronics DP DA2 is a high-performance signal distribution device that enables reliable transmission of DisplayPort signals to multiple displays. It features two DisplayPort outputs with support for resolutions up to 2560x1600 @ 60 Hz in normal mode and 3840x1080 @ 60 Hz in extend mode. The DP DA2 also offers EDID management, allowing users to store and recall EDID information for optimal compatibility with different display devices. Additionally, it provides muting control and RS-232 connectivity for flexible system integration.

Extron electronics DP DA2 is a high-performance signal distribution device that enables reliable transmission of DisplayPort signals to multiple displays. It features two DisplayPort outputs with support for resolutions up to 2560x1600 @ 60 Hz in normal mode and 3840x1080 @ 60 Hz in extend mode. The DP DA2 also offers EDID management, allowing users to store and recall EDID information for optimal compatibility with different display devices. Additionally, it provides muting control and RS-232 connectivity for flexible system integration.

DP DA2 • Setup Guide
This guide provides basic instructions for an experienced installer to set up and operate the
Extron DP DA2 (see the DP DA2 User Guide, on the Extron website, for full instructions).
Installation
Step 1 — Mounting
See the DP DA2 User Guide for all mounting options. Follow the instructions provided with
the appropriate installation kit.
Cable Connections
12V
0.6A MAX
POWER
EDID
STORE
EXTEND
NORMAL
DEFAULT
STORED
1
RS-232 MUTE
RxTx 1G2
2
INPUT REMOTEEDIDOUTPUTS
DP DA2
ab
ce
fghd
For a complete description of the rear panel features, see
the DP DA2 User Guide.
Step 2 — DisplayPort Input and Output
Connect the following cables, but do not power on the equipment yet:
1. Connect a DisplayPort cable from the input connector (
b
) to the source device.
2. Connect a DisplayPort cable from the output connectors (
c
) to the display devices.
NOTE: If one of the output devices is being used to provide EDID information, it
must be connected to output 1.
Step 3 — Power Cable Connections
Connect the provided 12 VDC power supply to the 2-pole, 3.5 mm captive screw connector.
ATTENTION: Before connecting power to the DP DA2, see the attention box in the
“Power Supply” section of the DP DA2 User Guide for important information
about power supplies.
NOTE: Before connecting power to the DP DA2, see the notes in the “Power Supply”
section of the DP DA2 User Guide for important information about wiring the
captive screw connectors.
Setup and Control
Step 4 (optional) — Muting an Output
Short the pins labelled 1 or 2 to ground (G) to mute the video signal from
that output.
Step 5 (optional) — Connecting a Control PC
To connect the DP DA2 to a control PC use the captive screw connector or the USB Config
port.
a
Power
b
DisplayPort Input
c
DisplayPort Outputs
d
EDID Minder LED
e
EDID Minder Store button
f
EDID Minder DIP switches
g
RS-232 control
h
Mute control
RS-232/ MUTE
TX RX
12
Mute Connectors
G
DP DA2 • Setup Guide (Continued)
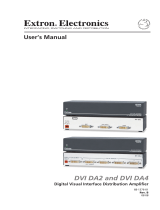
Captive screw connector — Connect the Tx, Rx, and G (ground) pins
of the rear panel captive screw connector to the control PC.
USB port — Connect the front panel mini USB B connector to the
control PC.
For information about RS-232 commands, see the DP DA2 User Guide.
Recording and Saving EDID
1. Connect the appropriate display device to output 1 and power on
both the DP DA2 and the display device.
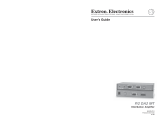
2. Set DIP switch 1 to Stored (down) position.
3. Press and release the EDID Store push button.
The LED lights amber while the EDID is being read and turns green
when the EDID has been saved.
Using a Saved EDID
1. Ensure the display and source devices are powered off and the DP DA2 is powered on.
2. Set DIP switch 1 to Stored (down).
3. Power on the source device.
4. Power on the display devices.
Using the Default EDID (1920x1080 @ 60 Hz, 2-Ch Audio)
1. Ensure the display and source devices are powered off and the DP DA2 is powered on.
2. Set DIP switch 1 to Default (up).
3. Power on the source device.
4. Power on the display devices.
Using Extend Mode
The DP DA2 supports resolutions up to 2560x1600 @ 60 Hz in normal mode. In addition,
a resolution of 3840x1080 @ 60 Hz can be carried over two outputs and displayed as
extended view.
1. Ensure appropriate display devices are connected to outputs 1 and 2.
NOTE: Extron recommends that the displays connected to outputs 1 and 2 are the
same model or have the same native resolution.
2. Set DIP switch 2 to Extend (up).
3. Power on the DP DA2, the display devices, and the source device.
Dual Mode DisplayPort
Use the appropriate adapters for interoperability with VGA and DVI or HDMI displays.
Extron Headquarters
+800.633.9876 Inside USA/Canada Only
Extron USA - West Extron USA - East
+1.714.491.1500 +1.919.850.1000
FAX:
+1.714.491.1517 +1.919.850.1001
Extron Europe
+800.3987.6673
Inside Europe Only
+31.33.453.4040
FAX:
+31.33.453.4050
Extron Asia
+800.7339.8766
Inside Asia Only
+65.6383.4400
FAX:
+65.6383.4664
Extron Japan
+81.3.3511.7655
FAX
+81.3.3511.7656
Extron Middle East
+971.4.2991800
FAX:
+971.4.2991880
Extron China
+4000.EXTRON
+4000.398766
Inside China Only
+86.21.3760.1568
FAX:
+86.21.3760.1566
Extron India
1800.3070.3777
Inside India Only
+91-80-3055.3777
+91 80 3055 3737 FAX
Extron Korea
+82.2.3444.1571
+82.2.3444.1575 FAX
© 2012 Extron Electronics All rights reserved. www.extron.com 68-2154-50 Rev A 05 12
EDID
STORE
EXTEND
NORMAL
DEFAULT
STORED
EDID
RS-232/ MUTE
TX RX 12
RS-232 Connectors
G
1 / 1

Extron DP DA2 User manual

Category
Audio amplifiers
Type
User manual

Extron electronics DP DA2 is a high-performance signal distribution device that enables reliable transmission of DisplayPort signals to multiple displays. It features two DisplayPort outputs with support for resolutions up to 2560x1600 @ 60 Hz in normal mode and 3840x1080 @ 60 Hz in extend mode. The DP DA2 also offers EDID management, allowing users to store and recall EDID information for optimal compatibility with different display devices. Additionally, it provides muting control and RS-232 connectivity for flexible system integration.

Ask a question and I''ll find the answer in the document

Finding information in a document is now easier with AI

Ask the document