M55152SW
M55152SB
You' ll soon be enjoying your new refrigerator.
It all begins here,with your instructions.Don't worry,
there's nothing too technical coming up.Just simple,
step-by-step guidance to get you up and running
quickly.Sound good?Then let's get sta rted
Help and Guidance
We' re here to help you get the most from your refrigerator.Should you require
any guidance,a simple solution can often be found online at.
www.
If you assistance,call one of our experts on 0345 257 7271.
bush-support.com
still require further
2 Help and Guidance
Contents 3
Contents
1
2
3
4
5
Safety information
Safety information 6
Getting to know
your refrigerator
Ready?Let's begin... 1 3
1 4
Installing your
refrigerator
Using your
refrigerator
Parts
Transportation 1 7
Installation 1 7
Door Reverse 1 8
Electrical Connection 1 9
Before f irst u se 2 2
U sing y our a ppliance 2 2
U seful i nformation 2 2
Care and Maintenance
General 2 6
Ligh t bulb replacemen t 2 6
Powe r failure 2 6
Moving you r appliance 2 6
Technica lSpecifications 2 7
6Product support
Trouble Shooting 30
Help and 31
Guarantee 32
assistance
Safety information 1
Safety information
Important-Please read these instructions fully
before installing or operating
6 Safety information
Before use
Safety information 7
Safety information
Important-Please read these instructions fully
before installing or operating
8 Safety information
Safety information
Important-Please read these instructions fully
before installing or operating
Safety information 9
Safety information
Important-Please read these instructions fully
before installing or operating
10 Safety information
Safety information
Important-Please read these instructions fully
before installing or operating
Getting to know
your refrigerator 2
Getting to know your refrigerator
You' ll be up and running in no time
Ready?Let's begin...
Please read these instructions carefully.They contain
important information which will help you get the best
from your refrigerator and ensure safe and
correct installation and operation
If you require any further assistance,our technical
experts are happy to help.For full details,refer to
the product support section at the end of these
instructions.
Getting to know your refrigerator 13
14 Getting to know your refrigerator
Getting to know your refrigerator
You' ll be up and running in no time
1.Thermostat and light
2. Shelf
3.Drain port
4.Crisper cover
5.Crisper
9
Spacers x 2
Accessories included
Instructions x 1
Parts
10
1
2
3
4
5
6
7
8
6.Freezing drawers
7.Compressor(at the back)
8.Adjustable leveling feet
9.Upper bracket
10.Lower bracket
Installing your refrigerator 3
Installing your refrigerator 17
Installing your refrigerator
Bringing it all together
Transportation
Caution: 2 people are required to unpack
and handle the appliance, it is
recommended that gloves are worn.
.The appliance should be transported only in an
upright position. Do not tilt the appliance greater
than 45 degrees . The packaging as supplied must
be intact during transportation.
.After transporting the appliance, leave it for at
least 4 hours before switching on to allow the
cooling system to settle. Failure to comply could
result in damage to the appliance.
.Do not move the appliance by pulling the door or
handle as it may damage your flooring and wall
coverings etc.
. Empty any water in the drain tray before moving.
. Make sure that the defrost water pipe at the
back of the product is fixed to the plastic
evaporating pan on the top of the compressor,
to avoid defrost water spillage on the on the floor.
.Ensure the supply cable is not caught under the
appliance during and after moving.
.Carefully remove all packaging materials
including the foam base, dispose of correctly
Installation
.Ensure sufficient spacing is provided for the
appliance to be installed. Leave space on both
sides (15cm), back (20cm) and above the
appliance (30cm) to ensure proper ventilation.
.Screw in the two spacers at the back of the
appliance.
.Do not place the appliance near a heat source or
in direct sunlight.
.Do not put any heavy objects on top of the
appliance. It will damage the appliance.
.Do not install the appliance in a moist and wet place.
.Adjust the feet at front to level the appliance. It
should be installed on a smooth surface to avoid
excessive vibration and noise.
.Each appliance has a climate class (shown on the
rating plate) where it indicates the temperature
range of the appliance operation in place. The
appliance may not work properly if it is left for a
long period at a temperature outside the specified
range.
Climate Class
SN
N
ST
T
16~38 C
16~43 C
10~32 C
16~32 C
Amb.T.( C) Amb.T.( F)
50~90 F
51~90 F
61~100 F
61~110 F
12
13
11
12
13
11
18 Installing your refrigerator
Installing your refrigerator
Bringing it all together
Door Reverse
Warning: Remove the main plug before
reversing the door. 2 people may be
required to reverse the door. The refrigerator
has the capability of opening the door from
either the left or the right side. The unit is
delivered to you with the door opening from
the left side. To change the opening direction,
please follow these instructions.
Note: Before reversing the door swing, unplug
the appliance from the mains or disconnect the
electrical power supply.
1.Take out four screw cover(12),remove the top
cover(13),and transfer the hinge cover from
left side to right side(11).
2.Remove the two screws (3) holding the top
hinge(4)(right side) to the frame. Remove
the top hinge (4).
3.Lift the door off the middle hinge pin and place it on
a non-scratching surface.
4.Remove the two screws (5) holding the middle
hing (6). Remove the middle hinge (6).
5.Lift the lower door off the bottom hinge pin and
place it on a non-scratching surface.
6.Remove the two screws (7) holding the bottom
hinge (8). Remove the bottom hinge (8).
7.Remove the left front leg (9) and transfer it to the
right side.
8.Before replacing the bottom hinge (8), remove the
hinge pin (10) and reverse the direction of
the hinge (8).Reassemble the bottom hinge
(6) on the left hand side using the two screws (7).
9.Refit the hinge pin (10) into the bottom hinge (8).
10. Lower the door onto the bottom hinge pin (10).
11.While holding the lower door in the closed position,
reassemble the middle hinge (6) on the left hand
side using the two screws (5). Do not put the
washer(14)on the left side. Do not tighten the
screws (5) until the top
of the lower door is level with the counter top
12.Before replacing the upper hinge (4), remove the
hinge pin (2) from right hole to left hole of the
upper hinge (4).
13. Lower the upper door onto the middle hinge pin.
14.While holding the upper door in the closed position,
reassemble the upper hinge (4)on the left hand
side using the two screws (3). Do not tighten the
screws (3) until the top of upper door is level with
the counter top.
15.Reassemble top cover(13).
Door opening from left side
Door opening from right side
Levelling the appliance
1.Rotate feet clockwise to heighten.
2.Rotate feet anti clock wise to lower.
Installing your refrigerator 19
Installing your refrigerator
Bringing it all together
Electrical connection
Any electrical work that is required to
install this appliance MUST be carried out
by a qualified electrician.
Warning: THIS APPLIANCE MUST BE
EARTHED
Before making any electrical connections,
ensure that:
.Electrical safety is only guaranteed when the earth
system of your house is in accordance with the
related local regulations.
.Do not damage the refrigerant circuit.
.Do not bend, stretch or pull the supply cable to
avoid electric shock.
.Do not use electrical appliances inside the food
storage compartments of the appliance, unless
they are of the type recommended by the
manufacturer.
.Ensure the power socket is suitable for the
maximum power of the machine (fuses in the
power circuit must be 13 amp).
.The supply voltage should be the same as that
indicated in the technical specifications and the
appliance rating plate.
.The appliance should be earthed and in
compliance with the applicable law.
.When installed, the power socket must be within
easy reach.
.If the socket outlets in your home are not suitable
for the plug supplied with this unit check with a
qualified electrician for replacement.
.The use of adapters, multiple connectors or
extension cables are not recommended.
.The appliance must be connected to a 220-240
volt 50Hz AC supply by means of a three pin
socket, suitably earthed and protected by a 13
amp fuse.
.Should the fuse need to be replaced, a 13 amp
fuse approved to BS1362 must be used.
.The plug contains a removable fuse cover that
must be refitted when the fuse is replaced. If the
fuse cover is lost or damaged, the plug must not
be used until a replacement cover has been fitted
or the plug is replaced.
.A damaged plug should be cut off as close to the
plug body as possible, the fuse should be removed
and the plug disposed of safely.
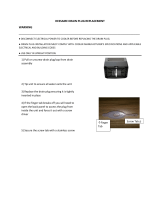
Plug replacement (UK & Ireland only)
Should you need to replace the plug; the wires
in the power cable are coloured in the
following way:
Blue Neutral 'N'
Brown Live 'L'
Green & Yellow Earth 'E'
As the colours of the wires in the power cable
may not correspond with the coloured
markings identifying the terminals in your
plug, and proceed as follows:
The green & yellow wire must be connected to
the terminal in the plug that is marked with the
letter E or by the earth symbol.
The blue wire must be connected to the
terminal that is marked with the letter N.
The brown wire must be connected to the
terminal that is marked with the letter L.
If the power supply cord is damaged, it must be
replaced by the manufacturer or its service
agent or a similar qualified person in order
to avoid a hazard.
  • Page 1 1
  • Page 2 2
  • Page 3 3
  • Page 4 4
  • Page 5 5
  • Page 6 6
  • Page 7 7
  • Page 8 8
  • Page 9 9
  • Page 10 10
  • Page 11 11
  • Page 12 12
  • Page 13 13
  • Page 14 14
  • Page 15 15
  • Page 16 16
  • Page 17 17
  • Page 18 18
  • Page 19 19
  • Page 20 20
  • Page 21 21
  • Page 22 22
  • Page 23 23
  • Page 24 24
  • Page 25 25
  • Page 26 26
  • Page 27 27
  • Page 28 28
  • Page 29 29
  • Page 30 30
  • Page 31 31
  • Page 32 32
  • Page 33 33
  • Page 34 34

Ask a question and I''ll find the answer in the document

Finding information in a document is now easier with AI