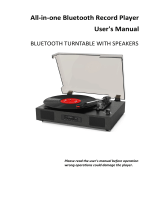
BC ACOUSTIQUE TD922 Owner's manual

Category
Audio turntables
Type
Owner's manual

BC ACOUSTIQUE TD922 is a Bluetooth© turntable that allows you to wirelessly connect to your Bluetooth© speakers or headphones and enjoy your vinyl records. It features a stylus pressure adjustment ring to ensure optimal sound quality and an anti-skating mechanism to prevent skipping. Additionally, it has an arm lifter lever to protect your records and styluses, and a 45 RPM adapter for playing extended play records.

BC ACOUSTIQUE TD922 is a Bluetooth© turntable that allows you to wirelessly connect to your Bluetooth© speakers or headphones and enjoy your vinyl records. It features a stylus pressure adjustment ring to ensure optimal sound quality and an anti-skating mechanism to prevent skipping. Additionally, it has an arm lifter lever to protect your records and styluses, and a 45 RPM adapter for playing extended play records.

1
ENGLISH FRANCAIS SPANISH DEUTSCH
OWNER’S MANUAL
MODE D’EMPLOI
MANUEL DEL USUARIO
BEDIENUNGSANLEITUNG
Bluetooth© Turntable
BC ACOUSTIQUE
14 Avenue de l’Europe - 77600 Bussy-Saint-Georges - France
TD922
ENGLISH FRANCAIS ESPAÑOL DEUTSCH
2
Dear Customer,
Thank you for choosing a BC Acousque product. Its implementaon has been our know-how, both in terms of design to the
manufacturing. Electronic components and mechanical parts correspond to the selecon criteria of very high quality. Operaon
and nish of each product have been checked before delivery. To obtain best results, please read the advice contained in this
document.
Safety instrucons ................................................................. 02
Glossary ................................................................................. 02
Recommandaons ................................................................. 02
Recycling product .................................................................. 03
Locaon and precauons ...................................................... 03
Power sources ....................................................................... 03
Warranty ................................................................................ 03
Main view and uses .............................................................. 04
Rear panel and connecons ................................................... 05
Preparing the turntable ......................................................... 06
Operaon and start-up ........................................................... 07
Bluetooth© connecon .......................................................... 07
Changing the cartridge ........................................................... 07
Recording with a computer ................................................... 08
Audacity soware installaon ............................................... 08
Specicaons and accessories ............................................... 09
Notes about records ............................................................... 10
Troubleshoong ..................................................................... 10
Notes ...................................................................................... 11
We invite you to read the instrucons on the proper use of your
product carefully. They will ensure the proper funconing of the
laer and it safely.
- Do not use this device in a wet area or near water.
- Clean only with a dry cloth. As a precauon it is best to unplug
the unit before handling.
- Never cover the venlaon of the unit. Be sure to install the
unit in a well venlated locaon.
- Do not install near heat sources.
- Take great care of the power cord and plugs electrical
connecon. In parcular, do not walk, or press the power cord,
specically at plugs, power plant and the output of the power
supply.
- Use only parts and accessories recommended by
BC Acousque.
- Be sure to use an appropriate power supply to the power jack
on the unit outlet. Especially if the device is equipped with a
ground, it is necessary to use it.
- Unplug the apparatus during lightning storms or when not in
use for a long me.
The CE mark indicates that this product
complies with European direcves called «low
voltag (2006/95/EC), Electromagnec
Compability (2004/108/EC) and apply eco-
design requirements for energy products (2009/125/EC) when
the appliance is installed and used in accordance with the user
manual.
For connued compliance only BC Acousque accessories must
be used with this product and servicing must be performed by
specialized and qualied sta.
The WEEE symbol is that of the European
Union regarding the recycling of electrical and
electronic equipment. It indicates that this
product contains electrical and electronic
components that can be reused, recycled or
recovered. Therefore this product should not
be disposed of in your regular trash.
Thank you to return the unit or contact your authorized dealer
for more informaon.
This symbol alerts the user that the
documentaon that comes with the device
contains important instrucons for
maintenance and proper use of the product.
This symbol alerts the user to the presence of
«dangerous voltage» uninsulated which may
pose a risk of electric shock to the user.
In the case of headphones, do not use it to excessive noise.
Otherwise, prolonged listening at high volume levels may cause
permanent damage to your hearing.
When disposing of used baeries, please comply with
governmental regulaons or rules dened by the public
statements relang to the environment applicable in your
country.
Never expose the baeries (baery pack or baeries installed)
to excessive heat such as sunshine, re, etc ...
Safety instrucons
Recommandaons
Summary Glossary
Introducon
3
ENGLISH FRANCAIS SPANISH DEUTSCH
At the end of its useful life, this product should not be disposed
of with regular garbage, but returned to a collecon point for
the recycling of electrical and electronic components. This point
is emphasized by the symbol on the product, the instrucon
manual and on the packaging.
The materials can be reused in accordance with their
markings. Through reuse and recycling of raw materials or any
other form of recycling, you make an important contribuon to
environmental protecon. Your municipality can tell you where
is the point of the nearest collecon site.
Product recycling Warranty
Locaon and precauons
Power sources
Avoid placing it in direct sunlight or near a heat source. No
source of light shall be placed on the apparatus. Also avoid all
sources that could cause vibraon, dust, cold or moisture. The
recommended ambient temperature range is 5-35 °C.
The device must be installed on a stable, level surface. Do not
place the unit on an unstable surface or shelf. The unit may
fall, causing serious injury to a child or adult as well as serious
damage to the product. Do not place other equipment on top
of the unit.
Due to stray, turntables or CRT TVs magnec elds should not
be located near the unit to avoid possible interference.
The unit should be operated only from the type of power
source indicated on the label. If you are unsure of the type of
power available to you, thank you to contact your dealer or the
company responsible for the power supply in your area.
Turn o device if you do not intend to use this unit for a long me.
In case of prolonged absence from home, it is recommended to
unplug from the electrical outlet.
Make sure each cable is correctly inserted. To prevent hum or
background noise, do not mix dierent other antenna cable
with the power cord or speaker wires.
BC Acousque warrants this product parts and labor (under the
condions specied below).
BC Acousque will repair or replace (at its discreon) this
product or any defecve parts. The warranty period may vary
by country. If in doubt, contact your dealer. Always retain proof
of purchase of this product.
For warranty service, please contact the BC Acousque
authorized reseller from which you purchased this product. If
your dealer is not itself repair the product, it can be sent to
BC Acousque authorized aer-sales service. If necessary,
you will need to ship this product in its original packaging or
packaging aording an equal degree of protecon.
Proof of purchase such as an invoice stang that the product is
covered by the Guarantee must be presented for any warranty
claims.
This warranty is void if:
- The factory serial number has been altered or removed.
- This product was not purchased from an authorized
reseller BC Acousque. To conrm that the serial number
has been altered or that the product was purchased from an
authorized reseller BC Acousque, you can call BC Acousque
or distributor in your country.
- If the power supply cord or plug is damaged.
- If liquid has been spilled or if objects have fallen inside.
- If the unit has been exposed to rain or water.
- If the unit is dropped or damaged in any way.
- This warranty does not cover cosmec damage or damage
caused by or due to force majeure, an accident, misuse, abuse,
negligence, commercial use or modicaon of part any product.
- This warranty does not cover damage caused by or resulng
from misuse, a maintenance or improper installaon or repairs
made or aempted by anyone other in BC Acousque or not
BC Acouscs dealer or technician approved, authorized to carry
out maintenance and repair under warranty for BC Acousque.
Any unauthorized repairs will void this warranty. This warranty
does not cover products sold «AS IS».
- REPAIR OR REPLACEMENT AS PROVIDED UNDER THIS
WARRANTY IS THE EXCLUSIVE REMEDY OF THE CONSUMER.
- BC ACOUSTIQUE NOT BE LIABLE FOR ANY INCIDENTAL OR
CONSEQUENTIAL DAMAGES.
4
- Some countries do not allow the exclusion or limitaon of
incidental or consequenal damages or exclusions of implied
warranes. Therefore, the limitaons or exclusions herein
may not apply. This warranty gives you specic legal rights,
in addion to other rights which vary from state to state or
country to country.
Warranty Uses
Main view and uses
① ADAPTOR FOR EP RECORDS
When you want to listen to EP record, aach the 45 RPM
adapatator to the center spindle.
② TURNTABLE PLATTER
The plaer is equipped with a slip mat. This makes it easier
to manipulate the record for scratch performance. Place vinyl
records centered on the turntable plaer.
③ COUNTERWEIGHT
Adjustment creates the proper downward pressure of the stylus
to the record. Aach now by sliding the counterweight onto the
rear of the tone arm.
④ STYLUS PRESSURE ADJUSTMENT RING
Adjusts stylus cartridge’s pressure alignment.
⑤ ANTISKATING
This applies inward force to the tone arm so it doesn’t skip
outward across the record due to the centrifugal force of the
record spinning.
⑥ ARM LIFTER LEVER
Use this lever to control the up and down acon of the tone
arm. We recommend using the arm kuer to avoid damaging
records and styluses, because it is safer and more certain than
to do it manually.
⑦ BLUETOOTH© CONNECTION
Power on the turntable, it will search for the speaker which
Bluetooth© is open and pairing automacally, when the
turntable is in searching the lateral blue led is ashing, aer
nish pairing, the led will solid light and there is beep sound to
prompt. Press BT buon can play or pause the music playback.
5
ENGLISH FRANCAIS SPANISH DEUTSCH
⑧ 78 / 45 / 33 - ROTATION SPEED SETTING BUTTONS
Press these buons to select the plaers rotataon according
to your speed indicated on the record for 33, 45 or 78
revoluons per minute.
II PLAY / PAUSE BUTTON
Press this buon to start playback or to resume playback aer
a pause.
⑩ HEADSHELL
This is a universal headshell that allows the cartridge to be
changed easily. The turntable comes with the Audio Technica
AT-3600 L cartridge, already inserted in the headshell.
Install cartridge here. During installaon, aach the stylus
protector to guard the stylus from damage.
Aach the headshell by inserng it into the front end of the
tone arm and then turn the locking nut clockwise.
Note: Before use, remove the protecve cover by plasc that
protects the cartridge.
Uses
② ANALOG (OUTPUTS - RCA)
RCA «OUTPUT L and are used for connecng the turntable
to the RCA analog input on your amplier. These outputs are
designed to generate «analog» said signals (as opposed to
«digital» signals). Cable compable with these sockets are of
the type «RCA», they are tradionally idened by a color code
«RED» to the RIGHT and «WHITE» channel for the LEFT channel.
③ PHONO / LINE
The turntable has a built-in PHONO preamplier that is
disengaged if you have an external preamplier (or that of your
amplier).
- If you want to use the signals amplied by the
internal amplier of the turntable, posion this cursor on
PHONO (for example to send the sound of the turntable on
amplied speakers).
- If you want to use an external PHONO preamplier, posion
this cursor on LINE.
- If you want to connect the turntable to a computer via USB, set
this cursor to PHONO.
IMPORTANT: In PHONO posion, if you connect the turntable
to the PHONO input of your amplier, the sound produced
by the speakers or the headphones will be much too loud,
which could damage your equipment or be detrimental to the
listener.
④ USB PORT
The sound of your vinyl record is converted to digital with a
maximum resoluon of 48 KHz / 16 bits.
Use the USB cable that came with the device to connect the
turntable to your computer. A CD with Audacity recording
soware is also provided.
Refer to Page 8, RECORDING WITH A COMPUTER secon for
more informaon.
⑤ AC MAIN INPUT
Aer all connecons to the amplier have been made, plug the
power cable into a power outlet and turn on the power.
Your turntable is now ready for use.
⑥ POWER ON/OFF
Used to turn the turntable on and o.
WARNING: Be sure to turn o the power of your product
before making any connecons. Similarly it is best to cut the
power of other devices you want to connect to your amplier.
Make sure the turntable is on a at surface.
① GROUND TEMINAL
Use the grounding wire of the included RCA audio cable to
connect this connector to the grounding terminal of the
amplier (for example).
Notes:
1- It is NOT an electrical safety ground.
2- If noise speaker is audible: If connecng the grounding wire
of the audio cable to the grounding terminal of this unit does
not reduce noise, disconnect the grounding wire and check the
sound again. Use this method (connect and disconnect) that
has the least noise.
Rear panel and connecons
Connecons
6
Make sure the turntable is unplugged from the wall outlet and
place it on a at surface so that the groove of the disc can be
read accurately.
AT THE FRONT OF THE TURNTABLE
-1- Hold the front edge of the dust cover and gently li it open
completely unl is stops.
-2- Loop the belt around the motor pulley:
Use a nger to pull the rubber belt that is wrapped around the
sub-plaer through the round opening and loop it around the
motor pulley.
Make sure that the rubber belt is not twisted aer you put it in
place.
Preparing the turntable
-7- Set the Anskang dial to zero.
-8- Slide the tone arm clasp to the right to remove it.
-9- Raise the tone arm lier and shi the tone arm to the le
slightly.
-10- Lower the arm lier.
-11- Before adjusng the counterweight, remove the protecve
cap of the cartridge and make sure it does not touch the unit.
Now turn the counterweight unl the tonearm is horizontal.
-12- Return the tone arm to its original posion, and use the
clasp to lock it.
-13- Turn the stylus pressure adjustment ring so that the center
line aligns with 0 on the scale.
-14- Turn the counterweight so that the stylus pressure
adjustment ring scale matches the stylus pressure value
specied for the cartridge.
Note: The pressure of the stylus with the cartridge provided
(AT-3600 L) is 3.5g ±0.5g.
AT THE REAR OF THE TURNTABLE
-15- Connect the turntable to the PHONO input of your
amplier using an RCA-RCA cable (pair usually terminated with
Red and White RCA connectors).
Make sure that at the back of the deck the PHONO output
selector is set to LINE.
In case you connect your turntable to acve speakers,
set the output selector to PHONO to acvate the phono
preamplier built into the turntable.
-16- Connect the AC power cord to the AC IN connector of the
product and to a power outlet wall area.
-17- On the turntable, press the units POWER ON buon to
turn it on.
Remark about AUTO-STOP funcon:
From a certain angle usually corresponding to the last engraved
groove of a vinyl, the turntable stops.
Some vinyl records do not trigger auto-stop funcon because
their last groove do not exceed the angle provided for this
purpose.
Once the belt is in the right posion, rotate the platen several
mes to make sure that the assembly is secure.
-3- Replace the felt mat on the plaer and posion your record.
-4- Place the counterweight at the end of the tone arm and
gently push it while you turn it to secure it to the arm.
-5- Aach the headshell by inserng it into the front end of the
tone arm and then turn manually the locking nut clockwise.
-6- It is now necessary to balance the tone arm and adjusng
the stylus pressure using the adjustment ring to control the
pressure of the cartdrige with the Anskang wheel.
___________ Counterweight
___________ Stylus pressure adjustment ring
______ Anskang
______ Arm lier
7
ENGLISH FRANCAIS SPANISH DEUTSCH
AT THE FRONT OF THE TURNTABLE
-18- Place a record on the turntable plaer. When playing a 45
RPM large-hole single record, use the included adapter. Select
the rotaon speed indicated on the record (33, 45 or 78 RPM).
-19- Slide the tone arm lock clasp to the right to release the
tone arm.
-20- Move the tone arms to the track where you want to start
playback.
This operaon can be done manually or, as we advise you,
use the arm lier and the slowly lower the tone arm to start
playback.
IMPORTANT Notes
- During the playback do not touch the tone arm or the record
as you may damage the stylus or cause scratches on the
record.
- Do not force the plaer to stop rotang during playback as this
may cause malfuncons.
This turntable is NOT designed for DJs who use direct drive
turntables.
-21- ANTISKATING ADJUSTMENT
To start, set the anskang wheel at posion 2, then during
playbak, try the other posions unl you nd, by listening to,
the right balance between the right and le channel volumes.
Operaon and start-up
Bluetooth© connecon
This turntable integrates a Bluetooth© transmier to send
music to your acves speakers wirelessly.
-1- Turn on the turntable POWER ON.
The switch is located on the back of the unit.
-2- On the right side of the turntable a blue led starts to blink.
It indicates that it sends a connecon request.
You should be able to see on your Bluetooth® speakers or hi-
system the connecon name of the deck that is: «BC-TD-922.»
-3- When the turntable and the Bluetooth® speaker is connected,
the pairing lamp will stay lit without blinking.
Pairing might take some me depending on the connected
device.
Refer to the operaon manual of the Bluetooth®
speaker for informaon about how to use it.
When connecng to a Bluetooth® speaker, move other
Bluetooth® speakers and receiving devices at least 10 meters
away from this unit or turn them o.
-4- Press the BT buon to send music or pause it.
-5- To turn o Bluetooth© connecon, press the BT buon
during 3 seconds. The led on the right side of the turntable will
go o when the Bluetooth© connecon is disabled.
Changing the cartridge
To change the cartridge, rst remove the headshell from the
tone arm. Remember to aach the protecve cap to protect the
stylus cartridge during this operaon.
An Audio Technica AT-3600 L type cartridge is installed in this
turntable.
Compabiliy:
VM type cartridges have the same characteriscs as MM type
cartridges.
-1- Disconnect the shell lead terminals from the cartridge.
Nuts
Headshell
Screws
Cartridge
Shell leads
-2- Loosen the screws and remove the cartridge.
-3- Aach the new cartridge and ghten the screws.
See the illustraon below for he posion of the screws when
aached.
-4- Connect the shell lead terminals to the cartridge.
Signal Color
Le Chanel + White
Le Chanel - Blue
Right Chanel + Red
Right Chanel - Green
-5- Once the balance done, Aach the headshell by inserng it
into the front end of the tone arm and then turn the locking nut
clockwise.
-6- Balance the tone arm and adjust the stylus pressure.
Follow this procedure on page 6 in «-6- Balancing the tone arm
and adjusng the stylus pressure».
8
The sound of your records can be digitally converted on a comu-
ter by using the USB cable provided in this package to connect
this turntable to a USB port on your computer.
Important notes: You must install a soware allowing the audio
recording on your computer.
Use the USB cable that came with the turntable to connect the
turntable to your computer.
Make sure you do not disconnect the USB cable or put the
turntable into standby mode while recording the vinyl on the
computer so as not to cause a bad your computer.
DRIVERS
This turntable will run with the standard Windows or OS X
driver. There is no need to install a specic driver.
SYSTEM REQUIREMENT
You will need a computer with a free USB port and a Microso®
operang system of at least Windows® 7, 8, 10, XP, Vista.
CONNECTING WITH A COMPUTER
-1- Turn the computer on and conrm that the operang system
is working correctly.
-2- Use the USB cable to connect the computer and the
turntable.
-3- Press POWER ON buon located at the rear panel.
The computer will automacally detect the turntable’s USB port
and idenfy the unit as «USB Audio CODEC».
-4- Use your audio recording soware installed on your
computer.
Note on computer sengs regarding audio capture:
On a computer using a Windows OS, you will need acvate the
CONFIGURATION PANEL and nd the AUDIO menu to set the
desired sound quality format for recording.
For informaon, the quality of an Audio CD is 16bits / 44.1KHz.
This recording format may be sucient for most users. You can,
however, if you wish, record in a higher quality standard, in
16bits/48KHz for example.
Lowering the sample rate value will reduce the size of the les,
but will also decrease the audio quality of the recorded sound.
Recording with a computer Audacity soware installaon
Connect the turntable to your computer with the USB cord
supplied with the device.
Insert the supplied Audacity soware disc into your
computers CD drive, double-click the program to start the
installaon procedure.
Once the CD inserted in the CD player of your computer,
double-clic on the soware installaon icon.
Click «NEXT» to proceed to next step.
When installaon is complete, click “FINISH”.
Start Audacity soware by double-clicking on the program
symbol on your desktop, or select the relevant item in your start
menu.
Select the menu item “PREFERENCES” in the “EDIT” menu.
Select “DEVICES”.
Change the following sengs in the “Recording” area:
- Device: “USB Audio CODEC”
- Channel: “2 (Stereo)”
Note: The opon “USB Audio CODEC is only available if you
have correctly connected the turntable before you start the
soware.
9
ENGLISH FRANCAIS SPANISH DEUTSCH
Audacity soware installaon
Cartridge specicaons
Audio-Technica AT-3600 L
Cell type: MM
Stylus Shape: Ellipcal
Recommended Load Impedance: 47k ohms
Diamond size: 0.6 mm Bonded Round Shank
Output voltage: 2.5 mV (± 3dB at 1kHz)
Frequency response: 20 - 20,000 Hz
Channel balance < 2.5 dB (1 kHz)
Channel separaon > 18 dB (1 kHz)
Suggested stylus force: 3.5g ±0.5g
Weight: 5g ±0.3g
Aluminum canlever
Replacement stylus: ATN-3600L
Connecons
1x RCA Analog output pair (PHONO or LINE)
1x USB Port (Type-B) to computer
1x Bluetooth© transmier
General
Detachable power cord
AC Power: 100-240V 50/60Hz
PRODUCT
Dimensions (W×H×D): 430 x 120 x 365 mm
Weight: 5.16 kg
BOX
Dimensions (W×H×D): 500 x 210 x 420 mm
Weight: 6.48 kg
EAN CODES
TD-922 (BN) Bamboo Natural: 0634154407103
TD-922 (BB) Bamboo Black Glossy: 0634154407097
TD-922 (BR) Bamboo Red Glossy: 0634154407080
TD-922 (WA) Walnut: 0634154407073
The picture below shows all the controls used to record your
vinyl records as digital les on the computer.
To start recording your vinyl, proceed as follows:
Click on the «Record» buon to start the record.
To abort the recording, click
To resume recording, click again
To stop recording, click
The data will be recorded on the audio track.
Check to be sure the box includes all the supplied accessories
shown below. Please contact the store where you purchased
this turntable if any of these accessories are missing or have
been damaged during the transportaon.
1x Turntable TD-922
1x Headshell with cartridge AT-3600 L preinstalled
1x Zamac plaer and his beltdrive
1x Felt mat
1x 45 RPM adaptater
1x Dust cover with 2x aached rubber feet
2x Cover hinges
1x RCA audio cable
1x USB cable
1x Power cord
1x Audacity soware CD
1x This manual
Included accessories
DC motor with beld drive system
Stac-balanced S-shaped tone arm
Plaer: Zamac
Speed rotaon: 33-1/3, 45 and 78 RPM
Bluetooth©: Codec Apt-X©, AAC, SBC
USB PORT (16bits/48kHz)
Anskang funcon
Auto-Stop funcon
Wow and uer: 0.1%
S/N rao: 60dB (A-weighted, 20kHz)
PHONO Preamplier acvable or not
Specicaons
10
HANDLING RECORDS
Never touch the playback side of the record. Hold the record by
the edge, so as not to leave ngerprints on the surface.
When your listening is over, take care to put the record in its
pocket.
STORING RECORDS
Aer playback, put the disc in its pocket. Do not expose the
records directly to direct sunlight or heat and never leave them
in a car parked in the sun.
Do not stack mulple records or place heavy objects on them.
The inclined posion is also not recommended as it may result
in warping, mold growth or other damage.
Pay special aenon to prevent the record from being in contact
with an object that damages the grooves.
CLEANING THE RECORDS
Fingerprints and dust on a record may cause noise or sound
jumps and may damage the record itself or the stylus of the
cartridge.
Use a commercial record cleaner. Do not use thinner as
chemicals may damage the surface of the record.
CLEANING THE STYLUS
If the stylus of the cartridge is bent or damaged, it may damage
your record or cause a dysfuncon.
Handle the tone arm holding the headshell carefully and do not
touch the stylus of the cartridge with your hand.
Use a commercially available cleaner to make sure you do not
damage the stylus.
REPLACING THE CARTRIDGE / STYLUS
When the end of the stylus is worn, the sound quality
deteriorates. The life of a stylus is about 300 hours.
Please use an Audio-Technica AT-3600 L replacement cartridge.
WARNING
Before changing the cartridge, make sure the turntable is
disconnected from the current to prevent loud noises and
sudden occur.
Note: Bent stylus due to, for example, insucient care provided
by the user are not covered by the warranty.
Notes about records Troubleshoong
Here you will nd a number of fault descripon and possible
soluons we invite you to read in order to ensure the possibility
of an actual breakdown of your device.
The unit does not turn on
- Make sure the power cord is properly connected.
- Make sure the plug is fully inserted into the wall outlet and
there is power.
- Make sure the camera is turned on.
- Check the fuse in the mains plug or adapter if necessary.
There is no sound
- Make sure the unit is not in standby mode.
- Check that the source component is connected properly.
- Make sure your speakers are properly connected.
The pitch is wrong (too fast or too slow)
Make sure you have selected the rotaon speed (33, 45 or 78
rpm) corresponding to the record speed you are listening to.
Jumps during playback
- Make sure the record is not subject to vibraon or external
shocks from external sources.
- Check if the record is not scratched.
- Balance the tone arm and readjust the stylus pressure. The
stylus and sound can jump if the stylus pressure is less than the
value specied for the cartridge.
Noise occurs when a record is playing
Noise could occur if the stylus pressure is higher that cartridge’s
specied value. Readjust the stylus pressure so that is the spe-
cied value.
Playing the record is impossible, there is noise
- Remove the protecve cap from the stylus.
- Clean the record with a dedicated commercial product if the
record has ngerprints or dust.
- Clean the stylus with a product provided for this purpose.
- If the stylus is worn or damaged, change it. The life of a stylus
is about 300 hours.
- Try to keep the turntable as far away as possible from
microwave ovens, TVs and other devices eming
electromagnec waves.
The Bluetooth© connecon with my Smartphone or tablet is
not possible.
This turntable integrates a Bluetooth© transmier to send the
sound of your record to the Bluetooth© receiver of your acve
speakers.
Since the deck does not include a Bluetooth© receiver, it can not
be connected to your Smartphone or tablet.
The Bluetooth© connecon does not work with the Bluetooth©
speakers I want to connect
- Turn o the turntable and your Bluetooth© speakers, then turn
them on again to pair them again.
- Turn o other Bluetooth© speakers within 10 meters of the
pair of speakers you want to pair.
11
ENGLISH FRANCAIS SPANISH DEUTSCH
The connecon to the Bluetooth© speaker was successful, but
I can not hear the sound of my record
- Check that the volume of the Bluetooth© speaker is at an
audible level.
- Turn o the turntable and your Bluetooth© speakers, then turn
them on again to pair them again.
Bluetooth© pairing impossible?
In the event that you are unable to connect your turntable with
Bluetooth© speakers (such as the BC Acousque SP-102-BT),
we invite you to use the stereo RCA cable supplied with the
turntable to connect it directly to analog input of your acve
speaker.
In case the above soluons do not remedy your problem, check
our FAQ secon (Frequently Asked Quesons) on our website:
www.bc-acousque.com
For repair, during or aer the warranty, please contact your
dealer.
To obtain warranty service and technical support, thank
you kindly to register your product online on the website
www.bc-acousque.com at the product registraon secon.
BC ACOUSTIQUE
14 Avenue de l’Europe
77600 Bussy Saint-Georges - France
www.bc-acousque.com
Troubleshoong Notes
12
BC ACOUSTIQUE
14 Avenue de l’Europe
77600 Bussy Saint-Georges - France
www.bc-acousque.com
  • Page 1 1
  • Page 2 2
  • Page 3 3
  • Page 4 4
  • Page 5 5
  • Page 6 6
  • Page 7 7
  • Page 8 8
  • Page 9 9
  • Page 10 10
  • Page 11 11
  • Page 12 12

BC ACOUSTIQUE TD922 Owner's manual

Category
Audio turntables
Type
Owner's manual

BC ACOUSTIQUE TD922 is a Bluetooth© turntable that allows you to wirelessly connect to your Bluetooth© speakers or headphones and enjoy your vinyl records. It features a stylus pressure adjustment ring to ensure optimal sound quality and an anti-skating mechanism to prevent skipping. Additionally, it has an arm lifter lever to protect your records and styluses, and a 45 RPM adapter for playing extended play records.

Ask a question and I''ll find the answer in the document

Finding information in a document is now easier with AI