Page is loading ...

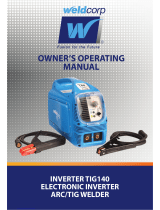
OWNER’S OPERATING
MANUAL
INVERTER TIG PRO 170
ELECTRONIC INVERTER
ARC/TIG WELDER


TABLE OF CONTENTS
Safety instructions 3-4
Page
Inverter TIG Pro Welders 5-8
Installation 9
Operation 9-11
• How to use the machine (Electrode MMA Welding)
• How to use the machine (TIG Lift Welding)
• Thermal Protection
• Maintenance
Troubleshooting Guide 11
Welding Information 12
• Electrode guide (for unskiled welders)
Welding machine technical data 12
Spare parts list 13
Wiring Diagram 14
Warranty 15-16
Declaration of conformity 17

SAFETY INSTRUCTIONS
When using power equipment, basic safety precautions should always be followed to reduce
the risk of re, electric shock and personal
injury, including the following. If used correctly, welders pose little
risk to the operator; however, care should always be taken to ensure
safety and proper performance. Read all owner’s operating instructions before attempting to
operate any product.
WARNING: PERSONS FITTED WITH ELECTRONIC
DEVICES INCLUDING BUT NOT LIMITED TO
PACEMAKERS AND HEARING AIDS SHOULD NOT
OPERATE ELECTRONIC INVERTER WELDERS
WARNING: CONTACT LENS SHOULD BE REMOVED
BEFORE USE
FOR SAFE OPERATION:
• KEEP THE WORK AREA CLEAN: Cluttered working areas (indoor and outdoor) invite
injuries.
• CONSIDER THE WORK ENVIRONMENT: Don’t expose power equipment to rain. Don’t
use welding equipment in damp or wet locations. Keep the work area well lit. Don’t use
welding equipment in the presence of ammable liquids or gases.
• GUARD AGAINST ELECTRIC SHOCK: Avoid body contact the grounded surfaces (e.g.
pipes, radiator, and electrical appliances).
• KEEP CHILDREN AND VISITORS AWAY: Keep children, inrmed persons and visitors
away from the area of operation. Do not let children, inrmed persons or visitors touch
equipment or extension cables.
• STORE IDLE TOOLS: When power equipment is not in use, keep them in a dry, high or
locked area, out of reach of children.
• SECURE WORK: Use clamps or a vice whenever possible to secure work.
• WEAR SAFETY GLASSES: Always wear safety goggles or other suitable eye protection
when using welding equipment .
!
Page 3

• DON’T OVERREACH: Keep proper footing and balance at all times.
• DRESS PROPERLY: DO NOT wear loose clothing or jewellery. They can be caught in
moving parts. Wear protective hair covering to cover long hair, and gloves and non-slip
footwear is recommended when working outdoors.
• TAKE CARE OF CABLES: Never carry welding equipment by the cable and never pull the
cable to disconnect it from a socket. Keep cables away from heat, oil and sharp edges.
Replace damaged cables.
• DISCONNECT TOOLS: Disconnect welding equipment when not in use, before servicing,
and when changing accessories such as blades, bits and cutters.
• AVOID UNINTENTIONAL OPERATION: Do not carry plugged in welding equipment with
a nger on the switch. Be sure that the switch is o when plugging in.
• OUTDOOR USE EXTENSION CABLES: When electric power equipment is used outdoors,
only use extension cables marked as suitable for outdoor use.
• STAY ALERT: Watch what you are doing. Use common sense. Do not operate welders
when you are tired or under the inuence of alcohol or drugs.
• CHECK DAMAGED PARTS: Before using welding equipment, parts that are damaged
should be carefully checked to determine that they will operate properly and perform
their intended function. Any part that is damaged should be properly repaired
or replaced by an authorized service agent. Have defect switches replaced by an
authorised repair agent. Do not operate power equipment if it cannot be turned o and
on by the switch.
• REPAIR OF POWER EQUIPMENT BY EXPERTS: Power equipment is built in accordance
with relevant safety authority requirements. The repair of power equipment must only
be carried out by experts; non-expert repairs may cause considerable danger for the
user and void warranty.
Page 4

INVERTER TIG PRO WELDERS
This device is a current inverter generator (DC) suitable for welding electrode MMA and TIG
LIFT. Thanks to the inverter technology which allows to achieve high performance and low
size and weight, the welder is portable and easy to handle.
The device is suitable for welding with coated electrodes (rutile, basic, stainless steel and cast
iron) and TIG LIFT welding for many metals except aluminium and alloys. It is a single phase
230V 50/60Hz and can be connected to power generators having power equal to or higher
than that value reported in Page 10.
The machine is equipped with the following functions:
• “MAINS ANALYSIS” - when turns on, the machine performs a series of tests to analyze the
mains supply.
•”HOT START”, “ARC FORCE” and “ANTI STICK” functions.
• “MEMORY PARAMETERS” - the microprocessor stores the welding parameters set during the
last use of the machine allowing automatic recovery at each turn on.
• “VOICE SYNTHESIZER” - it is equipped with a voice synthesizer (the language is selectable at
start), that helps the user during its use.
• “ADJUSTMENT PARAMETERS” - the machine is able to self-adjust its welding parameters
conguration after the user selection.
Page 5
A Control panel
B Negative pole (-)
C Positive pole (+)
D ON-OFF switch
E Power cord

INVERTER TIG PRO WELDERS (cont.)
CONTROL PANEL
Page 6
MENU ACCESS
Pushing the knob “MENU”, it is possible to select the MMA or TIG welding. The display will
show the corresponding selection. Setting the MMA welding, turning the knob “MENU”, it is
possible to select the type and diameter of the electrode or the manual mode. The display
will show the corresponding selection.
ELECTRODE SELECTION (MMA)
Once you have selected the type
and diameter of the electrode, the
onboard microcontroller self adjusts
the conguration by selecting the
corresponding value of the current to
obtain the best welding. The display
shows, rst, the electrode selected and
then, the current self-regulated.

Page 7
INVERTER TIG PRO WELDERS (cont.)
When the manual mode is selected,
the display will show “Man”; the
selfregulation of welding current
is disabled. The user can select the
desired setting of the welding current
and the type/diameter of the electrode.
Pushing the knob “MENU”, it is possible
to select the TIG welding. The display
will show “TIG”. Turning the knob “AMP”
it is possible to choose the desired
welding current.
MANUAL SELECTION
TIG SELECTION
MAINS ANALYSIS
At each turn on, the machine analyzes the electrical network checking the supply voltage
(SAFETY POWER) and the grounding system (SAFETY USER).
SAFETY USER
At each turn on, the machine scans the electrical grid to check if the system is equipped
with grounding system. The outcome of the verication is stored on its internal memory.
The purpose is to ensure the user safety . In case of negative outcome, the user will push
the knob “MENU” to continue using the welding machine. The event will be stored in the
memory and the data can be retrieved from a service centre.
SAFETY POWER
At each turn on, the machine performs the check of the supply voltage.
When the voltage supply is less than 1 BOV, the machine go in protection mode and it won’t
weld until the voltage supply is not within the allowed limits, the display will show “LO”.
When the voltage supply is greater than 250V, the machine go in protection mode and it
won’t weld until the voltage supply is not within the allowed limits, the display will show “HI”.

INVERTER TIG PRO WELDERS (cont.)
Page 8
The machine is equipped with a voice synthesizer that accompanies the user during use. For
selecting the language, if it was not previously set at factory, perform the following step at
rst turn on of the machine - when the display shows the desired language, push the knob
“MENU”. The correspondence between language and the display is as follows:
• “IT_” - ITALIAN
• “EN_” - ENGLISH
• “ES_” - SPANISH (optional)
• “RU_” - RUSSIAN (optional)
• “De_” - GERMAN (optional)
• “FR_” - FRENCH (optional)
If the user wants to re-select the language and return to factory settings, perform the
following steps:
• Turn o the welding machine;
• Simultaneously push the knob “MENU” and turn on the welding machine. The display will
show “coo” if successful
• Release the knob MENU. The display will scroll the selectable languages.
• Select the desired language by pushing “MENU”
The machine is able to self-adjust its welding parameters according to the user selection:
• When selecting the type and diameter of the electrode, the onboard microcontroller sets
the value of the welding current;
• When selecting the value of the welding current, the onboard microcontroller sets the
diameter of the electrode of the type previously selected.
VOICE GUIDE
RESET (LANGUAGE AND WELDING PARAMETERS)
AUTO ADJUSTMENT PARAMETERS

Page 9
INSTALLATION
Warning: Use all precautions required in the safety manual before operating the welder,
reading carefully the risks linked to the welding process. The installation must be made by
trained personnel in compliance to the standard IEC 60974-9 and the current legislation.
To lift the machine you must use the handle positioned on top of the product with the
machine in OFF position and the welding cable disconnected. The input voltage must match
the voltage indicated on the technical plate located on the product. The equipment shall
only be used on a supply system that is a single-phase, three-wire system with an earthed
neutral.
Use the machine on electric system having supply features and power protection that are
compatible with the current required for its use, for more details see the information on the
nameplate axed to the machine. The machine has an IP21 S protection level.
OPERATION
HOW TO USE IT
Warning: Use all precautions required in the safety general manual before operating the
welder, reading carefully the risks linked to the welding process.
ELECTRODE MMA
• Select the proper electrode polarity (direct or reverse) of the electrode (for more
information see the general part of the safety manual and the information on the electrode
packaging). Connect the plugs of the work clamp and the electrode holder to the sockets of
the machine as function of the polarity, rotating the attack in order to ensure a good grip.
• Connect the work clamp to the metal structure to be welded trying to establish a good
point of contact between the metal and the clamp, as close as possible to the area to be
welded, insert the electrode into the electrode holder.
• Connect the power supply plug to the power outlet and turn on the welding machine by
placing the on I oft switch to position I.
• Select the electrode or the MANUAL MODE
• Start the welding operation using all necessary protections to security.
• After completing the welding, turn o the welder and remove the electrode from the
electrode holder.

Page 10
OPERATION (cont.)
Warning: Use all precautions required in the safety general manual before operating the
welder, reading carefully the risks linked to the welding process.
TIG LIFT
• Select the proper polarity (direct or reverse) in relation to the type of material to be welded
(for more information see the general part of the safety manual). Connect the plugs of the
work clamp and the torch to the sockets of the machine (Fig 1, B and C) as function of the
polarity, rotating the attack in order to ensure a good grip.
• Connect the work clamp to the metal structure to be welded trying to establish a good
point of contact between the metal and the clamp, as close as possible to the area to be
welded.
• Connect the torch gas tube to the pressure reducer connected to the gas cylinder (for more
information consult the safety manual included in the packaging).
• Connect the power supply plug to the power outlet and turn on the welding machine by
placing the on I oft switch (Fig 1, D) to position I.
• Select the TIG welding (Fig 2 knob “MENU”).
• Turn the knob (Fig 2, “AMP”) in the position corresponding to the desired current .
• Regulate the cylinder gas ow with the pressure reducer and then open the torch valve.
• Use the torch to weld as in the following without a pause between the two phases:
• To stop welding, turn o the machine and close the gas valve

Page 11
PROTECTION FROM OVERHEATING
The duty cycle is the fraction or percentage of a ten-minute cycle that a power source may
be used without overheating. For example, a welding machine with 150 amp - 30% duty
cycle can weld continuously at 150 amps for 3 minutes, and then must cool down during the
remaining 7 minutes to prevent overheating, with the ambient temperature of 40 “C.
Using the machine with the proper duty cycle according to the selected welding current
allows to prevent overheating. If the machine is used for hard work cycle, the thermal
protection device will protect the machine from overheating. In case of overheating of the
machine the “LED TERM” will come on, and the display will show “HOO”. It is possible to start
the welding again once the LED is o and the word “HOO” is no longer on the display.
MAINTENANCE
All maintenance and repairs must be carried out by an authorised repair agent. Any non-
authorised repairs will void warranty. Personnel in compliance to the norm (IEC 60974-4).
TROUBLESHOOTING
If you are still having diculty with your welder, do not hesitate to contact our service team on:
1800 011 812

WELDING INFORMATION
Table for selection of the welding current according to the electrode (unskilled welder)
WELDING MACHINE TECHNICAL DATA
Page 12

Page 13
SPARE PARTS LIST - INVERTER TIG PRO 170
Product Code: WCI0007

Page 14
WIRING DIAGRAM

Page 15
1YEAR WARRANTY
Subject to the warranty conditions below, this Weldcorp product (“the Product”) is warranted by
ITW Group, a division of ITW Australia Pty Ltd (“the Company”) to be free from defects in material or
workmanship for a period of 12 months from the date of original purchase (“the Warranty Period”).
Under this warranty, the Company will, subject to the conditions below and at the Company’s option,
repair or replace the Product, or refund the purchase price of the Product, if such a defect becomes
apparent during the Warranty Period.
In the event of such a defect, the Product must be returned to the place of purchase, together with proof
of purchase. Any handling and transportation (and other expenses) incurred in claiming under this
warranty are not covered by this warranty and will not be borne by the Company.
The Company’s dealers or agents are not permitted to oer any warranty or guarantee on the Company’s
behalf in relation to the Product, except as expressly stated in this warranty.
The Company’s obligations under this warranty are subject to: (a) the Product having been used in
accordance with the Company’s directions, instructions and recommendations; (b) the Product having
been used under normal conditions and with reasonable care (including in relation to the maintenance
of the Product); (c) the Product not having been altered, tampered with or otherwise dealt with by any
person in a manner other than as intended in respect of the Product. For the avoidance of doubt, this
warranty does not cover damage, malfunction or failure resulting from misuse, neglect, abuse, or where
the Product has been used for a purpose for which it was not designed or is not suited, or if repairs,
alterations or modications have been attempted by a person who is not an Authorised Service Agent of
the Company. This warranty also does not apply to accidental damage or normal wear and tear.
In addition to other rights and remedies that may be available under law, our goods come with
guarantees that cannot be excluded under Australian Consumer Law (for consumers in Australia) and the
Consumer Guarantees Act (for consumers in NZ). If you are a consumer in Australia, you are entitled to a
replacement or refund for a major failure and compensation for any other reasonably foreseeable loss or
damage. You are also entitled to have the goods repaired or replaced if the goods fail to be of acceptable
quality and the failure does not amount to a major failure. If you are consumer in New Zealand, we will
comply with our obligations to you under the Consumer Guarantees Act.
ITW Group, a division of ITW Australia Pty Ltd (ACN 004 235 063)
73C Elizabeth Street
Wetherill Park, New South Wales, 2164
Australia
Ph: 1800 011 812
Email: weldcorp-enq@prager.com.au

WARRANTY FORM
THIS WARRANTY FORM SHOULD BE REAINED BY THE CUSTOMER AT ALL TIMES
For your record and to assist in establishing date of purchase (necessary for in
warranty service) please keep your purchase docket and this form completed
with the following particulars.
PURCHASED FROM
SUBURB
DATE
MODEL NO.
SERIAL NO.
Present this form with your original receipt when warranty service is required.
HELPLINE 1800 001 1812
Page 16

Page 17

Manufactured in Italy
Cyclone Tools Pty Ltd
ABN 89 169 427 061
73C Elizabeth Street
Wetherill Park NSW 2164
www.weldcorp.com.au
AUS Helpline: 1800 001 812
/


