Page is loading ...

Instruction Sheet P11257
2007 Daystar Products International Inc.
Page 1 of 2
www.DaystarWeb.com
Tech Support Contact Info
Tech@DaystarWeb.com
Phone: 623.907.0081
Fax: 623.907.0088
841 South 71
st
Avenue
Phoenix, AZ 85043
KC09106
2007 DODGE NITRO 2WD & 4WD
2” FRONT & REAR LEVENLING KIT
Bill of Materials 2”
Part No. Description Qty
M03323 Coil Spacer Ft 2
M03441 Stem Cushions 4
S10578 Left Mount plate 1
S10579 Right Mount plate 1
S10138 Washer (for boots) 2
M00313 Boot 2
P01055 Cable tie 2
REAR SPACER
M03784 Coil Spacer
rear 2
FIG.1
FIG.2
FIG.3
FIG.4
FIG.5
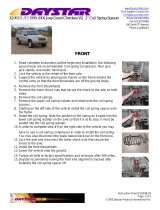
1. Read all instruction and check the bill of materials before beginning.
2. Disconnect the negative battery cable. Raise the front of the vehicle and support with
jack stands and block the rear wheels. Remove the front wheels
3. Remove the upper ball joint nut and separate the upper ball joint.
4. Disconnect the lower strut fork at the lower control arm and at the lower portion of the
strut assembly.( FIG 1 )
5. Remove the air box on the passenger’s side. Remove the 4 strut tower nuts from inside
the engine compartment on both sides. ( label the struts LT and RT).
6. Separate the strut fork from the strut assembly and remove the strut from the vehicle.
7. Compress the coil spring with a spring compressor. Remove the upper strut nut, washer
and mounting plate. Remove the strut from the spring. Remove the strut dust cover by
cutting it off the lower stem cushion washer. Remove the lower stem cushion washer.
FIG 3)
8. Remove the lower coil spring isolator from the strut and insert the coil spring spacer.
( FIG 3)
9. When reassembling the strut assembly make sure that the coil spring sites correctly into
the coil spring spacer.( FIG 3 )
10. Remove upper strut plate studs using a press. Install the factory studs into the new strut
mounting plate with the studs facing in the upward position. Reinstall the upper strut
isolator onto the new mount. FIG 2)
11. Remove the washer attached to the stock boot.
12. Insert one of provided washes into the inside groove on the smaller end of the boot.
Reassemble the strut assembly with the washer that is in inside of the boot, then factory
washer ( bevel down), stem cushion strut mount plate, stem cushion, factory washer and
nut. Making sure that the lower strut fork keyway aligns with the new upper strut
mounting plate studs for reassembly. Keyway faces outward as does the wide set upper
studs. Tighten the upper strut assembly nut washer. (FIG 4).
13. Continued on page 2
NOTE: This kit should be installed by a professional mechanic.

www.DaystarWeb.com
Tech Support Contact Info
Tech@DaystarWeb.com
Phone: 623.907.0081
Fax: 623.907.0088
841 South 71
st
Avenue
Phoenix, AZ 85043
Instruction Sheet P11257
2007 Daystar Products International Inc.
Page 2 of 2
KC09106
2007 DODGE NITRO 2WD & 4WD
2” FRONT & REAR LEVENLING KIT
14. Reinstall the strut assembly into the vehicle and start the upper nuts , hand tighten only,
reinstall the lower strut fork and hand tighten the bolts at the strut. Install the lower fork
bolt onto the lower control arm. An external spring compressor with then claws will help
in assembly. ( Make sure that the lower strut fork is aligned with the strut assembly keyway)
15.Tighen the upper 4 factory nuts on each side and reinstall the air box. Tighten the upper
and lower fork bolts. Reassemble the upper control arms and tighten all bolt to factory
torque specifications.
16. Install the wheels, remove the jack stands and lower to the ground.
Warranty:
Four Real Steel Products carry a limited warranty: This Limited Warranty does not include normal wear and tear and is void if product
shows any evidence of misuse, abuse, accident/collision, road hazard, improper installation and or maintenance or modification. This
warranty does not cover cost of removal, installation, shipping or other incidental charges. This warranty is limited to the repair and/or
replacement of the Four Real Steel Product only at the discretion of Four Real Steel Products, Inc. ALL WARRANTY ISSUES MUST
BE ACCOMPANIED BY A SALES RECEIPT WITH TRANSPORTATION OR SHIPPING CHARGES PREPAID. This warranty extends
only to the original purchaser of the Four Real Steel Products
Rear Installation Instructions
1. Raise the rear of vehicle and support with jack stands in front of the lower control arms so that the rear tires are off of
the ground. Remove the rear wheels.
2. With a floor jack supporting the axle, disconnect the upper shock mounts.
3. Lower the axle and remove the coil springs.
4.Remove the lower coil spring isolator.
5. Install the coil spring spacer in the same position as the lower isolator.
6. Install the coil spring on top of the coil spring spacer. (You may have to use a coil spring compressor to reinstall the
coil spring)
7. Raise the floor jack and reconnect the upper shock mounts and torque all bolts to factory specs.
8.Reinstall the wheels and lower the vehicle to the ground.
9.Recheck all bolts after 500 miles.
10.Upon completion of kit installation the following warning applies:
11. Alignment is needed .
12. check all bolts after 500 miles.
/


