Page is loading ...

USER GUIDE
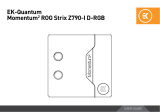
EK-Quantum
Momentum2 ROG Maximus Z690/Z790 Extreme I/O Cover - Black

Please note the installation of the product is intended to be undertaken
by an adequately trained and experienced person. You are installing the
product at your own risk. If you are not properly trained or experienced
or feel unsure about the installation procedure, please refrain from
installing the product yourself and contact our tech support for
assistance. We disclaim our liability for any damages to the product as
well as incidental, consequential, or indirect damages incurred due to
improper or inappropriate installation.
Before you start using this product, please follow these basic guidelines:
Carefully read the manual before beginning with the
installation process.
Remove your motherboard from the computer for the safest
mounting process to prevent any possible damage to your
water block or its circuit board (PCB).


- 4 -
BOX CONTENTS
EK-Quantum Momentum² ROG Maximus Z690/Z790 Extreme I/O
Cover - Black
Screw M2 x 4 (3 pcs)
TECHNICAL SPECIFICATIONS
Dimensions: 295.70 x 30.20 x 21.40 mm
The purpose of EK-Quantum Momentum² ROG Maximus Z690/Z790
Extreme I/O Cover - Black is to replace the stock motherboard I/O
cover and allow mounting the Vector² ABP (Active Backplate) sets.
The I/O shield is fully compatible only with:
• ROG Maximus Z690 Extreme
• ROG Maximus Z790 Extreme
• ROG Maximus Z690 Extreme Glacial

- 5 -
Important! Before starting, make sure to have a clean, flat
surface to work on. Putting foam or soft material to lay the
motherboard on is recommended.
PREPARING THE MOTHERBOARD
For this step, you will need:
Phillips Head Screwdriver
REMOVING THE BACKPLATE
Using a Philips head screwdriver, unscrew six (6) Screws. Rotate the
motherboard and remove an additional one (1) screw (Red marked in
the picture).
Carefully detach the connectors from the motherboard and remove
the backplate. Save the screws! The same screws will need to be used
to attach the supplied custom-made I/O Cover.
To detach the stock I/O side cover, the lower stock heatsink will have
to be loosened as well.
UNSCREW FROM THE BACKSIDE
UNSCREW FROM THE
FRONTSIDE

- 6 -
REMOVING THE STOCK I/O COVER
From the backside of the motherboard, unscrew one (1) marked
screw.
Detach the cover and save the screws.
For this step, you will need:
Phillips Head Screwdriver

- 7 -
To detach the stock I/O side cover, the lower stock heatsink will
have to be removed or at least loosened.
The mechanism from the stock I/O Side Cover can be transferred
to the EK’s I/O Cover using the provided M2 x 4 screws. Be careful
that you assemble the mechanism back exactly as it was.
Assemble the I/O Cover and the Motherboard using the same
stock screws.
M2 x 4 mm
SCREWS
1x COVER
(PLASTIC)
STOCK MECHANISM
PARTS:
2x SPRINGS
2x KEY COVERS

In case you need assistance, please contact:
https://www.ekwb.com/customer-support/
EKWB d.o.o.
Pod lipami 18
1218 Komenda
Slovenia - EU
EKWaterBlocks
@EKWaterBlocks
ekwaterblocks
ekwaterblocks
EKWBofficial
SUPPORT AND SERVICE
SOCIAL MEDIA
/


![ekwbEK-FG Digital Reef [14900K | RTX 4090] Liquid-Cooled Gaming PC](http://vs1.manuzoid.com/store/data/002370020_2-94f374cca04dd8a8915b7c175ec50117-160x210.png)


