SGM G-1 BEAM User manual
- Category
- Stroboscopes & disco lights
- Type
- User manual
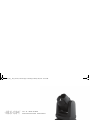
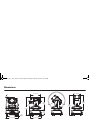
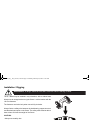
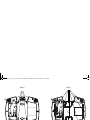
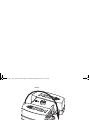
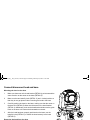
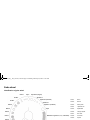
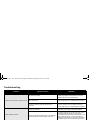
SGM G-1 BEAM is a professional moving head beam fixture featuring a 100 W LED light source, a wide zoom range, and a variety of effects. It is an ideal choice for a range of applications, including concerts, events, and stage productions. The G-1 BEAM offers a variety of features that make it a versatile and powerful lighting tool, including:
- A 100 W LED light source that provides a bright and powerful beam
- A wide zoom range from 5° to 60° for a variety of beam effects
- A gobo wheel with 13 static gobos and 3 rotating gobos for creating a variety of effects
- A color wheel with 14 colors and white for a variety of color options


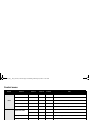
-
 1
1
-
 2
2
-
 3
3
-
 4
4
-
 5
5
-
 6
6
-
 7
7
-
 8
8
-
 9
9
-
 10
10
-
 11
11
-
 12
12
-
 13
13
-
 14
14
-
 15
15
-
 16
16
-
 17
17
-
 18
18
-
 19
19
-
 20
20
-
 21
21
-
 22
22
-
 23
23
-
 24
24
-
 25
25
-
 26
26
-
 27
27
-
 28
28
-
 29
29
-
 30
30
-
 31
31
-
 32
32
-
 33
33
-
 34
34
-
 35
35
-
 36
36
-
 37
37
-
 38
38
-
 39
39
-
 40
40
-
 41
41
-
 42
42
-
 43
43
-
 44
44
-
 45
45
-
 46
46
-
 47
47
-
 48
48
-
 49
49
-
 50
50
-
 51
51
-
 52
52
-
 53
53
-
 54
54
-
 55
55
-
 56
56
-
 57
57
-
 58
58
-
 59
59
-
 60
60
-
 61
61
-
 62
62
-
 63
63
-
 64
64


SGM G-1 BEAM User manual
- Category
- Stroboscopes & disco lights
- Type
- User manual
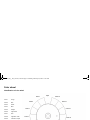
SGM G-1 BEAM is a professional moving head beam fixture featuring a 100 W LED light source, a wide zoom range, and a variety of effects. It is an ideal choice for a range of applications, including concerts, events, and stage productions. The G-1 BEAM offers a variety of features that make it a versatile and powerful lighting tool, including:
- A 100 W LED light source that provides a bright and powerful beam
- A wide zoom range from 5° to 60° for a variety of beam effects
- A gobo wheel with 13 static gobos and 3 rotating gobos for creating a variety of effects
- A color wheel with 14 colors and white for a variety of color options
Ask a question and I''ll find the answer in the document
Finding information in a document is now easier with AI