STIHL BG 86 User manual

Category
Air blowers/dryers
Type
User manual

This manual is also suitable for

{
STIHL BG 56, 66, 86, SH 56, 86
Instruction Manual
Original Instruction ManualPrinted on chlorine-free paper
Printing inks contain vegetable oils, paper can be recycled.
© ANDREAS STIHL AG & Co. KG, 2015
0458-296-0121-D. VB2.B15.
0000006593_008_GB
BG 56, BG 56 C, BG 66, BG 66 C, BG 86, BG 86 C, SH 56, SH 56 C, SH 86, SH 86 C
English
1
{
This instruction manual is protected by copyright. All rights reserved, especially the rights to reproduce, translate and process
with electronic systems.
Contents
Dear Customer,
Thank you for choosing a quality
engineered STIHL product.
It has been built using modern
production techniques and
comprehensive quality assurance.
Every effort has been made to ensure
your satisfaction and troublefree use of
the product.
Please contact your dealer or our sales
company if you have any queries
concerning this product.
Your
Dr. Nikolas Stihl
Guide to Using this Manual 2
Safety Precautions and Working
Techniques 2
Assembling the Blower 8
Assembling the Vacuum Shredder 9
Fuel 11
Fueling 12
Starting / Stopping the Engine 13
Cleaning the Air Filter 15
Adjusting the Carburetor 16
Spark Plug 17
Engine Running Behavior 18
Rewind Starter 19
Storing the Machine 19
Maintenance and Care 20
Minimize Wear and Avoid Damage 21
Main Parts 22
Specifications 23
Maintenance and Repairs 24
Disposal 24
EC Declaration of Conformity 25
BG 56, BG 56 C, BG 66, BG 66 C, BG 86, BG 86 C, SH 56, SH 56 C, SH 86, SH 86 C
English
2
Pictograms
The meanings of the pictograms
attached to the machine are explained in
this manual.
Depending on the model concerned, the
following pictograms may be attached to
your machine.
Symbols in text
WARNING
Warning where there is a risk of an
accident or personal injury or serious
damage to property.
NOTICE
Caution where there is a risk of
damaging the machine or its individual
components.
Engineering improvements
STIHL's philosophy is to continually
improve all of its products. For this
reason we may modify the design,
engineering and appearance of our
products periodically.
Therefore, some changes, modifications
and improvements may not be covered
in this manual.
Observe all applicable local safety
regulations, standards and ordinances.
If you have not used this model before:
Have your dealer or other experienced
user show you how to operate your
machine or attend a special course in its
operation.
Minors should never be allowed to use
this product.
Keep bystanders, especially children,
and animals away from the work area.
When the power tool is not in use, put it
in a place where it does not endanger
others. Secure it against unauthorized
use.
The user is responsible for avoiding
injury to third parties or damage to their
property.
Do not lend or rent your power tool
without the instruction manual. Be sure
that anyone using your power tool
understands the information contained
in this manual.
Guide to Using this Manual
Fuel tank; fuel mixture of
gasoline and engine oil
Operate manual fuel
pump
Safety Precautions and
Working Techniques
Special safety precau-
tions must be observed
when working with a
power tool.
It is important that you
read the instruction man-
ual before first use and
keep it in a safe place for
future reference. Non-
observance of the
instruction manual may
result in serious or even
fatal injury.
BG 56, BG 56 C, BG 66, BG 66 C, BG 86, BG 86 C, SH 56, SH 56 C, SH 86, SH 86 C
English
3
The use of noise emitting power tools
may be restricted to certain times by
national or local regulations.
Do not operate your unit if any of its
components are damaged.
Do not use a pressure washer to clean
the unit. The solid jet of water may
damage parts of the unit.
Accessories and Spare Parts
Only use parts and accessories that are
explicitly approved for this power tool by
STIHL or are technically identical. If you
have any questions in this respect,
consult a servicing dealer. Use only high
quality parts and accessories in order to
avoid the risk of accidents and damage
to the unit.
STIHL recommends the use of genuine
STIHL replacement parts. They are
specifically designed to match the
product and meet your performance
requirements.
Never attempt to modify your power tool
in any way since this may increase the
risk of personal injury. STIHL excludes
all liability for personal injury and
damage to property caused while using
unauthorized attachments.
Physical Condition
To operate this power tool you must be
rested, in good physical condition and
mental health.
If you have any condition that might be
aggravated by strenuous work, check
with your doctor before operating a
power tool.
Persons with pacemakers only: The
ignition system of your power tool
produces an electromagnetic field of a
very low intensity. This field may
interfere with some pacemakers. To
reduce health risks, STIHL recommends
that persons with pacemakers consult
their physician and the pacemaker
manufacturer before operating this
power tool.
Do not operate the power tool if you are
under the influence of any substance
(drugs, alcohol) which might impair
vision, dexterity or judgment.
Intended Use
The blower is designed for blow-
sweeping leaves, grass, paper and
similar materials, e.g. in gardens, sports
stadiums, car parks and driveways. It is
also suitable for blow-sweeping forest
paths.
The vacuum shredder is designed for
picking up dry leaves and other
lightweight, loose and non-combustible
materials.
Do not blow-sweep or vacuum
hazardous materials.
Do not use the power tool for any other
purpose because of the increased risk of
accidents and damage to the power tool
itself. Never attempt to modify the
product in any way since this may result
in accidents or damage to the product.
Clothing and Equipment
Wear proper protective clothing and
equipment.
Wear sturdy shoes with non-slip soles.
WARNING
Wear hearing protection, e.g. earplugs
or ear muffs.
STIHL offers a comprehensive range of
personal protective clothing and
equipment.
Transporting the Unit
Always stop the engine.
Transporting in a vehicle:
Properly secure your power tool to
prevent turnover, fuel spillage and
damage.
Clothing must be sturdy
but allow complete free-
dom of movement. Wear
snug-fitting clothing, an
overall and jacket combi-
nation, do not wear a
work coat.
Avoid any clothing,
scarves, neckties, jewel-
lery or anything that could
get into the air intake. Tie
up and confine long hair
(e.g. with a hair net, cap,
hard hat, etc.).
To reduce the risk of eye
injuries, wear snug-fitting
safety glasses in accord-
ance with European
Standard EN 166. Make
sure the safety glasses
are a good fit.
BG 56, BG 56 C, BG 66, BG 66 C, BG 86, BG 86 C, SH 56, SH 56 C, SH 86, SH 86 C
English
4
Fueling
Always shut off the engine before
refueling.
Do not fuel a hot engine – fuel may spill
and cause a fire.
Open the fuel cap carefully to allow any
pressure build-up in the tank to release
slowly and avoid fuel spillage.
Fuel your power tool only in well-
ventilated areas. If you spill fuel, wipe
the machine immediately if fuel gets on
your clothing, change immediately.
This reduces the risk of unit vibrations
causing the fuel cap to loosen or come
off and spill quantities of fuel.
Before Starting
Check that your power tool is properly
assembled and in good condition refer
to appropriate chapters in the instruction
manual.
Check the fuel system for leaks,
paying special attention to visible
parts such as the tank cap, hose
connections and the manual fuel
pump (on machines so equipped). If
there are any leaks or damage, do
not start the engine – risk of fire.
Have your machine repaired by a
servicing dealer before using it
again.
Throttle trigger must move freely
and spring back to the idle position
when released.
Setting lever/switch must move
easily to STOP or 0
Keep the handles dry and clean –
free from oil and dirt – for safe
control of the power tool.
The blower tubes must be properly
assembled.
Check that the spark plug boot is
secure – a loose boot may cause
arcing that could ignite combustible
fumes and cause a fire.
Check condition of blower wheel
and blower housing.
A worn blower housing (cracks, nicks,
chips) may result in an increased risk of
injury from thrown foreign objects. If the
blower housing is damaged, consult
your dealer – STIHL recommends you
contact a STIHL servicing dealer.
Never attempt to modify the controls or
the safety devices in any way.
To reduce the risk of accidents, do not
operate the unit if it is not properly
assembled and in good condition.
Starting the Engine
Start the engine at least 3 meters from
the fueling spot, outdoors only.
Your power tool is designed to be
operated by one person only. Do not
allow other persons in the work area
even when starting.
Do not drop start the power tool – start
the engine as described in the
instruction manual.
Place the power tool on level ground,
make sure you have secure footing, hold
the power tool securely.
As soon as the engine starts, the air flow
may throw small objects (e.g. stones) in
your direction.
During Operation
In the event of impending danger or in
an emergency, switch off the engine
immediately by moving the setting lever
/ switch to STOP or 0.
Your power tool is designed to be
operated by one person only. Do not
allow other persons in the work area.
Gasoline is an extremely
flammable fuel. Keep
clear of naked flames. Do
not spill any fuel – do not
smoke.
Check for leakage. To
reduce the risk of serious
of fatal burn injuries, do
not start or run the engine
until leak is fixed.
After fueling, tighten
down the screw-type fuel
cap as securely as
possible.
BG 56, BG 56 C, BG 66, BG 66 C, BG 86, BG 86 C, SH 56, SH 56 C, SH 86, SH 86 C
English
5
To reduce the risk of damage to
property, also maintain this distance
from other objects (vehicles, windows).
When blow-sweeping and vacuum
shredding (in open ground and
gardens), watch out for small animals to
avoid harming them.
Never leave a running machine
unattended.
Take special care in slippery conditions,
on slopes or uneven ground.
Watch out for obstacles: Be careful of
refuse, tree stumps, roots and ditches
which could cause you to trip or stumble.
Never work on a ladder or any other
insecure support.
Be particularly alert and cautious when
wearing hearing protection because
your ability to hear warnings (shouts,
alarms, etc.) is restricted.
Work calmly and carefully – in daylight
conditions and only when visibility is
good. Stay alert so as not to endanger
others.
To reduce the risk of accidents, take a
break in good time to avoid tiredness or
exhaustion.
Mufflers with a catalytic converter can
become particularly hot.
To reduce the risk of serious or fatal
injury from breathing toxic fumes,
ensure proper ventilation when working
in trenches, hollows or other confined
locations.
To reduce the risk of accidents, stop
work immediately in the event of
nausea, headache, visual disturbances
(e.g. reduced field of vision), problems
with hearing, dizziness, deterioration in
ability to concentrate. Apart from other
possibilities, these symptoms may be
caused by an excessively high
concentration of exhaust gases in the
work area.
To reduce the risk of fire, do not smoke
while operating or standing near your
power tool. Note that combustible fuel
vapor may escape from the fuel system.
If dust levels are very high, always wear
a suitable respirator.
Operate your power tool so that it
produces a minimum of noise and
emissions – do not run the engine
unnecessarily, accelerate the engine
only when working.
After finishing work, put the unit down on
a level, non-flammable surface. To
reduce the risk of fire, do not put it down
near easily combustible materials (e.g.
wood chips, bark, dry grass, fuel).
Never attempt to insert objects into the
blower housing through the intake
screen or the nozzle. They may be
expelled at very high speed by the
blower – risk of injury.
If there is a noticeable change in running
behavior (e.g. higher vibrations), stop
work and rectify the cause of the
problem.
If your power tool is subjected to
unusually high loads for which it was not
designed (e.g. heavy impact or a fall),
always check that it is in good condition
before continuing work – see also
"Before Starting Work". Check the fuel
system in particular for leaks and make
sure the safety devices are working
properly. Do not continue operating your
power tool if it is damaged. In case of
doubt, consult your servicing dealer.
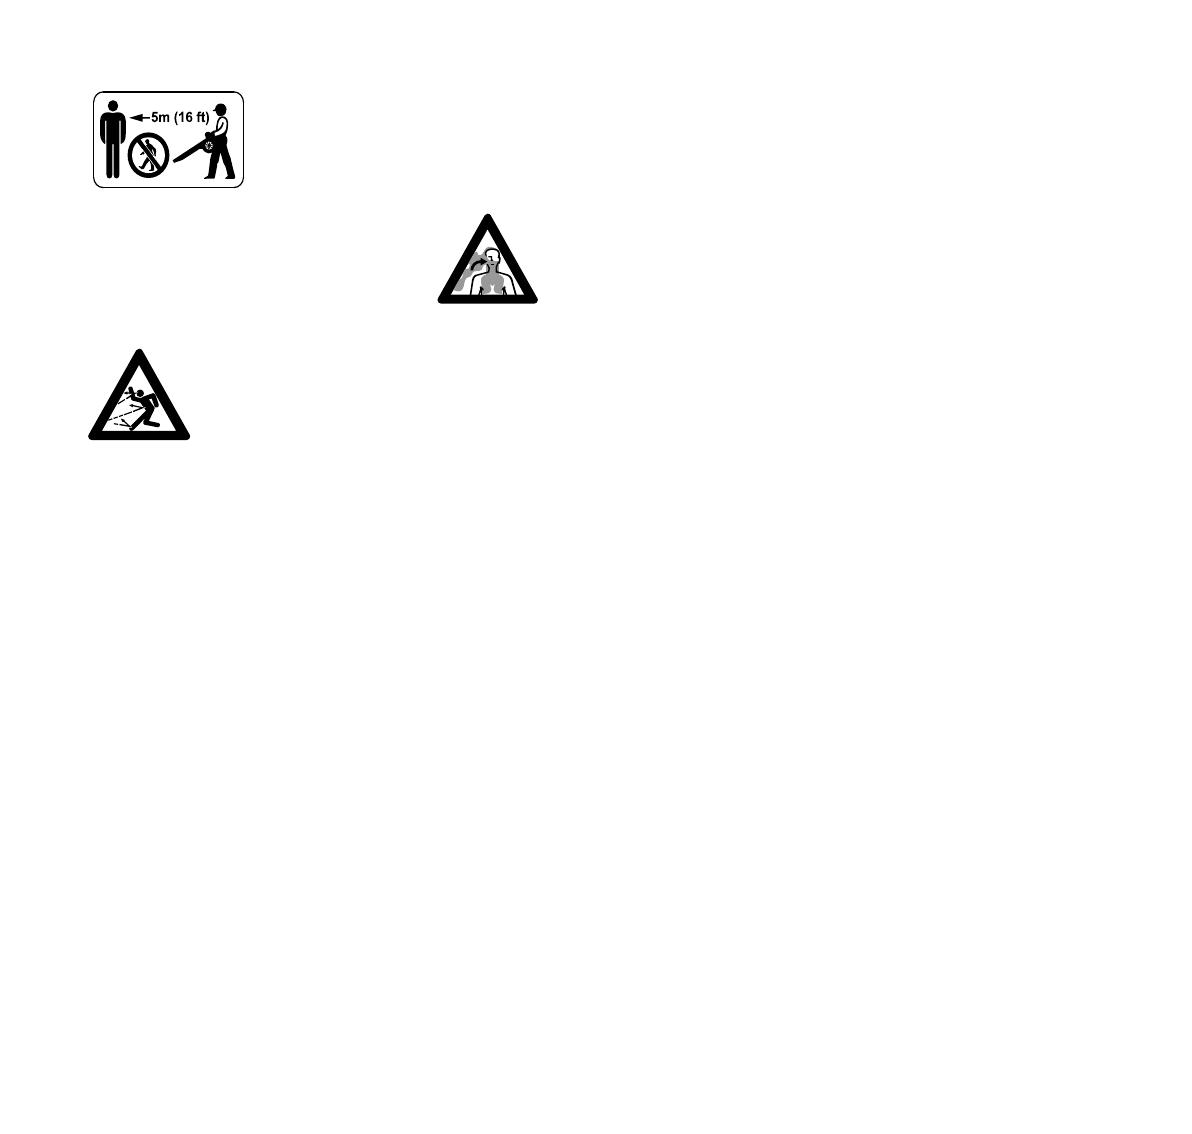
To reduce the risk
of injury from
thrown objects, do
not allow any other
persons within a
radius of 5 meters
of your own
position.
Do not direct the air blast
towards bystanders or
animals since the air flow
can blow small objects at
great speed – risk of
injury.
Your power tool produces
toxic exhaust fumes as
soon as the engine is
running. These fumes
may be colorless and
odorless and contain
unburned hydrocarbons
and benzol. Never run
the engine indoors or in
poorly ventilated loca-
tions, even if your model
is equipped with a cata-
lytic converter.
BG 56, BG 56 C, BG 66, BG 66 C, BG 86, BG 86 C, SH 56, SH 56 C, SH 86, SH 86 C
English
6
Using the Blower
Your blower is designed for one-handed
operation. It must be carried by the
control handle in the right hand.
Always hold the power tool firmly in your
hand.
Watch out for small animals when using
the blower on open ground, in yards and
gardens.
Walk slowly forwards as you work –
observe the nozzle outlet at all times –
do not walk backwards – risk of
stumbling.
WARNING
To reduce the risk of injury, operate the
unit only with a properly mounted blower
tube.
The round nozzle is particularly suitable
for use on uneven surfaces (e.g. fields
and lawns).
The fan nozzle (either included with
power tool or available as special
accessory) produces a broad and
powerful airstream at ground level. It can
be aimed and controlled very accurately.
This nozzle is highly effective for blow-
sweeping sawdust, leaves, grass
cuttings, etc. on flat surfaces.
Using the Vacuum Attachment
For specific assembling instructions,
see appropriate chapter in this manual.
Your vacuum shredder is designed for
two-handed operation. Hold and operate
the unit with your right hand on the
control handle and your left hand on the
assist handle.
Wear the catcher bag shoulder strap
over your left shoulder, not across your
chest. This enables you to quickly
remove the power tool and catcher bag
in an emergency.
WARNING
To reduce the risk of injury, operate your
power tool only with a properly mounted
suction tube and closed catcher bag.
NOTICE
Vacuuming abrasive material (such as
grit, stone chips, etc.) causes the blower
wheel and blower housing to wear at a
rapid rate. This results in a considerable
loss of suction power. In such a case
you should contact your dealer. STIHL
recommends an authorized STIHL
servicing dealer.
Take particular care when vacuuming
wet leaves since they may block the
blower wheel and elbow.
Watch out for small animals when using
the vacuum on open ground, in yards
and gardens.
295BA052 KN
295BA053 KN
To reduce the risk of per-
sonal injury from fire,
never attempt to pick up
hot or burning sub-
stances (e.g. smoldering
ashes, glowing
cigarettes).
BG 56, BG 56 C, BG 66, BG 66 C, BG 86, BG 86 C, SH 56, SH 56 C, SH 86, SH 86 C
English
7
Working Technique
To minimize blowing time, use a rake
and broom to loosen dirt particles before
you start blowing.
Recommended working technique to
minimize air pollution:
If necessary, dampen the surface to
be cleaned in order to avoid creating
too much dust.
Do not blow particles in the direction
of bystanders, in particular in the
direction of children, pets, open
windows or freshly washed
vehicles. Take special care in such
situations.
Remove the blow-swept debris in
rubbish bins do not blow it onto the
neighbor's land.
Recommended working technique to
minimize noise:
Operate your power tool at
reasonable times only – not early in
the morning, late at night or during
midday rest periods when people
could be disturbed. Observe local
rest periods.
Operate blowers at the lowest
engine speed necessary to
accomplish the task.
Check your blower before starting
work. Pay special attention to the
muffler, air intakes and air filter.
Vibrations
Prolonged use of the power tool may
result in vibration-induced circulation
problems in the hands (whitefinger
disease).
No general recommendation can be
given for the length of usage because it
depends on several factors.
The period of usage is prolonged by:
Keeping your hands warm
Work breaks
The period of usage is shortened by:
Any personal tendency to suffer
from poor circulation (symptoms:
frequently cold fingers, itching).
Low outside temperatures.
Gripping force (a tight grip hinders
circulation).
Continual and regular users should
monitor closely the condition of their
hands and fingers. If any of the above
symptoms appear (e.g. tingling
sensation in fingers), seek medical
advice.
Maintenance and Repairs
Service the machine regularly. Do not
attempt any maintenance or repair work
not described in the instruction manual.
Have all other work performed by a
servicing dealer.
STIHL recommends that you have
servicing and repair work carried out
exclusively by an authorized STIHL
servicing dealer. STIHL dealers are
regularly given the opportunity to attend
training courses and are supplied with
the necessary technical information.
Only use high-quality replacement parts
in order to avoid the risk of accidents
and damage to the machine. If you have
any questions in this respect, consult a
servicing dealer.
STIHL recommends the use of genuine
STIHL replacement parts. They are
specifically designed to match your
model and meet your performance
requirements.
To reduce the risk of injury, always shut
off the engine before carrying out any
maintenance or repairs or cleaning the
machine. – Exception: Carburetor and
idle speed adjustments.
Do not turn the engine over on the
starter with the spark plug boot or spark
plug removed since there is otherwise a
risk of fire from uncontained sparking.
Do not service or store your machine
near open flames.
To reduce the risk of fatal
injury from fire or explo-
sion, never attempt to
pick up combustible fluids
(e.g. gasoline) or materi-
als soaked in
combustible fluids.
Switch off the engine
before opening the intake
screen. The intake
screen must always be
closed and secured when
the suction tube is not
mounted to reduce the
risk of injury from contact
with rotating components.
This can also result in
damage to the engine.
BG 56, BG 56 C, BG 66, BG 66 C, BG 86, BG 86 C, SH 56, SH 56 C, SH 86, SH 86 C
English
8
Check the fuel filler cap for leaks at
regular intervals.
Use only a spark plug of the type
approved by STIHL and make sure it is
in good condition – see "Specifications".
Inspect the ignition lead (insulation in
good condition, secure connection).
Check the condition of the muffler.
To reduce the risk of fire and damage to
hearing, do not operate your machine if
the muffler is damaged or missing.
Do not touch a hot muffler since burn
injury will result.
Vibration behavior is influenced by the
condition of the AV elements check the
AV elements at regular intervals.
Shut off the engine before rectifying
problems.
Mounting the Blower Tube
N Line up the arrows (1).
N Position the union nut so that the
symbol is in line with the arrows.
N Push the blower tube (2) into the fan
housing stub (3) as far as stop.
N Push the union nut (4) over the fan
housing stub as far as stop.
N Rotate the union nut (4) in direction
of arrow until symbol ƒ is in line
with the arrows – union nut snaps
audibly into position.
BG 56, BG 86, SH 56, SH 86
N Push nozzle (5) onto blower
tube (2) as far as lug (6),
position (a) (long) or position (b)
(short), and rotate nozzle in
direction of arrow to lock in position.
BG 66
N Line up the arrows (1).
N Position the union nut so that the
symbol is in line with the arrows.
N Push the blower tube (2) into the fan
housing stub (3) as far as stop.
Assembling the Blower
1
3
296BA016 KN
296BA017 KN
a
b
5
6
2
296BA031 KN
1
296BA018 KN
3
BG 56, BG 56 C, BG 66, BG 66 C, BG 86, BG 86 C, SH 56, SH 56 C, SH 86, SH 86 C
English
9
N Push the union nut (4) over the fan
housing stub as far as stop.
N Rotate the union nut (4) in direction
of arrow until symbol ƒ is in line
with the arrows – union nut snaps
audibly into position.
N Push nozzle (5) in position (a) onto
the blower tube (2) as far as lug (6)
and rotate in direction of arrow to
lock in position.
Removing the Blower Tube
N Shut down the engine.
N Insert a suitable tool through the
opening in the union nut to press
down the tab.
N Rotate the union nut in the direction
of the arrow as far as the stop.
N Remove the blower tube.
Mounting the Elbow
N Push the elbow (1) into the catcher
bag (2) as far as the mark (smaller
arrow).
N Tighten strap (3) on catcher bag
and press down the tab (4).
NOTICE
Make sure the zipper on the catcher bag
is closed.
N Line up the arrows (5).
N Position the union nut so that the
symbol is in line with the arrows.
N Push the elbow into the recess in
the fan housing stub (6) as far as
stop.
296BA019 KN
a
6
5
2
296BA032 KN
296BA020 KN
Assembling the Vacuum
Shredder
4
295BA058 KN
3
2
1
5
296BA021 KN
6
BG 56, BG 56 C, BG 66, BG 66 C, BG 86, BG 86 C, SH 56, SH 56 C, SH 86, SH 86 C
English
10
N Push the union nut (7) over the fan
housing stub as far as stop.
N Rotate the union nut (7) in direction
of arrow until symbol ƒ is in line
with the arrows – union nut snaps
audibly into position.
Assembling the Suction Tube
N Line up the arrows on the suction
tube and extension tube. Push
together and lock in position.
Mounting the Suction Tube
N Shut down the engine.
N Insert screwdriver in the tab (1) and
press down to disengage the intake
screen (2) and then open the intake
screen.
N Line up the arrows (3).
N Position union nut (5) so that the
opening lines up with the arrows (3).
N Push the suction tube into the fan
housing stub (4) as far as stop.
N Push the union nut (5) over the fan
housing stub.
N Rotate union nut (5) in direction of
arrow until it snaps audibly into
position.
N Continue turning the union nut in
direction of arrow and tighten it
down firmly.
Removing the Elbow
N Shut down the engine.
N Insert a suitable tool through the
opening in the union nut to press
down the tab.
N Rotate the union nut in the direction
of the arrow as far as the stop.
N Remove the elbow.
Removing the Suction Tube
N Shut down the engine.
8
296BA022 KN
295BA080 KN
1
2
269BA030 KN
4
3
296BA023 KN
296BA033 KN
296BA024 KN
BG 56, BG 56 C, BG 66, BG 66 C, BG 86, BG 86 C, SH 56, SH 56 C, SH 86, SH 86 C
English
11
N Rotate the union nut in the direction
of the arrow as far as the stop.
N Insert a suitable tool through the
opening in the union nut to press
down the tab.
N Continue turning the union nut in the
direction of the arrow as far as the
next stop.
N Remove the suction tube.
N Close the intake screen and lock it
in position.
Your engine requires a mixture of
gasoline and engine oil.
WARNING
For health reasons, avoid direct skin
contact with gasoline and avoid inhaling
gasoline vapor.
STIHL MotoMix
STIHL recommends the use of STIHL
MotoMix. This ready-to-use fuel mix
contains no benzol or lead, has a high
octane rating and ensures that you
always use the right mix ratio.
STIHL MotoMix uses STIHL HP Ultra
two-stroke engine oil for an extra long
engine life.
MotoMix is not available in all markets.
Mixing Fuel
NOTICE
Unsuitable fuels or lubricants or mix
ratios other than those specified may
result in serious damage to the engine.
Poor quality gasoline or engine oil may
damage the engine, sealing rings, hoses
and the fuel tank.
Gasoline
Use only high-quality brand-name
gasoline with a minimum octane rating
of 90 – leaded or unleaded.
If your machine is equipped with a
catalytic converter, you must use
unleaded gasoline.
NOTICE
A few tankfuls of leaded gasoline will
greatly reduce the efficiency of the
catalytic converter.
Gasoline with an ethanol content of
more than 10% can cause running
problems in engines with a manually
adjustable carburetor and should not be
used in such engines.
Engines equipped with M-Tronic deliver
full power when run on gasoline with an
ethanol content of up to 25% (E25).
Engine oil
Use only high-quality two-stroke engine
oil – preferably STIHL HP, HP Super or
HP Ultra, which are specially formulated
for use in STIHL engines. HP Ultra
guarantees high performance and a
long engine life.
These engine oils are not available in all
markets.
Use only STIHL 50:1 two-stroke engine
oil for the fuel mix in models with a
catalytic converter.
Mix Ratio
STIHL 50:1 two-stroke engine oil: 50
parts gasoline to 1 part oil
296BA025 KN
Fuel
BG 56, BG 56 C, BG 66, BG 66 C, BG 86, BG 86 C, SH 56, SH 56 C, SH 86, SH 86 C
English
12
Examples
N Use a canister approved for storing
fuel. Pour oil into canister first, then
add gasoline and mix thoroughly.
Storing Fuel
Store fuel only in approved safety-type
fuel canisters in a dry, cool and safe
location protected from light and the sun.
Fuel mix ages – only mix sufficient fuel
for a few weeks work. Do not store fuel
mix for longer than 30 days. Exposure to
light, the sun, low or high temperatures
can quickly make the fuel mix unusable.
STIHL MotoMix may be stored for up to
2 years without any problems.
N Thoroughly shake the mixture in the
canister before fueling your
machine.
WARNING
Pressure may build up in the canister –
open it carefully.
N Clean the fuel tank and canister
from time to time.
Dispose of remaining fuel and cleaning
fluid properly in accordance with local
regulations and environmental
requirements.
Preparations
N Before fueling, clean the filler cap
and the area around it to ensure that
no dirt falls into the tank.
N Position the machine so that the
filler cap is facing up.
STIHL recommends you use the STIHL
filler nozzle for fuel (special accessory).
Fill up with fuel
Take care not to spill fuel while fueling
and do not overfill the tank.
Gasoline STIHL engine oil 50:1
Liters Liters (ml)
10.02(20)
5 0.10 (100)
10 0.20 (200)
15 0.30 (300)
20 0.40 (400)
25 0.50 (500)
Fueling
295BA064 KN
BG 56, BG 56 C, BG 66, BG 66 C, BG 86, BG 86 C, SH 56, SH 56 C, SH 86, SH 86 C
English
13
N Open the filler cap.
N Fill up with fuel
N Closing the cap
WARNING
After fueling, tighten down the filler cap
as securely as possible.
Changing the fuel pickup body
Change the fuel pick up body every
year.
N Drain the fuel tank.
N Use a hook to pull the fuel pickup
body out of the tank and take it off
the hose.
N Push the new pickup body into the
hose.
N Place the pickup body in the tank.
Starting the Engine
N Observe safety precautions.
N Press the manual fuel pump
bulb (1) at least five times – even if
the bulb is filled with fuel.
Adjusting the setting lever
Only on BG 66 C, BG 86, SH 86
N To start, move the setting lever to
the run position F
The setting lever (2) allows the throttle
trigger (3) to be locked in any required
position during operation.
Adjusting the choke knob
If the engine is cold
N Turn the choke knob to g
If the engine is warm
N Turn the choke knob to <
Also use this setting if the engine has
been running but is still cold.
295BA065 KN
Starting / Stopping the
Engine
1
296BA009 KN
295BA069 KN
296BA007 KN
3
295BA067 KN
295BA068 KN
BG 56, BG 56 C, BG 66, BG 66 C, BG 86, BG 86 C, SH 56, SH 56 C, SH 86, SH 86 C
English
14
Cranking
N Place the unit on the ground so that
it is secure.
N Make sure you have a firm footing:
Hold the unit firmly with your right
hand on the housing and press
down.
N Hold the starter grip with your left
hand.
Version with ErgoStart
N Pull the starter grip steadily.
Version without ErgoStart
N Pull the starter grip slowly until you
feel it engage and then give it a brisk
strong pull.
NOTICE
Do not pull out the starter rope all the
way – it might otherwise break.
N Do not let the starter grip snap back.
Guide it slowly back into the housing
so that the starter rope can rewind
properly.
As Soon as Engine Runs
N Blip the throttle trigger (3) – the
choke knob moves to the run
position F the engine returns to idle
speed.
Stopping the Engine
BG 56, BG 66, SH 56
N Move the stop switch to 0 – the
engine stops – the stop switch
springs back to the on position.
BG 66 C, BG 86, SH 86
N Move the setting lever to 0 – the
engine stops – the setting lever
springs back to the on position.
Other Hints on Starting
If the engine stops in position g or
during acceleration
N Move the choke lever to < and
continue cranking until the engine
runs.
296BA006 KN
296BA008 KN
3
296BA008 KN
295BA072 KN
295BA073 KN
BG 56, BG 56 C, BG 66, BG 66 C, BG 86, BG 86 C, SH 56, SH 56 C, SH 86, SH 86 C
English
15
If engine does not start
N Make sure all settings are correct
(choke knob, setting lever in run
position F).
N Repeat the starting procedure.
If fuel tank has been run completely dry
and then refueled
N Press the manual fuel pump
bulb (1) at least five times – even if
the bulb is filled with fuel.
N Now start the engine.
Dirty air filters reduce engine power,
increase fuel consumption and make
starting more difficult.
Different Air Filters
Different models are equipped with
different air filters. The models can be
identified by the filter housing and the air
filter itself.
Version with Flat Filter Material
N Turn the filter cover lock (1)
counterclockwise to the vertical
position.
N Remove the filter cover (2).
N Clean away loose dirt from around
the filter.
N Pull off the retainer (3) and take the
air filter element (4) out of the filter
housing (5).
N Replace the filter element. As a
temporary measure you can knock it
out on the palm of your hand or blow
it out with compressed air – do not
wash.
Replace any damaged parts.
Installing the filter element
N Fit the filter (4) in the filter
housing (5) and push the
retainer (3) into position.
N Refit the filter cover (2) and turn the
filter cover lock clockwise to the
horizontal position.
1
296BA009 KN
Cleaning the Air Filter
1
295BA074 KN
2
3
295BA075 KN
2
5
BG 56, BG 56 C, BG 66, BG 66 C, BG 86, BG 86 C, SH 56, SH 56 C, SH 86, SH 86 C
English
16
Version with Pleated Filter Material
N Unscrew the filter cover lock (1)
counterclockwise.
N Remove the filter cover (2).
N Clean away loose dirt from around
the filter.
N Take the air filter (3) out of the filter
housing (4).
Cleaning the air filter
N Carefully knock the filter out on the
palm of your hand or blow it clear
with compressed air from the inside
outwards.
In case of stubborn dirt or sticky filter
fabric
N Wash the air filter in STIHL special
cleaner (special accessory) or a
clean, non-flammable solution (e.g.
warm soapy water). Rinse the filter
from the inside outwards under a jet
of water – do not use a pressure
washer.
N Dry the filter do not expose to high
temperatures.
Place the filter in position.
N Install the filter element in the filter
housing.
N Fit the filter cover and tighten the
filter cover lock clockwise.
General Information
The carburetor comes from the factory
with a standard setting.
This setting provides an optimum fuel-air
mixture under most operating
conditions.
Preparations
N Shut off the engine.
N Check the air filter and clean or
replace if necessary.
N Check the spark arresting screen
(not in all models, country-specific)
in the muffler and clean or replace if
necessary.
Standard Setting
N Turn high speed screw (H)
counterclockwise as far as stop (no
more than 3/4 turn).
N Turn the low speed screw (L)
clockwise as far as stop, then turn it
back 3/4 turn.
1
296BA026 KN
22
296BA027 KN
3
4
Adjusting the Carburetor
296BA010 KN
BG 56, BG 56 C, BG 66, BG 66 C, BG 86, BG 86 C, SH 56, SH 56 C, SH 86, SH 86 C
English
17
Adjusting Idle Speed
N Carry out the standard setting.
N Start and warm up the engine.
Engine stops while idling
N Turn the idle speed screw (LA)
clockwise until the engine runs
smoothly.
Erratic idling behavior, poor acceleration
(even though standard setting of low
speed screw is correct)
Idle setting is too lean
N Turn the low speed screw (L)
carefully counterclockwise, no
further than stop, until the engine
runs smoothly and accelerates well.
Erratic idling behavior, engine speed
drops when swinging the machine
Idle setting is too rich
N Turn the low speed screw (L)
clockwise (1/8 of a turn or 45° at a
time) until the engine runs smoothly
and still accelerates well.
It is usually necessary to change the
setting of the idle speed screw (LA) after
every correction to the low speed
screw (L).
Fine Tuning for Operation at High
Altitude
A slight correction of the setting may be
necessary if the engine does not run
satisfactorily:
N Carry out the standard setting.
N Warm up the engine.
N Turn high speed screw (H) slightly
clockwise (leaner) – no further than
stop.
NOTICE
After returning from high altitude, reset
the carburetor to the standard setting.
If the setting is too lean there is a risk of
engine damage due to insufficient
lubrication and overheating.
N If the engine is down on power,
difficult to start or runs poorly at idle
speed, first check the spark plug.
N Fit a new spark plug after about 100
operating hours – or sooner if the
electrodes are badly eroded. Install
only suppressed spark plugs of the
type approved by STIHL – see
"Specifications".
Removing the spark plug
N Pull off the spark plug boot (1).
N Unscrew the spark plug.
296BA011 KN
Spark Plug
1
296BA015 KN
BG 56, BG 56 C, BG 66, BG 66 C, BG 86, BG 86 C, SH 56, SH 56 C, SH 86, SH 86 C
English
18
Checking the spark plug
N Clean dirty spark plug.
N Check electrode gap (A) and
readjust if necessary – see
"Specifications".
N Rectify the problems which have
caused fouling of the spark plug.
Possible causes are:
Too much oil in fuel mix.
Dirty air filter.
Unfavorable running conditions.
WARNING
If the spark plug comes with a
detachable adapter nut (1), screw the
adapter onto the thread and tighten it
down firmly to reduce the risk of arcing
and fire.
Installing the spark plug
N Screw the spark plug (3) into the
cylinder and fit the boot (2) (press it
down firmly).
If engine running behavior is
unsatisfactory even though the air filter
is clean and the carburetor is properly
adjusted, the cause may be the muffler.
Have the muffler checked for
contamination (carbonization) by your
servicing dealer.
STIHL recommends that you have
servicing and repair work carried out
exclusively by an authorized STIHL
servicing dealer.
000BA039 KN
A
1
000BA045 KN
3
002BA178 KN
2
Engine Running Behavior
  • Page 1 1
  • Page 2 2
  • Page 3 3
  • Page 4 4
  • Page 5 5
  • Page 6 6
  • Page 7 7
  • Page 8 8
  • Page 9 9
  • Page 10 10
  • Page 11 11
  • Page 12 12
  • Page 13 13
  • Page 14 14
  • Page 15 15
  • Page 16 16
  • Page 17 17
  • Page 18 18
  • Page 19 19
  • Page 20 20
  • Page 21 21
  • Page 22 22
  • Page 23 23
  • Page 24 24
  • Page 25 25
  • Page 26 26
  • Page 27 27
  • Page 28 28

STIHL BG 86 User manual

Category
Air blowers/dryers
Type
User manual
This manual is also suitable for

Ask a question and I''ll find the answer in the document

Finding information in a document is now easier with AI