Page is loading ...

INSTALLATION • CARE AND CLEANING • REPAIR PARTS
Installation procedures for
PRESSED FIBERGLASS TUBWAL KIT
Designed for areas 58ⴖ to 60ⴖ wide, 28ⴖ to 30ⴖ deep.
The Swan Corporation
MODEL NO.
TF-57
OWNER’S
MANUAL
CAUTION:
Read ALL instructions
carefully BEFORE
starting your installation.
Save this manual for
future reference

TOOLS REQUIRED TO INSTALL
The only tools needed are: saber saw, drill, ruler, caulking gun,
three tubes of adhesive, one tube of caulk, pressure sensitive
double stick tape, and whatever tools needed to remove faucet
handles.
This Fiberglass TUBWAL KIT system is designed to be installed
over any clean, solid, dry surface. It can be used with most con-
ventional tubs. Works well in remodeling or new construction.
INSTALLATION PROCEDURE
Allow panels to adjust to room temperature (65ⴗ to
90ⴗ) for at least 6 hours.
Next, turn off the hot and cold water supply, remove
faucet handles, escutcheons, filler spouts and any
fittings mounted to the wall that will be covered ie.
towel bars, soap dishes, etc.
Use a hammer and chisel to remove objects cement-
ed to walls. Old ceramic tiles, if solidly adhered to
walls, may be covered with the Swan Tubwal panels
and need not be removed.
Loose ceramic tiles must be removed and sub walls
sanded smooth. All plastic tiles whether secure or
loose, must be removed and sub walls sanded
smooth.
Front edge ceramic tiles may be reset for appear-
ance if desired. Remove soap film and all dirt from
wall surface using detergent. Wipe dry. Wall surface
must be dry before panels can be applied.
This Fiberglass TUBWAL KIT may be applied to sur-
faces such as drywall, plaster, ceramic tile, painted
surfaces etc.
READ ALL INSTALLATION INSTRUCTIONS
BEFORE STARTING.
TRIAL FIT BEFORE YOU BEGIN!
INCLUDED IN CARTON:
A One back panel
B One fiberglass left corner panel
C One fiberglass right corner panel
D Two fiberglass side panels
E Three tubes adhesive
F One tube caulk
G One roll pressure sensitive tape
ABC
D
FILLER BOARD
Measure the height of the tiles
from the tub ledge upward. If the
tiles measure less than 57ⴖ, it is
necessary to install a filler
board. The filler board must
equal the thickness of the tile.
Usually, 1/4ⴖ masonite or similar
material is adequate.
For best results, extend the filler
board from the top tile edge to
the ceiling.
FITTING
Before installing the TF-57 tubwal, measure the width of the back
wall. TF-57 panels will cover an area from 58ⴖ to 60ⴖ. If the wall
measures less than 58ⴖ, you cannot use Model TF-57.
IMPORTANT
28”
28”
57”
17”
3”
BACK WALL
FIBERGLASS
LIMITED
WARRANTY
E
F
G
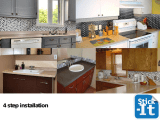
STEP-BY-STEP INSTALLATION INSTRUCTIONS
MODEL TF-57
DESIGNED FOR AREAS 58ⴖ TO 60ⴖ WIDE, 28ⴖ TO 30ⴖ DEEP

1. Select either
a left or right cor-
ner panel and trial fit.
Apply pressure sensitive tape
1ⴖ inch from each edge. Apply
adhesive in 1-1/2ⴖ diameters
as shown above. The mea-
surements above are approxi-
mations only. Keep adhesive
1ⴖ away from tape. Peel back-
ing from the tape before apply-
ing panel to the wall.
2. Carefully position corner
panel and press it firmly to the
wall. Move hand pressure up
and down and side-to-side
making sure all areas are in
firm contact with the wall.
Repeat steps 1 and 2 for the
other corner panel.
3. Measure location of plumb-
ing outlets from corner panel
forward and upward from the
top ledge of tub. Mark the
position on the corresponding
side panel.
Trial fit before drilling.
NOTE
Allow for overlap of the corner
panel.
TIP
Keep top of panels aligned for
a clean professional looking
installation.
4. Use a drill with a hole cut-
ting bit, or a hole saw to cut
the openings for the faucet
and handle outlets. Cut the
holes 1/2ⴖ larger than the
diameter of the outlets.
Drill or cut from the finished
side of the panel.
For best results when drilling,
place a piece of scrap wood
beneath the panel where the
hole is to be made. This pro-
vides for a cleaner hole.
Trial fit before proceeding.
WALL SURFACE PREPARATION RECOMMENDATIONS
FOR SWAN TUBWAL AND SHOWERWAL UNITS
When installing over SHEETROCK/GREENBOARD/WOOD:
A) Surface must be dry, smooth and free of any dust, soap
scum or any other contaminants. Wipe wall surface with a
damp cloth.
B) For maximum adhesion, the area where the double-faced
tape adheres to the wall surface should be sealed with a
primer (Bin-Seal or all purpose enamel paint).
C) After primer/sealer is completely dry, complete the installa-
tion following the installation instruction sheet.
When installing over PLASTER:
A) Surface must be dry, smooth and free of any dust, soap
scum or any other contaminants. Wipe wall surface with a
damp cloth.
B) The area where the double-faced tape adheres to the wall
surface (textured/swirled finish must be sanded smooth)
should be sealed with a primer (Bin-Seal or all purpose
enamel paint).
C) After primer/sealer is completely dry, complete the installa-
tion following the installation instruction sheet.
When installing over CEMENT/CONCRETE:
A) Surface must be dry, smooth and free of any dust, soap
scum or any other contaminants. Wipe wall surface with a
damp cloth.
B) The complete area should be sealed with two coats of
primer (Bin-Seal or all purpose enamel paint).
C) After primer/sealer is completely dry, complete the installa-
tion following the installation instruction sheet.
When installing over OLD TILE:
A) Surface must be dry, smooth and free of any dust, soap
scum or any other contaminants. Wipe wall surface with a
damp cloth.
NOTE: CERAMIC: LOOSE TILE MUST BE REMOVED.
PLASTIC: ALL TILE MUST BE REMOVED.
B) Complete the installation following the installation instruc-
tion sheet.
When installing over WALLPAPER:
A) All wallpaper must be removed from the area to be cov-
ered by unit. Surface must be dry, smooth and free of any
dust, soap scum or any other contaminants. Wipe wall sur-
face with a damp cloth.
B) For maximum adhesion, the complete wall surface area to
be covered by unit should be sealed with two coats of
primer (Bin-Seal or all purpose enamel paint).
C) After primer/sealer is completely dry, complete the installa-
tion following the installation instruction sheet.
When installing over MASONITE:
A) Surface must be dry, smooth and free of any dust, soap
scum or any other contaminants. Wipe wall surface with a
damp cloth.
B) Complete installation following the installation instruction
sheet.

FORM #572 1-99-5M
5. Apply adhesive to back of
panels with the application
pattern indicated at left. The
measurements given are
approximate. However, adhe-
sive must not come into
contact with the tape. Peel
and remove backing from
tape prior to application. Use
2/3 tube of glue for each side
and back panel.
6. Grasp side panel firmly by
the edges, carefully position
overlapping corner panel and
press firmly into wall. A 1ⴖ
overlap is recommended.
Use even pressure from top to bottom and side-to-side to
insure solid wall contact. Install other side panel and back
panel in like manner.
CAULKING
Follow instructions on the caulking tube and apply a bead of
caulk along the bottom and top edges of the entire unit. The
center panel’s two lapping vertical seams and each side
panel’s vertical seam may be caulked it desired. However, it is
not necessary.
IMPORTANT
Do not use the bath for 24 hours to allow for proper curing of
adhesive and caulk.
CARE AND CLEANING
All panels in this kit are made of fiberglass reinforced polyester. The finish is stain and abrasion resistant. However, the finish requires
reasonable care. Wash regularly with warm water, use a soft cloth with mild detergent such as: Top Job, Tough Act or Ajax Liquid Cleaner.
Scouring pads made of nylon, saran or polyethylene may be also be used.
IMPORTANT
Never use abrasive scouring powders, cleaners or steel pads. They will dull the finish.
5
/