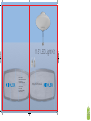
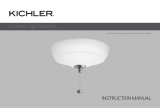
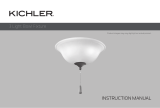
Kichler Lighting 380931MUL is an 11.5” LED Light Kit compatible with ceiling fans, providing bright and energy-efficient illumination. The kit includes a glass shade and a MUL finish cover for a stylish and customizable look. It features a wattage-limiting device to prevent overloading, ensuring safety. The polarized connections simplify installation, allowing for quick and effortless setup. The beaded pull chain and included fob offer convenient control over the light.
Kichler Lighting 380931MUL is an 11.5” LED Light Kit compatible with ceiling fans, providing bright and energy-efficient illumination. The kit includes a glass shade and a MUL finish cover for a stylish and customizable look. It features a wattage-limiting device to prevent overloading, ensuring safety. The polarized connections simplify installation, allowing for quick and effortless setup. The beaded pull chain and included fob offer convenient control over the light.


-
 1
1
-
 2
2
-
 3
3
-
 4
4


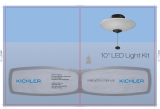
Kichler Lighting 380931MUL User manual
- Type
- User manual
- This manual is also suitable for
Kichler Lighting 380931MUL is an 11.5” LED Light Kit compatible with ceiling fans, providing bright and energy-efficient illumination. The kit includes a glass shade and a MUL finish cover for a stylish and customizable look. It features a wattage-limiting device to prevent overloading, ensuring safety. The polarized connections simplify installation, allowing for quick and effortless setup. The beaded pull chain and included fob offer convenient control over the light.
Ask a question and I''ll find the answer in the document
Finding information in a document is now easier with AI
Related papers
-
 Kichler Lighting 380030MUL User manual
-
 Kichler Lighting 380011MUL User manual
-
 Kichler Lighting 339501AP User manual
-
 Kichler Lighting 330013NI User manual
-
 Kichler Lighting 380945DBK User manual
-
 Kichler Lighting 380015MUL User manual
-
 Kichler Lighting 300026BSS User manual
-
 Kichler Lighting 300024AP User manual
-
 Kichler Lighting 330002WH User manual
-
 Kichler Lighting 310136DBK User manual


Other documents
-
Savoy 44-729-5RV-SN Owner's manual
-
 Hampton Bay 14934 Installation guide
-
 Hampton Bay AG971-BN Installation guide
-
-
 Concord Fans 60AV5ST Installation guide
-
 Hampton Bay AL772-BN Operating instructions
-
 Hampton Bay 34012 Installation guide
-
Canarm DUAL MOUNT SERIES Installation Instructions Manual
-
 Hampton Bay 34005 Installation guide
-
 Sahara Fans 10021 Operating instructions


