Page is loading ...

PLTS07
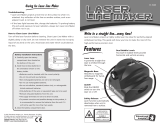
TILE AND FLOOR LASER SQUARE
ÉQUERRE AU LASER POUR PLANCHERS ET CARREAUX
ESCUADRA LÁSER PARA MOSAICOS Y PISOS
888-552-8665
TOLL-FREE
HELP LINE:
www.POwERSMITHPRODUCTS.COM
Operator's manual
Manuel d’utilisation
Manual del operario
SAVE THIS MANUAL FOR FUTURE REFERENCE
CONSERVER CE MANUEL POUR FUTURE RÉFÉRENCE
GUARDE ESTE MANUAL PARA FUTURAS CONSULTAS

4
English
IMPORTANT SAFETY INSTRUCTIONS
READ AND UNDERSTAND ALL WARNINGS, CAUTIONS
AND OPERATING INSTRUCTIONS BEFORE USING THIS
EQUIPMENT. Failure to follow all instructions listed below
may result in electric shock, fire and/or serious personal
injury.
WARNING:
CLASS 2 LASER RADIATION. Avoid direct eye exposure.
Do NOT stare into the beam, aperture, or into a
reflection from a mirror-like surface. This is a class 2
laser. Serious injury to eyes could result.
RADIATION EXPOSURE. Do NOT disassemble or modify
the laser. There are no serviceable components inside.
HAZARDOUS RADIATION. Avoid exposure. Use
of controls, or adjustments, or performance of
procedures other than those specified herein may
result in hazardous radiation exposure.
• Neverpointthelasertowardsaircraftorvehicles.Itis
unsafe and illegal.
• Neverpointthelasertowardspeopleoranimals.
• Keepthetoolawayfromchildren.Donotusethetool
around children. This is not a toy.
• Tool service mustbe performedbyaqualiedrepair
professional using only manufacturer supplied
components.
• Do not use the tool for any function that the
manufacturerdoesnotapprove.Seriousinjurytoeyes
could result.
• Make sure all individuals that are in the area that
the tool is being used are aware that a Class 2 Laser
productisbeingused.Makethoseindividualsawareof
all laser hazards.
• Alwaysusecarewhentransporting,settingup,using,
and storing the tool. Inspect the tool each time it is
being used for damage. A damaged tool could result in
serious injury.
• Donotuseopticaltoolssuchastelescopes,transitsor
camerastoviewthelaserbeam.Seriousinjurytoeyes
could result.
• Keep the tool mounting magnets away from cardiac
pacemakers. The magnets generate a field that can
impair the function of cardiac pacemakers.
• Keep the tools magnets away from magnetic data
medium and magnetically-sensitive equipment. The
effectofmagnetscancauseirreversibledataloss.
BATTERY SAFETY INSTRUCTIONS
WARNING: Batteries can explode or leak
corrosive substance causing fire or injury. Always
follow the battery manufacturer’s instructions.
TILE AND FLOOR LASER
SQUARE
PRODUCT FEATURES (FIG 1)
1. Power Button
2. Laser Output
3. Bubble Vials
4. 90° Scale
5. T- Edge
6. L- Edge
7. BatteryCover
8. Magnets
9. Bottom Base
10. Wall Mount Plate
SPECIFICATIONS
Model: ---------------------------- PLTL07
Work Range: ---------------------- 23' (7M)
Accuracy: ------------------------ ±1/64" @ 3'
Run Time: ------------------------ >15 Hours
Power: --------------------------- 3V (2 x AA)
Operating Temperature: ---------- 32°F - 104°F
Laser Classification: -------------- 2
WaveLength:-------------------- 635nm<1mw
Weight: ---------------------------- 5.6 oz.
This is a Class 2 laser product. It complies
with 21 CRF 1040.10 AND 1040.11 except
fordeviationspursuanttolasernotice50,
June 24th 2007.
UNPACkING CONTENTS
Important! Due to modern mass production
techniquies,itisunlikelythetoolisfaultyorthatapartis
missing. If you find anything wrong, do not operate the tool
untilthepartshavebeenreplacedorthefaulthasbeen
rectified. Failure to do so could result in serious personal
injury.
CONTENTS IN PACkAGE
Description Quantity
TileandFloorLaserSquare 1
Wall Mount Plate 1
Batteries (AA) 2
Manual 1

5
English
• Donotchargealkalinebatteries.
• Donotshortbatteryterminals.
• Donotmixnewandoldbatteries.Replaceallbatteries
at the same time.
• Useonlymanufacturerrecommendedbatteries.
• Donotmixthebrandortypeofbatteries.
• Properlydisposeofallbatteriesatarecyclingcenter
or per local code. More information regarding battery
disposalinU.S.andCanadaisavailableat;http://www.
rbrc.org/index.html, or by calling 1-800-822-8837
(1-800-8BATTER)
• Donotdisposeofbatteriesinre.
• Keepbatteriesoutofreachofchildren.
• Removebatteriesifthetoolwillnotbeusedforseveral
months.
• Installbatteriesinthecorrectpolarity.Positive(+)and
Negative(-)polarityaremarkedonthebatteryandthe
tool.
PREPARATION
BATTERY INSTALLATION
1. Pushtabtoopenbatterycompartmentcover(7).
2. Insertbatterieswiththecorrectpolarity.Matchthe(+)
and (-) symbol on the inside of the compartment with
the corresponding symbol on the batteries.
3. Closethebatterycompartmentcover.
OPERATION
Thetoolisintendedforhorizontal,diagonal,andsquare
alignment of tile and flooring materials.
The tool is designed for indoor use.
Make reference marks at the center of the laser line.
Extreme temperature changes can reduce the accuracy
of the laser. Allow the tool to adjust to the ambient
temperatureoftheworkenvironmentbeforeusing.Donot
subject the tool toextremelycoldorhotenvironments.
Turn the tool off when not in use.
POWER BUTTON
The Power Button (1) is located on the top of the tool. Press
the Power Button once to turn the tool on. The tool projects
two laser lines in a 90° angle from the Laser Output (2).
Press the Power Button a second time to turn the tool off.
T-EDGE (FIG 2)
The tool has a T-edge (5) which helps to align the tool
against a wall or an inside corner. See Fig 2.
BATTERY SAFETY INSTRUCTIONS
L-EDGE (FIG 3)
The tool has a L-edge (6) which helps to align the tool
against an outside corner. See Fig 3.
WALL MOUNT PLATE (FIG 4)
The tool comes with a metal Wall Mount Plate (10). It helps
attachthetooltoaverticalwall.SeeFig4.
The Wall Mount Plate can be attached to a wall by using
asmallscreworanadhesiveputty(notincluded).Make
sure the side with the raised center is facing out.
To attach the tool to the Wall Mount Plate, insert the raised
center of the Wall Mount Plate into the round recess
between the two Magnets (8) on the bottom of the tool.
The Magnets will hold the tool in place.
ROTATION SCALE (FIG 5)
The tool can be rotated in 5° increments to achieve
alignmentatvariousangles.
The two laser lines meet at the intersecting point P in front
of the tool. To project an angle, the tool must be rotated at
this intersecting point.
First, align the tool to the reference line. Draw a line on
the left or right edge of the tool. Rotate the tool at the
intersecting point P. The crossing point of the drawn line
on the scale (4) indicates the angle changed from the
reference line. See Fig 5.
BUBBLE VIALS
There are two Bubble Vials (3) on the tool. They are the
levelingreferenceONLYwhenthetoolisusedforvertical
orwallapplications,NOTforthelevelingreferencewhen
the tool is used for flooring applications.
CAUTION: If a Bubble Vial leaks, soak up
the liquid with an absorbent material and dispose of it
safely. Bubble Vials contain flammable liquid that may
cause respiratory, eye and skin irritation.
APPLICATION
Important! For flooring applications, always place
thetoolonaatandlevelsurface.
Do not use the laser lines on a surface other than the one
the tool is placed. Those lines may not be accurate.
HORIZONAL APPLICATIONS
1. Setthetoolonaatandlevelsurface.
2. Turn the tool on.
3. Select a reference line, either a wall, a corner or a
center line of the work surface.
4. Align one of laser lines on the reference line or parallel
to it. Use the T-edge or L-edge when applicable.
OPERATION

6
English
wARRANTY
This product is warranted free from defects in material and
workmanship for 2 (Two) years after date of purchase. This
limitedwarrantydoesnotcovernormalwearandtearor
damage from neglect or accident. The original purchaser
iscoveredbythiswarrantyanditisnottransferable.Prior
to returning your product to store location of purchase,
please call the Toll-Free Help Line for possible solutions.
ACCESSORIES INCLUDED IN THIS KIT ARE NOT
COVERED BY THE 2 YEAR WARRANTY.
HELP LINE
ForquestionsaboutthisoranyotherPowerSmith™
product,
Please call Toll-Free: 888-552-8665.
Orvisitourwebsite:
www.powersmithproducts.com
VERTICAL APPLICATIONS
1. Attach the Wall Mount Plate to the tool.
2. Turn the tool on.
3. Positon the tool against the wall. Use the Bubble Vial
(3)tolevelthelaserline.
4. Hold the Wall Mount Plate firmly in place against the
wall,andremovethetoolfromtheWallMountPlate.
5. Attach the Wall Mount Plate to the wall using a small
screworanadhesiveputty.
6. Re-attach the tool to the Wall Mount Plate.
7. UsetheBubbleVialtoproperlylevelthelaserline.
NOTE: To levelthetool,theairbubble mustbe inthe
center of the two black lines.
MAINTENANCE
WARNING: Do not turn the laser on while
cleaning the lens. Serious injury to eyes could result.
• Keepthelaserlensclean.Adirtylenswillaffectthe
laser beam operation. Clean the lens with a moist
cotton swab. Clothes with nylon content could scratch
the lens causing the laser to operate incorrectly.
• Clean the tool housing with a moist cotton cloth.
Use only water. Do Not use cleaners, solvents or
compressed air to clean the tool.
• Neverimmerseorletliquidgetinsidethetool.
• Drythetoolwithacottonlintfreeclothandallowtodry
completely before using or storing the tool.
APPLICATION

Richpower Industries, Inc.
736 Hampton Road
Williamston, SC USA
www.richpowerinc.com
2017.3 V01
/