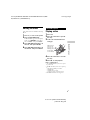
The Sony MHC-ESX6 is a versatile home audio system that combines powerful sound with a range of playback options. With its ability to play CDs, USB devices, and even music streamed from your smartphone via Bluetooth, it offers a comprehensive audio experience. You can also tune into your favorite radio stations with its built-in FM/AM tuner.
The Sony MHC-ESX6 is a versatile home audio system that combines powerful sound with a range of playback options. With its ability to play CDs, USB devices, and even music streamed from your smartphone via Bluetooth, it offers a comprehensive audio experience. You can also tune into your favorite radio stations with its built-in FM/AM tuner.


-
 1
1
-
 2
2
-
 3
3
-
 4
4
-
 5
5
-
 6
6
-
 7
7
-
 8
8
-
 9
9
-
 10
10
-
 11
11
-
 12
12
-
 13
13
-
 14
14
-
 15
15
-
 16
16
-
 17
17
-
 18
18
-
 19
19
-
 20
20
-
 21
21
-
 22
22
-
 23
23
-
 24
24
-
 25
25
-
 26
26
-
 27
27
-
 28
28


Sony MHC-ESX6 Operating instructions
- Category
- Audio tuners
- Type
- Operating instructions
The Sony MHC-ESX6 is a versatile home audio system that combines powerful sound with a range of playback options. With its ability to play CDs, USB devices, and even music streamed from your smartphone via Bluetooth, it offers a comprehensive audio experience. You can also tune into your favorite radio stations with its built-in FM/AM tuner.
Ask a question and I''ll find the answer in the document
Finding information in a document is now easier with AI
Related papers
-
Sony HCD-GS10 User manual
-
Sony CMT-LX10R Operating instructions
-
Sony MHC-EC59 Operating instructions
-
Sony CMT-FX200 Owner's manual
-
Sony CMT-V9 User manual
-
Sony MHC-EX700 Operating instructions
-
Sony ZS-PS50 Operating instructions
-
Sony CMT-HX3R User manual
-
Sony MHC-EC68USB Owner's manual
-
Sony CMT-S20 Operating instructions