Page is loading ...

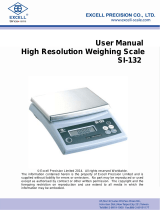
OPF-N Weighing Scale
USER’S MANUAL
optimascale.com

TABLE OF CONTENTS
Safety Precautions 1
Preparations and Set Up 1
Display and Key Description 2
Operating Instructions 3
Battery 4
Alarms 4
Specications 5
User Settings 6
Attachment 9
Scale Settings 10
Calibration 11
Contact Us 12

1
SAFETY PRECAUTIONS
• To avoid damaging the battery do not keep charger plugged in once
battery is fully charged.
• Avoid installing the balance in direct sunlight. This may cause poor
performance or malfunctions.
• If the balance will not be used for a long period of time, remove all bat-
teries from the battery compartment to avoid leakage, which may cause
damage to the instrument.
• Avoid overloading or dropping material onto the platform as that may
damage the balance.
• Place the weight on the center of the pan for accurate weighing.
• Make sure the weight is not over the Max capacity as it could damage
the load cell inside.
• Do not spill liquids on the balance as it is not water-resistant. Liquids
may damage the case and any liquid inside may cause damage to the
electronics.
• Material that has a static electric charge could inuence the weighing.
Discharge the static electricity of the samples, if possible. Another
solution to the problem is to wipe both sides of the pan and the top of
the case with an anti-static agent.
PREPARATIONS & SET UP
• Place your balance on a stable and level table. Then level your balance
by adjusting the feet to center the bubble in the spirit level.
• Plug into a wall outlet to avoid interference with other wirings
• Turn on the balance while there is no load on the pan
• We suggest to warm-up the balance by powering on 5 minutes before
use for accurate weighing.
• Calibration may be required before weighing when the balance is initially
installed or moved from a location.

2
DISPLAY AND KEY DESCRIPTION
LCD DISPLAY
Indication sign: Stable Zero Tare Low Battery
MODE
In weighing mode: shift weighing and counting function
In settings mode: it toggles between the mode options
ZERO
In weighing mode: it zero’s the scale
In counting mode: it’s the add key
UNIT/PRINT
In weighing mode: it shifts between weighing units
In the manual printing mode: it prints the weight data
TARE
In weighing mode: it tare’s the scale
In counting mode: it’s the reduce key

3
OPERATING INSTRUCTIONS
Power On
• Turn on the power by ipping the switch located on the underside of the
scale to the left. Once on, the scale with auto-check and count down
from 0-9 sequentially. It will then show the voltage
for 2 seconds before entering the weighing mode
Zeroing
• If the screen reads any number other than 0 before weighing, press the
ZERO key to set to 0
Unit Selection
• To switch between measuring units (kg, g, lb, oz) press the [UNIT/
PRINT] key
Tare Function
• Put a container you wish to use on the pan, then press the [TARE] key
and the display will show the tare symbol and reset back to 0
• Add your sample to the container to weigh without the weight of the
container
• To exit Tare mode simply press either [TARE] or [ZERO] key
Note: If you remove your container the scale will show the minus weight of
the container

4
FEATURES
• Large removable stainless steel weighing platform
• Comes with a 9V rechargeable battery
• Large high contrast back-lit liquid crystal display (LCD)
• Splash proof keyboard and display
• Anti-static stainless steel weighing pan and glass windshield
• Automatic zero-tracking and full range tare
• Calibration with reference weights
• Optional RS-232c for bi-directional communication with a PC or Printer
• Parts counting, percent weighing and dynamic weighing
• Multiple weighing units: g, kg, lb, oz
• 1 year limited warranty
BATTERY
• When appears on the display, you are requested to recharge the
scale for 12 hours. When the scale is recharging the mark will be
ashing and will disappear after recharging has nished
• Charging Light Indication: When the scale is charging the charge light
will turn Red. When the battery is done charging the charge light will
turn Green
ALARMS
Over load alarm
• When the load on the platform is over its set capacity a beeping will
sound and the display will show ------ , you must remove the load from
the platform immediately
Low load alarm
• If there is a problem in the load cell, a beep will sound and the display
will show
Counting alarm
• In counting mode when the count number goes over 1,000,000 the
display will show
• If it is a minus number the display will show

5
SPECIFICATIONS
UNIT\MODEL OPF-N1.5 OPF-N3 OPF-N7.5 OPF-N15 OPF-N30
Capacity
1.5kg (3.3 lb) 3kg (6.6 lb) 7.5kg (16.5 lb) 15kg (33 lb) 30kg (66 lb)
Resolution
0.05g/0.1g 0.1g/0.2g 0.2g/0.5g 0.5g/1g 1g/2g
Division
1:15,000 ~ 1:30,000
Response
2 seconds
Display
LCD display with backlight
Tare
Equal to Max capacity
Overload alarm
Auto alarm when load over capacity
Alarm
Protect automatically when the load is 125% of capacity
Source
Rechargeable battery : DC 6V 4Ah • Adapter : AC 110/220V DC 12V 500mA
Power
LCD: Backlight 90mA No backlight: 70mA
LED: Working 80mA Dormancy: 35mA
Temperature
Storage:
-
10°C - 50°C (14-120°F) Work: 0° - 40°C (32-104°F)
Humidity
Storage: 5% ~ 90% R.H. Work: 10% ~ 80% R.H.
Pan Size
218mm x 260 mm
Net/Gross
weight
3.62/4.40kg
Package
4 Units in one carton
box size 40x19x33 (cm
3
)
Weight 18.7 kg
Carton size 64x42x40 (cm
3
)
Dimensions(in):

6
USER SETTINGS
• Hold [TARE] key and turn on the scale to enter the setting mode.
• It will show the selection of parameter. Press the [MODE] key to go to
the selection
Unit Setting
• If you wish to disable one of the unit options (kg, g, lb) from showing in
weighing mode, you can do so by holding the [TARE] key while turning
the scale on. Then press the [UNIT] key to select which unit you wish to
turn off. Press the [TARE] key to toggle the unit between on or off. Press
[MODE] key to save settings
Backlight Setting
• There are three backlight options:
• bL 1 : the backlight lights up only when something is on the scale
• bL 2: the backlight is always on
• bL OFF: the backlight is always off
You can change these settings by:
• Hold the [TARE] key while turning on the scale
• Then press the [MODE] key twice or until the screen reads one of the
backlight options
• Then press the [ZERO] key to toggle between backlight modes

7
Transmission Setting (Optional)
• This function is for selecting a communication mode that is active when
the scale is connected to a printer/computer and the relative
equipment. There are four modes selectable
You can choose your communication setting by:
• Holding the [TARE] key while turning on the scale
• Then press the [MODE] key until the screen reads one of the modes
ex. [FC 1], [FC 2], [FC 3], [FC 4]
• Press the [ZERO] key to toggle between the transmission modes
• Press the [MODE] key to set your mode
Continuous Transmission mode [FC 1]
• Scale continuously sends data every 0.3 seconds to the PC (while in
weighing mode)
Response Transmission mode [FC 2]
• When the PC requests/inquires the data, the scale will respond and
transfer the corresponding data
Stable Transmission mode [FC 3]
• Once the weight on the scale is stable, the data will be transfered to the
PC
Print Transmission mode [FC 4]:
• This mode is the same as the previous mode, but the transferring
format is different. It applies to a printer connection
*See attachment section for more information

8
Selection of Indicator (Scale) Address
• You can set an address for your scale to better communicate with its PC
or printer (especially if multiples scales are in use). Doing so will help
the scale know when a command from the PC is meant for it versus
another scale
To set your indicator address:
• Holding the [TARE] key while turning on the scale
• Press [MODE] until you are on your set communication setting
ex. [FC 1]
• Then press [UNIT] to select address, the screen will read [Add 1]
• Press [ZERO] to change your address (the selection range is 1-25)
• Press [MODE] to select your setting and enter the BPS setting.
Selection of BPS (Bits Per Second) / Baudrate
• When the BPS of the scale and the communication equipment is not the
same the communication may not function properly
To change your BPS:
• Hold the [TARE] key while turning on the scale
• Press [MODE] until you are on your set communication setting
ex. [FC 1]
• Then press [UNIT] and you will see your address ex. [Add 1], and by
pressing [UNIT] again you will see your BPS ex. [b 9600]
• Press [ZERO] to change your BPS setting

9
ATTACHMENT
Continuous Transmission (mode 1) & Stable Transmission (mode 3)
• All the data is in ASCII code except the Start bit. This is the format:
Byte Notes Contents
1 Start of text 02H(STX)
2 Indicator Add A-Z
3 Stable Status 0 stable / 1 unstable
4 Data Sign +/-
5~10 Data Sign 6 Byte (From high to low)
11 Decimal From right to left (0-5).
12~14 Unit Code A-Z
15 Power 0 normal / 1 low battery
16~17 XOR Checksum 2 Byte A-Z
18 End of text 03(ETX)
Note: Checksum of the high-half byte and low-half byte less or equal to 9, adding 30H, then
the datas transfer as number of ASCII code. Example: Checksum of high-half is 6, adding
30H, it comes up to 36H, datas will be transfered as 6 of ASCII code. Checksum of high-half
byte and low-half byte is over 9, adding 37H, the datas transfer as alphabet of ASCII code.
Example: Checksum of high-half is B, adding 37H, it comes up to 42H, the datas will be
transfered as B of ASCII code.
When the weighing is stable, the next datas transfer will be done only after the weight on the
scale is removed and the scale goes back to 0.
Print Transmission Mode (mode 4)
• After the weighing is stable, press the [UNIT/PRINT] key to print the
data once. The format will be:
NO. 1 ; NO. 1 : Weighing times
Net: 0.0001kg Net: Net weight
Response Transmission (mode 2)
• PC transfers the order to the scale and the scale operates accordingly
after it receives the order.
Field Start Bit Scale Add. Order bit Date bit Checksum Stop bit
Value
0X02 1-25 1 units conversion xor checkout 0x03
Length
1 1 1 1 2 1
1. Zero(H) : The order bit 0x48(‘H’) is for zeroing once.
2. Tare(I) : The order bit 0X49(‘I’) is for tare once.
3. Units shift(L)

10
SCALE SETTINGS
To Enter the Settings Mode:
• While pressing [MODE] and [TARE], turn on the power. The scale will
enter the setting mode. Press [MODE] to select different settings which
you can set using the [UNIT] key
Filtering Range
• To change how much the scale uctuates while reading, you can change
how often it lters, Enter the settings mode and it will display “F lL #”
• Then press [ZERO] to select the zero tracking range (1-6), 3 is the
default number. The higher the number the more stable the scale
• Finally, press [MODE] key to conrm it, go to the next menu
Zero Tracking
• To change how lenient the scale is at nding the zero point, In the set-
tings mode press [MODE] until the display reads “ZE #”
• Pres [ZERO] to select the speed (1-7) the default is 3, The bigger the
number the more lenient it is
• Finally, press [MODE] key to conrm it, go to the next menu
Linearity Correction
• To change the linearity calibration, Enter the settings mode and press
[MODE] until the screen reads “L Id #”
• Press [ZERO] to change the range (1-5), 5 being the default
• We suggest not to change the default settings
• Finally, press [MODE] key to conrm it, and the display will show the
next menu
Linearity Dot
• To change the correction point, Enter the settings mode and press
[MODE] until the display reads “L In #”
• Press [ZERO] to change the range (-8 - +8), 0 being the default
• We suggest not to change the default settings
• Finally, press [MODE] key to conrm it, go to the next menu
Selection of Maximum Capacity
• To change the max capacity, In the settings mode press [MODE] until
the display reads “C#####” ex. “C7.5000” means the capacity is 7.5kg
• The default number is the max capacity of the scale
• We suggest not to change the default settings
• Finally, press [MODE] key to conrm it, go to the next menu

11
Selection of Division
• To change the max capacity, in the settings mode press [MODE] until
the display reads “D0.00##” ex. “d0.0002” means the division is 0.2g
• The default number is the actual division of the scale
• Use the [UNIT] key to toggle between options
• Finally, press [MODE] key to conrm it, and the display will show the
next menu
CALIBRATION
When to calibrate
• When the scale is initially installed
• When the scale’s location has changed
• After the scale has not been used for a long period of time
• If ambient temperatures have changed greatly
How to calibrate
• Enter the settings mode by pressing [MODE] and [TARE], while you turn
on the power
• Press the [MODE] key 6 times until the display reads “E#.0000”
• Press [UNIT] to choose the calibration weight (we suggest to use 2/3 of
the weight of the scales capacity)
ex. “E5.0000” would mean you calibrate with a 5kg weight
• You can change the weight by using the [ZERO] key to go up and the
[TARE] key to go down and the [UNIT] key to change to the next
sequential number
• Conrm your weight by pressing [MODE] key
• It will display ZeroAD value (range from 10000-60000)
• Press [MODE] key again and it will display “-Load-” for two seconds,
please place your weight that is the same as the one you just entered
on the scale within two seconds!
• Press [MODE] to conrm

CONTACT US
Please e-mail [email protected] for any sales related question
Please e-mail [email protected] for any support related questions
Don’t forget to visit our website at:
optimascale.com
/