View Quest Retro Mini Owner's manual

Category
Alarm clocks
Type
Owner's manual

View Quest Retro Mini is a versatile music player that combines classic design with modern functionalities. It offers DAB+/DAB/FM radio reception, Bluetooth connectivity, 3.5mm AUX-in and headphone connections, and a USB charging port for external devices. You can personalize your listening experience with the MyEQ feature and set dual alarms with the VQ Lifestyle Alarm function. Enjoy your favorite tunes or programs at home or on the go with its portable design and battery power option.

View Quest Retro Mini is a versatile music player that combines classic design with modern functionalities. It offers DAB+/DAB/FM radio reception, Bluetooth connectivity, 3.5mm AUX-in and headphone connections, and a USB charging port for external devices. You can personalize your listening experience with the MyEQ feature and set dual alarms with the VQ Lifestyle Alarm function. Enjoy your favorite tunes or programs at home or on the go with its portable design and battery power option.

GB
1
Retro Mini Operation Guide
Operation Guide
Guide d’utilisation
Betriebsanleitung
Guía de funcionamiento
Guia de Operação
Gebruiksaanwijzing
Bruksanvisning
GB GB
Retro Mini Operation Guide
3
Retro Mini Operation Guide
2
Welcome To View Quest
View Quest is a unique British brand inspired by the fusion of Sound and Style.
At View Quest we believe that colour and design is an important part of who we are, so why
should the technology we buy only be Black or Silver and lacking individuality of design?
Our award winning acoustic development programme ensures all our products feature the latest
technology and unbeaten sound quality. Couple this with our passion for the creative world of: the arts,
fashion & interior design and this means our products don’t just sound great, they look great too.
So thank you for joining the View Quest Revolution with our award
winning technology that’s designed to match your style.
We encourage you to fall in love with View Quest and your new Retro Mini.
Jonathan Merricks Daniel Copley
CEO & Creative Director Product Designer
GB GB
Retro Mini Operation Guide
5
Retro Mini Operation Guide
4
Classic design, modern functionality
DAB / DAB+ / FM Radio Reception
Bluetooth & NFC Connectivity
Optional Rechargable Battery Pack & Carry Case
An Iconic design which embodies our Sound & Style mission
DAB / DAB+ / FM Radio Reception
Bluetooth Connectivity
Award winning British Speaker Technology
GB GB
Retro Mini Operation Guide
7
Retro Mini Operation Guide
6
Our classic, with retro style and modern function
DAB / DAB+ / FM Radio Reception
Apple docking for 30-pin or Lightning connector devices
Vintage style with modern functionality
DAB / DAB+ / FM Radio Reception
Bluetooth Connectivity
GB GB
Retro Mini Operation Guide
9
Retro Mini Operation Guide
8
The View Quest Colour Range
CREAM
BLACK
BROWN
RED
MUSTARD
EMERALD
BLUE
RADIANT ORCHID
PURPLE
HOT PINK
TEAL
POLKA DOT
PINK WALLPAPER
ROSE & BEE
MARMALADE
BLUE DAISY
BLACK TOAST
SAMPLER
Pattern Range 2014/15
GB GB
Retro Mini Operation Guide
11
Retro Mini Operation Guide
10
Contents
Welcome to View Quest .................................................................................................................................................................... 3
If You Love Retro Mini... You’ll Love... ...........................................................................................................................................4
The Benets of Digital Radio ........................................................................................................................................................ 12
Your VQ Retro Mini - Born in Britain ......................................................................................................................................... 13
Finding Your Way Round Your VQ Retro Mini ....................................................................................................................... 14
What Can My VQ Retro Mini Do? ............................................................................................................................................... 17
Overview ......................................................................................................................................................................... 17
DAB/DAB+ Radio Reception ................................................................................................................................... 17
FM Radio Reception .................................................................................................................................................... 17
Bluetooth ......................................................................................................................................................................... 17
Auxiliary Connections ................................................................................................................................................ 18
MyEQ ................................................................................................................................................................................ 18
VQ Lifestyle Alarm ....................................................................................................................................................... 18
Turn on, Tune in and Enjoy Retro Mini Sound & Style ......................................................................................................... 20
Positioning ...................................................................................................................................................................... 20
Preparing ......................................................................................................................................................................... 20
Switching On .................................................................................................................................................................. 20
DAB/DAB+ ...................................................................................................................................................................... 21
FM ...................................................................................................................................................................................... 22
Bluetooth ......................................................................................................................................................................... 23
Auxiliary Connections ................................................................................................................................................ 25
MyEQ ................................................................................................................................................................................ 25
VQ Lifestyle Alarm ....................................................................................................................................................... 27
Sleep Timer ..................................................................................................................................................................... 28
Other Functions ............................................................................................................................................................29
Important Safety & Environmental Information ................................................................................................................... 30
Specication ........................................................................................................................................................................................ 33
Support .............................................................................................................................................................................................. 34
RETRO STYLE | MINI DESIGN | MODERN SOUNDS
GB GB
Retro Mini Operation Guide
13
Retro Mini Operation Guide
12
The Benets of Digital Radio
When you upgrade to digital radio you get more choice than ever before – with your existing favourite
stations just waiting to be experienced in digital quality but also a plethora of new digital-only stations
featuring all kinds of; music, chat and programming you’ll love.
Digital radio is not just about choice, it’s about quality – with digital broadcasts you’ll hear everything in
crystal clear clarity.
If you have any concerns about the digital coverage in your area – you can check your signal on the UK Digital
Radio website, it’s completely free and totally impartial – www.ukdigitalradio.com
Your VQ Retro Mini - Born In Britain
You can be proud of your Retro Mini and rely on its quality as it’s
designed and engineered in Britain featuring British acoustic
development.
At View Quest we’re proud to be British and we’re proud to take
our inspiration from quintessential British areas of excellence
- Design, Fashion, Music and The Arts.
It’s our aim to take these inspirations and create our own unique sense of Sound & Style – but also to share
these inuences with you to inspire your own sense of style.
GB GB
Retro Mini Operation Guide
15
Retro Mini Operation Guide
14
Back View
13. Battery Compartment
14. AUX IN socket
15. Headphone socket
16. Telescope Antenna
17. 5V/2A DC IN socket
18. 5V/1A USB charge out socket
AUX IN HEADPHONE
DC : 5V/2000mA
USB CHARGING
5V/1000mA
13
14
15
16
17
18
Finding Your Way Around Your Retro Mini
Front View
1. Centre button
2. Vol- button
3. MODE button
4. FAVOURITE button
5. Play/Pause button
6. Left button
7. LCD display
8. Vol+ button
9. MENU button
10. INFO button
11. Alarm button
12. Right button
MODE MENU
1
2
3
4
5
6
7
8
9
10
11
12
GB GB
Retro Mini Operation Guide
17
Retro Mini Operation Guide
16
4
What Can My VQ Retro Mini Do?
Overview
DAB / DAB+ / FM Radio Reception
Bluetooth Connectivity
3.5mm Aux-in Connection
3.5mm Headphone Connection
USB Charging (For External Devices)
MyEQ
VQ LifeStyle Alarm – dual alarm & sleep timer
Mains or Battery Power
DAB/DAB+ Radio Reception
DAB / DAB+ (Digital Radio) brings a superior listening experience whether it’s music, chat or any other
programming. Your Retro Mini features DAB and DAB+ the two standards in digital broadcasting which means you
can listening to digital radio all across Europe. And when you nd a station you love save it as one of your 30 preset
favourites.
FM Radio Reception
Just in case you nd yourself without Digital Coverage we make sure you can keep listening to the radio with FM
reception, and you can save your favourite stations to the 30 presets.
Bluetooth
When it’s time for your own music simply connect by Bluetooth and you can enjoy all the music you’ve got on any
of your smart devices – whether it’s stored on your device or being streamed through services such as Spotify or
TuneIn it all sounds great on your Retro Mini.
LCD DISPLAY
19. 2x16 dot matrix
20. Alarm 2 icon
21. Alarm 1 icon
22. PM icon
23. Snooze icon
24. Volume bar
Battery Use
Your Retro Mini can be powered by 4 x Type ‘AA ’ batteries.
Battery Removal
1. Use the thumb or
nger to pull clip down
and outward in order
to release battery
cover.
NOTE: If you’re not powering your Retro Mini with batteries we recommend you remove them.
25. Sleep icon
26. AM icon
27. Clock icon
28. FM mode icon
29. DAB mode icon
30. STEREO icon
31. AUX in mode icon
2. Be sure to insert
batteries of the correct
type and ensure correct
polarity (+/-). And then
secure the battery cover.
19
20
21
22
23 24 26 27 28
29
30
31
25
AUX IN HEADPHONE
DC : 5V/2000mA
USB CHARGING
5V/1000mA
GB GB
Retro Mini Operation Guide
19
Retro Mini Operation Guide
18
TECHNICAL SPECIFICATIONS
Auxiliary Connections
3.5mm Aux-in Connection:
If you don’t have a smart device or would rather not use Bluetooth but still want to listen to your own music, it’s no
problem with Retro Mini, simply connect via the 3.5 Aux-in cable connection.
3.5mm Headphone Connection:
Past your bedtime and time to hide under the covers with your favourite tunes – just plug in your headphones and
no one will know.
USB Charging:
Your Retro Mini is a very useful companion as you can charge smart devices from the USB connection – perfect for
a bedside table, in the ofce or just anywhere you need a little power boost.
MyEQ
The MyEQ function on Retro Mini gives a range of specially tailored presets controlling bass and treble because it’s
your sound, so it should be perfect for what you’re listening to, where you’re listening and when you’re listening.
VQ Lifestyle Alarm
The dual alarms and sleep timer make Retro Mini the perfect bedside companion, his & hers or week & weekend -
set the alarm or countdown for whenever you need it.
GB GB
Retro Mini Operation Guide
21
Retro Mini Operation Guide
20
The Specic Functions of Your Retro Mini
DAB/DAB+
1. For best reception, make sure the aerial is fully extended vertically.
2. To switch to DAB/DAB+, press MODE button repeatedly until the display shows DAB.
a. First time use, or after Factory Reset : Your Retro Mini will automatically begin to quick scan for DAB/
DAB+ stations. A progress bar will show the progress of the scan, and multiplex information is shown.
Stations found will be automatically stored. The number of stations found will also be displayed at the
upper right corner of the display. The rst station available will be shown on the display and played
automatically.
If no DAB/DAB+ signal is detected, “No Signal” will be displayed.
b. Subsequent use: Your last selected station will be displayed, tuned and played if possible.
The display will show the Station Name on the top line of 2X16 matrix, and the Programme Type, if available,
on the second line.
3. Press the Left and Right button to browse the stations.
Press Centre button to conrm the stations you want to
listen to.
4. To full scan or manually tune for stations
If you want to perform full scan or manual scan for your desired stations, press MENU button to select Full Scan
or Manual Scan. Using Left and Right button to select and conrm by the Centre button.
5. Press Play/Pause button if you want to mute the DAB radio.
6. Press INFO button, the scrolling information of the station will be displayed according to the following
sequence DYNAMIC LABEL SEGMENT (DLS), PROGRAM TYPE, ENSEMBLE NAME, SIGNAL
STRENGTH, CURRENT TIME, ENSEMBLE FREQ, TRANSFER RATE. The information type you select
will then be displayed for the current DAB/DAB+ station.
2GB>
11D 222.064MHz
Turn On, Tune In and Enjoy Retro Mini Sound & Style
Positioning
A good place for your Retro Mini:
- has a at and stable surface with sufcient ventilation
- is within 1.4metres of a power socket if you are using mains power.
- has space above it for you to fully extend the telescopic aerial vertically.
- is away from bright sunlight, heat sources, humidity and dampness.
Preparing
- If using mains power: connect the mains power lead into the socket on the back of the radio (DC IN).
Switch the mains power wall socket off. Now plug the power adaptor into the wall socket, and switch the wall
socket on.
- If not using mains power, ensure new batteries are correctly tted. Your Retro Mini can be powered by four type
AA’ alkaline or rechargeable batteries (not supplied). When using batteries to power the unit, function and
operation are the same as using the mains, except that in standby mode, the LCD will shut down and can not
charge out for any device .
If operating on batteries, please switch of the mains adaptor and remove the mains power plug from the back of
the radio.
- Fully extend the radio aerial vertically for the best reception.
Switching on
- When switching on the unit, press and hold the Centre button.
What you will see when you switch on:
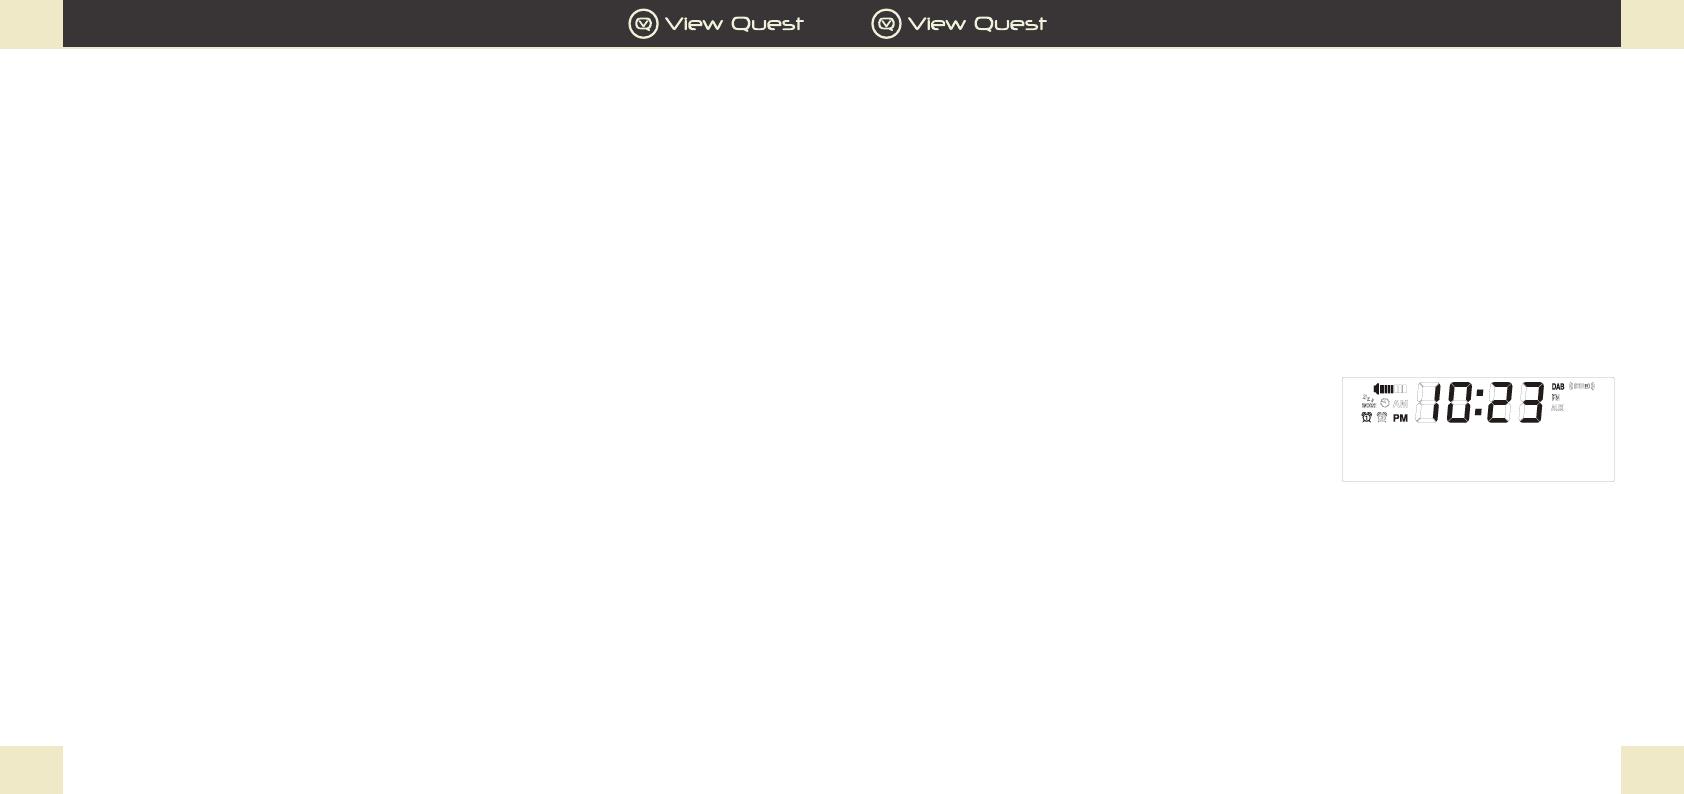
- “View Quest” will be displayed for 2 seconds, followed by the clock. This is ‘standby’ mode.
- After 10 seconds the display backlight will switch off.
Leaving and entering standby mode
- Press and hold Centre button to switch between working and standby mode. In standby mode the
display shows a clock and date, in working mode the display shows information about the current
function.
GB GB
Retro Mini Operation Guide
23
Retro Mini Operation Guide
22
Storing and Selecting Favourite Stations
The Retro Mini can store up to 30 stations DAB radio and 30 stations FM radio stations. Follow the steps
below to store and select your favourite stations
To store a Favourite station:
1. Tune to the DAB or FM radio station you want to store.
2. Press and hold the FAVOURITE button to setup the favourite list. Using Left and Right button to
navigate the number you want to store.
3. Press Centre button to conrm your selection
To recall a Favourite station when listening to DAB or FM radio
1. To tune to the favourites, press FAVOURITE button to access.
2. Press Left and Right button to navigate your desired favourite station and press Centre button to conrm.
Bluetooth
If your phone, tablet or any Bluetooth devices is capable of storing audio les, you can use Bluetooth to stream any
music stored in your Bluetooth devices to Retro Mini.
1. To switch to BLUETOOTH press MODE button repeatedly until the display shows Bluetooth.
Preset Stored
<3: (Empty) >
Bluetooth
Pairing
FM
1. For best reception, make sure the aerial is fully extended vertically.
2. To switch to FM, press MODE button repeatedly until the display shows FM.
a. First time use, or after Factory Reset: Your Retro Mini will tune to and display 87.50MHz, the lowest point of
the FM spectrum.
b. Subsequent use: Your last selected station will be displayed, tuned and played if possible.
3. If you would like to perform manual scanning, you can press Left and Right button to ne tune the
station by 0.05Hz step, or you can press and hold the Left and Right button to scan next or previous
available stations.
4. Press Play/Pause button if you want to mute the FM radio.
5. Press INFO button to scroll the station info from below accordingly can include RADIO TEXT, PROGRAM
TYPE, SIGNAL STRENGTH, CURRENT TIME, FM FREQ, STEREO MONO. The information type you select will
the be displayed for the current FM station.
87.5MHz
<Programme Type>
GB GB
Retro Mini Operation Guide
25
Retro Mini Operation Guide
24
Auxiliary Connections
AUX-IN
1. To connect the auxiliary device: plug the aux-in cable into the 3.5mm AUX-IN jack at the back of the radio.
2. To switch to AUX IN, press MODE button repeatedly until the display shows AUX.
3. To control the playback of the auxiliary device you need to use the device’s own controls. You may
need to adjust volume on your Retro Mini and the auxiliary device for optimum volume and clarity.
4. Press Play/Pause button if you want to mute the music playback
Using the Headphone Jack
You can enjoy your personal music via the headphone jack. Simply plug your headphone to the headphone
jack at the back of the unit.
MyEQ
Tailor your audio experience to what you’re listening to with the MyEQ function.
1. Press the Menu button to enter into the menu list.
2. Press Left and Right button to choose “EQ Setup, press the Centre button to conrm your selection.
3. Press Left and Right button to select our preset EQ: Flat / Rock / Pop / Jazz / Classical / Bass
4. Press Centre button to conrm the selection
Volume
2. Enable Bluetooth on your device.
3. On your device, select an option to add a new Bluetooth device.
NOTE: Adding a Bluetooth Device varies on different smart devices, if in doubt please refer to your device
manufacturers manual.
4. Start the pairing on your device. Do this by selecting “Retro Mini” from the list of available devices shown
on your device. This will connect automatically and once paired, your Retro Mini display will show
“Connected”.
NOTE: The auto pairing will search for 1 minute for available device. If nothing is paired, the display will
show “NO CONNECTION”.
5. To reconnect or disconnect from Retro Mini, press and hold the MODE button until a “Beep” sound is heard.
NOTE: You will need to disconnect any connected Bluetooth devices from Retro Mini to stream from a
different Bluetooth device.
NOTE: Bluetooth will automatically disconnect if you are out of the range of the Retro Mini.
Controlling Bluetooth music playback
You can control the music in Retro Mini to your Bluetooth device wirelessly.
1. Press Play/Pause button to play or pause the music playback.
2. Press Left and Right button to skip track or press and hold to rewind and forward.
3. Press the Vol+ and Vol - button to adjust the volume level.
NOTE: You can do vice versa, press the same type of buttons in your Bluetooth device to control the music
playback function wirelessly.
GB GB
Retro Mini Operation Guide
27
Retro Mini Operation Guide
26
Set the time 12/24 hour
1. Press Menu button, and press Left and Right button to choose “12/24 hour”, and then press Centre
button to conrm.
2. Press Left and Right to choose 12 or 24 hour. Press Centre button to conrm.
Setting the VQ Lifestyle alarm
The alarm in Retro Mini switches the radio on (if in standby) and tunes to a DAB or FM radio station or sounds
a tone.
1. Press the Alarm button to enter into Alarm setup Menu.
2. Press Alarm button to choose the Alarm 1 or Alarm 2.
3. Press Left and Right button to the next Alarm setting to turn the alarm on and off. Press Centre button
to conrm and go to the next level.
4. In alarm time setting, using Left and Right to adjust the hh. Press Centre to conrm and to set the mm.
Press Centre button to conrm again.
5. Finally choose how you would like to wake up. Using Left and Right to select your alarm tone, you can
have Beep1/Beep2/DAB/FM. Press Centre button to conrm your selection and exist.
6. The alarm icon will appear on the display to show that the alarm is set.
Snoozing a sounding alarm
To snooze a sounding alarm, press Centre button to snooze.
The alarm will sound again in 10 minutes
NOTE: The alarm will automatically stop after 60mins if
Centre button is not pressed to snooze.
Cancelling a sounding alarm
To cancel a sounding tone alarm, press ALARM button once to stop.
Alarm1: FM
On 10:30
Setting the Clock, Alarm, Count Down Timer and Sleep Timer
Note: The clock, alarm, count down timer and sleep timer function does not work when Retro Mini is being
powered by the AA batteries.
Setting the clock
The time and date on Retro Mini is automatically set by the DAB or FM radio signal. If the time/date does not
update automatically, you can manually set it by using this option.
Note: Any time or date updates received by DAB or FM broadcast will override manual settings, if clock
synchronisation is selected. Please refer below instructions for more information.
Setting the time and date manually
1. Press the Menu button, and press Left and Right button to choose “Clock Setup”, and then press Centre button
to conrm.
2. Press Left and Right to scroll to “Time Setup. Press Centre button to conrm.
3. Press Left and Right to scroll to “Manual”. Press Centre button to conrm.
4. Press Left and Right button repeatedly to adjust the year and then press Centre button to next setting.
5. Repeat the action as step 4 to set Month/Date/HOUR/MIN. Press Centre button to conrm the choice
you selected.
Clock synchronisation options
1. Press Menu button and press the Left and Right button to choose “Clock Setup”, press Centre button
to conrm. Press Left and Right to scroll to “Time Setup. Press Centre button to conrm.
2. Press Left and Right button to choose Radio/Manual. Press Centre button to conrm your selection
Note: Radio means clock synchronisation automatically via the radio broadcasting signal. Any manual setting
will be override when Radio is chosen.
Note: Manual means clock will not be synchronised. The clock will only be set manually.
GB GB
Retro Mini Operation Guide
29
Retro Mini Operation Guide
28
Other Functions
Backlight Setting
You can adjust the backlight during power on.
1. Press Menu button to enter into the menu list.
2. Press Left and Right button to choose “Backlight”, press Centre button to conrm your selection.
3. Press Left and Right button to choose Lo/Mid/Hi backlight level.
4. Press Centre button to conrm the selection.
Changing the language
1. Press Menu button to enter into the menu list.
2. Press Left and Right button to choose “Language, press Centre button to conrm your selection.
3. Press Left and Right button to select a menu language from English, French, German and Dutch.
4. Press Centre button to conrm the selection.
WARNING:
Factory Reset
Resetting your Retro Mini removes all favourites, stored stations, alarms and resets all other options
to the default settings.
1. Press Menu button to enter into the menu list.
2. Press Left and Right button to choose “Reset”, press Centre button to conrm your selection.
3. Press Left and Right button to choose YES or NO, press Centre button to conrm your selection.
4. When you conrm YES, the Retro Mini will be reset to the factory default.
Disabling an alarm
1. Press Alarm button when alarm is not sounding. Enter into the alarm setting menu
2. Press Left and Right button to select Alarm On/Off menu.
3. Press Centre button to conrm your selection.
Setting the Count Down Timer
1. Press and hold the Alarm button to enter into the setup menu.
Press Left and Right button to switch the timer ON/OFF, and then
press Centre button to conrm the selection.
2. HH:MM:SS is displayed. Press Left and Right button to adjust the HH, press Centre button to conrm.
Repeat the instruction to set the MM and SS setting. Press the Centre button to start.
3. When the timer sounds, press CENTRE button to cancel the timer.
Note: If the alarm is snoozed, the countdown timer is also set to buzz during the same time, the countdown timer
will be disabled.
Setting the Sleep Timer
The Sleep Timer can be set to switch Retro Mini off after a period of time.
1. Press Menu button to enter into the menu list.
2. Press Left and Right button to choose “Sleep, press Centre button to conrm your selection.
3. Press Left and Right button to set the timer for up to 90 minutes or choose Sleep off to cancel.
4. The sleep timer icon will appear on the display to show that the sleep timer is set.
Count Down
On 00:00:00
GB GB
Retro Mini Operation Guide
31
Retro Mini Operation Guide
30
Always:
Operate all controls as instructed in the manual.
Ensure that all electrical connections (including the mains plug, extension leads and inter-connections
between the pieces of equipment) are properly made and in accordance with the manufacturer’s
CAUTION
TO REDUCE THE RISK OF ELECTRIC SHOCK DO NOT REMOVE COVER (OR BACK),
NO USER SERVICEABLE PARTS INSIDE, REFER SERVICING TO QUALIFIED SERVICE PERSONNEL.
DANGEROUS VOLTAGE
risk of electric shock to persons is present within this product’s enclosure.
ATTENTION
This manual contains important operating and maintenance instructions, for
your safety, it is necessary to refer to the manual.
WARNING
TO PREVENT FIRE OR SHOCK HAZARD, DO NOT EXPOSE
THIS APPLIANCE TO DRIPPING OR SPLASHING.
Note: This unit will become warm when used for a long period of time. This
is normal and does not indicate a problem with the unit.
Important Safety Information – please read
Please read this guide before using your unit – it contains guidance and recommendations that can help ensure
long-lasting, trouble-free, safe operation. Please keep this guide for future reference.
Be careful. Avoid:
Liquids: don’t expose your unit to drips or splashes, and don’t put liquid containers like vases on it or near it.
Humidity or moisture: humid or moist places like outdoors, bathrooms and steam rooms need specially-
designed equipment.
Heat: don’t expose your unit to direct sunlight or heat from radiators or other heat sources. Audio/video
devices can generate a lot of heat; don’t put your unit on top of such devices. Don’t use naked ames
anywhere near your unit.
Dust and restricted airow: make sure your unit is in free-owing air to avoid overheating.
Vibration: constant vibration can cause damage.
Extreme climates: this unit is designed for operation in moderate climates.
IMPORTANT:
DO NOT listen at high volume: High volumes can permanently damage hearing.
DO NOT Use equipment, especially headphones, when it could distract you from activities that require
attention to safety.
DO NOT Use equipment that is not working normally or you suspect may be faulty or damaged.
DO NOT leave equipment switched on when it is unattended unless it is specically stated that it is designed
for unattended operation. Switch off using the switch on the equipment and make sure that your family
knows how to do this. Special arrangements may need to be made for inrm or handicapped people.
GB GB
Retro Mini Operation Guide
33
Retro Mini Operation Guide
32
Environmental Disposal Information
Electrical and electronic products displaying the crossed out wheeled bin symbol
above must not be disposed of in general household waste. Take the product to a
recycling facility that accepts electrical and electronic products. Check with your
Local Authority for your nearest recycling centre.
For further details, please contact:
View Quest
9-10 Mill Lane
Alton
Hampshire
GU 34 2QG
Specication
1. Mode: DAB/DAB+ (BAND III 5A-13F), FM (87.5MHz-108MHz), BLUETOOTH, AUX_IN
2. LCD:2x16 dots matrix; black background white fonts, negative LCD
3. Power Supply: DC 5V/2A, DC OUTPUT 5V/1A (USB SOCKET)
4. Battery requirement: 4 xAA type (not included)
5. Output Power: 5W
6. STANDBY MODE: Show Clock(Only in DC IN mode)
7. Dimensions: 224mm x 147mm x 105mm
Battery safety guidelines
- Be sure to insert batteries of the correct type and ensure correct polarity (+/-).
- To insert batteries, remove the battery compartment cover and insert batteries observing polarity.
- Ensure the cover is secure and remove batteries in a safe manner without the use of metallic or other conductive
objects.
- Batteries should not be replaced by children.
- Never dispose of batteries in re as they may explode.
- Batteries should not be exposed to excessive heat such as sunshine, re or a naked ame.
- Only use batteries of the same type.
- Do not mix old and new batteries and do not mix alkaline and rechargeable batteries.
- Do not attempt to charge non-rechargeable batteries.
- If the radio is not going to be used for a long period of time, remove the batteries.
- Always remove spent batteries from the battery compartment and dispose of them responsibly to protect the
environment.
Note: For battery operation, please switch off the mains adaptor and remove the mains power plug from the back of
the radio.
GB GB
Retro Mini Operation Guide
35
Retro Mini Operation Guide
34
Support
We’re sure you’re going to have a long and happy relationship with your new Retro Mini. How can we be so sure,
well, we’ve designed, engineered and loved this product from the pages of a concept book through to the gorgeous
product you have in your hands. We’re very proud of our products and the care and attention we give them, this is
reected in our fantastically low returns rate.
However, if you do have a problem then we’re always happy to help:
+44 (0)1792 704 452
If You Love Your Retro Mini Let The
World Know
We take great pride in all our products and we hope you
love your Retro Mini, if you do wed love to hear about it.
So why not share your experience and your own sense
of sound & style with us via social media or reviews with
our retailers.
#SoundStyle
GB Retro Mini Operation Guide
36 www.viewquest.co.uk +44 (0)1792 704 452 [email protected]
Facebook – /ViewQuest
Instagram @ViewQuest
Twitter – @View_Quest
Pinterest – /ViewQuest
www.viewquest.co.uk +44 (0)1792 704 452 [email protected]
/ViewQuest
@View_Quest
@ViewQuest
/ViewQuest
SHOW US YOUR
#SoundStyle
  • Page 1 1
  • Page 2 2
  • Page 3 3
  • Page 4 4
  • Page 5 5
  • Page 6 6
  • Page 7 7
  • Page 8 8
  • Page 9 9
  • Page 10 10
  • Page 11 11
  • Page 12 12
  • Page 13 13
  • Page 14 14
  • Page 15 15
  • Page 16 16
  • Page 17 17
  • Page 18 18
  • Page 19 19

View Quest Retro Mini Owner's manual

Category
Alarm clocks
Type
Owner's manual

View Quest Retro Mini is a versatile music player that combines classic design with modern functionalities. It offers DAB+/DAB/FM radio reception, Bluetooth connectivity, 3.5mm AUX-in and headphone connections, and a USB charging port for external devices. You can personalize your listening experience with the MyEQ feature and set dual alarms with the VQ Lifestyle Alarm function. Enjoy your favorite tunes or programs at home or on the go with its portable design and battery power option.

Ask a question and I''ll find the answer in the document

Finding information in a document is now easier with AI