Page is loading ...


Page 2 For technical questions, please call 1-888-866-5797. Item 61638
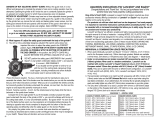
WARNING SYMBOLS AND DEFINITIONS
This is the safety alert symbol. It is used to alert you to
potential personal injury hazards. Obey all safety messages
that follow this symbol to avoid possible injury or death.
Indicates a hazardous situation which, if not avoided,
will result in death or serious injury.
Indicates a hazardous situation which, if not avoided,
could result in death or serious injury.
Indicates a hazardous situation which, if not avoided,
could result in minor or moderate injury.
Addresses practices not related to personal injury.
Important Safety Information
To prevent serious injury, amputation, and DEATH, read and follow all
power tool instructions and all instructions included with this item.
Save all warnings and instructions for future reference.
Set up Precautions
1. The grinder’s safety guard MUST be
positioned as described in Adjusting
the Safety Guard on page 5 prior
to installing and using Carving Disc.
2. DO NOT install Carving Disc on any
grinder that requires mechanically
modifying the safety guard to
achieve proper positioning.
3. Set up only according to these instructions.
Improper assembly can create hazards.
4. Install only on 4" or 4-1/2" angle grinder
equipped with a constant pressure
switch (paddle, dead man or kill switch),
with a 5/8" spindle and a maximum
speed of 14,000 RPM or less.
5. Wear ANSI-approved safety goggles and
heavy-duty work gloves during set up.
6. Do not carve wood containing foreign
objects. Remove all screws, nails,
staples and other obstructions from
workpiece before using Carving Disc.
7. Make sure that the power switch/trigger
of the power tool is in the off-position and
unplug the tool from its electrical outlet
before performing any set up procedures.
8. Keep set up area clean and well lit.
9. Keep bystanders out of the
area during set up.
10. Do not set up when tired or when under the
influence of alcohol, drugs or medication.
Use Precautions
1. DANGER: Keep hands away from
cutting area and the Carving Disc.
Keep your second hand on auxiliary
handle, or motor housing.
If both hands are holding the grinder,
they cannot be cut by the Carving Disc.

Page 3For technical questions, please call 1-888-866-5797.Item 61638
2. Never hold piece being cut in your
hands or across your leg. Secure
the workpiece to a stable platform.
It is important to support the work
properly to minimize body exposure,
Disc binding, or loss of control.
3. Do not reach underneath the workpiece
or remove wood shavings from the
cutting area while the Disc is rotating.
The safety guard cannot protect you from
the Carving Disc below the workpiece.
4. Operate a power tool equipped with
this Carving Disc with both hands only.
Using equipment with only one hand
can easily result in loss of control.
5. Do not operate a power tool equipped
with this Carving Disc near the face
or in a position above the head.
6. Do not overreach. Keep proper
footing and balance at all times. This
enables better control of the power
tool in unexpected situations.
7. Follow the manufacturer’s operating
instructions and safety warnings
applicable to your angle grinder.
8. This product is not a toy. Do not allow
children to play with or near this item.
9. Use as intended only.
10. Inspect before every use; do not use
if parts are loose or damaged.
11. Stay alert, watch what you are doing and
use common sense when operating a
power tool equipped with this Carving
Disc. Do not use while tired or under the
influence of drugs, alcohol or medication.
12. Dress properly. Do not wear loose
clothing or jewelry. Keep hair, clothing
and gloves away from moving parts.
Loose clothes, jewelry or long hair
can be caught in moving parts.
13. The warnings, precautions, and
instructions discussed in this instruction
manual cannot cover all possible
conditions and situations that may occur.
It must be understood by the operator that
common sense and caution are factors
which cannot be built into this product,
but must be supplied by the operator.
Kickback and Related Warnings
Kickback is a sudden reaction to a pinched or
snagged rotating wheel, backing pad, brush
or any other accessory. Pinching or snagging
causes rapid stalling of the rotating accessory
which in turn causes the uncontrolled power
tool to be forced in the direction opposite of the
accessory’s rotation at the point of the binding.
For example, if an abrasive wheel is
snagged or pinched by the workpiece, the
edge of the wheel that is entering into the
pinch point can dig into the surface of the
material causing the wheel to climb out or
kick out. The wheel may either jump toward
or away from the operator, depending on
direction of the wheel’s movement at the
point of pinching. Abrasive wheels may
also break under these conditions.
Kickback is the result of power tool misuse
and/or incorrect operating procedures or
conditions and can be avoided by taking
proper precautions as given below.
1. Maintain a firm grip on the power
tool and position your body and
arm to allow you to resist kickback
forces. Always use auxiliary handle,
if provided, for maximum control
over kickback or torque reaction
during start-up. The operator can
control torque reactions or kickback
forces, if proper precautions are taken.
2. Never place your hand near the
rotating accessory. Accessory
may kickback over your hand.
3. Do not position your body in the
area where power tool will move if
kickback occurs. Kickback will propel
the tool in direction opposite to the wheel’s
movement at the point of snagging.

Page 4 For technical questions, please call 1-888-866-5797. Item 61638
Kickback and Related Warnings (continued)
4. Use special care when working
corners, sharp edges etc. Avoid
bouncing and snagging the accessory.
Corners, sharp edges or bouncing have a
tendency to snag the rotating accessory
and cause loss of control or kickback.
5. This tool is designed to reduce
the risk of kickback. However,
improper assembly, installation, or
usage may still cause kickback.
Set up Instructions
Read the ENTIRE IMPORTANT SAFETY INFORMATION section
at the beginning of this document including all text under subheadings therein
before set up or use of this product.
TO PREVENT SERIOUS INJURY FROM ACCIDENTAL OPERATION:
Make sure that the power switch/trigger of the power tool is in the off-position and
unplug the tool from its electrical outlet before performing any procedure in this section.
Installing the Carving Disc
1. Press in and hold the grinder’s spindle
lock (if equipped) and use a spanner
wrench (not included) to loosen and
remove the grinder’s outer flange nut.
2. Carefully remove center plug holding the
three components of the Carving Disc
assembly together and retain for future use.
3. Hold Disc firmly so the components don’t
separate and with the side stamped TOP
facing up, place it over the grinder spindle
until seated on the grinder’s inner flange.
Note: If components become separated refer
to Disc and Chain Assembly on page 5.
4. Thread the outer flange nut into place and
tighten securely with a spanner wrench.
Spindle
Safety Guard
Inner
Flange
Carving
Disc
Outer
Flange
Nut
Figure A

Page 5For technical questions, please call 1-888-866-5797.Item 61638
Adjusting the Safety Guard
1. Lay the grinder to be used on its side
and loosen the hardware securing
the safety guard in place.
2. Rotate the safety guard until it is at
an approximate 45° angle with the
grinder body. Refer to Figure B.
3. Tighten the hardware holding the guard
in place and ensure it is secure. Adjust
if necessary before proceeding.
Incorrect Safety
Guard Position
Correct Safety
Guard Position
Safety Guard
Figure B
Disc and Chain Assembly
The Carving Disc consists of three
components, a top disc stamped TOP,
a bottom disc stamped BOTTOM, and a
saw chain. To assemble the components
use the following procedure:
1. Place the bottom disc with the word
BOTTOM facing up on a flat surface.
2. Place the saw chain on the bottom
disc with rakers facing left as shown in
Figure C and arrange chain around the
outside edge of the disc, making sure
chain link tangs fit over disc perimeter.
Note: Chain direction is critical for proper
operation. If assembled in the wrong direction,
the saw chain blades will not cut effectively
and may burn the wood due to heat buildup.
3. Place the top disc with the word TOP
facing up onto the saw chain and bottom
disc. Make sure that the slots in the top
disc line up with the slots in the bottom
disc and make minor adjustments to the
position of the top and bottom discs until
the chain is secured between them.
Raker
Tang
Figure C

Page 6 For technical questions, please call 1-888-866-5797. Item 61638
Operation Instructions
Read the ENTIRE IMPORTANT SAFETY INFORMATION section
at the beginning of this document including all text under subheadings therein
before set up or use of this product.
Workpiece and Work Area Set Up
1. Designate a work area that is clean
and well-lit. The work area must not
allow access by children or pets to
prevent distraction and injury.
2. Route the power cord along a safe
route to reach the work area without
creating a tripping hazard or exposing
the power cord to possible damage.
The power cord must reach the work
area with enough extra length to allow
free movement while working.
3. Secure loose workpieces using a
vise or clamps (not included) to
prevent movement while working.
4. There must not be hazardous objects, such
as utility lines or foreign objects, nearby
that will present a hazard while working.
5. You must use personal safety equipment
including, but not limited to, ANSI-
approved safety goggles underneath
full face shield, hearing protection,
and heavy-duty work gloves.
Operation
TO PREVENT SERIOUS INJURY: Grip the tool firmly in both hands.
1. Follow the manufacturer’s operating
instructions and safety warnings
applicable to your angle grinder.
2. Make sure that the switch/trigger is in
the off-position, then plug in the tool.
3. Turn on the switch or squeeze the
trigger to start the tool. DO NOT
start the tool with the Carving Disc
in contact with the workpiece.
4. Allow the Carving Disc to come up to full
speed before touching the work material.
5. Use both hands to operate grinder.
Hold tool at main housing, and use
auxiliary handle on top/side.
6. Apply the Carving Disc to the
work material, allowing the tool
to operate at full speed.
WARNING! Cut by pulling the saw back
towards you, not pushing away from you.
7. Do not use excessive pressure or force
the Carving Disc into the workpiece. If
the tool bogs down, use lighter pressure.
Allow the tool to do the work.
8. Periodically remove sawdust and wood
shavings from around and under the
grinder’s on/off switch to prevent buildup of
debris and ensure safe switch operation.
9. TO PREVENT ACCIDENTS, AFTER USE:
Turn off the tool.
WARNING! Allow the tool to come to a
complete stop before setting it down.
Unplug the tool. Remove the Carving
Disc from the grinder, replace
center plug to hold the Carving Disc
assembly together, then store the Disc
indoors out of children’s reach.

Page 7For technical questions, please call 1-888-866-5797.Item 61638
Maintenance
TO PREVENT SERIOUS INJURY FROM ACCIDENTAL OPERATION:
Make sure that the Power Switch/Trigger of the power tool is in the off-position and
unplug the tool from its electrical outlet before performing any procedure in this section.
For optimum performance, periodically
sharpen the saw chain:
a. Wear heavy-duty work gloves
and remove the Carving
Disc from the power tool.
b. Replace the center plug supplied
with the accessory to hold the
Carving Disc assembly together.
c. Hold the Disc assembly in one
hand and sharpen the saw
chain blades using a standard
1/8" or 5/32" chainsaw file.
d. Reinstall the Carving Disc or store
indoors out of children’s reach.

3491 Mission Oaks Blvd. • PO Box 6009 • Camarillo, CA 93011 • 1-888-866-5797
/