MicroNet SP212E User manual

Category
KVM switches
Type
User manual

This manual is also suitable for

Quick Installation Guide
2/4-Port KVM Switch
Model No.: SP212E/ SP212EL/ SP214E/ SP214EL
http://www.micronet.info
1
Introduction
The Micronet SP212E/ SP212EL/ SP214E/ SP214EL 2/4-Port KVM
switch is a compact device for managing multiple PCs via a single
set of local equipment (keyboard, mouse, and monitor). Its compact
in nature helps user to placed on desktop or be hidden from view. In
addition, SP212E and SP214E supports both audio and microphone
interface allowing multiple PCs to share the single set of sound
device. All models provide push button and hotkey for easy
operation at a touch of a fingertip.
Package Contents
Please verify the following items are in the package:
SP212E/SP214E SP212EL/SP214EL
y 2/4-Port KVM Switch
y Quick Installation Guide
y 2/4 x KVM Cable
y 2/4 x Audio Cable
y 2/4-Port KVM Switch
y Quick Installation Guide
y 2/4 x KVM Cable
Note: Contact your dealer immediately if any of the above items are
missing, damaged, or if the unit does not work.
2
Key Features
y Supports high VGA resolutions up to 2048 x 1536
y Control 2/4 computers with one keyboard, mouse and monitor
y Support audio and microphone switching function with one
speaker and microphone (SP212E/SP214E only)
y Support scrolling mouse & multi-button mouse (Microsoft,
Logitech, etc.)
y Easy installation with Plug & Play, no external software or other
supporting interface card required
y Switch computers easily with convenient hotkeys and push
button
y Compatible with Windows and Linux operating systems
y Supports Mac and Sun Micro System (NOTE: Only support
standard PS/2 Keyboard & Mouse)
y Supports Auto-Scan function to alternate video between both
computers in preset intervals 5~100 sec.
3
Hardware Installation
Please follow steps below to setup the hardware:
Step 1: Make sure that all computers are connected to the KVM
Switch with the provided KVM cable and their peripherals are in
power-off state.
Step 2: Connect the shared PS/2 keyboard, mouse and VGA
monitor to the KVM switch.
Step 3: Connect the shared speaker set and microphone to the
KVM switch (SP212E/ SP214E only).
Step 4: Connect PC’s audio and microphone interface to KVM
switch using the Audio cable.
Step 5: Power on all PCs, KVM will now automatically initiate and
recognize mouse and keyboard.
Push Button Control
The Push Button is located on the top of the device for users to
switch between PCs. On default, PC port and Audio/Mic port are
bound together. Meaning when switching between PC ports,
Audio/Mic will also be changed. For more information on binding and
unbinding of Audio/Mic, please refer to Hotkey Control.
4
Redefining Hotkey Control
Redefining Hotkey can be achieved through both hotkey and push
button. (Allowed Hotkey: Scroll Lock, Caps Lock, Esc, F12 or Num
Lock)
Step 1: Pressing current hotkey twice then ‘H’, the system will signal
with two beeps alarm, then enter the new hotkey. For example,
default hotkey is Scroll Lock then command sequence is (y is the
new user-defined hotkey):
Scroll Lock + Scroll Lock + H + (y)
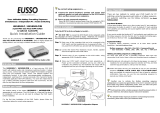
Step 2: Alternatively, users can change the hotkey by pressing and
holding the last push button of the device (Button 2 for 2-Port KVM
Switch and Button 4 for 4-Port KVM). By holding the button for more
than 3 seconds, the device will enter hotkey configuration mode then
press the preferred hotkey to complete the setting.
Note: Each keystroke in the hotkey sequence should be within 2
seconds for valid command execution.
Hotkey Command
Troubleshooting & Tips
1. Hotkey Convention: The hotkey notation (Scroll Lock + Scroll
Lock + key) requires users to press the command in
consecutive order, not simultaneously.
2. Mouse Troubleshoot: Execute the following hotkey
commands when mouse fail to response or malfunction.
¾ PnP O/S (Windows 98/98SE/2000/XP):
ScrLk + ScrLk + End
¾ Non-PnP O/S (Linux/NT 4.0):
2-key mouse: ScrLk + ScrLk + M + 1
3-key wheel mouse: ScrLk + ScrLk + M + 2
5-key wheel mouse: ScrLk + ScrLk + M + 3
3. On default, Audio/Mic and PC selection are bind together
(SP212EL/ SP214EL Only). To unbind, execute hotkey
command: ScrLk + ScrLk + W. To applying binding, run the
command: ScrLk + ScrLk + Q.
  • Page 1 1
  • Page 2 2
  • Page 3 3
  • Page 4 4
  • Page 5 5
  • Page 6 6
  • Page 7 7

MicroNet SP212E User manual

Category
KVM switches
Type
User manual
This manual is also suitable for

Ask a question and I''ll find the answer in the document

Finding information in a document is now easier with AI