Connecting to a Computer Cont.
Step 4:
Enabling VGA or HDMI output on your Computer – To enable VGA or HDMI output on your computer
most computers require “turning on” the video output feature. Each computer is different. Please
consult your owner’s manual for instructions to enable VGA or HDMI output. Below are standard
instructions for a Windows XP computer – not all systems are the same.
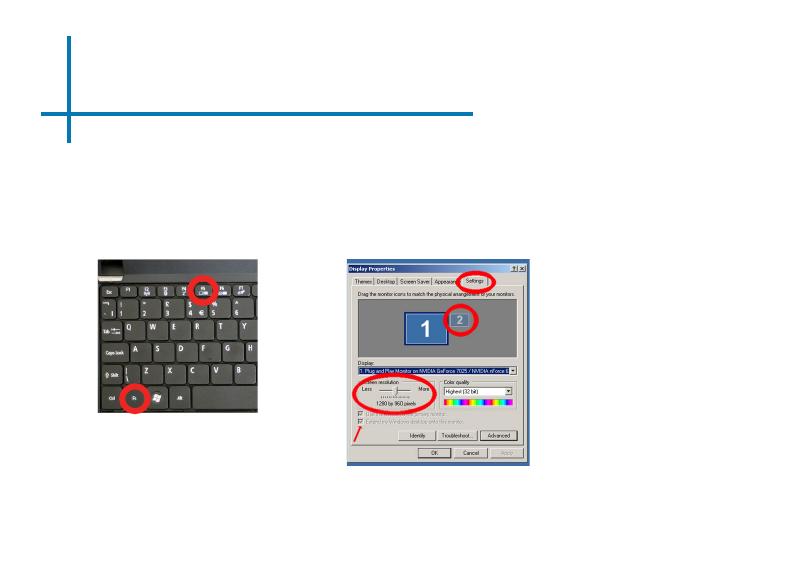
Press function & “F5” to instruct
the computer to enable multiple
displays.
You can also press Windows+P to
toggle through display settings.
*NOTE: different operating sys-
tems may differ
Step 5:
1. Right click on computer desktop
and select “Properties”
2. Display Properties window will
pop up
3. Click on the “Settings” Tab
4. If a secondary monitor is grayed
out, click on it and check “Extend
my Windows Desktop onto this
monitor”
5. If the image is blurry or the text
is not legible, adjust the screen
resolution. We recommend
800x600 or 1024x768.
Step 6:
9