Page is loading ...

9/17/2012
ASSEMBLY INSTRUCTIONS
2.
DESCRIPTION
Models: TGD100, TGD101, TGD102
9/8/2011
Features
No assembly required1.
Extra screw plugs included
QTY
TGD100
1
HDWPK-#8 SCREW PLUGS, 4X (EXTRAS)
TGD101
TGD102

PILOT HOLE
A
CLOCKWISE
ROTATE
INSERT
NUTS
ROTATE
CLOCKWISE
TGD200
9/17/2012
ASSEMBLY INSTRUCTIONS
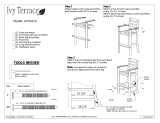
frame into the insert nuts
Description
the dowel screw attached to the arm
on the arm supports
TGD200, TGD201, TGD202
Qty.
Attach back of arm by threading
into the pilot hole until the arm is snug
Model:
4mm Hex Key (included)
__(2) ARM ASMB (LH/RH)
__(1) CHAIR
__(1) HARDWARE PACK
against the back leg.
Step 1
Step 2
Attach (A) bolts thru the seat
TOOLS NEEDED
ALLHARDWAREISCOATEDSTAINLESSSTEEL
TGD201
TGD202
HDWPK-#8 SCREW PLUGS, 4X (EXTRAS)
1
A -1/4-20 X 1-3/4 WAFER SHCS
4

A
B
Leg
B
Brace
C
A
C
Table Frame
Removable table plug
included in table.
Foot
Leg
C - 1/4-20 X 2-1/2 WAFER SHCS
9/17/2012
ASSEMBLY INSTRUCTIONS
8
Model: NCCT3772, NCT3772, NCRT3772, NCBT3772
Qty. Description
__(1) Hardware pack
__(1) Table top
__(8) Leg
__(4) Foot
__(4) Brace
ALL HARDWARE IS COATED STAINLESS STEEL
Step 1
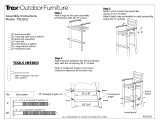
Attach feet to legs using (8) 2½" Chair bolts.
Step 2
Lay the table frame on a flat surface.
Attach the leg assemblies to the frame using
(16) .27x2½" screws - Do not tighten yet.
Step 4
Set table upright and tighten all bolts.
Step 3
Attach braces to the leg assemblies using
(8) .27x3" screws
TOOLS NEEDED
4mm T Handle HEX KEY: INCLUDED
88
B - .27 X 3 SOCKET WAFER A
16
A - .27 X 2-1/2 SOCKET WAFER A
/


