Page is loading ...

Before installing and using the camera, please read this manual carefully.
Be sure to keep it handy for future reference.
User Manual ver.: 03/20
n
stalling and using the camera, please read this manual carefully
.
t
o keep it hand
y
for future reference.
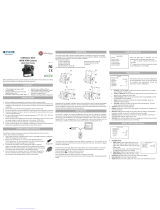
DWC-PB753WTW
Star-Light™ Pano 6MP
HD over Coax
™
bullet camera

Contents
Safety information
Features
Product and accessories
Parts names
Dimensions
03
08
09
10
11
Installation
Connecting the camera t
o monitors
Control board
Adjusting the camera's angle
12
14
14
16
APPENDIX
T
roubleshooting
Product Specifications
Limits and exclusions
Warranty
32
33
35
36
OSD MENU
Menu tree
OSD menu - Expos
ure
OSD menu - Color
OSD menu - Day and night
OSD menu - Function
OSD menu - Motion
OSD menu - Privacy
OSD menu - Setup
OS
D menu - Exit
17
19
22
23
24
25
27
29
31
INSTALLATION
INTRODUCTION
2

CAUTION
RISK OF ELECTRIC SHOCK.
DO NOT OPEN
This symbol indicates that dangerous voltage
consisng a risk of electric shock is present within
this unit.
This exclamaon point symbol is intended to alert the
user to the presence of important operang and
maintenance (servicing) instrucons in the literature
accompanying the appliance
To prevent damage which may result in fire or electric shock hazard, do not expose this appliance to
rain or moisture.
1. Be
sure to use only the standard adapter that is specified in the specificaon sheet.
Usi
ng any other adapter could cause fire, electrical shock, or damage to the product.
2.
Incorrectly connecng the power supply or replacing baery may cause explosion, fire, electric
shock, or damage to the product.
3. Do not conne
ct mulple cameras to a single adapter.
Excee
ding the capacity may cause abnormal heat generaon or fire.
4.
Securely plug the power cord into the power receptacle. Insecure connecon may cause fire.
5.
When installing the camera, fasten it securely and firmly.
A fal
ling camera may cause personal injury.
6.
Do not place conducve objects (e.g. screw drivers, coins, metal things, etc.) or containers filled
with water on top of the camera. Doing so may cause personal injury due to fire, electric shock, or
fal
ling objects.
TO REDUCE THE RISK OF ELECTRIC SHOCK, DO NOT REMOVE COVER (OR BACK) NO USER
SERVICEABLE PARTS INSIDE. REFER SERVICING TO QUALIFIED SERVICE PERSONNEL.
CAUTION
:
WARNING
WARNING
Safety Informaon

7. Do not install the unit in humid, dusty, or sooty locaons.
Doing so may cause fire
or electric shock.
8.
If any unusual sme
lls or smoke come from the unit, stop using the product.
In such case
, immediately disconnect the power source and contact the service cente
r.
Connued use
in such a condion may cause fire or electric shock.
9. If this product fails to operate normally, contact the nearest service center.
N
ever disassemble or modify this product in any way.
10. When cleaning, do not spray water directly onto parts of the product.
Doing so may
cause fire or electric shock.
Operang
.
Before using, make sure power supply and all other parts are properly connected.
.
While operang, if any abnormal condion or malfuncon is observed, stop using the camera
immediately and contact your dealer.
Handling
.
Do not disassemble or tamper with parts inside the camera.
.
Do not drop the camera or subject it to shock or vibraon as this can damage the camera.
.
Clean the clear Lens cover with extra care. Scratches and dust can ruin the quality of the camera image.
Installaon and Storage
.
Do not install the camera in areas of extreme temperature, exceeding the allowed range.
.
Avoid installing in humid or dusty environments.
.
Avoid installing in places where radiaon is present.
.
Avoid installing in places where there are strong magnec fields and electric signals.
.
Avoid installing in places where the camera would be subject to strong vibraons.
.
Never expose the camera to rain or water.
PRECAUTION
Safety Informaon

1. Read these instrucons.
-
All these safety and operang instrucons should be read before the product is installed or operated.
2. K
eep these instrucons.
- The safety, ope
rang and use instrucons should be retained for future reference.
3. Hee
d all warnings.
- All warnings on the product and in the ope
rang instrucons should be adhered to.
4. Follow all instrucons.
- All operang and use
instrucons should be followed.
5. Do not use
this device near water.
- For example
: near a bath tub, wash bowl, kitchen sink, laundry tub, in a wet basement, near a
swimming pool,
etc.
6. Cle
an only with dry cloth.
- Unplug this product from the wall outlet before cleaning. Do not use liquid cleaners.
7. Do not block any venlaon openings. Install in accordance with the manufacturer’s instrucons.
- Slots and openings in the cabinet are provided for venlaon, to ensure reliable operaon of the
product, and to protect it from over-heang. The openings should never be blocked by placing the
product on bed, sofa, rug or other similar surface. This product should not be placed in a built-in
installaon such as a bookcase or rack unless proper venlaon is provided and the manufacturer’s
unstrucons have been adhere to.
8. Do not install near any heat sources such as radiators, heat registers, or other apparatus
(including amplifie
rs) that produce heat.
9. Do not de
feat the safety purpose of the polarized or grounding-type plug. A polarized plug has
two blade
s with one wider than the other. A grounding type plug has two blades and a third
grounding prong. The wide blade or the third prong are
provided for your safety. If the provided
plug doe
s not fit into your outlet, consult an electrician for replacement of the obsolete outlet.
10. Protect the power cord from being walked on or pinched parcularly at plugs, convenience
re
ceptacles, and the point where they exit from the apparatus.
Important Safety Instrucons

11. Only use aachments/accessories specified by the manufacturer.
12. Use only with cart, stand, tripod, bracket, or table specified by the
manufacturer, or sold with the apparatus.
When a cart is used, use cauon when moving the cart / apparatus
combinaon to avoid injury from p-over.
13. Unplug this apparatus during lightning storms or when unused for long periods of me.
14. Refer all servicing to qualified service personnel. Servicing is required when the apparatus has been
damaged in any way, such as power supply cord or plug is damaged, liquid has been spilled or objects
have fallen into the apparatus, the apparatus has been exposed to rain or moisture, does not operate
normally, or has been dropped.
Important Safety Instrucons

1. When this crossed-out wheel bin symbol is aached to a product it means
the product is covered by the European Direcve 2002/96/EC.
2. All electrical and electronic products should be disposed of separately form
the municipal waste stream stream in accordance to laws designated by
the government or the local authories.
3. The correct disposal of your old appliance will help prevent potenal negave
consequences for the environment and human health.
4. For more detailed informaon about disposal of your old appliance, please
contact your city office, waste disposal service or the shop where you
purchased the product.
This equipment has been tested and found to comply with the limits for a Class A digital device,
pursuant to part 15 of the FCC Rules.
These limits are designed to provide reasonable protecon against harmful interference when
the equipment is operated in a commercial environment.
This equipment generates, uses, and can radiate radio frequency energy and, if not installed
and used in accordance with the instrucon manual, may cause harmful interference to radio
communicaons.
Operaon of this equipment in a residenal area is likely to cause harmful interference in which
case the user will be required to correct the interferenece at his own expense.
Disposal of Old Appliances

Analog HD over Coax® technology with HD-Analog signal support
Star-Light™ super low light technology
3x 2.1MP/1080p 1/3" image sensor at real-time 30fps
6MP 180° panoramic camera
3x 4.3mm fixed lenses
Digital wide dynamic range (D-WDR)
OSD control via coaxial (UTC)
Smart DNR™ 3D digital noise reduction
True day/night mechanical IR cut filter
De-Fog™ extreme weather image compensation
Highlight masking exposure (HME)
Auto sensing 24VAC/12VDC with line lock
Easy icon driven OSD menu with built-in joystick
Programmable Privacy Zones
Auto gain control (AGC)
Backlight compensation (BLC)
Dynamic range compressor (DRC) reveals low light detail
Auto white balance (AWB)
IP66 environmental-rated dust-tight and water-resistant
5 year warranty
█
█
█
█
█
█
█
█
█
█
█
█
█
█
█
█
█
█
█
█
Features

Camera
Cables
Test
video cable
Quick setup
guide
Mounting template
Screws and
plastic anchors-4pcs
Product & Accessories
NOTE :
The ‘ test video cable ’ is used to test the camera by connecting to a portable display.
Please check if all the camera and accessories are included in the package.
Sunshield and
Sunshield screws
Torque wrench

Part name
Con cap
Lens
Sunshield
Sunshield screws
Ball neck bracket
Pan/tilt stoper screw
RS485
Alarm
HD Universal 1CH
HD Universal 2CH
HD Universal 3CH
HD Universal 4CH
EX-LED
IR LED cable
Terminal block

Unit: inches (mm)
Dimension
1.56"
(116mm)
3.79"
(96.5mm)
9.8" ~ 10.62" (250 ~ 270mm)
6.07" (154.2mm)
9.76" (248mm)
3.07" (78mm)
3.8" (96.7
mm)

Before installing your camera, you have to read the following cautions.
1.
You have to check whether the location can bear five times of the weight of your camera.
2. Don’t let the cable to be caught in improper place or the electric line cover to be
damaged. Otherwise it may cause a breakdown or fire.
3. When installing your camera, don’t allow any person to approach the installation site.
If you have any valuable things under the place, move them away.
Using the Template sheet, make the cabling hole on the wall/ceiling.
Connect the cables respecvely.
Fix the camera on the wall/ceiling by screw provided.
NOTE
:
Loosen the Pan/Tile stoper screw a lile before fixing the camera.
Installaon - Instrucons
1
2
3
By using the test video cable, check the screen during installaon.
4
Aach the sunshield to the boom case by using sunshield screws.
5

Installaon - Cabling
1
Use the diagram below to connect the camera to external devices:
Power : connect the camera to a proper power supply.
HD Universal Output 4 : Connect all 3 of the camera’s lenses as a single output to a DVR
supporng HD Universal signal. On the DVR side, the camera’s full panoramic view will
appear on a single channel.
2
5
4
~ HD Universal BNC Outputs 1~3 : Connect each of the camera’s lenses as a separate
output to a DVR supporng HD Universal signal. On the DVR side, each lens will be set
as a different channel.
1
Power
7
RS485
8
LED
6
ALARM
2
HD Universal 1CH
3
HD Universal 2CH
4
HD Universal 3CH
5
HD Universal 4CH

Use the diagram below to connect the camera to external devices:
Installaon - Cabling
RS485 : Connect the camera to a controller or the DVR using RS485.
1) WHITE Cable : RS485 -
2) BLACK Cable : RS485 +
7
LED : Connect the camera to a IR Sunshield EX-LED Cable.
Set LED On/Off when connected to camera’s LED cable.
8
1# DOUT +
1# DOUT -
2# DOUT +
2# DOUT -
3# DOUT +
3# DOUT -
ORANGE
RED
YELLOW
BLUE
GREEN
GRAY
Alarm
6

12VDC/24VAC
Connecng to monitors
Use the diagram below to connect to a Monitor or CRT Monitor properly.
Monitor
UNIVERSAL DVR
Test Video Output
Channel Selecon Switch
COAX
- Power Connecon - 12VDC/24VAC Dual Voltage
(Auto Polarity Detecon and Protecon)
- All cameras are equipped with a test video output for on-site configuraon.
NOTE
:
Test Video Output will display video for 60 seconds.

Control Board
- Remove the con cap by rotang it counter-clockwise.
- Use the Joysck to control the camera’s OSD opons.
Channel Selecon Switch
Test Video Output
Hold
5sec
R
L
HD-A
HD-TVI
- OSD Joysck : The funcon seng and video output can be adjusted with
OSD joysck. (default : HD-A)
Image Mode
Switches to HD-TVI mode when press OSD Joysck to le 5sec or longer.
Switches to HD-A mode when press OSD Joysck to right 5sec or longer.

Adjusng the Camera angle
Warning:
- Do not rotate more than 360
- Do not unnecessarily twist too many times.
90˚
360˚
360˚

OSD Menu Tree
EXPOSURE DAY & NIGHT
FUNCTION
COLOR
LENS
BRIGHTNESS / SHUTTER /
FOCUS ADJ.
BACKLIGHT OFF / HME / BLC / WDR
DRC
OFF / LOW / MIDDLE / HIGH
DEFOG
OFF / ON
AGC 0 ~ 10
STARLIGHT OFF / x2 ~ x32
3D DNR
OFF / LOW / MIDDLE / HIGH
EXIT JUMP SAVE & EXIT / EXIT
MODE AUTO / COLOR / BW
CDS THRES 0 ~ 20
CDS MARGIN 0 ~ 20
EXIT JUMP SAVE & EXIT / EXIT
SHARPNESS 0 ~ 10
EXIT JUMP SAVE & EXIT / EXIT
WHITE BAL.
AUTO / AUTO-EX /
PRESET / MANUAL
COLOR GAIN 0 ~ 20
EXIT JUMP SAVE & EXIT / EXIT
EXPO
RGB
FUNC
D&N
MOTION
DET. WINDOWS
SENSITIVITY 0 ~ 10
MOTION OSD OFF / ON
TEXT ALARM OFF / ON
EXIT JUMP SAVE & EXIT / EXIT
MOTI

OSD Menu Tree
SETUP
EXIT
4th BNC OUTPUT PANORAMIC OSD MENU
PRIVACY
CAM ID
1 ~ 250
CAM TITLE OFF / ON
FREQUENCY 50Hz / 60Hz
LANGUAGE ENG / CHN / CHN(S) / JPN
DEFECT DET ON
INITIAL ON
EXIT JUMP SAVE & EXIT / EXIT
SAVE & EXT
EXIT
MOTION OFF / ON
PATROL OFF / ON
STITCH
FIX / CAM1+ / CAM2+ /
CAM3+
EXIT
BOX OFF / ON
POLYGON OFF / ON
EXIT JUMP SAVE & EXIT / EXIT
PRIV
SET
EXIT

How to access the Camera’s OSD Menus
1
To access each sensor’s OSD menus select one of the following options :
The camera has four (4) BNC outputs, each supporting UTC (Up the Coax) communication.
When the camera is connected to a DVR supporting UTC communication, you can access
the camera’s OSD menu directly from the DVR.
2
The camera supports RS485 communication, allowing to control the camera remotely.
3
In the camera’s external control board, there is a switch next to the joystick controller.
The switch determins which of the three (3) sensor will be displayed in the test BNC output.
When selected, the selected sensor’s display will appear in the Test video out for 60 sec.
The camera has three separate sensors, each with its own OSD menu and settings.
When adjusting the camera’s settings, each lens/sensor will have their own set of values and settings
and will be set separately.
In addition, the camera offers a 4 BNC output of a combined 180˚view as a single camera output. This
output has an additional Panoramic OSD menu with special settings including sticthing and motion
and patrol setup.
UP
R
D
L
NOTE : Option 3 does not support access to the fourth Panoramic OSD menu. Please use UTC or RS485
cabling to access those options.
/