Page is loading ...

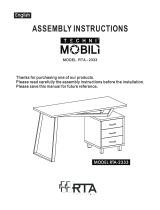
MODEL RTA-2012
Thanks for purchasing one of our products.
Please read carefully the assembly instructions before the installation.
Please save this manual for future reference.
ASSEMBLY INSTRUCTIONS
P.1
P.1

RTA-2012
P.2
P.2
Main Structure,
x2
Crossbars,
X1 SET
Horizontal Tube,
x2
Tabletop,
x1
Studs,
x4
M6x40,
x4
M6x15,
x4
M6x30,
x6
Allen Wrench,
x1
⚠ BEFORE YOU START THE ASSEMBLY, PLEASE READ THE
FOLLOWING TIPS AND WARNINGS.
☛ Do a quick inventory to make sure the product contains all the parts and hardware.
☛ Missing, damaged and defective parts can be replaced at no cost to you. Please
refer to the CONTACT and the WARRANTY cards included with the product.
☛ If during assembly you find an issue or need clarification, please contact our Customer
Service for assistance. Please refer to the CONTACT card included with the product.
☛ On each step read the instructions and analyze the illustrations thoroughly before
proceeding to do the assembly.
☛ To avoid misalignments, always leave the screws loose and tighten them until all pieces
are positioned correctly.
☛ Do not overtighten or force the screws as they might break, strip, damage the threads
of the holes or get stuck inside the part.
☛ Make sure you understand which hardware will be used on each step. Using the wrong
size of screw, bolt or pin might cause damage to the part in which it is being used.

RTA-2012
P.3
P.3
Assemble the horizontal tubes (3) at the top of the main structures (1) using
screws (B), the crossbars (2) at the back using screws (C), and the studs (A)
at the bottom as shown.
Assemble the tabletop (4) to the horizontal bars using screws (D) as shown.
Proceed to tighten all the screws.

☛ Do not expose the surfaces to direct sunlight or to extreme environmental conditions. Damages
caused by this kind of exposure is not covered by the product’s warranty.
☛ Clean the surfaces preferable with a soft cloth damped with a solution of mild soap and water, then
dry with a clean towel. Damages caused by the use of solvents or abrasive materials are not
covered by the product’s warranty.
☛ If you decide to apply a cleaning agent, first test on a small area of the unit that is hidden from view,
for example, underneath the tabletop.
☛ Do not allow small children to climb over the unit or play underneath.
☛ Before moving the unit within the same room or to an adjacent room:
a) Remove all objects from the drawers and shelves that are heavy or might fall off.
b) The unit must be handled by at least 2 persons.
c) Use both of your hands and bend your knees, not your backs.
☛ Making any modification to the unit will void the warranty on it.
RTA-2012
P.4
P.4
⚠ AFTER THE ASSEMBLY IS DONE, PLEASE READ THE
FOLLOWING WARNINGS FOR CARE AND MAINTENANCE:
100 Lbs.
/


