7
OFF
ALARM
DEMO
HRS
POWER FAILHIGH TEMP
DOOR AJAR
ºC
REFRIGERATOR
FREEZER
ºF
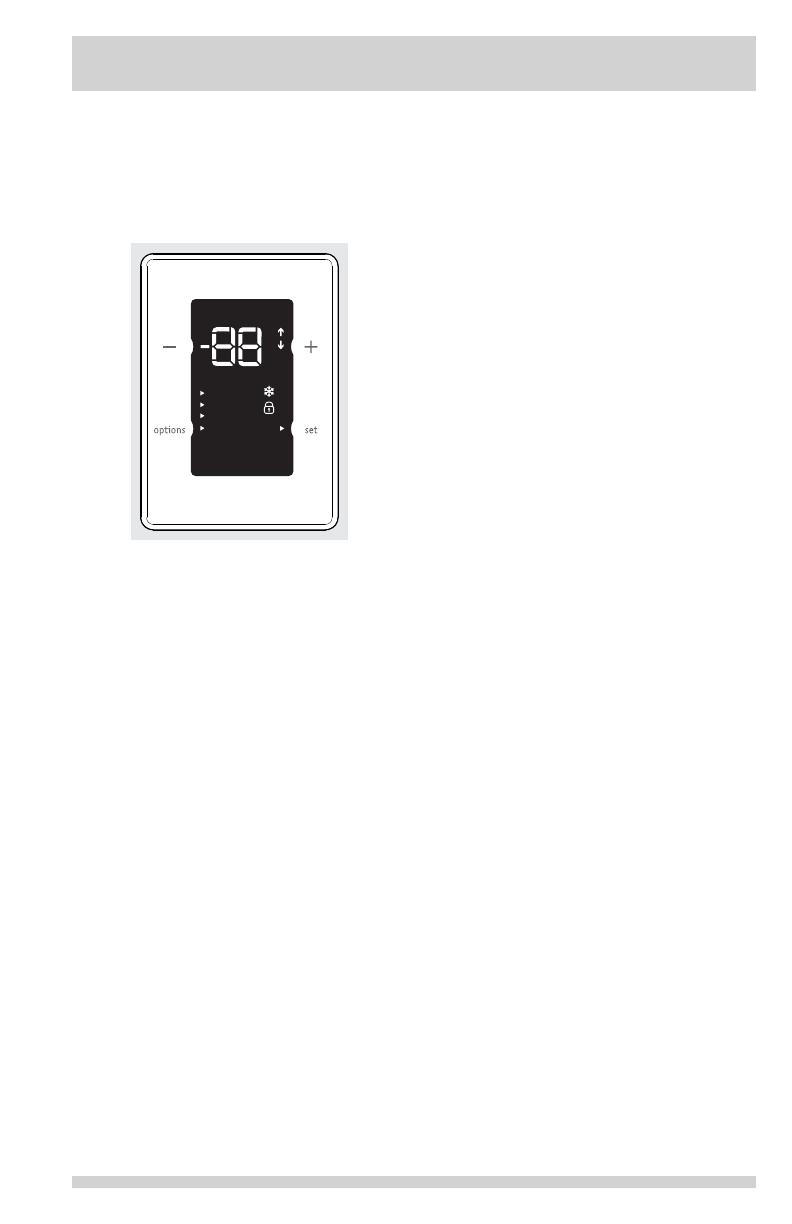
quick freeze
power off
exit
control lock
PRESS
& HOLD
Electronic Temp Alarm
If a malfunction causes an unsafe temperature
inside the freezer, the high temp will display on
the control panel and the alarm will sound. To
silence the alarm, press the set button next to
the “alarm off” indicator on the display or any
key on the control panel.
Quick Freeze
Quick freeze can be enabled by entering into
the options menu on the control panel and by
pressing the “set” button once the indicator
is highlighted next to “quick freeze”. The unit
will be in quick freeze mode for 72 hours and
will show a snowake indicator on the control
panel to indicate that it is in quick freeze
mode. To exit quick freeze mode, enter into
the options menu on the control panel and
press the “set” button once the indicator is
highlighted next to “quick freeze”, after which
the snowake indicator will be removed from
the control panel. Or quick freeze will end
automatically after 72 hours.
Control Lock
Control lock can be enabled by entering into
the options menu on the control panel and by
pressing the “set” button once the indicator
is highlighted next to “control lock”. A control
lock icon will be displayed on the control
panel to indicate that the control panel has
been locked. To unlock, press and hold the
set button for 3 seconds, after which the lock
indicator will be removed from the control
panel and the control panel has been unlocked.
Temperature Conversion
Press and hold both temperature buttons ("+"
and "-") to toggle between °F and °C.
SETTING THE
TEMPERATURE CONTROL
Power Off
To shut cooling off to the unit and to turn off
the interior lights of the unit, enter into the
options menu on the control panel and press
and hold the “set” button for 3 seconds once
the indicator is highlighted next to “power
off”. “Power off” will be displayed on the
control panel to indicate that the unit is in the
powered off mode. To turn power back on to
the unit, press and hold the “set” key for 3
seconds. Then the power off indicator will be
removed from the control panel and the set
point of the unit will be displayed again.
Power Fail
If your unit has lost power, the control panel
will display “power fail” and the number of
hours that your unit has been without power
up to a maximum of 48 hrs. The alarm will
sound until the condition is acknowledged by
pressing the set button or any other button on
the control panel.
Door Ajar
If your door has been left open for more 5
minutes, the control panel will display “door
ajar” and will sound an alarm until the door
has been closed or any button is pressed on
the control panel. If a button on the control
panel has been pressed but the door has not
been closed, “door ajar” will continue to be
displayed on the control panel until the door
has been closed.
Sabbath Mode
The Sabbath mode is a feature that disables
portions of the appliance and its controls in
accordance with observance of the weekly
Sabbath and religious holidays within the
Orthodox Jewish community.
To turn Sabbath mode on, press and hold
the “Options” button and “+” button for 5
seconds, after which “Sb” will be displayed on
the control panel indicating that the unit is in
Sabbath mode. To exit Sabbath mode, press
and hold the “Options” button and “+” button
for 5 seconds, after which the display will
return to displaying the set point of the unit.
In the Sabbath mode, the High Temp alarm
is active for health reasons. If a high
temperature alarm is activated during this
time, for example, due to a door left ajar, the
alarm will sound for about 10 minutes. The
alarm will then silence on its own and a “high
temp” icon will be displayed on the control
panel. The high temp icon will continue to
display even if the door is closed until Sabbath
mode is exited and the icon reset.
OPTIONAL FEATURES


