7
TEMPERATURE CONTROLs
La temperatura predeterminada para el enfriador el enfriador de bebidas es de 41 ºF (5 ºC). La temperatura luego de una falla
de alimentación será la temperatura establecida antes de la falla de alimentación.
Para prolongar la vida del compresor, espere al menos 5 minutos antes de reiniciar el enfriador de después de la falla de
alimentación.
Si se muestra “E” y “F”, comuníquese con el personal de servicio local para su reparación.
Si la temperatura en el enfriador es demasiado baja, se mostrará “L”.
Si la temperatura en el enfriador es demasiado alta, la pantalla mostrará “H” y parpadeará. Bajo este estado, el zumbador
realizará un zumbido durante 30 segundos. Un minuto más tarde, el zumbador continuará zumbando durante los próximos 30
segundos. Después de tres veces, la alarma no zumbará más. Puede pulsar cualquier tecla para cancelar la alarma de sonido.
Si almacena demasiadas botellas en el enfriador, puede provocar que la temperatura en el enfriador aumente temporalmente.
Press this button once to increase temperature 1° F/C.
Press this button once to decrease temperature 1° F/C.
Pulse este botón una vez para aumentar la temperatura en 1° F o C.
Pulse este botón una vez para disminuir la temperatura en 1° F o C.
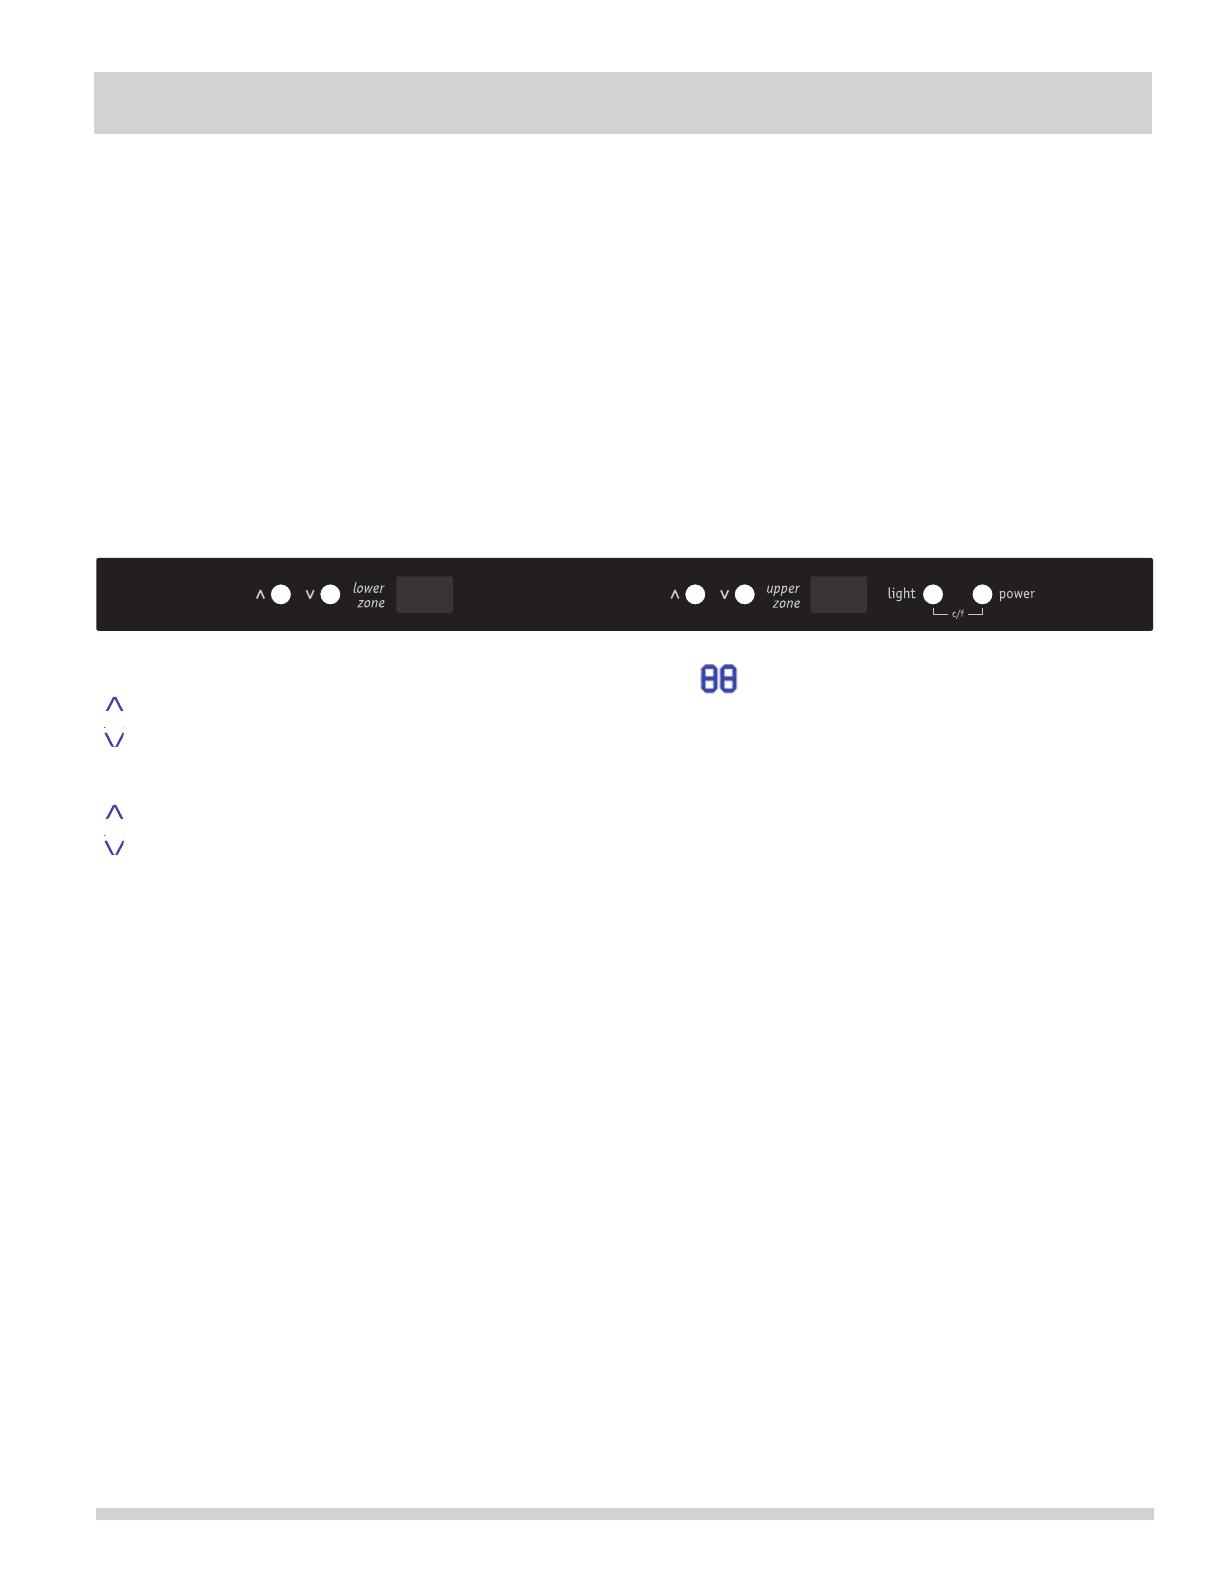
Indication of Temperature in Lower Chamber
: Press this button once and the temperature increase 1°C.
: Press this button once and the temperature decrease 1°C.
Indication of Temperature in Upper Chamber
: Press this button once and the temperature increase 1°C.
: Press this button once and the temperature decrease 1°C.
: Temperature display.
Light: Lighting button for LED lamp; it controls the on/off of lamp.
Power: On/off button used to turn on/off all load.
Press Light and Power together for 2 seconds and you can convert between
fahrenheit temperature and Celsius temperature.
Notice!
z The default temperature is 10/10°C, and the temperature after power
failure will be the temperature set before the power failure.
z To elongate the service life of compressor, please wait for at least 5
minutes before the wine cooler is restarted after power failure.
z Failure display
z If there is failure on the sensor, the screen may display failure code, such
as: E and F. When the screen displays the above-mentioned errors, please
do not disassemble it for check by yourself. You should contact local
after-sales service personnel for repair.
z If the temperature in the cooler is too low, it will display “L”.
When the temperature in the cooler is too high, the screen will display “H”
and will flash; under this state, the buzzer will buzz until 30 seconds; one
minute later, the buzzer will continue to give alarm in the next 30 seconds; after
the alarm is given for three times, it will not give alarm any more. You can
press any key to cancel sound alarm.
z When you put a lot of wines together in the cooler, the temperature in the
cooler may rise temporarily.
- 10 -
este botón ENCIENDE y APAGA la luz.
este botón ENCIENDE y APAGA la
alimentación.
Pulse los botones de y al
mismo tiempo para cambiar entre temperaturas
Fahrenheit y Celsius.
La temperatura predenida es 46°F (8°C) para la zona superior y 59°F (15°C) para zona más baja. La temperatura luego de una
falla de alimentación será la temperatura establecida antes de la falla de alimentación.
Para prolongar la vida del compresor, espere al menos 5 minutos antes de reiniciar el enfriador de después de la falla de
alimentación.
Si se muestra “E” y “F”, comuníquese con el personal de servicio local para su reparación.
Si la temperatura en el enfriador es demasiado baja, se mostrará “L”.
Si la temperatura en el enfriador es demasiado alta, la pantalla mostrará “H” y parpadeará. Bajo este estado, el zumbador
realizará un zumbido durante 30 segundos. Un minuto más tarde, el zumbador continuará zumbando durante los próximos 30
segundos. Después de tres veces, la alarma no zumbará más. Puede pulsar cualquier tecla para cancelar la alarma de sonido.
Si almacena demasiadas botellas en el enfriador, puede provocar que la temperatura en el enfriador aumente temporalmente.
El rango de temperatura MÍN. y MÁX. es de 41° a 64°F (5° a 18° C).
El refrigerador para bebidas puede ser ajustado usando los botones de control de temperatura (echas hacia arriba y hacia
abajo).


