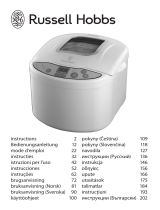
Princess 152006152007 Owner's manual

Category
Bread making machines
Type
Owner's manual

This manual is also suitable for

152006 Princess
Breadmaker Wake Up
Nederlands 4
English 13
Français 22
Deutsch 31
Español 41
Italiano 50
Svenska 60
Dansk 69
Norsk 78
Suomi 86
Português 95
 105
 123
13
EN
Congratulations!
You have purchased a Princess product.
Our aim is to provide quality products with
a tasteful design and at an affordable price.
We hope that you will enjoy this product for
many years.
Description (fig. A)
Your 152006 Princess bread maker has been
designed for making bread. The appliance is
suitable for indoor use only. The appliance is
suitable for domestic use only.
1. Operation panel
2. Lid
3. Lid handle
4. Viewing window
5. Baking compartment
6. Bread pan
7. Bread pan handle
8. Kneading paddle
9. Measuring cup
10a. Measuring spoon (1 tbsp.)
10b. Measuring spoon (1 tsp.)
11. Hook
Operation panel (fig. B)
12. START/STOP button
13. MENU button
14. COLOR button
15. LOAF SIZE button
16. TIME + button
17. TIME - button
18. On/off indicator
19. Display
20. Baking mode indicator
21. Baking time indicator
22. Roast colour indicator
23. Loaf size indicator
Initial use
Preparation:
- Clean the appliance. Refer to the section
"Cleaning and maintenance".
- Clean the accessories. Refer to the section
"Cleaning and maintenance".
Before you proceed, we need you to pay
attention to the following notes:
- Make sure that there is sufficient space
around the appliance to allow heat to
escape and provide sufficient ventilation.
Place the appliance on a stable and flat •
surface.
Insert the mains plug into the wall socket.•
Set the following baking mode: BASIC.•
Start the baking process. The appliance •
starts heating.
After 10 minutes, remove the mains plug •
from the wall socket and allow the appliance
to cool down completely.
Note: If you switch on the appliance for the
first time, the appliance may emit a little
smoke and a characteristic smell for a short
period. This is normal operation.
Use
Setting the baking mode (fig. B)
The baking mode can be set using the MENU
button (13). The baking mode indicator (20)
shows the baking mode.
Refer to the table below to set the correct •
baking mode.
Repeatedly press the MENU button (13) to •
set the baking mode. The appliance will
beep each time you press the button.
Note: If the last setting has been reached, it is
still possible to adjust the setting. Press the
MENU button (13) to go back to the first setting.
Baking
mode Name Application
1 BASIC White and mixed breads mainly
made from wheat flour or rye
flour. The bread has a compact
consistency. Use normal yeast for
the baking mode.
2 FRENCH Light breads made from fine flour.
The bread is usually fluffy and has
a crispy crust. The baking mode is
not suitable for baking recipes
requiring butter, margarine or milk.
3 WHOLE WHEAT Heavy breads with heavy varieties
of flour requiring a longer phase
of kneading and rising. The bread
has a compact consistency.
14
EN
4 QUICK Kneading, rising and baking bread
in less time than when using the
baking mode "BASIC". The bread is
usually small and has a dense
texture. Use baking powder
instead of baking yeast.
5 SWEET Breads with sweet additives
(sugar, chocolate, dry fruits or
fruit juices). The bread has an airy
consistency and a light texture.
6 ULTRA FAST-I Kneading, rising and baking a loaf
of bread (1.5LB) in a shortest time.
The bread is usually smaller and
coarser than when using the baking
mode "QUICK". Use quick-rise
yeast for the baking mode.
7 ULTRA FAST-II Kneading, rising and baking a loaf
of bread (2.0LB) in a shortest time.
The bread is usually smaller and
coarser than when using the baking
mode "QUICK". Use quick-rise
yeast for the baking mode.
8 DOUGH Kneading and rising, without
baking. Making bread rolls, pizza,
steamed bread, etc.
9 JAM Making jam and marmalade.
10 CAKE Kneading, rising and baking cakes.
Use baking powder instead of
baking yeast.
11 SANDWICH Kneading, rising and baking
sandwiches. The bread has a light
texture and a thin crust.
12 BAKE Additional baking of breads that
are too light or not baked through,
without kneading or rising.
13 GLUTEN FREE * Gluten-free dough is usually
wetter than normal dough.
Do not over-mix or over-knead
gluten-free dough. Gluten-free
dough must rise only once and
requires a longer baking time than
normal dough. Add additional
ingredients to the basic ingredients
at the very beginning of the
baking process.
14 KNEAD Kneading, without rising and
baking.
15 YOGURT Rising, without kneading and
baking. Available times: 6 hours or
8 hours. Press the TIME + button
(16) or the TIME - button (17) to
select the time. Press the START/
STOP button (12) to set the time.
* A gluten-free diet is recommended for
persons suffering from celiac disease (gluten
enteropathy) and wheat allergy. The gluten-
free diet is completely free of ingredients
derived from gluten-containing cereals (wheat,
rye, barley, etc.). The gluten-free diet is also
completely free of gluten as a food additive
in the form of a flavoring, stabilising or
thickening agent. Additionally, some gluten-
free diets exclude oats.
Setting the roast colour (fig. B)
The roast colour can be set using the COLOR
button (14). The roast colour indicator (22)
shows the roast colour: LIGHT / MEDIUM /
DARK.
Note: The roast colour can not be set in the
following baking modes: DOUGH / JAM /
CAKE / SANDWICH / BAKE / KNEAD / YOGURT.
Repeatedly press the COLOR button (14) to •
set the roast colour. The appliance will
beep each time you press the button.
Note: If the last setting has been reached, it is
still possible to adjust the setting. Press the
COLOR button (14) to go back to the first setting.
Setting the loaf size (fig. B)
The loaf size can be set using the LOAF SIZE
button (15). The loaf size indicator (23) shows
the loaf size: 1.5LB / 2.0LB.
Note: The loaf size can only be set in the
following baking modes: BASIC / FRENCH /
WHOLE WHEAT / SWEET / SANDWICH /
GLUTEN FREE.
Repeatedly press the LOAF SIZE button •
(15) to set the loaf size. The appliance will
beep each time you press the button.
Note: If the last setting has been reached, it is
still possible to adjust the setting. Press the
LOAF SIZE button (15) to go back to the first
setting.
Delaying the baking process (fig. B)
The appliance has a delay start function (max.
13 hours) which makes it possible to program
the time for starting the baking process.
15
EN
The baking process can be delayed using the
TIME + button (16) and the TIME - button (17).
The baking time indicator (21) shows the
baking time.
Before you proceed, we need you to pay
attention to the following notes:
- Do not delay the baking process for recipes
with perishable ingredients (eggs, cheese,
fresh milk, etc.).
Note: The baking process can only be delayed
in the following baking modes: BASIC / FRENCH /
WHOLE WHEAT / QUICK / SWEET / DOUGH /
CAKE / SANDWICH / BAKE / GLUTEN FREE.
Press the TIME + button (16) to increase •
the time by 10 minutes. Keep the button
pressed to accelerate the process.
Press the TIME - button (17) to decrease •
the time by 10 minutes. Keep the button
pressed to accelerate the process.
Example:
- The current time is 7:30 p.m.
- The delayed finish time is 8 a.m.
- The difference between the delayed finish
time and the current time is 12.5 hours.
Press the TIME + button (16) or the TIME •
- button (17) until the baking time
indicator (21) shows "12:30".
Starting and stopping the baking
process (fig. B)
The START/STOP button (12) must be used to
start and stop the baking process.
If the baking process is set, press the •
START/STOP button (12) to start the process.
The on/off indicator (18) comes on.
If the baking process is running, press the •
START/STOP button (12) until a beep
sounds to stop the process. The on/off
indicator (18) goes off.
Hints for use (fig. A - C)
Before you proceed, we need you to pay
attention to the following notes:
- Before assembly or disassembly, remove
the mains plug from the wall socket and
wait until the appliance has cooled down.
- Allow the bread pan to cool down before
removing the bread.
Mount the kneading paddle (8) onto the •
spindle (24) into the bottom of the bread
pan (6).
Put the ingredients into the bread pan (6) •
in the required order. If necessary, use the
measuring cup (10) or the measuring
spoon (11) to add the ingredients.
Open the lid (2) using the lid handle (3).•
Mount the bread pan (6) into the bottom •
of the baking compartment (5). Lock the
bread pan (6) by turning it clockwise.
Close the lid (5) using the lid handle (3).•
Insert the mains plug into the wall socket. •
The appliance will beep. The display (19)
comes on. The baking mode indicator (20)
shows "1". The baking time indicator (21)
shows "3:00". The roast colour indicator
(22) indicates "MEDIUM". The loaf size
indicator (23) indicates "2.0LB".
Set the baking mode using the MENU •
button (13).
Set the roast colour using the COLOR •
button (14).
If necessary, delay the baking process using •
the TIME + button (16) and the TIME -
button (17).
Press the START/STOP button (12) to start •
the process. The on/off indicator (18)
comes on. The display (19) counts down
during the process.
Regularly look through the viewing window •
(4) to check whether the food is baked and
to make sure that it does not burn.
Note: In the following baking modes, beeps
will sound during the baking process to prompt
you to add ingredients: BASIC / FRENCH /
WHOLE WHEAT / CAKE / SANDWICH /
GLUTEN FREE.
Note: Steam can escape through the lid during
the baking process. This is normal operation.
If the process is completed, ten beeps will •
sound to indicate the end of the process.
The appliance will keep the food warm for •
a maximum of 60 minutes. A beep will
sound to indicate the end of the process.
The on/off indicator (18) goes off.
16
EN
Note: The appliance will not keep the food
warm in the following baking modes: DOUGH /
JAM / KNEAD / YOGURT. If the process is
completed, a beep will sound to indicate the
end of the process. The on/off indicator (18)
goes off.
Before you proceed, we need you to pay
attention to the following notes:
- Use oven gloves to remove the bread pan
from the baking compartment and the
bread from the bread pan. The bread pan
and the bread become very hot during use.
Unlock the bread pan (6) by turning it •
counterclockwise. Remove the bread pan
(6) from the baking compartment (5) using
the bread pan handle (7).
Remove the bread from the bread pan (6). •
If necessary, use a rubber or plastic spatula.
Note:
- If the kneading paddle remains in the bread
pan, fill the bread pan with hot water to
remove the kneading paddle. Do not use
sharp or metal objects to remove the
kneading paddle.
- If the kneading paddle remains in the bread,
use the hook (11) to remove the kneading
paddle. Do not use sharp or metal objects
to remove the kneading paddle.
Remove the mains plug from the wall •
socket. The display (19) goes off.
Allow the appliance to cool down •
completely.
General tips
Make sure that the ingredients are of good •
quality and at room temperature.
Place the appliance on a stable and flat •
surface.
If the baking compartment is still warm, •
allow it to cool down completely before
use.
Put the ingredients into the bread pan in •
the required order:
- Put the liquid ingredients into the bread
pan.
- Put a small amount of flour into the
bread pan.
- Put the solid ingredients into the bread
pan.
- Put the rest of the flour into the bread
pan. Make sure that all solid ingredients
are covered by the flour.
- Make a small indentation on one side of
the flour. Pour the baking yeast or the
baking powder into the indentation.
Make sure that the baking yeast or the
baking powder does not come into
contact with salt or liquid ingredients.
Preferably use bread-making flour. If you •
use heavy flour (wheat flour, rye flour, corn
flour, etc.), the bread will rise less than if
you use light flour. Use the correct amount
of flour. If necessary, use a kitchen scale to
measure the amount of flour.
Use the correct amount of baking yeast. •
Use dried active baking yeast instead of
baking powder. If you use fresh yeast, use
thrice more yeast than if you use dried
yeast and solve the yeast in a small amount
of lukewarm water. Make sure that the
baking yeast does not come into contact
with water, milk, salt, or sugar.
Use lukewarm water. If possible, use tap •
water. If you use eggs, break the eggs and
add them to the water.
If you use milk, use fresh milk or milk •
powder. If you use milk powder, add the
required amount of water to the milk
powder. If you want to add water to the
fresh milk, the total amount of milk and
water must be equal to the required
amount for the recipe.
If you use sugar, preferably use white •
sugar, brown sugar, or honey. Do not use
refined sugar or sugar cubes.
If you use salt, the yeast will rise better and •
the bread will have more taste.
If you use butter or oil, the bread will •
become softer and have more taste. If you
use butter, cut the butter into pieces or
allow it to become soft.
Keep the lid closed during the baking •
process.
If the baking process is completed, use •
oven gloves to remove the bread pan from
the baking compartment and the bread
from the bread pan.
17
EN
Allow the bread to cool down before •
cutting the bread into slices. If you want to
eat the bread when it is still warm, it is
recommended to cut the bread into slices
of 2.5 cm.
Use a serrated knife or an electric knife to •
cut the bread into slices.
Keep the bread in an hermetically sealed •
container to keep the bread fresh as long
as possible (approximately 2 days). If the
bread contains eggs, the bread must be
consumed the same day. If the bread
contains neither butter nor oil, the bread
must be consumed the same day. Do not
keep the bread in the refrigerator.
If you want to keep the bread in the •
freezer, put the bread into a freezing bag
before putting it into the freezer.
Memory function
The appliance is equipped with a memory
function. If the power supply is interrupted,
the baking process will be continued
automatically after 10 minutes, even without
pressing the START/STOP button (12).
Before you proceed, we need you to pay
attention to the following notes:
- If the power supply is interrupted for more
than 10 minutes, the memory function will
not work. Remove the old ingredients from
the bread pan (6). (Do not use the old
ingredients for other cooking purposes!)
Put new ingredients into the bread pan (6).
Restart the appliance. If the dough is not yet
in the rising phase when the power supply
is interrupted, you can press START/STOP
button (12) to continue the program from
the beginning.
Error messages
If the display (19) shows "HHH" after pressing •
the START/STOP button (12), the
temperature in the baking compartment (5)
is too high. The appliance will not operate
until it has cooled down. Open the lid (2)
and allow the appliance to cool down for
10-20 minutes.
If the display (19) shows "EEE" after pressing •
the START/STOP button (12), the temperature
sensor is disconnected. Have the temperature
sensor checked by an authorised repair agent.
Recipes
This recipe list provides a small overview of
recipes which are specifically created for the
appliance. For other recipes, please refer to
a recipe book for bread makers.
Bread
White bread
Ingredients Quantity
High-gluten flour 2.25 cups
Dried active baking yeast 1.25 tsp.
Salt 1 tsp.
Sugar 1.5 tbsp.
Skim milk powder 1 tbsp.
Oil 1 tbsp.
Water 0.75 cup + 1 tbsp.
Note: The ingredients and quantities are
applicable to the following baking modes:
BASIC. Other ingredients and quantities may
be applicable to the following baking modes:
ULTRA FAST-I / ULTRA FAST-II.
Corn bread
Ingredients Quantity
High-gluten flour 2 cups
Cornmeal 0.25 cup
Dried active baking yeast 1.5 tsp.
Salt 1 tsp.
Sugar 2 tbsp.
Skim milk powder 0.75 cup
Oil 2 tbsp.
Eggs 1
Water 0.75 cup + 1 tbsp.
Note: The ingredients and quantities are
applicable to the following baking modes:
BASIC. Other ingredients and quantities may
be applicable to the following baking modes:
ULTRA FAST-I / ULTRA FAST-II.
18
EN
Walnut bread
Ingredients Quantity
High-gluten flour 2 cups
Dried active baking yeast 1.5 tsp.
Salt 1 tsp.
Sugar 1.5 tbsp.
Skim milk powder 1 tbsp.
Oil 1 tbsp.
Walnuts (chopped) 0.33 cup
Water 0.75 cup
Note: The ingredients and quantities are
applicable to the following baking modes:
SWEET.
French bread
Ingredients Quantity
High-gluten flour 2.25 cups
Dried active baking yeast 1.25 tsp.
Salt 1 tsp.
Sugar 1 tbsp.
Oil 1 tbsp.
Water 0.75 cup + 2 tbsp.
Note: The ingredients and quantities are
applicable to the following baking modes:
FRENCH.
Whole-wheat bread
Ingredients Quantity
Whole-wheat flour 2.25 cups
Dried active baking yeast 2.25 tsp.
Salt 1 tsp.
Brown sugar 2 tbsp.
Oil 2 tbsp.
Water 0.75 cup
Note: The ingredients and quantities are
applicable to the following baking modes:
WHOLE WHEAT.
Gluten-free bread
Note: The ingredients and quantities are
applicable to the following baking modes:
GLUTEN FREE.
White bread
Ingredients Quantity
White rice flour 1.5 cups
Soy flour 2 tbsp.
Potato flour 0.5 cup
Tapioca flour 3 tbsp.
Xanthan gum 1 tsp.
Quick-rise yeast 1.5 tsp.
Salt 1 tsp.
Sugar 2 tbsp.
Skim milk powder 6 tbsp.
Oil 2 tbsp.
Cider vinegar 0.5 tsp.
Eggs (XL) 2
Water 0.5 cup + 3 tbsp.
Corn bread
Ingredients Quantity
White rice flour 1.5 cups
Tapioca flour 2 tbsp.
Cornmeal 0.75 cup
Xanthan gum 1 tsp.
Quick-rise yeast 1.5 tsp.
Salt 1 tsp.
Brown sugar 4 tsp.
Skim milk powder 6 tbsp.
Oil 2 tbsp.
Cider vinegar 0.5 tsp.
Eggs (XL) 2
Water 0.5 cup + 6 tbsp.
Walnut bread
Ingredients Quantity
White rice flour 1.5 cups
Potato flour 0.5 cup
Tapioca flour 0.25 cup
Xanthan gum 1 tsp.
Quick-rise yeast 1.5 tsp.
Salt 1 tsp.
Sugar 2 tbsp.
Skim milk powder 0.5 tbsp.
Oil 2 tbsp.
Cider vinegar 0.5 tsp.
Lemon zest 1.5 tsp.
Eggs (XL) 2
Water 0.75 cup + 2 tbsp.
Dough
Note: The ingredients and quantities are
applicable to the following baking modes:
DOUGH.
Pasta dough
Ingredients Quantity
All-purpose flour 1 cup
Semolina flour 0.5 cup
Salt 0.5 tsp.
19
EN
Olive oil 1 tbsp.
Eggs (beaten) 1
Water 0.25 cup
Pizza dough
Ingredients Quantity
High-gluten flour 2.25 cups
Dried active baking yeast 1 tsp.
Salt 0.5 tsp.
Sugar 1 tbsp.
Olive oil 1 tbsp.
Water 0.75 cup
Bagel dough
Ingredients Quantity
High-gluten flour 2 cups
Dried active baking yeast 2.25 tsp.
Salt 1 tsp.
Sugar 2 tbsp.
Water 0.75 cup
Jam
Note: The ingredients and quantities are
applicable to the following baking modes: JAM.
Strawberry jam
Ingredients Quantity
Frozen strawberries
(thawed, crushed) 225 g
Strawberries (fresh) 2 cups
Dry pectin 0.5 package
Sugar 0.75 cup
Lemon juice 1.5 tsp.
Quick bread
Note: The ingredients and quantities are
applicable to the following baking modes:
QUICK.
Muffin quick bread
Ingredients Quantity
All-purpose flour 1.25 cups
Baking powder 2 tsp.
Vanilla extract 0.5 tsp.
Salt 0.25 tsp.
Sugar 6 tbsp.
Skim milk powder 2 tbsp.
Butter (softened) 0.5 cup
Eggs (XL) 2
Raisin quick bread
Ingredients Quantity
All-purpose flour 1.25 cups
Baking powder 2 tsp.
Vanilla extract 0.5 tsp.
Salt 0.25 tsp.
Sugar 6 tbsp.
Milk 0.5 cup
Butter (softened) 0.5 cup
Eggs (XL) 2
Raisins 0.25 cup
Cake
Note: The ingredients and quantities are
applicable to the following baking modes:
CAKE.
Normal cake
Ingredients Quantity
Cake mix (any flavour) 65 g
Vegetable oil 0.33 cup
Eggs (XL) 3
Water 1.25 cups
Cleaning and maintenance
The appliance must be cleaned after each use.
Before you proceed, we need you to pay
attention to the following notes:
- Before cleaning or maintenance, remove
the mains plug from the wall socket and
wait until the appliance has cooled down.
- Do not immerse the appliance in water or
other liquids.
Before you proceed, we would like you to
focus your attention on the following notes:
- Do not use aggressive or abrasive cleaning
agents to clean the appliance.
- Do not use sharp objects to clean the
appliance.
- Do not use oven cleaners to clean the
inside of the appliance.
Regularly check the appliance for possible •
damage.
Clean the outside of the appliance with •
a soft, damp cloth. Thoroughly dry the
outside of the appliance with a clean, dry
cloth.
20
EN
Clean the lid and the baking compartment •
with a soft, damp cloth. Thoroughly dry
the lid and the baking compartment with
a clean, dry cloth.
Clean the bread pan in soapy water. •
Thoroughly dry the bread pan with a clean,
dry cloth.
If the kneading paddle is clogged, clean the •
kneading paddle with a wooden or plastic
toothpick. Clean the kneading paddle in
soapy water. Thoroughly dry the kneading
paddle with a clean, dry cloth.
Put the appliance and the accessories in •
the original packaging.
Store the appliance with the accessories in •
a dry place, out of the reach of children.
Safety instructions
General safety
Read the manual carefully before use. Keep •
the manual for future reference.
Only use the appliance and the accessories •
for their intended purposes. Do not use the
appliance and the accessories for other
purposes than described in the manual.
Children should be supervised to ensure •
that they do not play with the appliance.
The appliance is not intended for use by •
persons (including children) with reduced
physical, sensory or mental capabilities, or
lack of experience and knowledge, unless
they have been given supervision or
instruction concerning use of the appliance
by a person responsible for their safety.
Do not use the appliance if any part or any •
accessory is damaged or defective. If a part
or an accessory is damaged or defective,
it must be replaced by the manufacturer or
an authorised repair agent.
Do not use the appliance near bathtubs, •
showers, basins or other vessels containing
water.
Do not immerse the appliance in water or •
other liquids. If the appliance is immersed
in water or other liquids, do not remove
the appliance with your hands. Immediately
remove the mains plug from the wall socket.
If the appliance is immersed in water or
other liquids, do not use the appliance
again.
This appliance is intended to be used in •
indoor only and similar applications such as
staff kitchen areas in shops, offices and
other working environments; farm houses;
by clients in hotels, motels and other
residential type environments; bed-and-
breakfast type environments.
Electrical safety
Before use, always check that the mains •
voltage is the same as the voltage on the
rating plate of the appliance.
Connect the appliance to an earthed wall •
socket. If necessary, use an earthed
extension cable of a suitable diameter
(at least 3 x 1.5 mm
2
).
For additional protection, install a residual •
current device (RCD) with a rated residual
operating current that does not exceed
30 mA.
The appliance is not intended to be •
operated by means of an external timer or
separate remote-control system.
Make sure that water cannot enter the •
contact plugs of the mains cable and the
extension cable.
Always fully unwind the mains cable and •
the extension cable.
Make sure that the mains cable does not •
hang over the edge of a worktop and
cannot be caught accidentally or tripped
over.
Keep the mains cable away from heat, oil •
and sharp edges.
Regularly check the mains cable and the •
mains plug for signs of damage. Do not use
the appliance if the mains cable or the
mains plug is damaged or defective. If the
mains cable or the mains plug is damaged
or defective, it must be replaced by the
manufacturer or an authorised repair agent.
Do not pull the mains cable to disconnect •
the mains plug from the mains.
Disconnect the mains plug from the mains •
when the appliance is not in use, before
assembly or disassembly and before cleaning
and maintenance.
21
EN
Safety instructions for bread makers
Do not use the appliance outdoors.•
Do not use the appliance in humid •
surroundings.
Place the appliance on a stable and flat •
surface.
Place the appliance on a heat-resistant and •
splash-proof surface.
Do not place the appliance on a hob.•
Make sure that there is sufficient space •
around the appliance to allow heat to
escape and provide sufficient ventilation.
Do not cover the appliance. Do not place •
objects on top of the appliance.
Make sure that the appliance does not •
come into contact with flammable material.
Keep the appliance away from heat sources.•
Always be careful when touching the •
appliance. Use oven gloves if you need to
touch the appliance during or shortly after
use.
The heating elements become very hot •
during use. Do not touch the hot heating
elements.
Do not touch moving parts. Do not touch or •
remove the bread pan while the appliance
is switched on.
Do not move the appliance while it is •
switched on or is still hot. Remove the
mains plug from the wall socket and wait
until the appliance has cooled down.
Do not leave the appliance unattended •
during use.
U.K. Wiring instructions
The wires in the mains lead are coloured in
accordance with the following code:
BLUE NEUTRAL
BROWN LIVE
GREEN/YELLOW EARTH
As the colours of the wire in the mains lead of
this appliance may not correspond with the
colour markings identifying the terminals on
your plug, proceed as follows:
The wire which is coloured BLUE must be
connected to the terminal which is marked
with the letter N or coloured black.
The wire which is coloured BROWN must be
connected to the terminal which is marked
with the letter L or coloured red.
The wire which is coloured GREEN/YELLOW
must be connected to the terminal which is
marked with the letter E or
and is coloured
GREEN or GREEN/YELLOW.
If a 13Amp (BS1363) plug is used, a 13Amp
(BS1362) fuse must be fitted, or if any other
type of plug is used, a 13Amp fuse must be
fitted, either in the plug or adaptor, or on the
distribution board.
Warning! This appliance must be earthed.
Disclaimer
Subject to change; specifications can be
changed without further notice.
© Princess 2012 03/12
  • Page 1 1
  • Page 2 2
  • Page 3 3
  • Page 4 4
  • Page 5 5
  • Page 6 6
  • Page 7 7
  • Page 8 8
  • Page 9 9
  • Page 10 10
  • Page 11 11
  • Page 12 12
  • Page 13 13
  • Page 14 14
  • Page 15 15
  • Page 16 16
  • Page 17 17
  • Page 18 18
  • Page 19 19
  • Page 20 20
  • Page 21 21
  • Page 22 22
  • Page 23 23
  • Page 24 24
  • Page 25 25
  • Page 26 26
  • Page 27 27
  • Page 28 28
  • Page 29 29
  • Page 30 30
  • Page 31 31
  • Page 32 32
  • Page 33 33
  • Page 34 34
  • Page 35 35
  • Page 36 36
  • Page 37 37
  • Page 38 38
  • Page 39 39
  • Page 40 40
  • Page 41 41
  • Page 42 42
  • Page 43 43
  • Page 44 44
  • Page 45 45
  • Page 46 46
  • Page 47 47
  • Page 48 48
  • Page 49 49
  • Page 50 50
  • Page 51 51
  • Page 52 52
  • Page 53 53
  • Page 54 54
  • Page 55 55
  • Page 56 56
  • Page 57 57
  • Page 58 58
  • Page 59 59
  • Page 60 60
  • Page 61 61
  • Page 62 62
  • Page 63 63
  • Page 64 64
  • Page 65 65
  • Page 66 66
  • Page 67 67
  • Page 68 68
  • Page 69 69
  • Page 70 70
  • Page 71 71
  • Page 72 72
  • Page 73 73
  • Page 74 74
  • Page 75 75
  • Page 76 76
  • Page 77 77
  • Page 78 78
  • Page 79 79
  • Page 80 80
  • Page 81 81
  • Page 82 82
  • Page 83 83
  • Page 84 84
  • Page 85 85
  • Page 86 86
  • Page 87 87
  • Page 88 88
  • Page 89 89
  • Page 90 90
  • Page 91 91
  • Page 92 92
  • Page 93 93
  • Page 94 94
  • Page 95 95
  • Page 96 96
  • Page 97 97
  • Page 98 98
  • Page 99 99
  • Page 100 100
  • Page 101 101
  • Page 102 102
  • Page 103 103
  • Page 104 104
  • Page 105 105
  • Page 106 106
  • Page 107 107
  • Page 108 108
  • Page 109 109
  • Page 110 110
  • Page 111 111
  • Page 112 112
  • Page 113 113
  • Page 114 114
  • Page 115 115
  • Page 116 116
  • Page 117 117
  • Page 118 118
  • Page 119 119
  • Page 120 120
  • Page 121 121
  • Page 122 122
  • Page 123 123
  • Page 124 124

Princess 152006152007 Owner's manual

Category
Bread making machines
Type
Owner's manual
This manual is also suitable for

Ask a question and I''ll find the answer in the document

Finding information in a document is now easier with AI