Page is loading ...

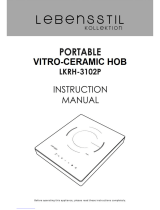
INSTRUCTIONS MANUAL
FOR VITROCERAMIC HOBS
H78TC
“TOUCH CONTROL”
C60T127A1 15/7/03 07:21 Página 1

3
BET WITH US ON ECOLOGY. RECYCLE THE PACKAGING.
We contribute in the defence of the Environment. Thus, our packagins:
• Are 100% recyclable.
• Contain the smaller quantity of parts and possible material to facilitate
thus the recycling.
C60T127A1 15/7/03 07:21 Página 3

4
CONTENTS
General description .............................................................5
Sensor description .................................................................6
Description of timer...........................................................7,8
Operating.................................................................9,10,11,12
Safety..........................................................................................13
Special considerations .......................................................13
Use of containers ..................................................................14
Cleaning ..................................................................................15
Connections schema...........................................................16
Installation ........................................................................17,18
WARNING
Pot.max:
Type:
Voltage:
• Repair of any fault in your hob must be carried out only by an
Authorized Repair Service, otherwise the guarantee is not valid.
•Technical details and identification of the appliance are
shown on the specifications plate.
Consult this plate before procceding with electrical connection.
• Electrical connection must be carried out by a specialist
familiar with the laws and official regulations recognized in each
country.
Fill in the data table you will find below, with the data appearing on
the specifications plate sticked on the hob.
Trade mark:
w
C60T127A1 15/7/03 07:21 Página 4

5
GENERAL DESCRIPTION
0,7kW
1,8 kW
1,2 kW
1,4kW
0.8kW
1,4kW
{
Horizontal control sensors
TYPE
VT7: PDFM-
C60T127A1 15/7/03 07:21 Página 5

6
Control point
Sensor double heat zone
Indicator display of selected power
Indicator display of residual heat
Control point
Sensor oval plate heat zone
Heat zone position indicators
Heat zone power selection sensors
from: 0....9
from: 9....0
Locking control point
Locking sensor
Sensor ON/OFF
HORIZONTAL CONTROL SENSORS
SENSOR DESCRIPTION
TYPE VT7:FPDM-
C60T127A1 15/7/03 07:21 Página 6

7
DESCRIPTION OF TIMER
A timer, can be assigned to any heat source, and can be timed between 1 and
99 minutes. This timer will turn off the assigned heat zone once the time
chosen by the user has passed.
C60T127A1 15/7/03 07:21 Página 7

8
Assigning and Timing the Heat zone
To carry out the assignation of the timer to a heat zone the following steps
must be followed:
With vitro ceramic hob switched on:
1- Choose the required power of the heat zone that you wish to time.
2- Switch on the timer. For this act once on the sensor + which corresponds
to the timer. In the timer display appears and appears in the display
of each heat zone.
3- Act on the + of the chosen heat zone. will flash in the display
corresponding to this heat zone. At this moment the timer is assigned to the
chosen heat source.
4- Choose the desired time acting on the + which corresponds to the timer.
Once these steps have been carried out the assignation sequence of the heat
zone timer ends.
The timer will automatically switch itself off, if between each step there is a
time space of over 10 seconds or if you do not choose a length of time.
Once the timer has been assigned to a heat source and the time has been
chosen, the timer will gradually discount the time and the display will
indicate at each moment the time remaining to switch off the heat source.
During the timing, in the timed heat zone display you can see the selected
power and the (indicating that this heat zone is timed) alternatively. Once
the time has passed the heat zone will switch itself off, the control will
release a warning acoustic signal and will flash in the timing display.
Acting on any sensor control the warning signal will stop.
Cancelling the timer
Act on the sensor of the timer until is shown on the minute display.
DESCRIPTION OF TIMER
C60T127A1 15/7/03 07:21 Página 8

9
Starting up
Touch the ON/OFF sensor for 3 seconds. The power 0 displays will light
up. If no power is selected within five seconds, the hotplate will automatically
switch off and must be switched on again.
OPERATING
Sensors
The vitro-ceramic cooking surface is fitted with sensors that are touch-
sensitive and also react to the presence of a reflective object.
The hotplate is operated by touching the corresponding sensors with your
fingers.
Take care to touch only one sensor at a time, otherwise they will not react to
the touch.
Setting up
While the cooking surface is inoperative, the indicators for all sensors are
switched off.
Keep the sensors clean and do not place objects on them. The sensors may
misinterpret dirt or objects placed on them as finger contacts.
Power selection-/+
Each has - / + power sensors. Touching these allows the power to be set in
the range 1 to 9.
To alter the power while the hotplate is on, touch - / + sensors to obtain the
required power level.
C60T127A1 15/7/03 07:21 Página 9

10
OPERATING
Switching off the heat zone
Choose 0 power of the heat zone you wish to turn off. If the hotplate is hot, H
will light up.
¡Warning!
If a power cut occurs while the residual heat display is on, remenber that
when power is restrored the display will not re-appear even though the
hotplate is still hot.
Residual heat display H
When activated but with level 0, the corresponding displays shows 0 and H
alternatively.
While a hotplate is still hot but switched off, the display will show H.
Depending on the power that was used, this display may remain on for up to
approximately 30 minutes.
Do not touch the area of the hotplate.
There is a risk of burning.
C60T127A1 15/7/03 07:21 Página 10

11
Hotplate blocking function
The blocking of the hotplates prevents accidental changes while they are
operating. The initial selections are maintained and the indicators remain
active. The hotplates should be blocked to prevent children from operating
them or to prevent the effects of accidental contact with containers or tools.
Press the blocking sensor until its pilot light comes on.
Unblocking
Touch the blocking sensor until its pilot light switches off.
OPERATING
Double hotplate
Acting over the corresponding sensors of this heat zone only work with their
small circuit . To operate the outer part, touch the double hotplate sensor
until its pilot light comes on. To switch off touch the sensor until the pilot
light switches off.
Oval hotplate
Oval hotplate acting over the corresponding sensors of this heat zone, only
work with their circular circuit. To swicth on the outer part as well, touch the
source hotplate sensor until its control point switches on.
To swicth off the oval hotplate, touch the oval hotplate sensor until the
control point switches off.
C60T127A1 15/7/03 07:21 Página 11

12
Automatic programming 9
(quick heating)
Each control area includes an automatic programming function.
This programming allows the corresponding maximum temperature to be
reached quickly and maintained automatically.
Selection
Touch sensor + once and it is in position 9, the corresponding decimal point
to 9 will switch itself on.
Touching sensor – of the same zone will decrease to the required level
(levels 3…6 are recommended).
After having reached the automatic heating time a short signal will be heard
and the decimal point will switch itself off. The heat zone goes on working in
a conventional manner.
To cancel the automatic programming touch the - sensor and the decimal
point will switch off.
OPERATING
C60T127A1 15/7/03 07:21 Página 12

13
Safety systems
In order to protect the electronics, if the control unit detects excessive heat
it will switch off the hotplate closest to the sensors and the letter H will
appear on the display. This hotplate can be activated when the temperature
of the electronic unit returns to normal level.
Each hotplate is equiped with an interior temperature limiter that switches
off the hotplate if the vitro-ceramic surface is heated excessively.
If any cracks appear on the vitro-ceramic surface, inmediately disconnect it
from the mains. Do not use any part of the hob until a new vitro-ceramic surface
has been fitted.
Automatic switch off
If a hotplate is left on accidentally, it will automatically be switched off after
a period of time has passed, depending on the power level that has been
selected (level 1 - 10 hours, level 9 - 1 hour).
If more than one sensor is pressed simultaneously, the keys are blocked.
If all the power levels are at 0, the control is automatically switched off after
5 seconds.
If one or more sensors are pressed for more than 30 seconds (a container or
tools is resting on the sensor), the control will automatically be switched off
and a warning will sound every 30 seconds while the sensor remains pressed.
SAFETY
SPECIAL CONSIDERATIONS
C60T127A1 15/7/03 07:21 Página 13

14
USE OF COOKING PANS
Most stainless steel, enamel, iron,
ceramic and copper pans can be used
on vitroceramic hobs.
Aluminium pans are not recommended
as they may stain the vitreous surface,
unless they have stainless-steel
covered bottoms.
Make sure that the diameter of the pan
is at least that of the hotplate.
Avoid scarping pans over the
vitroceramic surface, as it may
become scratched.
Always lift the pan.
Never use tinfoil or plastic containers.
They will melt and fuse permanently
with the vitroceramic surface.
STAINLESS STEEL
ENAMEL
CERAMIC
COPPER
ALUMINIUM ALUMINIUM
SATINLESS STEEL
YES
Hotplates should not be switched on
without a pan on top. The base of the
pan should be flat and dry.
Pans that have been used on gas
cookers are not normally enough flat
and absorb heat badly.
C60T127A1 15/7/03 07:21 Página 14

15
IMPORTANT: If the vitroceramic surface breaks or you notice cracks on it, disconnect the hob.
Call your Repair Service.
CLEANING
Clean the vitroceramic surface
frequently, when it is cool. Never use
abrasive products or pads. Clean
with a damp cloth and soapy water.
Never use a steam cleaner.
Once a week, clean thoroughly with
specific products that preserve and
protect vitroceramic hobs (Sample in
accessory bag). Scrape off hard stuck
dirt with the scraper (Included in
accessory bag).
The manufacturer recommends
VITRO-CLEN for cleaning and
conserving your vitro-ceramic hob.
If sugar (or sugary matter) or plasttic
is accidentally burnt on the hob,
remove at once with the scraper
while it is still hot. Otherwise they
may leave a pemanent mark.
Do not use the hob as a work surface.
Be particularly careful with dirt like
soil or dust from vegetables, cleaning
powders, etc. which may scratch the
surface when pans are slid over it.
INMEDIATELY
C60T127A1 15/7/03 07:21 Página 15

16
CONNECTIONS SCHEMA
If the type of connections to which the hotplate will be installed is other than
220 to 240 V AC remove the cable and make the connection according to the
adjacent drawings. (The cable must support temperatures of up to 120ºC).
The hotplate must be connected to the mains with a plug that meets the EEC 7
publication or with a multi-pole switch with a distance between the open
contacts of a least 3mm.
Total power
Hotplate: 75 cms., 7,4 kW
This device conforms to European directives 73/23/CEE and 89/336/CEE
75 cms 220...240V~ 32 A 32 A 220...240V~ 16,5 A 20 A
Voltage Int.nominal Protection
by phases
Voltage Int.nominal Protection
by phases
PLATE
Three phase
75 cms 380...400V~ 13 A 16 A 380...400V~ 19 A 20 A
Voltage Int.nominal Protection
by phases
Voltage Int.nominal Protection
by phases
PLATE
Three phase
C60T127A1 15/7/03 07:21 Página 16

17
INSTALLATION
Place the hob face down on a
table. Remove the backing paper
and affix the sealing gasket all
round the perimeter (fig.1).
When the plate comes with no
frame, first stick on the shaped
strips as per plan and then stick
on the straight strips in a close fit
with the others (fig.2).
1
2
Cut out a piece of the worktop following
the instructions on the template that
comes with the hob.
“X” type apparatus for degree of fire
protection.
Minimum distance between hole and
wall 100 m/m.
NOTE: DO NOT USE NON-REMOVABLE ELEMENTS WITH SILICONE.
fig.1
fig.2
C60T127A1 15/7/03 07:21 Página 17

18
INSTALLATION
3
Place the hob alongside the cavity in
the worktop and connect the power
cable to the electrical socket.
IMPORTANT: Carry out connection
with the power disconnected. There
must be a good grounding connection
and a switch must be provided in an
accessible place to isolate all phases,
with at least 3mm. clearance between
contacts. The manufacturer will not accept responsability for
installations carried out in a different way as informed here.
It is equipped with a power input cable for high
temperatures.
If a new power input cable is required, installation should be
performed by a technician certificated by the manufacturer. If
the power feed wire is damaged, it must be replaced by the
manufacturer, by the after-sales service or by authorized
personnel for safety reasons.
4
Next insert the hob in the worktop
cavity, pressing down firmly to ensure a
good seal.
5
NOTE: This equipment complies with standard 82/499/CE on radio interferences.
Fix the 4 clamps underneath the hob to
the 4 corners of the cavity.
(Clamps, brackets and nuts supplied in
acessory bag).
C60T127A1 15/7/03 07:21 Página 18

C60T127A1 15/7/03 07:21 Página 19

07-03
C60T127A1
Printer on recycled paper
Your 1
st
Year Guarantee
Yo ur appliance carries a 12 months parts and labour warranty. To fulfil the
conditions of your guarantee, the appliance must be correctly installed and
operated, in accordance with the instructions, and be only used for normal
domestic purposes.
Please note that the guarantee, and service availability, only apply to the
United Kingdom.
Customer Service
In case of difficulty please call the Customer Service Helpline on
01245 321111
Please ensure you have the model and serial number to hand when calling
customer service.
C60T127A1 15/7/03 07:21 Página 20
/