Page is loading ...

WHITE-RODGERS DIVISION
EMERSON ELECTRIC CO.
9797 REAVIS ROAD
ST. LOUIS, MISSOURI 63123-5398
PART NO. 37-5391A
9505
FAILURE TO READ AND FOLLOW ALL INSTRUCTIONS CAREFULLY
BEFORE INSTALLING OR OPERATING THIS CONTROL COULD CAUSE
PERSONAL INJURY AND/OR PROPERTY DAMAGE.
INSTALLATION INSTRUCTIONS
DESCRIPTION
Printed in U.S.A.
1F58
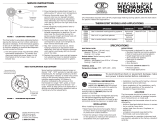
Low Voltage Multi-Stage Heat PumpThermostat
WHITE-RODGERS
This thermostat and subbase combination is designed to
control a heat pump system where automatic changeover
is not required. However, manual changeover of the
reversing valve can be controlled by the wiring selection
on the subbase and the switching of the SYSTEM switch
to COOL or HEAT (see fig. 2).
PRECAUTIONS
CAUTION
!
WARNING
!
SPECIFICATIONS
ELECTRICAL DATA
Switch Rating:
24 VAC
Stage 1 heat – 0 to 1.2 amp
Stage 2 heat – 0.15 to 1.2 amp
Cooling – 0 to 1.5 amp
Switch Action:
Stage 1 heat & cool – SPDT
Stage 2 heat – SPST (sealed mercury contacts)
Anticipator Rating:
Stage 1 heat – 24 VAC, fixed
Stage 2 heat – 0.15 to 1.2 amp, adjustable
Cooling – 24 VAC, fixed
Fan Circuit: See Fig. 2 – FAN CAUTION
THERMAL DATA
Temperature Range: 50°F to 90°F (10°C to 32°C)
Rated Differential: Stage 1 heat – 1.5°F
Stage 2 heat – 1°F
Cooling – 1.5°F
If in doubt about whether your wiring is millivolt, line, or low
voltage, have it inspected by a qualified heating and air
conditioning contractor, electrician, or someone familiar
with basic electricity and wiring.
Do not exceed the specification ratings.
All wiring must conform to local and national electrical
codes and ordinances.
This control is a precision instrument, and should be
handled carefully. Rough handling or distorting compo-
nents could cause the control to malfunction.
To prevent electrical shock and/or equipment
damage, disconnect electric power to system, at
main fuse or circuit breaker box, until installation
is complete.
Do not short out terminals on gas valve or primary
control to test. Short or incorrect wiring will burn
out heat anticipator and could cause personal
injury and/or property damage.
Do not use on circuits exceeding 30 volts. Higher
voltage will damage control and could cause
shock or fire hazard.
50
90
80
70
60
50
SYSTEM
COOL
OFF
HEAT
EMER.
FAN
AUTO
ON
60
70
80
90
Operator: Save these instructions for future use!

2
INSTALLATION
SELECT THERMOSTAT LOCATION
Proper location insures that the thermostat will provide a
comfortable home temperature. Observe the following
general rules when selecting a location:
1. Locate thermostat about 5 ft. above the floor.
2. Install thermostat on a partitioning wall, not on an
outside wall.
3. Never expose thermostat to direct light from lamps,
sun, fireplaces or any temperature radiating equip-
ment.
4. Avoid locations close to windows, adjoining outside
walls, or doors that lead outside.
5. Avoid locations close to air registers or in the direct
path of air from them.
6. Make sure there are no pipes or duct work in that part
of the wall chosen for the thermostat location.
7. Never locate thermostat in a room that is warmer or
cooler than the rest of the home, such as the kitchen.
8. Avoid locations with poor air circulation, such as
behind doors or in alcoves.
9. The living or dining room is normally a good location,
provided there is no cooking range or refrigerator on
opposite side of wall.
ROUTE WIRES TO LOCATION
1. If an old thermostat is being replaced and is in a
satisfactory location, and the wiring appears to be in
good condition, use existing wiring. If in doubt, re-
wire.
2. If a new location is chosen or if this is a new installa-
tion, thermostat wire must first be run to the location
selected. All wiring must conform with local and
national electrical codes and ordinances.
3. Probe for obstructions in partition before drilling
1
⁄2”
hole in wall at selected location. Take up quarter
round and drill a small guide hole for sighting (see fig.
1). From basement, drill
3
⁄4” hole in partition floor next
to guide hole. In houses without basements, drill
1
⁄2”
hole through ceiling and into partition from above (see
fig. 1).
4. Through this hole drop a light chain, or 6” chain
attached to a strong cord. Snag cord in basement
with hooked wire. In houses without basements, drop
cord through hole in ceiling and down partitioning;
snag cord at the thermostat location.
5. Attach thermostat wire to cord and pull wire through
hole in wall so that 6” of wire protrudes.
ATTACH SUBBASE TO WALL
1. Pull wires through opening near center of subbase
and connect wires under terminal screws (see figs. 2
& 3).
2. Push excess wire into wall and plug up hole with fire-
resistant material, such as fiberglass insulation, to
prevent drafts from affecting thermostat operation.
3. Place subbase over hole in wall for wires and mark
mounting hole locations on wall.
4. Drill mounting holes.
5. Fasten subbase loosely to wall, as shown, using two
mounting screws. Place a level against bottom of
subbase, adjust until level, and then tighten mounting
screws to secure subbase. If holes in wall are too
large and do not allow you to tighten subbase snugly,
use plastic screw anchors to secure subbase.
6. Check anticipator setting and adjust, if required (see
OPERATION & MAINTENANCE).
Care must be taken when securing and routing
wires so they do not short to adjacent terminals or
rear of thermostat. Shorted wires may result in
personal injury and/or property damage.
Approximately
5 feet from floor
1
⁄
2
” hole for
thermostat wire
Stout cord with 6”
chain attached
Baseboard
strip moulding
1
⁄
4
” guide hole
for sighting
Quarter round
removed
3
⁄
4
” hole in floor of partition
Hooked wire for snagging chain
Figure 1. Routing thermostat wires
CAUTION
!

3
To prevent electrical shock and/or equipment
damage, disconnect electrical power to system,
at main fuse or circuit breaker, until installation is
complete.
To prevent personal injury and/or equipment dam-
age, check equipment manufacturer’s wiring of
fan relay circuit when in EMER HEAT. When the
thermostat system switch is in the EMER HEAT
position, the thermostat DOES NOT energize the
fan relay when the fan switch is in the AUTO
position.
This typical wiring diagram shows only the terminal iden-
tification and wiring hookup. Always refer to wiring
instructions provided by equipment manufacturer for sys-
tem hookup.
All wiring should be installed in accordance with local and
national codes and ordinances.
CAUTION
!
NOTE
FAN CAUTION
!
THERMOSTAT
SUBBASE
HEAT PUMP
SYSTEM
Figure 2. Typical wiring diagram
Fixed Stage 1 Heat
& Cool Anticipator
Adjustable Stage 2
Heat Anticipator
COOL
STAGE 1
HEAT
STAGE 2
HEAT
System
Switch
Fan
Switch
TRANSFORMER
24 VAC120 VAC
ON
COOL
OFF
HEAT
EMER.
COOL
OFF
HEAT
EMER.
FAN
RELAY
SEE FAN
CAUTION
(ABOVE)
EMER. HEAT
RELAY
AUXILIARY
HEAT RELAY
COMPRESSOR
CONTACTOR
YW2EX1RG B
*
O
*
*
Reversing Valve – if the reversing valve in your heat pump energizes
during HEAT, then make your electrical connection at terminal B on
the subbase. If the reversing valve is energized during COOL, then
make your connection at terminal O on the subbase.
Always refer to equipment manufacturer’s instructions for proper
identification of the reversing valve electrical connections.
AUTO

4
ATTACH THERMOSTAT TO SUBBASE
1. Remove cover from thermostat base by gripping the
base in one hand and with the fingers of the other
hand, pull lightly at the top or bottom of the cover.
2. Carefully remove the shipping protective packing
from the mercury switches.
3. Attach thermostat base to subbase. Be sure that all
captive screws are tightened snugly, because they
serve as electrical connections between thermostat
and subbase (see fig. 4).
4. Snap cover onto thermostat and set temperature
lever to desired setpoint. Turn on electrical power.
OPERATION &
MAINTENANCE
The chart below shows the how the system functions when
the system and fan switches are in various positions.
OFF
AUTO
ON
FAN SYSTEM
COOL HEAT
G
R
Y
Figure 3. Thermostat subbase
EMER.
W2
Mounting screw
KEEP THIS AREA
CLEAR OF WIRES!
Hole
in wall
Mounting screw
X1
E
OB
Figure 4. Attach thermostat to subbase
Cover
Thermostat
Subbase
Captive terminal
screws
Captive terminal
screws
Mounting
screws
50
60
70
80
60
50
70
80
90
90
OFF
FAN
AUTO ON
SYSTEM
COOL HEAT
G
O
B
B
B
B
B
O
G
Compr.
Contact
SUBBASE SWITCH POSITIONS SYSTEM FUNCTION
COMPONENT OPERATION
Emer
Heat
Relay
Rev
Valve
Fan
RelayAuto On Cool Off Heat Emer
FAN SYSTEM
No heat - no cool - no fan.
Heat Mode: stage 1 calling. Fan relay and com-
pressor contactor energized by thermostat.
Heat Mode: both stages calling. Fan relay, com-
pressor contactor, and auxiliary heat relay are
energized.
Emergency Heat Mode: stage 1 calling. Emergency
heat relay energized. Compressor locked out at
thermostat.
Emergency Heat Mode: both stages calling. Emer-
gency and auxiliary heat relays energized. Compres-
sor locked out at thermostat.
Cool Mode: Compressor contactor and fan relay
energized.
Indicates switch position on thermostat subbase
and system function at those switch positions.
Aux
Heat
Relay
G
Fan relay energized. Fan runs continuously,
regardless of system switch position.
Reversing valve energized if connected to B terminal.
Reversing valve energized if connected to the O terminal.
See fig. 2 (fan caution)

5
.18
L
O
N
G
E
R
C
Y
S
.25
.3
.4
.2
.15
1.0
.8
.6
.5
Arrow points to the
matched current rating
of the primary control
Move this lever to
adjust heat
anticipator
Figure 6. Anticipator adjustment
10 turns
of wire
Split jaw
current meter
Figure 5. Current meter
The stage 2 heat anticipator is located on the thermostat
base. Adjust the anticipator by turning the lever until the
pointer is set on the correct anticipator setting determined
above (see fig. 6). If additional adjustments are neces-
sary, they may be made as follows (adjust the anticipator
1
⁄2 division at a time; for example, from 0.6 to 0.55).
1. If shorter heating cycles are desired, set the anticipa-
tor to a slightly lower setting.
2. If longer heating cycles are desired, set the anticipa-
tor to a slightly higher setting.
ADJUSTING STAGE 2 HEAT ANTICIPATOR
This thermostat is equipped with two anticipators. The
anticipator for stage 1 heat and cool is fixed and does not
require any adjustments. The stage 2 anticipator is adjust-
able and must be set to the current draw of the component
it is controlling.
To determine the correct stage 2 anticipator setting,
measure the current draw of the stage 2 (auxiliary heat)
relay. You may use the following procedure to determine
current draw.
1. Loosely wrap exactly 10 coils of thermostat wire
around the jaws of a split-jaw induction-type current
meter (see fig. 5).
2. With the subbase correctly wired to the heat pump
system, attach one end of the 10-turn coil to terminal
R and attach the other end to terminal W1.
3. With the heat pump system power on, center the coil
on the meter jaws and read the current draw of the
stage 2 heat relay on the meter and divide the reading
by 10. This is the value that should be set on the
adjustable anticipator.
Example:
Meter reads 6.0 amp
10 turns of wire
4. Turn power to heat pump system off, then remove
coil leads from the subbase and move system switch
to OFF.
= 0.6 amp anticipator setting
CALIBRATION ADJUSTMENT
This thermostat has been carefully adjusted at the factory
and should not require recalibration.
A few degrees difference between the indicator setting of
the thermostat and actual room temperature is not consid-
ered important. If the disagreement is appreciable, how-
ever, first make sure that the thermostat is properly
located and leveled. Then, if recalibration still seems
necessary, proceed as follows:
1. Move temperature adjustment lever to a setting about
5° above room temperature.
2. Remove thermostat cover. Slip
7
⁄32” wrench onto hex
nut beneath bimetal and hold temperature adjust-
ment lever stationary. Turn hex nut clockwise until
mercury shifts to right end of tube (see fig. 7).
3. Move temperature adjustment lever to lowest setting.
4. Replace thermostat cover. Wait 10 minutes for bi-
metal temperature to stabilize. Don’t stand near ther-
mostat during this period as your breath and body
heat will affect temperature of bimetal.
5. Move temperature adjustment lever to correspond to
actual room temperature. Then remove thermostat
cover.
6. Slip
7
⁄32” wrench onto hex nut, holding temperature
adjustment lever
Bimetal
7
⁄
32”
calibration
wrench
Temperature
adjustment
lever
Figure 7. Calibrating thermostat

If you need further information about this product, please write to
WHITE-RODGERS DIVISION
Emerson Electric Co.
9797 Reavis Road
St. Louis, MO 63123-5398
Attn: Technical Service Department
/