Page is loading ...

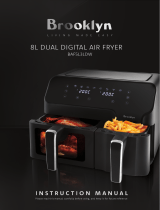
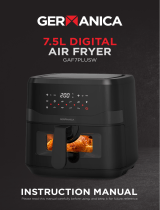
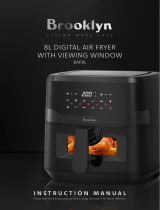
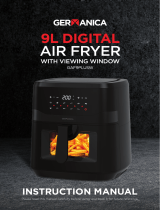
3.5L DIGITAL
AIR FRYER
GRDAF35L
INSTRUCTION MANUAL
Please read this manual carefully before using, and keep it for future reference.


CONTENTS
General Safety 4
Product Overview 8
Using the Appliance 10
Settings 13
Cleaning and Maintenance 14
Troubleshooting 15
Storage 17
Environment 17
Specifications 18
Customer Helpline Last Page

4
Read this manual thoroughly before you start using the Air Fryer. The safety
precautions instructions reduces the risk of fire, electric shock and injury when
correctly complied to. Please follow all instructions and take notice of all warnings.
IMPORTANT INFORMATION
GENERAL SAFETY
The lightning flash with symbol within the
triangle is intended to warn you of a
non-insulated dangerous voltage in the
product’s enclosure that could be of
sucient magnitude to generate a risk of
electric shock to persons.
The exclamation point within the triangle
is intended to warn you to the presence
of important operating and maintenance
instructions in the documents included with
the product.
The lightning flash symbol within the triangle is intended to warn you of
non-insulated dangerous voltage the product’s enclosure that could be of
sucient magnitude to generate a risk of electric shock to persons.
• Only using furniture that can safely support the Products.
• Ensure the Product is not overhanging the edge of the supporting furniture.
• Do not place the product on a high furniture without securing both the furniture
and the product to a stable support.
• Do not place the product on cloth or other conductive materials.
• Warn children of the dangers of climbing on furniture to reach the air fryer
or its controls and to call for an adult to assist.
IMPORTANT INFORMATION
The cover (or back) of the unit
should not be removed to prevent
risk of electric shock. This unit
must be serviced by a qualified
service personnel only. CAUTION! HOT
SURFACE

5
GENERAL SAFETY (Cont.)
• When handling Air fryer, make sure to use handle to remove basket after
using the air fryer. Other surfaces may be hot.
• The outside of the air fryer is hot during and after use.
• Always use heat-resistant gloves, pads, or oven mitts when handling hot
materials, and when placing items in or removing items from the air fryer,
including trays, racks, accessories, or containers.
• When the air fryer is not in use, and before cleaning, turn o the appliance,
then unplug from outlet. Allow to cool completely before putting on or
taking o parts.
• Do not immerse the housing, cord, or plug in water or liquid.
• Closely supervise children near the air fryer.
• Do not use your air fryer if it is damaged, not working, or if the cord or plug is
damaged. Contact Customer Support info@ayonz.com
• Do not use third-party replacement parts or accessories, as this may
cause injuries.
• Do not use outdoors.
• Be extremely cautious when removing the basket if it contains hot oil, grease,
or other hot liquids.
• Do not clean with metal scouring pads. Metal fragments can break o the pad
and touch electrical parts, creating a risk of electric shock.
• Clean the basket after using and after allowing it to cool. Accumulated grease
and crumbs can overheat and catch fire.
• Do not store anything on top of your air fryer when in operation. Do not store
anything inside your air fryer other than recommended accessories.
• Do not operate with a separate remote control system (i.e. Timers or Wi-Fi
Smart Power Plugs).
• Only use as directed in this manual.
• Not for commercial use. Household use only.
RECOMMENDED:
Air Fryers should be placed and used on a “stable, horizontal, flat and
heat-resistant” surface. Must be placed on an insulated heat pad.
We recommend you purchase a heat insulation pad to be placed under
the air fryer, as the heat generated from the air fryer may cause damage
to the surface overtime.

6
GENERAL SAFETY (Cont.)
WHEN USING ELECTRICAL APPLIANCES, BASIC SAFETY PRECAUTIONS
SHOULD ALWAYS BE FOLLOWED INCLUDING THE FOLLOWING:
1. Read all instructions.
2. Do not touch hot surfaces.
3. To protect against electric shock do not immerse cord, plugs, or base in water
or other liquid.
4. WARNING: This electrical appliance contains a heating function. Surfaces,
also dierent than the functional surfaces, can develop high temperatures.
Since temperatures are dierently perceived by dierent persons, this
equipment shall be used with CAUTION. The equipment shall be touch only
at intended handles and gripping surfaces, and use heat protection like
gloves or similar. Surfaces other than intended gripping surfaces shall get
suciently time to the cool down before getting touched.
5. Unplug from outlet when not in use and before cleaning. Allow to cool before
putting on or taking o parts.
6. Type Y: If the supply cord is damaged, it must be replaced by the
manufacturer, its service agent or similarly qualified persons in order to
avoid a hazard.
7. The use of accessory attachments not recommended by the appliance
manufacturer may cause injuries.
8. Do not use outdoors
9. Do not let cord hang over edge of table or counter, or touch hot surfaces.
IMPORTANT SAFEGUARDS

7
GENERAL SAFETY (Cont.)
10. Do not place on or near a hot gas or electric burner, or in a heated oven.
11. Extreme caution must be used when moving an appliance containing
hot oil or other hot liquids.
12. Always attach plug to appliance first, then plug cord in the wall outlet.
To disconnect, turn any control to “o,” then remove plug from wall outlet.
13. Do not use appliance for other than intended use.
14. This appliance is not to be used by persons including children with
reduced physical, sensory or mental capabilities, or lack of experience
and knowledge, unless they have been given supervision or instruction.
Children being supervised not to play with the appliance.
15. Keep the appliance and its cord out of reach of children less than 8 years.
16. The appliances are not intended to be operated by means of an external
timer or separate remote-control system.
This product is equipped with an overheating protection system. When the
internal temperature control system fails, the overheat protection system will
automatically turn on. The product can no longer be used at any time. Please
unplug the plug first.
OVERHEATING PROTECTION

8
PRODUCT OVERVIEW
A. Support plate
B. Holder
C. Pot
D. Air inlet
E. Display board
F. Air outlet

9
PRODUCT OVERVIEW (Cont.)
1. Working indicator
2. Temperature/time display
3. Temperature indicator
4. Time indicator
5. Temperature increase button
6. Temperature decrease button
7. Reservation function button
8. Switch start button
9. Function button
10. Time increase button
11. Time decrease button
a. The heat indicator light will come on at this time.
b. The time will count down from the set cooking time.
c. The hot air frying process is in progress.
d. Excess oil from ingredients will collect at the bottom of the fryer.

10
USING THE APPLIANCE
Before using this product, please read through the instruction manual,
and preserve the booklet for the later reference.
IMPORTANT INFORMATION
BEFORE FIRST USE
PREPARATION FOR USE
1. Remove all packaging materials, including those in the fryer.
2. Please remove the adhesive or label from the product.
3. Clean the fryer and grill thoroughly with hot water, detergent, and a
non-abrasive sponge.
NOTE: You can also use the dishwasher to clean these parts. Please wipe
the inside and outside of the product with a damp cloth.
CAUTION: This air fryer is heated by hot air. Do not pour oil or grease
in the fryer.
1. Place the product on a stable, level, and flat surface. Do not place the
product on a heat resistant surface.
2. Place the grill properly in the fryer.
3. Push the fryer into the product correctly.
NOTE: The fryer must be correctly placed in the product, otherwise the
product will not work!
4. Pull out the wire and insert it into the wall socket that has been grounded.
5. Do not pour oil or other liquids into the fryer.
6. Do not place objects above the product.
7. Do not place anything on the air inlet at the bottom, which will block the
airflow and aect the heating eect of hot air.

11
USING THE APPLIANCE (Cont.)
USE OF THE PRODUCT
NOTE: Do not touch the fryer for a short time after use when it is hot. Please
hold the holder to move the fryer.
1. Insert the power cord plug into a grounded outlet.
2. Carefully pull the fryer out of the air fryer.
3. Put the ingredients into the fryer basket.
NOTE: Do not put more ingredients than the MAX indicator or more than
the amount shown in the table below, as this may aect the frying quality.
4. Push the fryer back into the air fryer.
DO NOT use the fryer without the basket. If heating product without the
fryer basket, open the drawer using oven mitts. The edges and inside of the
drawer will become very hot.
CAUTION: Do not touch the skillet during or for a short time after use as it
is very hot.
5. Adjust the temperature (this operation is not required for products that are
not temperature adjustable) to the desired temperature.
6. The time control button determines the desired food preparation time.
7. Press the Start/Confirm button to power on the product.
NOTE: You can also preheat the product without adding ingredients when
necessary. At this time, please adjust the time more than 5 minutes, then
wait for the heating indicator light to go out (about 5 minutes later), and
then adjust the timer knob to the desired cooking time.
8. Confirm the required time and temperature for cooking the ingredients,
press the button on the control panel to adjust the time and temperature to
the required temperature and time for cooking the ingredients.
NOTE: When you set the time to half the cooking time, which means you
must set the time again for the remaining cooking time after flipping.
NOTE: When you set the time to the full cooking time; the timer will not
ring until the set cooking time is completed. You can draw out the fryer
at any time during the cooking process to check the food. The power
supply will automatically turn o after you draw out the fryer and turn on
automatically after the fryer is put into the product again. (In this case, the
timer is always counting down.)

12
USING THE APPLIANCE (Cont.)
9. When the timer rings; the set cooking time is reached. Pull the fryer out of
the product and place it on a heat-resistant surface.
10. Check that the ingredients are cooked.
If the ingredients are not fully cooked, just push the fryer back into the
product and adjust the heating time for an additional few minutes.
11. For smaller ingredients (such as French fries), remove the fryer basket from
the bottom of the pan and fry.
Do not invert the fryer basket while it is still attached to the fryer, otherwise,
residual oil from the bottom of the fryer will leak into the ingredients.
The fryer and ingredients after frying with hot air are still very hot.
Depending on the type of ingredients in the air fryer, steam may be released
from the fryer.
12. 12. Spoon the ingredients from the fryer basket into a serving dish.
TIP: When it is necessary to take out large or fragile ingredients, you can use
a clip to clip them out of the fryer basket.
13. The air fryer can start cooking the next batch of ingredients at any time after
the cooking of one batch of ingredients is completed.

13
SETTINGS
TYPE MIN. MAX.
FOOD AMOUNT
(G)
TIME
(MIN.)
TEMP. (OC) OVERTURNING ADDITIONAL
INFORMATION
300-500 15 200 Overturning -
300-800 18 200 Overturning -
300-500 18-25 160 Overturning -
2-3PCS 15-20 180 Overturning -
4-8PCS 20-25 200 Overturning Adding 1/2
spoon of oil
2-3PCS 18-25 200 Overturning -
300-500 35-50 200 Overturning -
300-500 15-20 180 Overturning Adding 1/2
spoon of oil
3-6PCS 20-25 180 Overturning
2-3PCS 15-20 180 Overturning Adding 1/2
spoon of oil

14
CLEANING AND MAINTENANCE
• The product should be cleaned immediately after each use.
• The fryer, grill and product interior are covered with a non-stick coating. Do
not use metal kitchen utensils or abrasive cleaning materials for cleaning to
avoid damaging the non-stick coating.
1. Remove the power plug from the electrical outlet and cool the product.
NOTE: Remove the fryer to allow the air fryer to cool down faster.
2. Wipe the exterior of the product with a damp cloth.
3. Wash the fryer and grill with hot water; detergent and a non-abrasive
sponge. You can use a degreaser to wash away any remaining dirt.
Note: The fryer and grill can be cleaned in the dishwasher.
TIP: If dirt sticks to the grill, or the bottom of the fryer, add hot water to the
fryer and some detergent. Place the grill in the fryer and let the fryer and grill
soak for about 10 minutes.
4. Clean the inside of the product with hot water and a non-abrasive sponge.
5. Clean the heating element with a cleaning brush to sweep away food residue.

15
TROUBLESHOOTING
PROBLEM POSSIBLE CAUSES SOLVING METHOD
The frying-pan
does not work
1. The plug of the
product is not
inserted into the
power socket.
2. You have failed to
set the timer
1. Insert the plug into the grounded power
socket.
2.Turn the timer knob to set the right time
needed for cooking, and then turn on the
power.
Food ingredients
cooked by the
frying-pan not
ripe enough
1. Too much food
ingredients in the
frying basket.
2. The heating
temperature
enacted is
too low.
3. The cooking
time is too short.
1.Put the food ingredients into the frying
basket in small batches. In small batches,
the frying can be more evenly distributed.
2.Turn the temperature control knob to
set the temperature required.
3.Turn the timer knob to decide the time
for cooking (refer to the “Setting” part in
the chapter of “Operating this Product”)
Food ingredients
not baked evenly
in the frying-pan.
Some food ingredients
should be overturned
during the process of
cooking.
If some food ingredients lay on the top, or
join together with other food ingredients
(e.g. fried chips), then they must be
overturned in the process of cooking,
please refer to the “Setting” part in the
chapter of “Operating this Product”)
The fried
refreshment
coming out of the
frying-pan not
crisp.
The frying refreshment
you choose must be
baked in traditional
fryer.
You can choose the oven refreshment, or
you can add some oil on the refreshment
to increase their crispy quality.

16
TROUBLESHOOTING (Cont.)
PROBLEM POSSIBLE CAUSES SOLVING METHOD
White smoke
coming out of
the product.
1.You are cooking
food ingredients with
a high content of oil.
2.Oil dirt from last
use is still remained
inside the frying-pan.
1.When you are cooking food ingredients
with comparatively high oil content in the
fat-free fryer, a large amount of oil fume
will infiltrate into the frying-pan might be
hotter than usual, But this will not aect
the final cooking eect.
2.The white smoke produced by heating
the oil and fat inside the frying-pan. Make
sure to clean the frying-pan each time
after the using.
Fresh crisps
are not fried
evenly inside
the frying-pan.
You have hailed to
soak the potato
chips correctly
before the frying.
Use fresh potatoes, and make sure that
they will not split in the process of frying.
The crisp extent
is decided by the
oil content and
moisture content
contained in the
potato chips.
You in Fried potatoes
before not correctly
article soaking.
1.Make sure to drain the potato chips
correctly before adding oil to them.
2.By cutting the potato chips into smaller
sizes, they can be made lighter and crisper.
3.The potato chips can be made lighter and
crisper by adding small amount of oil to
them.

17
STORAGE
ENVIRONMENT
1. Unplug the appliance and let it cool down.
2. Make sure all parts are clean and dry.
Do not throw away the appliance with the normal household waste when it is
exhausted,, but hand it in at an official collection point for recycling. By doing this,
you help to preserve the environment
This marking indicates that this product should not be disposed with other
household wastes throughout the Australia. To prevent possible harm to the
environment or human health from uncontrolled waste disposal, recycle it
responsibly to promote the sustainable reuse of material resources. To return
your used device, please use the return and collection systems or contact the
retailer where the product was purchased. They can take this product for
environmental safe recycling.
Correct Disposal of this product

18
SPECIFICATIONS
Power Supply 220-240V~50-60Hz
Rated Power 1400W
Unit Dimensions 234 (w) x 301 (d) x 234 (h) mm
Weights Net: 3.25kg / Gross: 4.25kg

19
THIS PAGE HAS
BEEN LEFT BLANK
ON PURPOSE

CUSTOMER HELPLINE:
info@ayonz.com
DISTRIBUTED BY:
Ayonz Pty Ltd
/