STIEBEL ELTRON DHCE 6/50 Operation And Installation Instructions Manual

Type
Operation And Installation Instructions Manual

This manual is also suitable for

STIEBEL ELTRON DHCE 6/50 is an electronic instantaneous water heater designed to provide hot water on demand. With three temperature settings, it delivers water up to 50°C (122°F). The unit is easy to install and operate, making it a convenient choice for various applications like sinks and baths. Refer to the manual for detailed instructions on installation and operation.

STIEBEL ELTRON DHCE 6/50 is an electronic instantaneous water heater designed to provide hot water on demand. With three temperature settings, it delivers water up to 50°C (122°F). The unit is easy to install and operate, making it a convenient choice for various applications like sinks and baths. Refer to the manual for detailed instructions on installation and operation.

This water heater must be installed (water and electrical installation),
commissioned and serviced by approved service technicians in
accordance with these instructions.
English
Instantaneous water heater - Operation and installation instructions
DHCE 6/50, 8/50
STIEBEL ELTRON
2
General information
The chapter Operation is intended
for users and qualified installers.
The chapter Installation is intended
for qualified installers.
Read these instruction
carefully before using the
appliance and retain them for
future reference. If the appliance
is passed on to a third party please
hand these instructions to the new
user.
- This appliance is not
intended for use by
persons (including children) with
reduced physical, sensory or men-
tal capabilities, or lack of experi-
ence and knowledge, unless they
have been given supervision or
instruction concerning use of the
appliance by a person responsible
for their safety.
- Children should be
supervised to ensure that
they do not play with the appliance.
General information
WARNING:
THIS APPLIANCE DELIVERS
WATER NOT EXCEEDING 50°C IN
ACCORDANCE WITH AS 3498.
REFER TO AS/NZS 3500.4, LOCAL
REQUIREMENTS AND INSTALLA-
TION INSTRUCTIONS TO DETER-
MINE IF ADDITIONAL DELIVERY
TEMPERATURE CONTROL IS
REQUIRED.
WARNING:
For continued safety of this
appliance it must be installed,
operated and maintained in
accordance with the
manufacturers instructions.
a
b
cdFig. 1
Description of the unit (External)
STIEBEL ELTRON 3
Operation Instruction for the user and the qualied installer
1. Operation and installation
instruction
1.1 Description of the unit.
The DHCE.../50 fully electronic instanta-
neous water heater heats the water while
it is owing through the unit. The indicator
light will show when the heater is in
operation, and the temperature can be
adjusted by turning the knob at the front
of the unit, which controls the operation
of the heater electronically.
1.2 Using the unit
1. Adjust the temperature using at
the selector.
Level heats the water to a
temperature of ~ 40 C
Level heats the water to a
medium temperature
of ~ 45C
Level heats the water to a
maximum temperature
of ~ 50C
Note : Incase incoming water ow is
too high or cold water
temperatures are to low
temperatures may not be reached.
2. Turn the hot water
valve
on. The
indicator light
will show at the
front of the unit (a)
1.3 Description of the unit (External)
a. Indicator Light c. Hot Water Outlet Pipe
b. Temperature Control knob d. Cold Water Inlet Pipe
STIEBEL ELTRON
4
Operation Instruction for the user and the qualied installer
The DHCE.../50 water heater
unit is to be installed in a closed,
frost-free room (disconnected units are to be
stored in a frost-free location, since there will
always be some water left in the unit) The
water heater is to be installed vertically on a
wall (water connection downwards).
Warning :
For electrical heating appliances
equipped with a heat cuto device that
does not reset automatically, if you would
like to reset the unit, the mains power
supply must be disconnected rst.
1.4 This model features an automatic
cut-o device that functions when the
water temperature is unusually high
.
In the event that the thermostat
cut o from operating, please
refrain from taking any action. Please contact
the Stiebel Eltron Service Centre for further
inspections and repairs to be made.
Call 1800 153 351 (Australia).
STIEBEL ELTRON 5
Operation Instruction for the user and the qualied installer
2. First Operation
Before turning on the water
heater to start operation open all
of water valves fully at every point, so that
water is able to ow through the heater
and expel air from the pipe and the tank,
until the water ow is constant. Please
ensure that the water heater is functioning
correctly, and close the valve again.
WARNING:
When selecting an appropriate
water temperature, the temperature may
be dangerously high, especially for children.
Keep away from the hot water outlet, as it
may cause a potential scalding hazard.
- The indicator light will show.
- The DHCE.../50 Water Heater fea-
tures a temperature control knob at the
front of the unit, whereby 3 temperature
levels may be selected.
2.1 Adjusting Water Flow
If the required temperature is not
reached, you may adjust the ow rate by
turning the combination valve or water
ow control device (Fig. 2, No.12).
The hot water temperature
depends on the power of the
unit, the cold water temperature and the
ow volume.
This appliance is designed for
domestic use. It can be used safely by
untrained persons. The appliance can also
be used in a non-domestic environment,
e.g. in a small business, as long as it is used
in the same way.
Warning Injury
The appliance may be used by
children aged 8 and up and persons with
reduced physical, sensory or mental
capabilities or a lack of experience provided
that they are supervised or they have
been instructed on how to use the
appliance safely and have understood the
resulting risks. Children must never play
with the appliance. Children must never
clean the appliance or perform user main-
tenance unless they are supervised.
STIEBEL ELTRON
6
Operation Instruction for the user and the qualied installer
3. Technical Data
Type DHCE 6/50 DHCE 8/50
Norminal capacity l. 0.45
Design Close outlet
Max. water pressure 1000 kPa
Min. water pressure to activate unit 200 kPa
Water connection G ½“ (External thread) (15mm)
Dimension (W x H x D) mm. 200 x 360 x 110
Weight kg. 2.0
Electrical connection 1/N/PE/AC 220..240 V.
Rated power (kW) Rated current (A.) kW - A kW - A
220 V 6.0 - 27.3 8.0 - 36.4
230 V 6.6 - 28.7 8.7 - 37.8
240 V 7.1 - 29.6 9.5 - 39.6
Safety device Manual reset thermostat
4. Regulations and Provisions
- Regulations of the local power
supply company should be
observed.
- Regulations of the water supply
company should be observed
- Read & study the technical data.
- Install the unit vertically on the
wall.
- Electrical connection to be
secured.
The device must be capable of
being isolated from the mains,
for example by fuses, with an isolating
distance of at least 3.5 mm. in all poles.
5. Important notes
- Make sure the data on the unit rating
plate is current
- Install the unit so that it is ush with
the wall
- Material for the water installation:
Installation must comply with
AS/NZS 3500.4
STIEBEL ELTRON 7
Operation Instruction for the user and the qualied installer
Guarantee
Steel, copper, or plastic piping
systems. If plastic piping systems
are being used, the following
instructions are to be respected.
- Temperature : max 50 ˚C
- Pressure : max 1000 kPa
The unit must be connected to
the protective earth conductor
(see electric circuit diagram).
6. Installation location
The instantaneous water heater
should be installed in an enclosed
frost-free area, if possible close to the
drawing-o point (when dismantled, the
unit is to be stored in a place not subject to
frost, because there will always be some
residual water left inside). The unit is to be
installed vertically, as in Example (Fig. 1)
7. Care and maintenance
All the information in these
instructions for operation and
installation must be followed carefully.
They provide important information
regarding safety, operation, and
maintenance of the unit.
A damp cloth is sucient to clean the
outside of the unit. Do not use any foam-
ing or abrasive cleaning agents!
Maintenance work may only be
carried out by a qualied installer.
When carrying out any work,
disconnect the unit from the
mains.
8. Guarantee
For guarantees please refer to the respec-
tive terms and conditions of supply for
your country.
The installation, electrical
connection and rst operation
of this appliance should be carried
out by a qualied installer.
The company does not accept
liability for any failure caused
by inproper installation and / or
unauthorized installers.
9. Fault elimination for the user
STIEBEL ELTRON
8
Fault elimination for the user
Fault Cause Rectication
No hot water despite water ow
through the unit.
- The water ow volume
required for the unit
to turn it on has not
been reached.
- Increase ow volume
- Water ow too high - Reduce water ow
- Heating setting too low - Turn knob to the right
(max. position)
STIEBEL ELTRON 9
Installation Instruction for the qualied installer
Description of the unit (Internal)
1
6
13
5
2 10
11
7
8
9
12
14
Fig. 2
Description of the unit
(internal)
1. Upper mounting hole
2. Lower mounting hole
3.
Depth for mounting screw
(Fig. 6 No.3)
4. Distance of the connection
cable (Fig. 5 No.4)
5. Thermostat
6. Cable entry with seal
7. Electrical connection
8. Plug connecting the circuit
board to the cover
9. Reed switch
10. Cold water connection
11. Hot water connection
12. Flow Limiter
13. Circuit board cover
14. Cover
Fig. 3
Installation to a bath / sink.
Fig. 4 Fig. 5
Dimension Cable
4
100 mm
200 mm
35 mm
G1/2
G1/2
110 mm.
59 mm.
280 mm.
360 mm.
270 mm.
264 mm.
9 mm.
50 mm.
65 mm
STIEBEL ELTRON
10
Installation Instruction for the qualied installer
Fig. 6 Fig. 7
Using the installation template to drill the holes Wiring diagram
Wall Mounting
A - Heating Element
B - Electronic control set
C - Control Triac set
D - Thermal cut-out
E - Temperature Sensor (Inlet)
F - T
emperature Sensor (Outlet)
4 x 35 mm
4,3 mm
Fig. 8
min. 4.5 mm
max. 5.5 mm
mm 6
4 x 35 mm
6 mm
4 x 35 mm
6 mm
3
STIEBEL ELTRON 11
Installation Instruction for the qualied installer
Fig. 9 Fig. 11
Fig. 10 Fig. 12
(concealed connection)
STIEBEL ELTRON
12
Installation Instruction for the qualied installer
Installation
Preparation before installation of the unit:
- Before taking any action, always
switch o the water heaters main circuit
breaker rst.
- Place a drilling guide at the drilling
position in order to drill a hole in the wall
(Fig. 6).
- Insert a wall plug and screw in (the
depth of the protruding screw head must
be correct) (Fig. 6 No.3).
- Remove the screw from underneath
the water heater to open the cover of the
unit.
.
- Open the cover of the unit.
- Remove the plug connecting the
cover of the unit.
- Inspect the internal components.
The cable must be in good condition,
- Create an opening for the water
inlet in the case of wall-embeded and
wall-mounted pipes.
Fig. 14
Fig. 15
Fig. 16
Fig. 13
STIEBEL ELTRON 13
Installation Instruction for the qualied installer
- In the case of laying the cable from
above and from the side, create an opening
for the electric cable using a pair of pliers to
pinch or break the plastic chip on the side or
on the top of the heater as appropriate, so
that the cable is tightly secured to the unit.
- Insert the cable through the rubber
seal at the rear of the unit. Please ensure
that the power is turned o at the mains.
- A circuit breaker or power control
switch should be installed before the unit.
The size of the circuit breaker must corre-
spond to the voltage of the heater (check
the size of the circuit breaker in the
Technical Information section).
- Hang the heater on the screws
mounted on the wall, and slide the heater
down into position.
- Measure and cut the insulation at the
end of the wire in preparation.
- Insert the wires into the respective
openings according to the diagram, and fasten
the screws to secure the wires tightly. Please en-
sure that the correct size of wire is used.
A
min. 46
max. 50
mm
HW
C
B
CW
CW
B
A
Fig. 17 Fig. 18
STIEBEL ELTRON
14
Installation Instruction for the qualied installer
Connecting Water Pipes (concealed connection)
Connecting the water heater to a wall-em-
bedded water pipe:
- Connect the nipple joints (Fig. 17/B)
to the cold water inlet pipe and the hot water
outlet pipe embedded in the wall at an
appropriate position and depth (please pay
attention to the distances shown in the dia-
gram).
- Screw the joints on the unit (Fig. 17/A)
to the joints (both hot and cold water), using a
rubber leakage gasket (Fig. 17/C) between
the joints.
Installing Water Heater wall-mounted
Connecting the water heater to a wall-mounted
water pipe:
- Connect the prepared water pipe to the
pre-assembled nipple joint.
- Screw the joints on the unit (Fig. 18/A)
to the pipe (both hot and cold water), using a
rubber leakage gasket (Fig. 18/B) between
the joints.
The cold water pipe must be turned
on in order to rinse it before
installation. Pressure-resistant equipment
must be used in compliance with accepted
standards.
Fig. 19
Fig. 20
Fig. 21
STIEBEL ELTRON 15
Installation Instruction for the qualied installer
- Install the cover. Connect the power
cord between the circuit board and the cover.
- After installation is complete, close
the casing and screw in tightly.
Stiebel Eltron Warranty for Water Heaters – Models DHCE
Who gives the warranty
1. The warranty is given by Stiebel Eltron (Aust) Pty Ltd (A.B.N.
82 066 271 083) of 6 Prohasky Street, Port Melbourne, Victoria,
3207 (“we”, “us” or “our”).
The warranty
2. This warranty applies to Stiebel Eltron Water Heaters –
Models DHCE 6/50, DHCE 8/50 and DHCE 8/60 (the “unit”)
manufactured after 1 May 2015.
3. Subject to the warranty exclusions we will repair or replace,
at our absolute discretion, a faulty component in your unit
free of charge if it fails to operate in accordance with its
specifications during the warranty period.
4. If we repair or replace a faulty component to your unit under
this warranty, the warranty period is not extended from the
time of the repair or replacement.
5. The warranty period commences on the date of completion
of the installation of the unit. Where the date of completion
of installation is not known, then the warranty period will
commence 2 months after the date of manufacture.
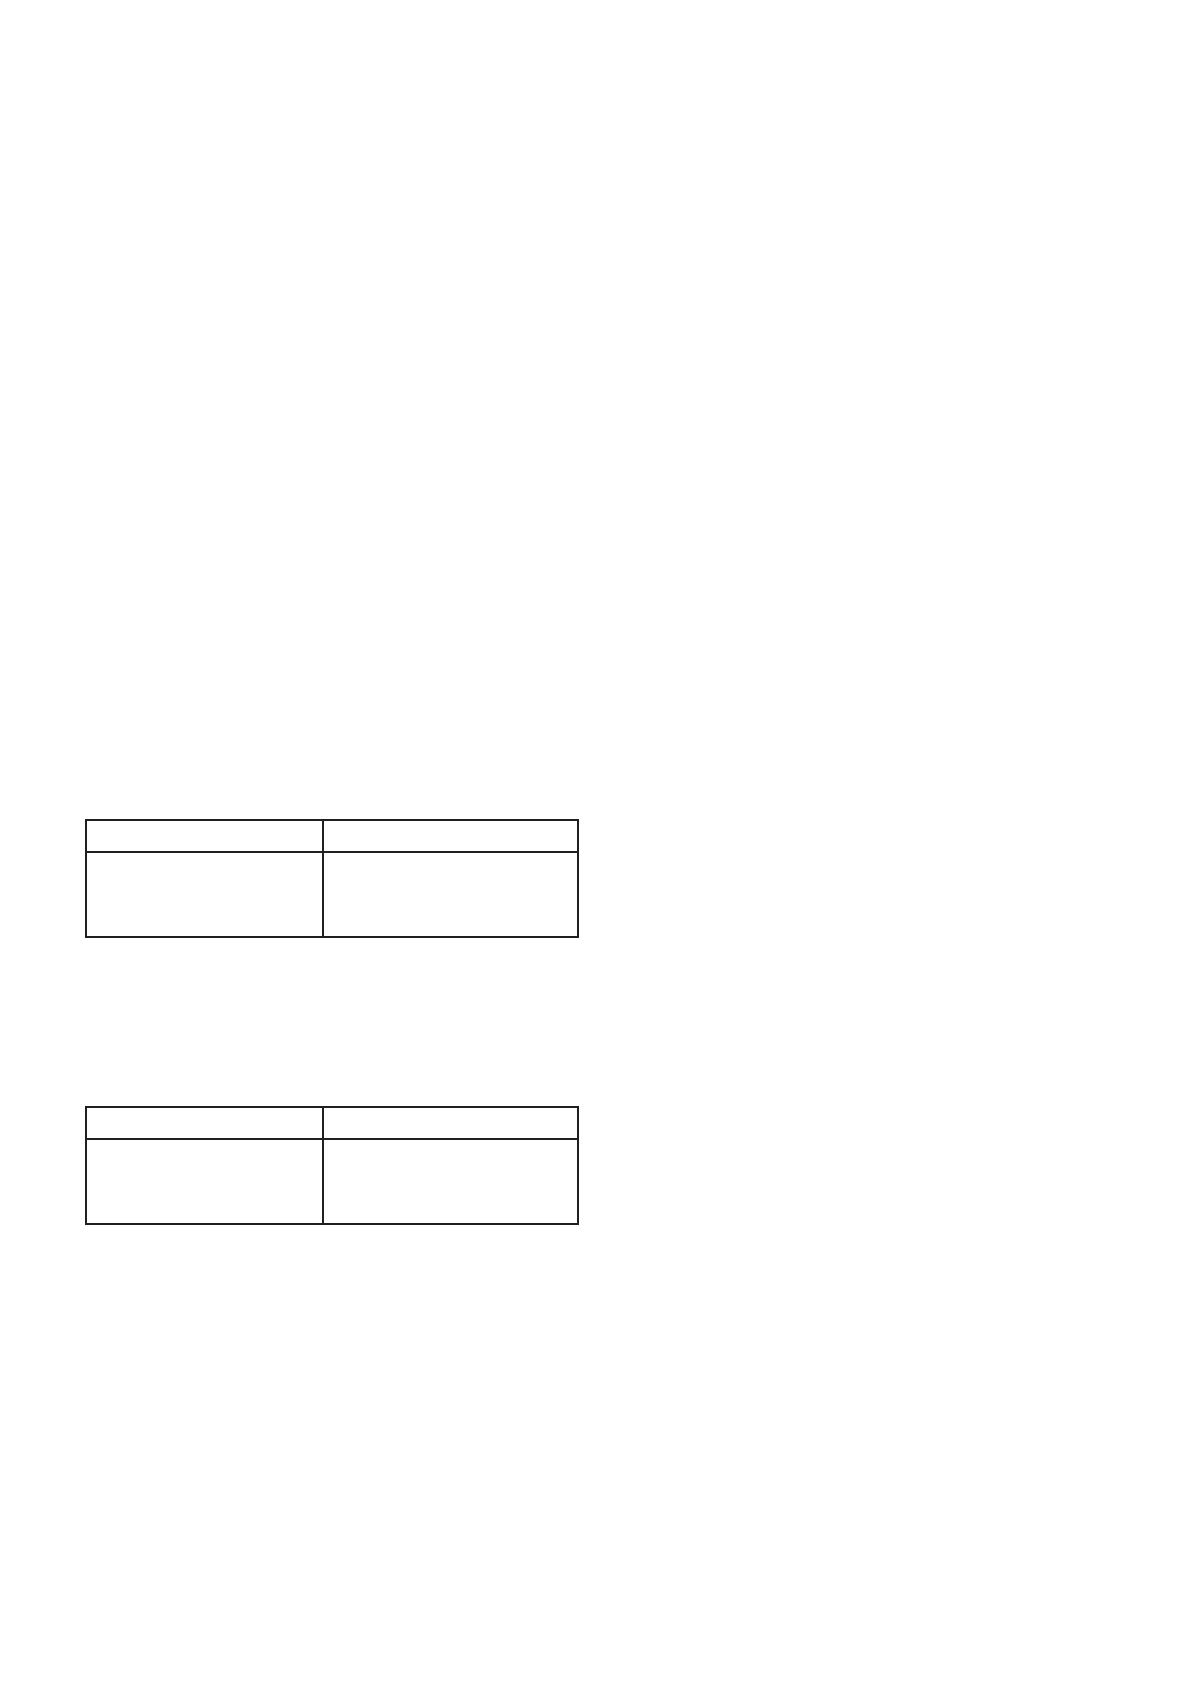
6. The warranty period for a unit used for domestic purposes is
shown in the table below. Domestic purposes means that the
unit is used in a domestic dwelling.
Component Warranty period
All components 5 years from the date of
completion of the installation
of the unit.
7. The warranty period for a unit used for commercial purposes
is shown in the table below. Commercial purposes means that
the unit is used for a non-domestic purpose and includes but
not limited to being used in a motel, hotel, mining camp or
nursing home.
Component Warranty period
All components 1 year from the date of
completion of the installation
of the unit.
Your entitlement to make a warranty claim
8. You are entitled to make a warranty claim if:
8.1. you own the unit or if you have the owner’s
consent to represent the owner of the unit;
8.2. you contact us within a reasonable time of
discovering the problem with the unit;
How you make a warranty claim
9. To make a warranty claim you must provide us with the
following information:
9.1. The model number of the unit;
9.2. A description of the problem with the unit;
9.3. The name, address and contact details (such as
phone number and e-mail address) of the owner;
9.4. The address where the unit is installed and the
location (e.g. in laundry);
9.5. The serial number of the unit;
9.6. The date of purchase of the unit and the name of
the seller of the unit;
9.7. The date of installation of the unit;
9.8. A copy of the certificate of compliance when the
unit was installed.
10. The contact details for you to make your warranty claim are:
Name: Stiebel Eltron (Aust) Pty Ltd
Address: 6 Prohasky Street, Port Melbourne,
Victoria, 3207
Telephone: 1800 153 351
(8.00 am to 5.00 pm AEST Monday to Friday)
Contact person: Customer Service Representative
E-mail: service@stiebel.com.au
11. We will arrange a suitable time with you to inspect and test
the unit.
Warranty exclusions
12. We may reject your warranty claim if:
12.1. The unit was not installed by registered and
qualified tradespeople.
12.2. The unit was not installed and commissioned:
(a) in Australia;
(b) in accordance with the Operating and
Installation Guide; and
(c) in accordance with the relevant statutory
and local requirements of the State or
Territory in which the unit is installed.
12.3. The unit has not been operated or maintained in
accordance with the Operating and Installation Guide.
12.4. The unit does not bear its original Serial Number
or Rating Label.
12.5. The unit was damaged by any or any
combination of the following:
(a) normal fair wear and tear;
(b) connection to an incorrect water supply;
1 Jan 2014
(c) connection to water from a bore, dam or
swimming pool;
(d) connection to an incorrect power supply;
(e) connection to faulty equipment, such as
damaged valves;
(f) foreign matter in the water supply, such
as sludge or sediment;
(g) corrosive elements in the water supply;
(h) accidental damage;
(i) act of God, including damage by flood,
storm, fire, lightning strike and the like;
(j) excessive water pressure, negative water
pressure (partial vacuum) or water pressure
pulsation.
12.6. The unit was damaged before it was installed
e.g. it was damaged in transit.
12.7. An unauthorised person has modified, serviced,
repaired or attempted to repair the unit without our
consent.
12.8. Non genuine parts other than those
manufactured or approved by us have been used on
the unit.
13. We may charge you:
13.1. for any additional transport costs if the unit is
installed more than 30 kilometres from our closest
authorised service technician.
13.2. for the extra time it takes our authorised service
technician to access the unit for inspection and
testing if it is not sited in accordance with the
Operating and Installation Guide and not readily
accessible for inspection.
13.3. for any extra costs of our authorised service
technician to make the unit safe for inspection.
14. You must ensure that access to the unit by our authorised
service technician is safe and free from obstruction.
15. Our authorised service technician may refuse to inspect and
test the unit until you provide safe and free access to it, at your
cost.
16. If we reject your warranty claim in accordance with clause
12, we may charge you for our authorised service technician’s
labour costs to inspect and test the unit.
17. In order to properly test the unit we may remove it to
another location for testing.
Australian Consumer Law
18. Our goods come with guarantees that cannot be excluded
under the Australian Consumer Law. You are entitled to a
replacement or refund for a major failure and compensation for
any other reasonably foreseeable loss or damage. You are also
entitled to have the goods repaired or replaced if the goods fail
to be of acceptable quality and the failure does not amount to a
major failure.
19. The Stiebel Eltron warranty for the unit is in addition to
any rights and remedies you may have under the Australian
Consumer Law.
1 Jan 2014
Part no. 7901-312238
Part name : OPERATING INSTRUCTION DHCE.../ 50
Product code : DHCE 6/50 : 233639 / DHCE 8/50 : 233640
STIEBEL ELTRON (AUST) Pty Ltd
Free call 1800 153 351 (Australia) | stiebel.com.au
  • Page 1 1
  • Page 2 2
  • Page 3 3
  • Page 4 4
  • Page 5 5
  • Page 6 6
  • Page 7 7
  • Page 8 8
  • Page 9 9
  • Page 10 10
  • Page 11 11
  • Page 12 12
  • Page 13 13
  • Page 14 14
  • Page 15 15
  • Page 16 16
  • Page 17 17
  • Page 18 18

STIEBEL ELTRON DHCE 6/50 Operation And Installation Instructions Manual

Type
Operation And Installation Instructions Manual
This manual is also suitable for

STIEBEL ELTRON DHCE 6/50 is an electronic instantaneous water heater designed to provide hot water on demand. With three temperature settings, it delivers water up to 50°C (122°F). The unit is easy to install and operate, making it a convenient choice for various applications like sinks and baths. Refer to the manual for detailed instructions on installation and operation.

Ask a question and I''ll find the answer in the document

Finding information in a document is now easier with AI