Getting to know your Micro System
You’ll be up and running in no time
Getting to know your Micro System 15
section of these instructions, or online at www.argos-support.co.uk If you still require further assistance, call one of our experts on 0345 600 3021.
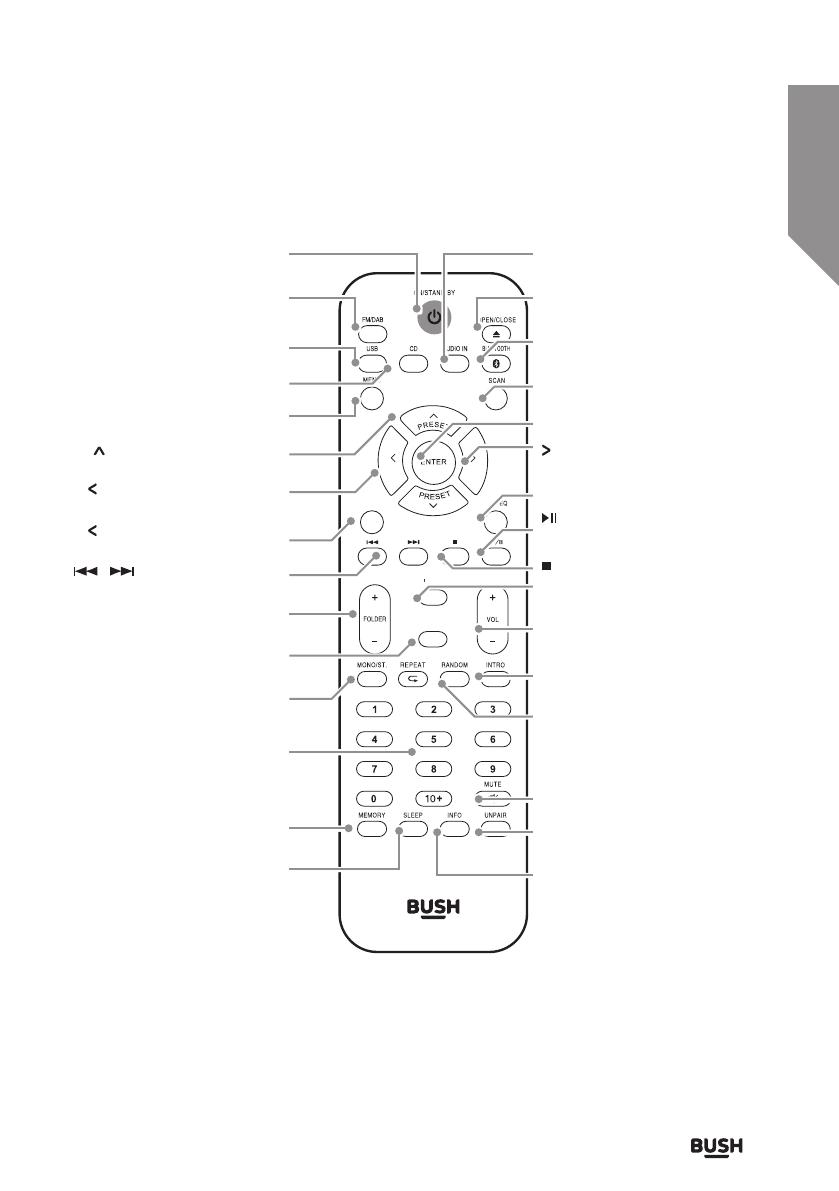
X-BASS
TUNE
TUNE
TREBLE
LIGHT
TUNE: Tune down and menu
navigation button
TUNE: Tune down and menu
navigation button
MONO/ST: Press to switch between
FM radio stereo & mono modes
NUMERIC BUTTONS: Press to enter
digits directly
MEMORY/PROGRAM: Press and
hold to store a radio station preset/
Press in CD STOP mode to program
a playlist
SLEEP: Press to activate the sleep
timer settings
/ : Skip to the previous or
next track in CD mode.
X-BASS: Press to enhance the bass
output
FOLDER +/-: Skip folders on a disc
or USB flash drive
PRESET: Tune up and menu
navigation button
AUDIO IN: Press to enable the
audio in mode
OPEN/CLOSE: Press to eject or
close the disc compartment
BLUETOOTH: Press to enable
Bluetooth mode
SCAN: Press to perform a station
scan FM/DAB
ENTER: Press select menu options
TUNE: Tune up and menu
navigation button
EQ: Press to cycle EQ sound modes
INTRO: Press to playback the first 10
seconds off all tracks on a CD
RANDOM: Press to playback CD
tracks in a random order
MUTE: Press to mute audio
playback.
PLAY/PAUSE: Press for play,
pause functions
STOP: Press to stop playback
TREBLE: Press enable BASS &
TREBLE adjustments
VOLUME +/-: Press + to increase
and - to decrease the volume level
UNPAIR: Press and hold to unpair a
connected Bluetooth device
INFO: Press in DAB mode to display
information
FM/DAB: Press to switch between
FM & DAB radio
USB: Press to enable USB mode
MENU: Press enable the DAB/FM
menu options
CD: Press to enable CD mode
Standby: Standby mode ON/ OFF
button


