Page is loading ...

Dell Networking W-7008-MNT-19 Mounting Kit
Installation Guide
0511923-01 | July 2016 1
This document provides installation instructions for mounting the W-7008 controller in a two-post 19-inch Telco
rack.
Package Contents
Rack mount tray
Power adapter bracket
Hard disk drive (HDD) bracket
Four M6 x 15 mm Phillips pan head screws
Four M3 x 5 mm flat head screws
Four M3 x 6 mm pan head screws
Power supply cord clip
Installation Guide (this document, printed)
Rack Mount Installation
This mounting option allows mounting the W-7008 controller in a two-post 19-inch Telco rack.
Required Tools and Equipment
The following tools and equipment are required for installing a W-7008 controller:
Rack mount tray (x1) for rack mount installation
Power adapter bracket for securing the adapter on the rack mount tray
Power supply cord clip for securing the power supply cord
M3 x 5 mm flat head screws (x4) for securing the controller on the rack mount tray
M6 x 15 mm Phillips pan head screws (x4) for rack mount
M3 x 6 mm pan head screws (x2) for power adapter bracket
(Optional) HDD bracket for securing the HDD on the rack mount tray
(Optional) M3 x 6 mm pan head screws (x2) for HDD bracket
Suitable screwdrivers for all screw types provided in the box (not included in the kit)
Installation Steps
To install a W-7008 controller into a two post 19-inch Telco rack:
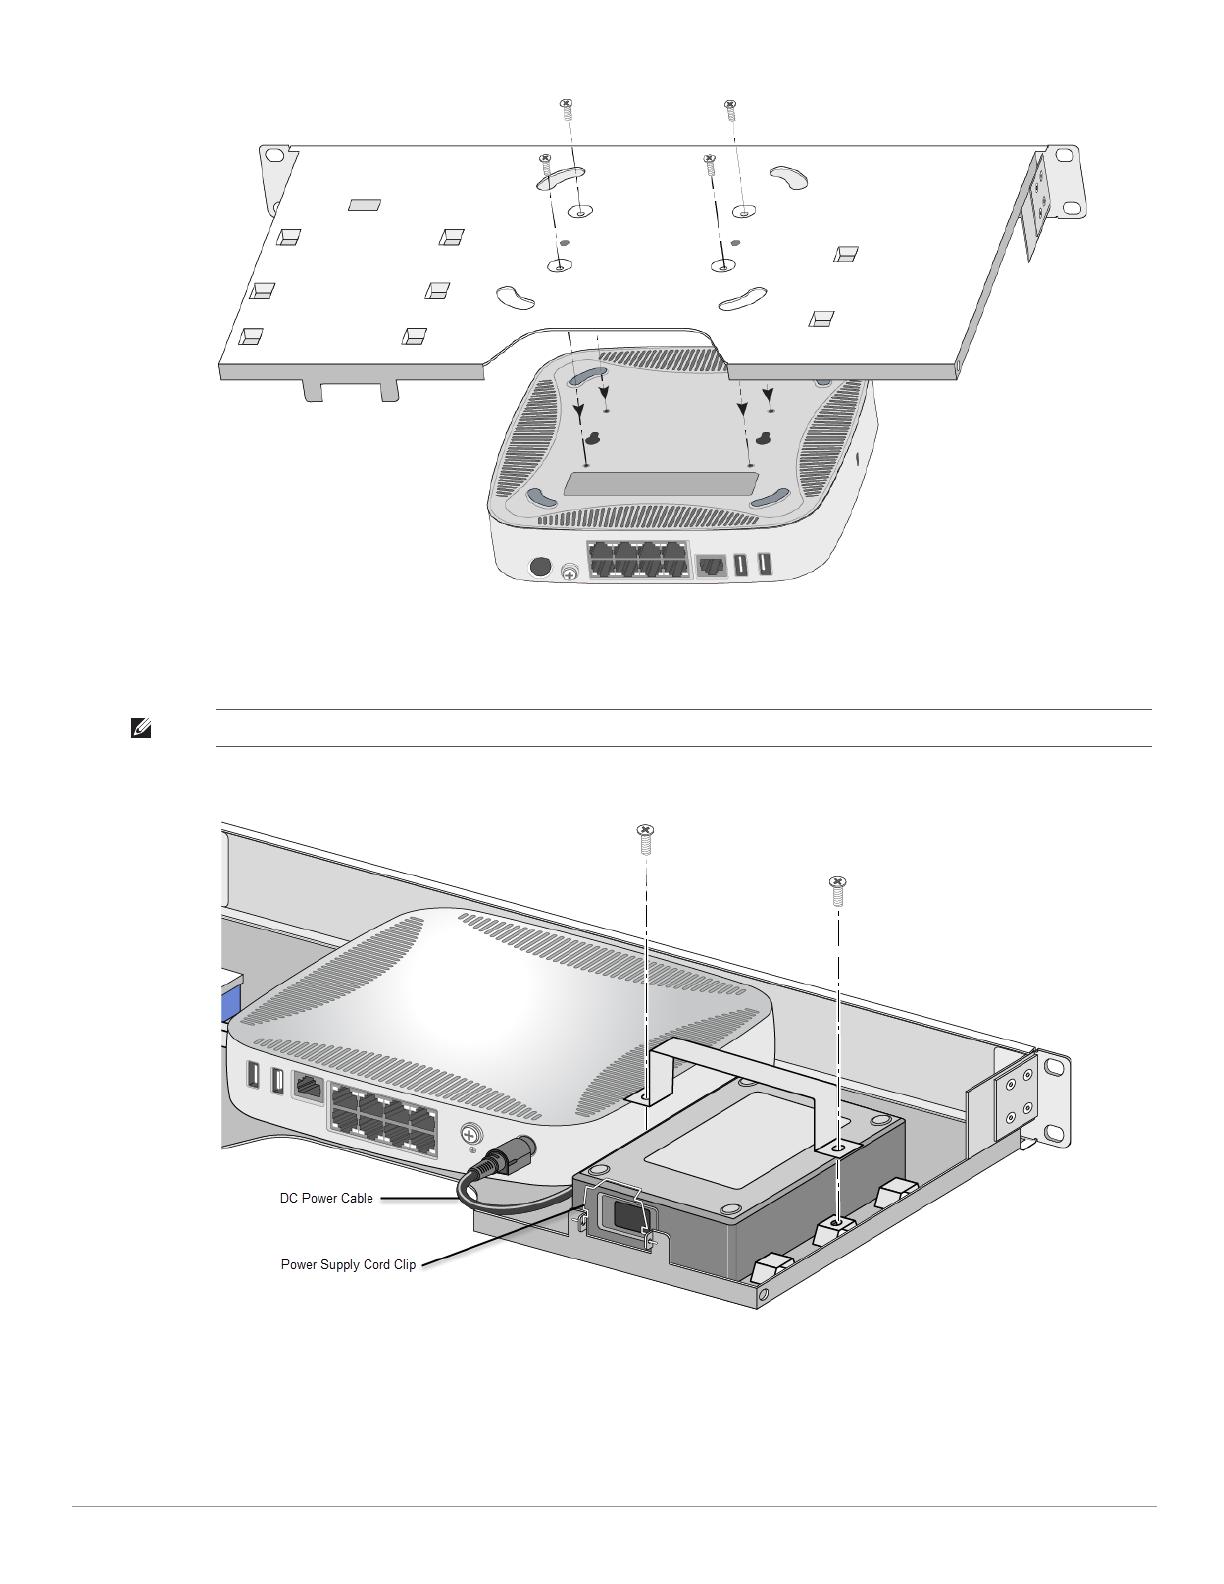
1. Turn the rack mount tray up side down to align the controller with the screw holes on the tray. Secure the
controller using four M3 x 5 mm flat head screws and a suitable screwdriver. See Figure 1.
NOTE: Some racks require screws that differ from those included with the W-7008 controller accessory kit. Ensure that you have
the correct screws before installing the W-7008 controller.
2 Dell Networking W-7008-MNT-19 Mounting Kit | Installation Guide
Figure 1
Controller Installation on the Tray
2. Connect the DC cable from the power adapter to the controller.
3. Place the power adapter up side down in the specified location in the tray. See Figure 2.
Figure 2
Securing the Power Adapter in the Rack Mount Tray
4. Secure the power adapter using the power adapter bracket and two M3 x 6 mm pan head screws, and a
suitable screwdriver. See Figure 2.
5. Insert the power supply cord clip. See Figure 2.
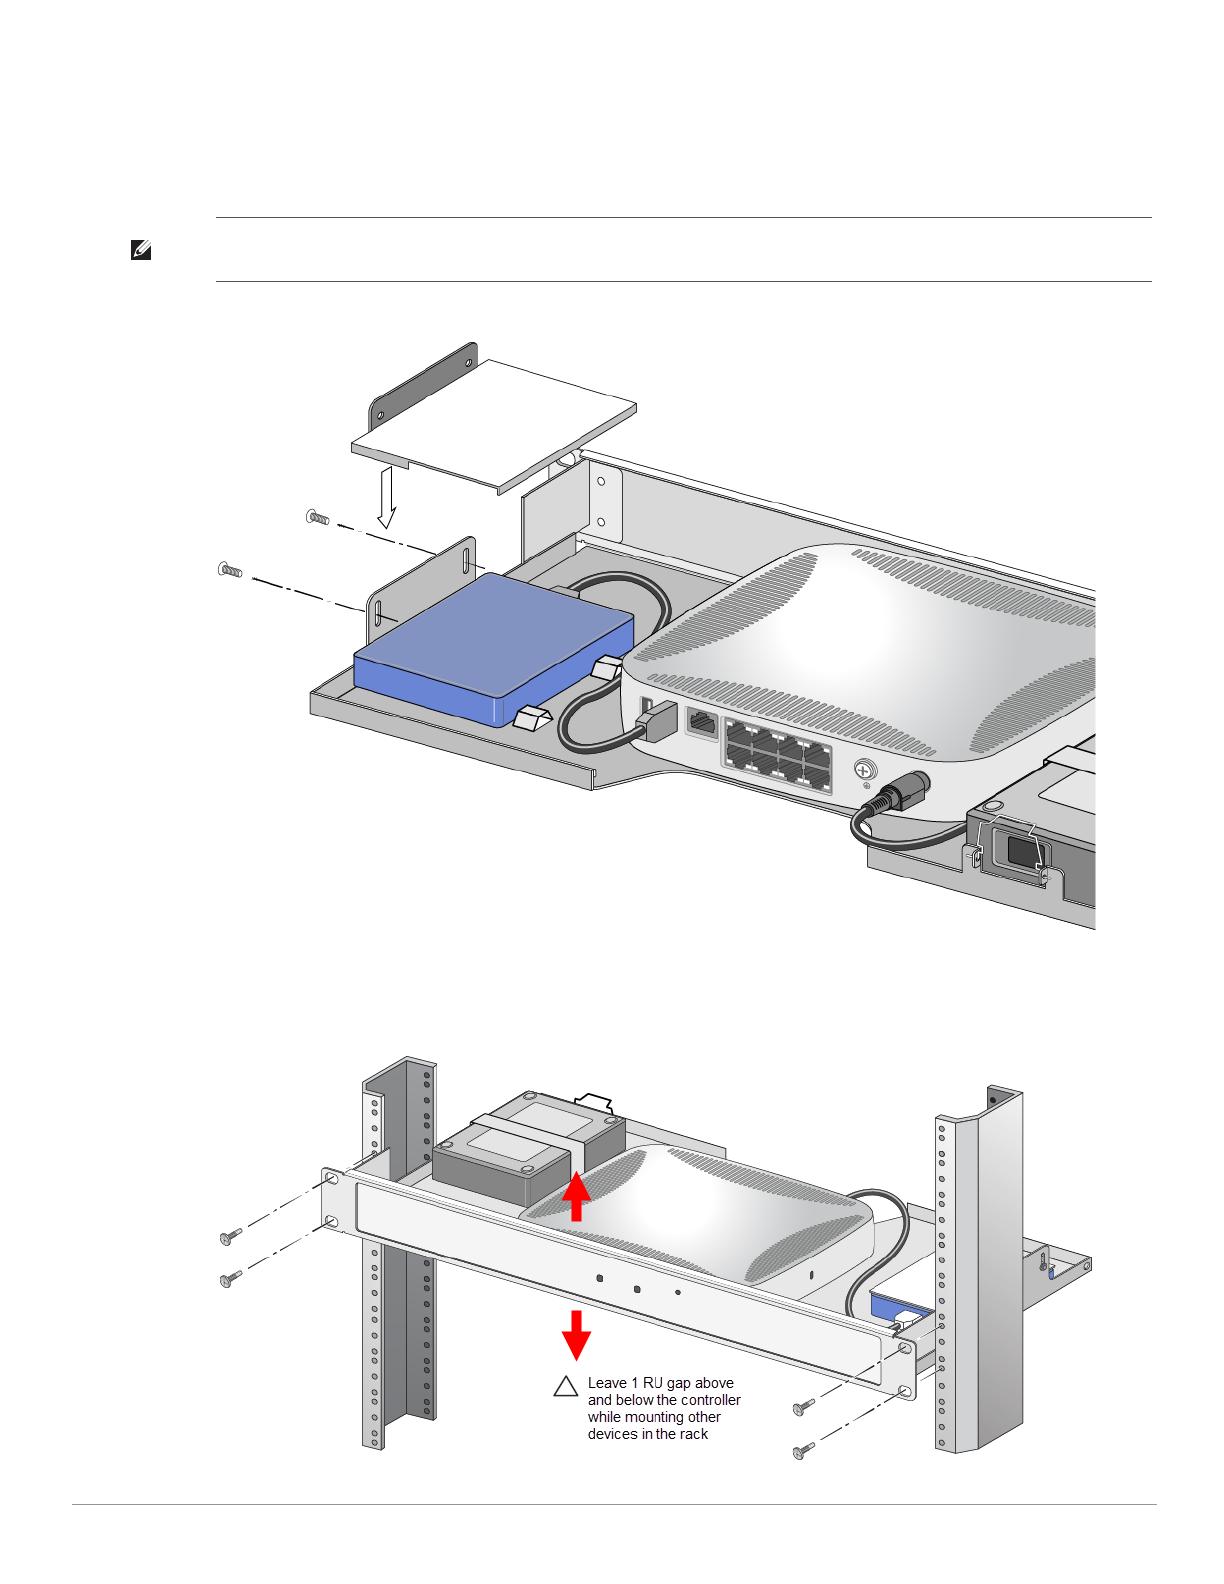
6. (Optional) Mount the HDD by performing the following steps:
NOTE: If the power adapter is not placed up side down, the power adapter bracket will not secure correctly.
Dell Networking W-7008-MNT-19 Mounting Kit | Installation Guide 3
a. Place the HDD in the specified location in the rack mount tray.
b. Connect the USB cable from the HDD to the USB 3.0 interface on the controller.
c. Secure the HDD using the HDD bracket, two M3 x 6 mm pan head screws, and a suitable screwdriver.
See Figure 3.
Figure 3
(Optional) Securing the HDD in the
Rack Mount Tray
7. Mount the tray within the two-post 19-inch Telco rack using four M6 x 15 mm Phillips pan head screws and a
suitable screwdriver. See Figure 4.
Figure 4
Rack Mount Installation
NOTE: The HDD bracket is designed to fit only the WD Elements 1TB Portable External Hard Drive (part number:
WDBUZG0010BBK).
4 Dell Networking W-7008-MNT-19 Mounting Kit | Installation Guide
8. At the back of the rack mount tray, ensure the power supply cord clip is up. Insert the power supply cord into
the power adapter.
9. Bring down the power supply cord clip and latch it on the power supply cord to secure the cord.
Rack mount installation of a W-7008 controller is now complete.
Installation Recommendation
Leave at least one rack unit (RU) gap above and below the rack-mounted W-7008 controller.
Leave additional space in front and rear side of the controller to access power cords, network cables, and
indicator LEDs.
Contacting Dell
Copyright Information
© Copyright 2016 Hewlett Packard Enterprise Development LP. Dell™, the DELL™ logo, and PowerConnect™ are
trademarks of Dell Inc.
All rights reserved. Specifications in this manual are subject to change without notice.
Originated in the USA. All other trademarks are the property of their respective owners.
Open Source Code
This product includes code licensed under the GNU General Public License, the GNU Lesser General Public License, and/or
certain other open source licenses.
Table 1
Contact Information
Web Site Support
Main Website dell.com
Contact Information dell.com/contactdell
Support Website dell.com/support
Documentation Website dell.com/support/manuals
/