Page is loading ...

-1-
PN-ZB01
対応機種
Applicable models
インフォメーションディスプレイ
LCD MONITOR PN-E601 / PN-E521 / PN-E471 / PN-E421
(地域により発売されているモデルが異なります。)
(Available models dier according to region.)
安全のために For your safety
この取付手順書には、安全のためのいろいろな表示をして
います。
その表示を無視して、誤った取り扱いをすることによって
生じる内容を「警告」に区分しています。内容をよく理解
してから本文をお読みください。
This installation manual and the product use various displays
and labels to ensure safe use. Ignoring these displays and
labels and incorrectly using the product could have results as
classied below.
Please read the following warning symbol information before
reading the rest of this section, and be sure to strictly
observe all instructions.
Warning: Not following these instructions could
result in death or serious injury.
Be sure to turn off the main power switch of the •
monitor and disconnect the power before
attaching/detaching this product.
Otherwise, you may suffer electric shock.
Only use the accessories with specied models.•
Otherwise, re may result.
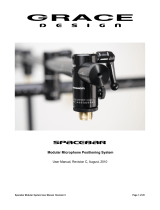
取付手順書 ご販売店様・設置業者様用
Installation Manual Instructions for SHARP dealers
and service engineers
インターフェース拡張ボード
Expansion Board
TCADZ1081MPZZ (1)
09L KS1

-2-
ご注意
• 本機およびインフォメーションディスプレイのコネクターに触れないでください。静電気により故障の原因となる場合があります。
• 作業前に金属部分などに触れ、体内の静電気を取り除いてください。
• 本書で記載しているイラストは説明用のものであり、実際とは多少異なる場合があります。
Caution
Do not touch the connectors of this product and LCD MONITOR. The static electricity in your body may cause breakdown.•
Touch a grounded source to discharge the static electricity in your body before starting operation.•
The illustrations in this manual are for explanatory purposes and may not exactly represent the actual product.•
取り付けかた / Installation procedure
1. インフォメーションディスプレイの主電源スイッチを
「切」にし、コンセントから電源プラグを抜く。
1. Set the main power switch of the monitor to “off” and
disconnect the power from the wall outlet.
2. 安定した水平な場所に厚手の柔らかい布(毛布など)を
敷き、インフォメーションディスプレイを液晶パネルが
下向きになるようにして置く。
2. Spread a thick and soft cloth (such as a blanket) on a
level surface, such as a table, and place the monitor
on it with its LCD panel facing downward.
3. 拡張カバーを外す。
ネジを 8 個(PN-E421 の場合は 7 個)外します。
拡張カバーの位置は、インフォメーションディスプレイ
の取扱説明書で確認ください。
3. Remove the expansion terminal cover.
Remove 8 screws (PN-E421: 7 screws).
For the location of the expansion terminal cover, refer to the
operation manual of the LCD MONITOR.
Expansion terminal cover
4. ダミープレートを外す。
ネジを 2 個外します。
4. Remove the dummy plate.
Remove 2 screws.
Dummy plate
ダミープレートは保管いただくようお客様にお渡しください。
本機を取り外した際は、ダミープレートを必ず取り付けてください。
Give the dummy plate to the customer and ask them to store it.
Always install the dummy plate after removing the expansion board.
5. 本機を付ける。
コネクターをしっかりと差し込んでください。
5. Attach the expansion board.
Fully insert the connector.
Connector
Connector
6. 本機を固定する。
付属の取り付けネジ 1 個と手順 4. で外したネジ 2 個で
固定します。
6. Secure the expansion board.
Secure the board with the supplied mounting screw and the 2
screws removed in Step 4.
Supplied screws
7. 拡張カバーを付ける。
手順 3. で外したネジ 8 個(PN-E421 の場合は 7 個)
で固定します。
7. Attach the expansion terminal cover.
Secure the cover with the 8 screws (PN-E421: 7 screws)
removed in Step 3.
8. 上図(A)の部分に端子シールを貼る。
8. Afx the terminal label in the area indicated by (A) in
the above illustration.
Printed in China
/