La Crosse Technology WS6206 User manual
- Category
- Alarm clocks
- Type
- User manual
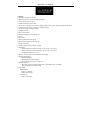
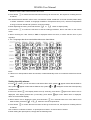
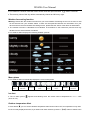
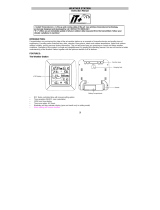
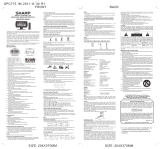
La Crosse Technology WS6206 lets you monitor indoor and outdoor temperature and humidity, forecast the weather, and even track moon phases. With its wireless remote sensor, you can keep an eye on conditions in up to three different locations. The device features a large, easy-to-read display that shows all the important information at a glance, and it also has a built-in alarm clock with snooze function. Its ability to detect ice alerts and provide indoor comfort indicators make it a versatile tool for maintaining a comfortable living environment.
La Crosse Technology WS6206 lets you monitor indoor and outdoor temperature and humidity, forecast the weather, and even track moon phases. With its wireless remote sensor, you can keep an eye on conditions in up to three different locations. The device features a large, easy-to-read display that shows all the important information at a glance, and it also has a built-in alarm clock with snooze function. Its ability to detect ice alerts and provide indoor comfort indicators make it a versatile tool for maintaining a comfortable living environment.


-
 1
1
-
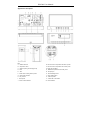 2
2
-
 3
3
-
 4
4
-
 5
5
-
 6
6
-
 7
7
-
 8
8
-
 9
9
-
 10
10


La Crosse Technology WS6206 User manual
- Category
- Alarm clocks
- Type
- User manual
La Crosse Technology WS6206 lets you monitor indoor and outdoor temperature and humidity, forecast the weather, and even track moon phases. With its wireless remote sensor, you can keep an eye on conditions in up to three different locations. The device features a large, easy-to-read display that shows all the important information at a glance, and it also has a built-in alarm clock with snooze function. Its ability to detect ice alerts and provide indoor comfort indicators make it a versatile tool for maintaining a comfortable living environment.
Ask a question and I''ll find the answer in the document
Finding information in a document is now easier with AI
Related papers
-
La Crosse Technology WS6282 User manual
-
La Crosse Technology WS6304 User manual
-
La Crosse Technology WS6204 User manual
-
La Crosse Technology WS-1517 User manual
-
 La Crosse Technology wireless weather station User manual
-
La Crosse 308-1451H User manual
-
La Crosse Technology wireless weather station User manual
-
 La Crosse Technology WS9611 User manual


Other documents
-
Lexibook SM1760 User manual
-
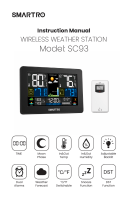 SMARTRO SC93 User manual
-
Livoo SL253 Weather Station User manual
-
UPM WS928 Owner's manual
-
SMARTRO SC91 User manual
-
Bresser Tendence WSX Weather Station Owner's manual
-
Sencor SWS 5051 User manual
-
 Shenzhen Great Power Innovation And Technology Enterprise ZY9-SPC775 User manual
-
 Ambient Weather RC-8401 Owner's manual
-
Oregon Scientific C8266B User manual


