Page is loading ...

All disclosures, notices and warranty conditions are being written on EKWB web page. Please check terms of use. Revision 1.1. Published on February 21st 2018
This product is intended for installation only by expert users. Please consult with a qualified technician for installation. Improper installation may result in damage to your equipment. EK Water Blocks assumes no
liability whatsoever, expressed or implied, for the use of these products, nor their installation. The following instructions are subject to change without notice. Please visit our web site at www.ekwb.com for updates.
Before installation of this product please read important notice, disclosure and warranty conditions printed on the back of the box.
Before you start using this product please follow these basic guidelines:
1. Please carefully read the manual thoroughly before beginning with the installation process!
2. Please remove your motherboard from the computer to assure safest mounting process in order to prevent any possible damages to your CPU and/or motherboard’s circuit board (PCB).
3. The EK-HFB and EK-ACF type fittings require only a small amount of force to screw them firmly in place since the liquid seal is ensured by the rubber o-ring gaskets.
4. The use of quality, market proved corrosion inhibiting coolants is always strongly recommended for any liquid cooling system.
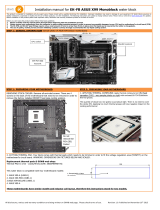
STEP 1: GENERAL INFORMATION Sample photo of ASUS PRIME X299-DELUXE motherboard
BAG CONTENT: Bag content is universal for all water blocks, you may not need all screws.
STEP 1: PREPARING YOUR MOTHERBOARD
STEP 2: PREPARING YOUR MOTHERBOARD
REMOVING STOCK COOLER. Remove all encircled screws. There are 2 screws on
the back of the motherboard that need to be removed in order to remove the
factory installed MOSFET heat pipe cooling solution. Please store away the factory
backplate as it will be reused.
1. APPLYING THERMAL COMPOUND. Apply thermal compound on CPU heat
spreader (IHS) - see sample photo on right with enclosed EK-TIM Ectotherm thermal
grease.
The quantity of about two rice grains is just about right. There is no need to cover
the whole IHS. Applying too much thermal grease will have negative impact on the
cooling performance!
2. CUTTING THERMAL PADS. Your block comes with thermal pads which needs to be trimmed in order to fit the voltage regulation area (MOSFET) on the motherboard’s
circuit board. WARNING: DIMENSIONS ON PICTURES BELOW ARE SCALED.
Replacement thermal pads @ EKWB web shop:
Thermal PAD F 1mm - (120x16mm) [EAN: 3830046996732]
Installation manual for EK-FB ASUS PRIME X299 RGB Monoblock water block
Mosfets
CPU socket
X299 PCH
(SB)
1. Thermal pad F– 1.0mm
(for mosfets):

All disclosures, notices and warranty conditions are being written on EKWB web page. Please check terms of use. Revision 1.1. Published on February 21st 2018
STEP 3: PLACING THE BLOCK ON TO MOTHERBOARD
STEP 4: ATTACHING BLOCK ON TO THE MOTHERBOARD
PLACING THE BLOCK ON THE MOTHERBOARD. Place the EK-FB ASUS PRIME X299
RGB Monoblock series water block gently to the motherboard or vice versa (as shown
on photo below). Make sure that mounting holes are aligned. Place it on factory
installed washers on the motherboard (MOSFET area).
Prior to fastening the screws please make sure the mounting holes on the
motherboard’s circuit board are aligned with the water block.
A) Mosfet part: Use two M2,5x7 AX1 screws with original backplate. Tighten the
screws evenly. Do not use excessive force when tightening the screws!
B) CPU part: Use four thumb nuts with screws and washers. Tighten
the thumb nuts.
Use the enclosed screws and washers as shown in picture below:
STEP 5: CONNECTING THE D-RGB LED STRIP (optional)
Plug the 4-pin connector from Monoblock RGB LED strip to the motherboard. Please
ensure that the arrow indicated on the connector is plugged into the 12v line as
indicated on your motherboard. Failure to do so will damage your motherboard or
LED strip.
For the EK-FB ASUS PRIME X299 RGB Monoblock series water block to operate
properly the G1/4 port nearest to the right edge of the water block MUST BE USED
AS THE INLET PORT. EK recommends the use of EK-ACF fittings. When using
fittings other than EK-ACF series please use hose clamps or appropriate substitute to
secure the tubing to the barb. The use of biocide containing and corrosion inhibiting
coolant is always recommended for any liquid cooling system.
REQUIRED TOOLS AND MOUNTING SCREWS:
scissors philips screwdriver Allen key
3. PLACING THERMAL PADS ON MOTHERBOARD. Place thermal pads on
PCB as shown on the picture
PLEASE REMOVE THE PROTECTIVE FOIL FROM BOTH SIDES OF THE
THERMAL PADS PRIOR TO INSTALLATION!
Place 1mm thermal pads in large strip
over marked area and make sure all
mosfet chips are covered.
M3 PVC Washer
Factory backplate
M2.5x7 screws
M3 thumb nut
Tubing
IMPORTANT: USE
THIS OPENING AS
AN INLET PORT!
/


