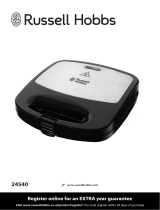
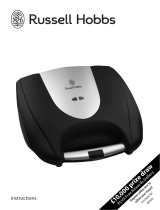
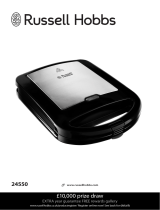
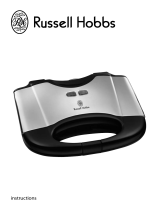
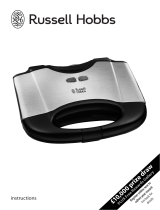
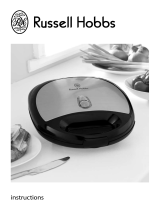
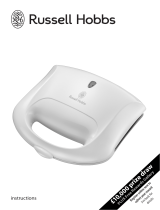
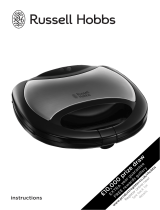
Russell Hobbs R HOBBS YOUR CREATIONS SANDWICH MAKER User manual

Type
User manual

This manual is also suitable for

Russell Hobbs R HOBBS YOUR CREATIONS SANDWICH MAKER makes perfectly golden toasted sandwiches in just 4-5 minutes. Fill the hollows of the bread slices with fillings such as ham and pineapple, cheese and onion, salami and tomato, cooked chicken and ham, or fruits like apple and sultanas, apply the top slices of bread and close the lid. The fillings must be safe and fit to eat before cooking. The outside of the bread will turn golden brown and the fillings will be heated through, giving you a delicious toasted sandwich.

Russell Hobbs R HOBBS YOUR CREATIONS SANDWICH MAKER makes perfectly golden toasted sandwiches in just 4-5 minutes. Fill the hollows of the bread slices with fillings such as ham and pineapple, cheese and onion, salami and tomato, cooked chicken and ham, or fruits like apple and sultanas, apply the top slices of bread and close the lid. The fillings must be safe and fit to eat before cooking. The outside of the bread will turn golden brown and the fillings will be heated through, giving you a delicious toasted sandwich.

£10,000 prize draw
EXTRA year guarantee
FREE rewards gallery
www.russellhobbs.co.uk/productregister/
Register online now!
See back for
details
instructions
r
2
e
f
g
i
i
3
BEFORE USING FOR THE FIRST TIME
Wipe the non-stick surfaces of the toasting plates with a damp cloth.
PREPAR ATION
1. Sit the sandwich toaster on a stable, level, heatproof (not just heat-resistant)
surface.
2. Put the plug into the power socket (switch the socket on, if its switchable).
3. The red power light will come on as long as the sandwich toaster is connected to
the electricity supply.
4. The green ready light will come on when the elements reach the correct cooking
temperature, then cycle on and off with the thermostat.
5. Wait till the green light comes on before starting to cook.
Read the instructions, keep them safe, pass them on if you pass the grill on.
Remove all packaging before use.
IMPORTANT SAFEGUARDS
Follow basic safety precautions, including:
This appliance can be used by children aged from 8 years and above and
persons with reduced physical, sensory or mental capabilities or lack of
experience and knowledge if they have been supervised/instructed and
understand the hazards involved. Children shall not play with the appliance.
Cleaning and user maintenance shall not be done by children unless they
are older than 8 and supervised.
Keep the appliance and cable out of reach of children under 8.
Always allow adequate air space above and on all sides for air circulation.
Never use the appliance under cupboards or curtains or other flammable
materials.
This appliance must not be operated by an external timer or remote control
system.
h The surfaces of the appliance will get hot during use.
If the cable is damaged, return the appliance, to avoid hazard.
Don’t put the grill in liquid, don’t use it in a bathroom, near water, or outdoors.
Don’t wrap food in plastic film, polythene bags, or metal foil. You’ll damage the
grill and you may cause a fire hazard.
Don’t use the grill for any purpose other than cooking food.
Don’t use the grill if its damaged or malfunctions.
Route the cable so it doesn’t overhang, and can’t be tripped over or caught.
HOUSEHOLD USE ONLY
PARTS
1. Power light (red)
2. Ready light (green)
3. Latch
4. Toasting plates
4
MAKING TOASTIES
CAUTION Don’t use raw meat of any kind in the sandwich toaster. All fillings must be
safe and fit to eat before cooking.
1. Use a level dessertspoon of filling per toastie. Too much will ooze out.
2. Cut 8 slices of bread to overlap the plates by about 0.5cm (¼ inch) all round. Fresh
medium-sliced bread is best.
3. Spread butter/margarine thinly on each slice. Don’t use low fat spread. Low fat
spreads may burn, damaging the non-stick surfaces.
4. Toasties are made buttered side out. Put 4 slices of bread, buttered side down, on
the bottom toasting plate.
5. Press the bread gently into the hollows in the toasting plate with a wooden spoon.
6. Fill the hollows formed in the bread with the filling.
7. Lay a slice of bread, buttered side up, on top of each of the filled slices.
8. Close the lid, squeeze the handles together, and press in the latch.
9. Cook for 4-5 minutes, or till the outside of the bread turns golden brown.
10. If the toasties stick, use a plastic or wooden spatula to release them.
CARE AND MAINTENANCE
1. Unplug the sandwich toaster and let it cool before cleaning and storing away.
2. Wipe the toasting plates, and the external surfaces with a damp cloth.
3. Use a paper towel with a dab of cooking oil to remove stubborn stains.
4. Don’t put the sandwich toaster in water or any other liquid.
5. Don’t use harsh or abrasive cleaning agents or solvents.
6. Don’t use scourers, wire wool, or soap pads.
At the places where the top and bottom toasting plates make contact, the non-stick
surfaces may show signs of wear. This is purely cosmetic, and will not affect the
operation of the sandwich toaster.
SAVOURY FILLING IDEAS
Ham and pineapple
Ham and mushroom
Ham, cheese and tomato
Smoked ham and gouda
Cheese and onion/celery/apple
Salami and tomato
Chicken (cooked) and ham/mushroom
Bacon (cooked), lettuce and tomato
SWEET FILLING IDEAS
Apple and sultanas/raspberries
Apple and cinnamon
Apple and blackcurrant
Banana and honey
5
Banana and butterscotch sauce
Fruits of the forest
Date, walnut and honey
Cherry and almonds
VARIATIONS
Use pastry, pizza base, or ciabatta instead of ordinary bread; try fruit loaf with a sweet
filling; try garlic or herb butter.
6
7
8
T22-5002498
W
ENVIRONMENTAL PROTECTION
To avoid environmental and health problems due to hazardous substances in
electrical and electronic goods, appliances marked with this symbol mustn’t be
disposed of with unsorted municipal waste, but recovered, reused, or recycled.
SERVICE
If you ring Customer Service, please have the Model No. to hand, as we won’t be able
to help you without it. Its on the rating plate (usually underneath the product).
The product isn’t user-serviceable. If its not working, read the instructions, check the
plug fuse and main fuse/circuit breaker. If its still not working, consult your retailer.
If that doesn’t solve the problem – ring Customer Service – they may be able to offer
technical advice.
If they advise you to return the product to us, pack it carefully, include a note with your
name, address, day phone number, and whats wrong. If under guarantee, say where
and when purchased, and include proof of purchase (till receipt). Send it to:
Customer Service
Spectrum Brands (UK) Ltd
Fir Street, Failsworth, Manchester M35 0HS
email: support@russellhobbs.com
telephone: 0845 658 9700 (local rate number)
GUARANTEE
Defects affecting product functionality appearing within two years of first retail
purchase will be corrected by replacement or repair provided the product is used and
maintained in accordance with the instructions. Your statutory rights are not affected.
Documentation, packaging, and product specifications may change without notice.
J ONLINE/SPARES
www.russellhobbs.co.uk for more products and/or spares
I REGISTER ONLINE FOR –
r
£10,000 prize draw,
EXTRA year guarantee,
FREE rewards gallery
Visit www.russellhobbs.co.uk/productregister/
You must register within 28 days of purchase.
  • Page 1 1
  • Page 2 2
  • Page 3 3
  • Page 4 4
  • Page 5 5
  • Page 6 6
  • Page 7 7
  • Page 8 8

Russell Hobbs R HOBBS YOUR CREATIONS SANDWICH MAKER User manual

Type
User manual
This manual is also suitable for

Russell Hobbs R HOBBS YOUR CREATIONS SANDWICH MAKER makes perfectly golden toasted sandwiches in just 4-5 minutes. Fill the hollows of the bread slices with fillings such as ham and pineapple, cheese and onion, salami and tomato, cooked chicken and ham, or fruits like apple and sultanas, apply the top slices of bread and close the lid. The fillings must be safe and fit to eat before cooking. The outside of the bread will turn golden brown and the fillings will be heated through, giving you a delicious toasted sandwich.

Ask a question and I''ll find the answer in the document

Finding information in a document is now easier with AI