Hampton Bay EFG1011P-3-ORB Installation guide
- Type
- Installation guide
This manual is also suitable for
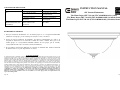
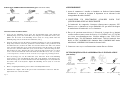
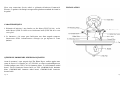
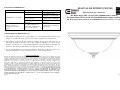
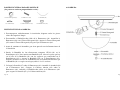
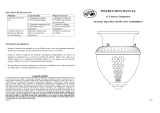
Hampton Bay EFG1011P-3-ORB is a three-light outdoor wall lantern with a traditional style and an oil-rubbed bronze finish. It features a clear seeded glass shade that provides a warm and inviting glow. The lantern is constructed from durable materials and is designed to withstand the elements, making it ideal for use in outdoor spaces such as patios, porches, and driveways. It is easy to install and requires minimal maintenance, making it a great choice for homeowners who want to add a touch of style and functionality to their outdoor spaces.
Hampton Bay EFG1011P-3-ORB is a three-light outdoor wall lantern with a traditional style and an oil-rubbed bronze finish. It features a clear seeded glass shade that provides a warm and inviting glow. The lantern is constructed from durable materials and is designed to withstand the elements, making it ideal for use in outdoor spaces such as patios, porches, and driveways. It is easy to install and requires minimal maintenance, making it a great choice for homeowners who want to add a touch of style and functionality to their outdoor spaces.


-
 1
1
-
 2
2
-
 3
3
-
 4
4
-
 5
5
-
 6
6
-
 7
7
-
 8
8
-
 9
9
-
 10
10
-
 11
11
-
 12
12


Hampton Bay EFG1011P-3-ORB Installation guide
- Type
- Installation guide
- This manual is also suitable for
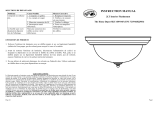
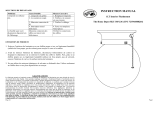
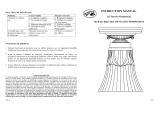
Hampton Bay EFG1011P-3-ORB is a three-light outdoor wall lantern with a traditional style and an oil-rubbed bronze finish. It features a clear seeded glass shade that provides a warm and inviting glow. The lantern is constructed from durable materials and is designed to withstand the elements, making it ideal for use in outdoor spaces such as patios, porches, and driveways. It is easy to install and requires minimal maintenance, making it a great choice for homeowners who want to add a touch of style and functionality to their outdoor spaces.
Ask a question and I''ll find the answer in the document
Finding information in a document is now easier with AI
in other languages
Related papers
-
 Hampton Bay FL142 Installation guide
-
 Hampton Bay JO206H Installation guide
-
 Hampton Bay FXA8291A Installation guide
-
 Hampton Bay FL903 Operating instructions
-
 Hampton Bay EJ8014 Installation guide
-
 Hampton Bay JO403H Operating instructions
-
 Hampton Bay AIK1013 Installation guide
-
 Hampton Bay JO201H Installation guide
-
 Hampton Bay WB0329 Installation guide
-
 Hampton Bay FZP8012A/WH-8PK Operating instructions


Other documents
-
Design House 517706 Installation guide
-
-
-
 Commercial Electric GCI 8011A Operating instructions
-
 Commercial Electric HBV8991-BN Installation guide
-
 Commercial Electric ESS8212 Operating instructions
-
 Commercial Electric ESS1311 Installation guide
-
Trend TP20013GD User manual
-
 Commercial Electric EFG1392A/BN User manual
-
 Commercial Electric GHR8991AL-NTMG Operating instructions


