Page is loading ...

Item #1000 603 404
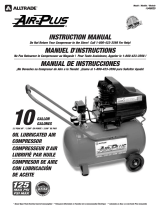
Model #TA-2530B
THANK YOU
We appreciate the trust and confidence you have placed in Husky through the purchase of this air compressor. We strive to continually
create quality products designed to enhance your home. Visit us online to see our full line of products available for your home improvement needs.
Thank you for choosing Husky!
USE AND CARE GUIDE
8 GALLON PORTABLE AIR COMPRESSOR
Questions, problems, missing parts?
Before returning to the store, call
Husky Customer Service
8 a.m. - 6 p.m., EST, Monday-Friday
1-888-43-HUSKY
HUSKYTOOLS.COM

2
Table of Contents
Table of Contents .......................................................... 2
Safety Information ......................................................... 2
Work area safety ......................................................................2
Personal Safety ........................................................................2
Air Compressor and Pneumatic Tool Safety .............................3
Electrical Safety (Extension Cords) ..........................................3
Electrical Safety (Electrical Connection) ..................................4
Electrical Safety (Speed And Wiring) .......................................4
Electrical Safety (Grounding Instructions) ................................4
Warranty ......................................................................... 5
Husky Air Compressor Limited Two-Year Warranty .................5
Additional Limitations ..............................................................5
Specifications ................................................................ 5
Air Compressor ........................................................................5
Pre-Assembly ................................................................ 6
Packing List .............................................................................6
Tools Required .........................................................................6
Hardware Included ...................................................................6
Package Contents ....................................................................7
Assembly ....................................................................... 8
Compressor Operation ............................................... 10
Maintenance ................................................................ 11
General Maintenance .............................................................11
Recommended Oil ..................................................................11
Checking The Pump Oil ..........................................................11
Adding Pump Oil ....................................................................11
Changing Pump Oil.................................................................12
Troubleshooting .......................................................... 13
Service Parts ............................................................... 14
Exploded View ........................................................................14
Parts table ..............................................................................15
Safety Information
WORK AREA SAFETY
1. Keep your work area clean and well lit. Ensure floors are not
slippery from wax or dust.
2. Do not operate power tools in explosive atmospheres, such
as in the presence of flammable liquids, gases, or dust.
Power tools create sparks which may ignite the dust or
fumes. Keep bystanders, children, and visitors away while
operating tools. Distractions can cause you to lose control.
3. Operate the air compressor in an open area at least 18 in.
away from any wall or object that could restrict the flow of
fresh air to the ventilation openings.
4. Always disconnect the air supply and power supply before
making adjustments, servicing a tool, or when a tool is not
in use.
5. This compressor/pump is not equipped and should not be
used to supply breathing quality air. Additional equipment is
necessary to properly filter and purify the air to meet
minimal specifications for Grade D breathing as described in
Compressed Gas Association Commodity Specification G 7 .1
- 1966, OSHA 29 CF9 1910.134. Compressed Gas
Association, 4221 Walney Road, Fifth Floor, Chantilly, VA
20151-2923
(703) 788 2700, www.cganet.com.
Any such additional equipment has not been examined and
no implication of proper use for breathing air is intended or
implied.
PERSONAL SAFETY
WARNING: Operating any power tool can result in foreign
objects being thrown into your eyes, which can result in
severe eye damage. Before beginning operation, always
wear safety goggles, safety glasses with side shields, or a
full face shield when needed. Always use eye protection
marked to comply with ANSI Z87. 1.
WARNING: This product contains chemicals known to the
State of California to cause cancer and birth defects or
other reproductive harm. Wash hands after handling.
1. Use safety equipment. Always wear eye protection with side
shields when operating power tools. A dust mask, nonskid
safety shoes, a hard hat, or hearing protection must be used
for appropriate conditions.
2. Stay alert when operating a power tool. Do not use the tool
while tired or under the influence of drugs, alcohol, or
medication.
3. Do not wear loose clothing or jewelry. Contain long hair.
Keep your hair, clothing, and gloves away from moving
parts. Loose clothes, jewelry, or long hair can be caught in
moving parts.
4. Keep proper footing and balance at all times. Proper footing
and balance enables better control
of the tool in unexpected
situations.
5. Do not use on a ladder or unstable support.

3 HUSKYTOOLS.COM
Please contact 1-888-43-HUSKY for further assistance.
Safety Information (continued)
AIR COMPRESSOR AND PNEUMATIC TOOL
SAFETY
WARNING: Do not attempt to modify this tool or create
accessories not recommended for use with this tool. Any
such alteration or modification is misuse and could result in
a hazardous condition leading to possible serious personal
injury.
CAUTION: Do not use in an environment that is dusty or
otherwise contaminated. Using the air compressor in this
type of environment may cause damage to the unit.
1. Keep compressors as far from the spraying area as possible,
at least 15 ft. from the spraying area and all explosive
vapors.
2. Risk of bursting. Do not adjust the regulator to result in
output pressure greater than the marked maximum pressure
of the attachment. Do not use at pressure greater than the
rated maximum pressure of this compressor.
3. If connected to a circuit protected by fuses, use time-delay
fuses with this product.
4. To reduce the risk of electric shock, do not expose to rain.
Store indoors.
5. Ensure the hose is free of obstructions or snags. Entangled
or snarled hoses can cause loss
of balance or footing and
may become damaged.
6. Use the air compressor only for its intended use. Do not alter
or modify the unit from the original design or function. Never
weld or drill holes in the air tank.
7. Never leave a tool unattended with the air hose attached.
8. Do not operate this tool if it does not contain a legible
warning label.
9. Do not continue to use a tool or hose that leaks air or does
not function properly.
10. Do not attempt to pull or carry the air compressor by the
hose.
11. Your tool may require more air consumption than this air
compressor is capable
of providing.
12. Never direct a jet of compressed air toward people or
animals.
13. Protect your lungs. Wear a face or dust mask if the operation
is dusty.
14. Do not use this air compressor to spray chemicals. Your
lungs can be damaged by inhaling toxic fumes. A respirator
may be necessary in dusty environments or when spraying
paint.
15. Do not use this compressor if any parts have been exposed
to water.
ELECTRICAL SAFETY
1. Avoid body contact with grounded surfaces such as pipes,
radiators, ranges, and refrigerators. There is an increased
risk of electric shock if your body is grounded.
2. Do not expose power tools to rain or wet conditions. Water
entering a power tool will increase the risk of electric shock.
3. Do not abuse the cord. Never use the cord to carry the tool
or pull the plug from an outlet. Keep the cord away from
heat, oil, sharp edges, and moving parts.
4. Replace damaged cords immediately. Damaged cords
increase the risk of electric shock.
ELECTRICAL SAFETY (EXTENSION CORDS)
WARNING: Keep the extension cord clear of the working
area. Position the cord so that it will not get caught on
lumber, tools, or other obstructions while you are working
with a power tool. Failure to do so can result in serious
personal injury.
WARNING: Check extension cords before each use. If
damaged, replace immediately. Never use the air
compressor with a damaged cord since touching the
damaged area could cause electrical shock resulting in
serious personal injury.
WARNING: Improperly connecting the equipment·
grounding conductor can result in a risk of electrical shock.
1. Use only 3-wire extension cords that have 3-prong
grounding plugs and 3-pole receptacles that accept the air
compressor's plug.
2. When using the air compressor at a considerable distance
from the power source, use an extension cord heavy enough
to carry the current that the compressor will draw. An
undersized extension cord will cause a drop in line voltage,
resulting in a loss of power and causing the motor to
overheat. Use the following chart to determine the minimum
wire size required in an extension cord.
3. Only use 50 ft. or less round jacketed cords listed by
Underwriter's Laboratories (UL).
4. When operating a power tool outside, use an outdoor
extension cord marked “w-A” or “w”. These cords are rated
for outdoor use and reduce the risk of electric shock.

4
Safety Information (continued)
ELECTRICAL SAFETY (EXTENSION CORDS)
(CONTINUED)
Ampere rating (on air compressor data plate)
0–
2.0
2.1–
3.4
3.5–
5.0
5.1–
7.0
7.1–
12.0
12.1
–
16.0
Cord
Length
Wire Size (A.W.G)
25 ft. 16 16 16 16 14 14
50 ft. 16 16 16 14 14 12
100 ft. 16 16 14 12 10
–
Used in 12 gauge – 20 amp circuit.
NOTE: Use longer air hoses instead of long extension
cords. Your air compressor will run better and last
longer.
ELECTRICAL SAFETY (ELECTRICAL
CONNECTION)
1. This air compressor is powered by a precision built electric
motor. It should be connected to a power supply that is 120
volts, 60 Hz, AC only (normal household current).
2. Do not operate this tool on direct current (DC). A substantial
voltage drop will cause a loss of power and the motor will
overheat. If the air compressor does not operate when
plugged into an outlet, double check the power supply.
ELECTRICAL SAFETY (SPEED AND WIRING)
1. The no-load speed of the electric motor varies by model and
specification. The motor speed is not constant and
decreases under a load or with lower voltage. For voltage,
the wiring in a shop is as important as the motor's
horsepower rating.
2. A line intended only for lights cannot properly carry a power
tool motor. Wire that is heavy enough for a short distance
will be too light for a greater distance. A line that can
support one power tool may not be able to support two or
three tools.
ELECTRICAL SAFETY (GROUNDING
INSTRUCTIONS)
1. This product must be grounded. In the event of an electrical
short circuit, grounding reduces the risk of electric shock by
providing an escape wire for the electric current. This air
compressor is equipped with an electric cord having an
equipment-grounding conductor and a grounding plug. The
plug must be plugged into a matching outlet that is properly
installed and grounded in accordance with all local codes
and ordinances
2. Do not modify the plug provided. If it will not fit the outlet,
have the proper outlet installed by a qualified electrician.
3. The conductor with insulation having an outer surface that is
green with or without yellow stripes is the equipment
grounding conductor. If repair or replacement of the electric
cord or plug is necessary, do not connect the equipment
grounding conductor to a live terminal.
4. Check with a qualified electrician or service personnel if
you
do not completely understand the grounding instructions, or
if you are in doubt as to whether the tool is properly
grounded. This product is
for use on a nominal 120-V. Do
not use an adapter with this product.

5 HUSKYTOOLS.COM
Please contact 1-888-43-HUSKY for further assistance.
Warranty
HUSKY AIR COMPRESSOR LIMITED TWO-YEAR WARRANTY
This warranty covers defects in workmanship or materials in this Husky air compressor for the two-year period from the date of purchase.
This warranty is specific to this air compressor model. Warranties for other Husky products may vary. This warranty applies only to the
original retail purchaser and may not be transferred. This warranty does not cover normal wear and tear or any malfunction, failure or
defect resulting from misuse, abuse, neglect, alteration, modifications or repair by other than a service center authorized to repair Husky
branded air compressors. Expendable materials, such as motor brushes, seals, etc. are not covered by this warranty. This warranty does not
apply to this compressor used in industrial applications or for rental purposes. Husky makes no warranties, representations, or promises as
to the quality or performance of its air compressors other than those specifically stated in this warranty.
ADDITIONAL LIMITATIONS
To the extent permitted by applicable law, all implied warranties, including warranties of merchantability or fitness for a particular purpose,
are disclaimed. Any implied warranties, including warranties of merchantability or fitness for a particular purpose, that cannot be
disclaimed under state law are limited to two years from the date of purchase. Husky is not responsible for direct, indirect, incidental,
special or consequential damages. If this air compressor is used for commercial purposes, the warranty will apply for ninety (90) days from
the date of purchase. Some states do not allow limitations on how long an implied warranty lasts and/or do not allow the exclusion or
limitation of incidental or consequential damages, so the above limitations may not apply to you. This warranty gives you specific legal
rights, and you may also have other rights, which vary from state to state.
Contact the Customer Service Team at 1-888-43-HUSKY or visit www.HomeDepot.com.
Specifications
AIR COMPRESSOR
Running horsepower
1.5 HP
Air tank capacity
8 gal.
Air pressure
125 PSI max.
Air delivery
5.0 SCFM at 40 PSI
4.0 SCFM at 90PSI
Lubrication
Oil lubricated
Gauges
(2) gauge 2 in. diameter
Input
120 V. 60 Hz. AC only. 12.5 Amps.
Net weight
61.7 lbs.
Fill time
(0 PSI – 125 PSI): approximately 2 minutes
15 seconds (135 seconds)

6
Pre-Assembly
PACKING LIST
Before assembling and operating this air compressor, ensure the following items are identified in the packaging:
- Air compressor
- Air filter (L)
- Wheel assembly package (includes 2 wheels (D), 2 shoulder bolts (AA), 2 nuts (BB), and 2 lock washers (CC))
- Handle assembly package (includes 1 Handle (A), 4 screws (DD), 4 flat washers (EE))
- Oil bottle (M)
TOOLS REQUIRED
Safety
goggles
14 mm
Wrench
17 mm
Wrench
5 mm Hex key
HARDWARE INCLUDED
NOTE: Hardware not shown to actual size.
Part Description Quantity
AA
10 mm shoulder bolt
2
BB
10 mm nut
2
CC
Lock washer
2
DD
6 mm screw
4
EE
6 mm flat washer
4
AA
BB
CC
DD
EE

7 HUSKYTOOLS.COM
Please contact 1-888-43-HUSKY for further assistance.
Pre-Assembly (continued)
PACKAGE CONTENTS
Part Description Quantity
A
Handle 1
B Manual AUTO/OFF switch 1
C Safety valve 1
D Wheel 2
E Tank 1
F Quick coupler 1
G Pressure regulator knob 1
H Tank pressure gauge 1
I Regulator pressure gauge 1
J Rubber foot 2
K Drain valve 1
L Air filte
r
1
M Oil bottle 1
A
B
C
D
E
F
G
H
I
J
K
L
M

8
Assembly
1
Assembling the wheels
2
Assembling the handle
□ With the offset hub of a wheel (D) facing the tank's wheel
bracket, assemble a 10 mm shoulder bolt (AA) through the
holes in the wheel and tank wheel bracket.
□ Place a lock washer (CC) onto the threaded end of the
shoulder bolt (AA). Then, place a 10 mm nut (BB) on the
threaded end of the bolt (AA) and tighten securely.
□ Repeat for the other wheel (D).
□ Insert the two open ends of the handle (A) into the handle
brackets on the air compressor tank.
□ Align the holes in the handle bracket with the threaded
holes in the handle (A).
□ Attach the handle (A) to both sides of the air compressor
using 6 mm flat washers (EE) and 6 mm screws (DD).
Tighten securely.
3
Attaching the air filter
□ Insert the threaded end of the air filter (L) into the threaded
port of the pump head. Do not apply thread tape to the air
filter assembly's threads.
□ Rotate clockwise to tighten. Hand tighten only.
BB
CC
D
AA
A
DD
EE
L

9 HUSKYTOOLS.COM
Please contact 1-888-43-HUSKY for further assistance.
Assembly
4
Air compressor lubrication
5
Breaking in the pump
CAUTION: This unit is shipped without oil in the pump!
Follow these lubrication instructions before operating the
compressor.
□ Add oil to the pump using the oil bottle (M). The
compressor pump holds approximately 380 ml (13 oz.) of
oil. The sight glass, located on the crankcase portion of the
pump, is used to maintain proper oil level. The “Max” oil
level is when the oil is in the center of the dot in the middle
of the sight glass. “Min” oil level is at the bottom of the dot
in the center of the sight glass. Avoid overfilling by adding
oil gradually and checking the oil level with the sight glass
several times. Add enough oil to reach the “Max” level on
the sight glass. Proper oil level is illustrated here:
□ Check and tighten all bolts and fittings.
□ Open the air flow by turning the pressure regulator knob (G)
fully clockwise.
□ Place the AUTO/OFF switch (B) in the OFF position and plug
in the power cord.
□ Open the drain valve (K).
□ Place the AUTO/OFF switch (B) in the ON position and run
the air compressor for 10 minutes.
□ Place the AUTO/OFF switch (B) in the OFF position.
□ Close the drain valve (K).
M
B
G
K

10
Compressor Operation
1
Draining the tank
2
Checking the safety valve
□ Turn off the compressor.
□ Pull the safety valve pull ring (C) to remove all air pressure
from the tank. Continue to hold the safety valve open until
both pressure gauges show 0 PSI. Next, unplug the air
compressor from the power source.
□ Position a suitable container below the drain valve.
Fully open the drain valve (K).
□ Keep the compressor tilted until all moisture has been
removed.
□ If the drain valve (K) is clogged, unplug the compressor
and pull the drain valve (K) to remove all air pressure.
Remove and clean the drain valve (K) and then reinstall it.
Apply sealant tape (not included) to the threads of the
drain valve (K) to reduce the likelihood of air leaks.
□ Completely close the drain valve (K).
WARNING: Failure to unplug the air compressor and
depressurize the tank before removing the valve may cause
serious personal injury.
NOTE: Because condensate is a pollutant, dispose of it
in compliance with local regulations.
□ Turn on the air compressor and wait for the tank to fill.
The compressor automatically shuts off when the pressure
reaches the preset maximum.
□ Turn off the air compressor.
□ Pull the ring on the safety valve (C) for 20 seconds to
release the air.
□ Release the ring. Air stops escaping at approximately
40-100 PSl. if the safety valve dose not reset stop
dispelling air between 40-100 PSI discontinue use and
seek service before using the air compressor again.
DANGER: Do not tamper with the safety valve. Items
loosened from this device could fly up and hit you. Failure to
heed this warning could result in death or serious personal
injury. The safety valve automatically releases air when the
receiver pressure exceeds the preset maximum. Check the
valve.
WARNING: Air leaks after releasing the safety valve ring
or if the valve is stuck. Do not use the air compressor until
the safety valve has been replaced. Using the air compressor
in this condition could result in serious personal injury.
C
K
C

11 HUSKYTOOLS.COM
Please contact 1-888-43-HUSKY for further assistance.
Maintenance
GENERAL MAINTENANCE
Condensate forms in the tank when there is humidity in the air.
Depending on the environmental conditions, drain the
condensate daily and/or every hour. For instructions, see
Draining the tank on page 9. The safety valve automatically
releases air when the receiver pressure exceeds the preset
maximum. Inspect the tank annually for rust, pin holes, or other
Imperfections that could cause it to become unsafe. Avoid using
solvents when cleaning plastic parts. Most plastics are
susceptible to damage from various types of commercial
solvents and may be damaged by their use. Use a clean cloth to
remove dirt, dust, oil, grease, etc.
RECOMMENDED OIL
Use only synthetic and conventional oils specifically designed for
air compressor use. These oils can be purchased at The Home
Depot and other places oil lubricated air compressors are sold.
CHECKING THE PUMP OIL
1. Unplug the compressor, and allow the oil to settle into the
crankcase for at least 2 minutes.
2. Verify the oil level using the red dot in the sight glass on the
front of the pump crankcase. (MAX oil level is when the oil
level is in the center of the red dot, and MIN oil level is when
the oil is at the bottom of the red dot. See the Illustration
below.)
3. If the oil level is in the center of the red dot, no oil needs to
be added. If the oil level is at or near the bottom of the red
dot, oil should be added.
ADDING PUMP OIL
1. (This step is only required If the steps above in CHECKING
PUMP OIL were followed and oil needs to
be added.)
2. Remove the oil vent
cap. The vent cap is threaded, so
remove it by turning it counterclockwise.
3. Add air compressor oil slowly to avoid overfilling the
crankcase. Pour very small amounts, approximately 1 oz.,
and allow 10–15 seconds for the oil to settle into the
crankcase. When the oil level reaches the center of the red
dot in the oil sight glass, you have added sufficient oil.
WARNING: Do not allow brake fluids, gasoline, petroleum
based products, etc., to come in contact with plastic parts.
Chemicals can weaken or destroy plastic which may result
in serious personal injury.
WARNING: When servicing, use only identical Husky
replacement parts. Use of any other parts may create a
hazard or cause product damage.
WARNING: Always disconnect the air compressor from
the power supply. Release all pressure, and allow to cool
before cleaning or making repairs to the air compressor.
4. Replace the oil vent cap by threading it clockwise into the
crankcase opening. Do not over-tighten the oil vent cap, as
this can cause damage to the oil vent cap.
Red Dot
Max.
Min.
Oil vent cap

12
Maintenance (continued)
CHANGING PUMP OIL
The pump's oil should be changed every 100 hours of use. Use
only approved air compressor oil when changing this pump's oil
or the pump may be damaged.
1. Plug in the compressor and allow it to run for 5 minutes to
warm up the oil.
2. Unplug the compressor.
3. Place a suitable oil drain container under the oil drain plug
located on the side of the crankcase. Secure the oil drain
container.
4. Remove the oil drain plug using a wrench by turning it
counter-clockwise.
5. Allow the oil to drain from the pump for several minutes.
6. Replace the oil drain plug by threading it clockwise. Do not
over tighten the drain plug, as this can damage the air
compressor.
7. Remove the oil vent cap by threading it counterclockwise.
8. Pour approved air compressor oil into the crankcase
following the CHECKING THE PUMP OIL section above to
assure the crankcase is property filled. (The crankcase will
hold approximately 13 oz. of oil.)
9. Replace the oil vent cap by threading it clockwise into the
crankcase opening. Do not over-tighten the oil vent cap, as
this can cause damage to the oil vent cap.
10. Remove the waste oil container and property dispose of the
oil.
Oil vent cap
Oil drain plug

13 HUSKYTOOLS.COM
Please contact 1-888-43-HUSKY for further assistance.
Troubleshooting
Problem Possible Cause Solution
The compressor will not
run.
□ There is loss of power or
overheating.
□ There is no electrical power.
□ There is a blown shop/house
fuse.
□ The shop/house breaker tripped
or the pressure switch is bad.
□ The tank is full of air.
□ The overload protector tripped.
□ Check the proper use of the extension cord.
□ Check to make sure the unit is plugged in.
□ Check the fuse/breaker or motor overload.
□ Reset the shop/house breaker and determine why the
problem happened.
□ Take the compressor to a service center.
□ The compressor will turn on when the tank pressure drops
to cut-in.
□ Check the voltage from the outlet.
□ The outside air or room temperature is too high.
□ The extension cord is too long or wrong gauge wire used.
The motor hums but
cannot run or runs slowly.
□ The voltage is low.
□ Wrong gauge wire or length of
extension cord.
□ There is shorted or open motor
winding.
□ There is a defective check valve
or unloader.
□ Call an electrician or check with meter.
□ Check for proper gauge wire and cord length.
□ Take the compressor to a service center.
□ Take the compressor to a service center.
□ Remove the extension cord and plug directly into the wall
outlet. If the issue is corrected, refer to chart on page 4 for
proper gauge and length extension cords.
The fuses blow/circuit
breaker trips repeatedly.
□ The fuse size is incorrect, or
there is a circuit overload.
□ Wrong gauge wire or length of
extension cord.
□ There is a defective check valve
or unloader.
□ Check for proper fuse, use a time-delay fuse, disconnect
other electrical appliances from the circuit or operate the
compressor on its own branch circuit.
□ Check for proper gauge wire and cord length.
□ Take the compressor to a service center.
The Push Button Overload
protector cuts out
repeatedly.
□ The voltage is low.
□ There is a lack of proper
ventilation or the room
temperature is too high.
□ Wrong gauge wire or length of
extension cord.
□ Call an electrician or check with meter.
□ Move the compressor to a well-ventilated area.
□ Check for proper gauge wire and cord length.
The air receiver pressure
drops when the
compressor shuts off.
□ There are loose connections
(fittings, tubing, etc.)
□ The drain valve is loose.
□ The check valve is leaking.
□ Check all connections with a soap and water solution and
tighten.
□ Tighten the drain valve.
□ Take the compressor to a service center.
There is excessive
moisture in the discharge
air.
□ There is excessive water in the
air tank.
□ The humidity is high.
□ Drain the tank.
□ Move to an area with less humidity and use an airline filler.
The compressor runs
continuously.
□ There is a defective pressure
switch.
□ There is excessive air usage.
□ Take the compressor to a service center.
□ Decrease air usage. The compressor is not large enough
for tool's requirement.
The compressor vibrates. □ There are loose mounting bolts. □ Tighten the mounting bolts.
The air output is lower
than normal.
□ There are broken inlet valves.
□ The connections are leaking.
□ Take the compressor to a service center.
□ Tighten connections.

14
Service Parts
EXPLODED VIEW
13
13
14
10
15
16
19
18
17
12
30
31
2
1
3
4
5
6
8
7
29
28
36
37
34
53
54
55
56
26
32
25
63
60
65
66
64
24
21
20
22
58
57
52
73 74
75
49
51
31
67
68
44
48
69
70
71 72
46
50
23
61
41
59
47
62
43
44
31
45
35
38
39
40
27
9
11
42
33

15 HUSKYTOOLS.COM
Please contact 1-888-43-HUSKY for further assistance.
Service Parts
(
continued
)
PARTS TABLE
Par
t
Description
Kit
#
Part #
Qty
.
Part Description
Kit
#
Part # Qty.
1
Head bolt, M80×105
4
39 Screw, with washer, M5×512 2
2 Washer, lock 8 mm
4
40 Shroud 06-063 1
3 Cylinder head
03-100 1
41 Strain relief 6W–3 21-040 2
4 Fitting, tee
40-033 1
42 Air filter 41-005 1
5 Gasket head C
35-060 1
43 Bolt, hex head, M8×30 4
6 Valve, Assy. B
11-004 1
44 Washer, flat, 8 mm
K
12
7 Pin, dia. 3×6 mm B
2
45 Washer, lock, 8 mm 4
8 Valve, reed, inlet B
34-001B 1
46 Tank, 8 gal. 1
9 Gasket, cylinder upper C
35-061 1
47 Check valve 38-001A 1
10 Piston A
28-012 1
48 Drain valve, 1/4 in. NPT 39-020A 1
11 Cylinder
10-004 1
49 Nut, rivet, M6
E
45-086 4
12 Gasket, Cylinder lower C
35-062 1
50 Washer, flat, 6 mm 4
13 Ring, compression A
29-021 2
51 Screw, SHCH, M6×20 4
14 Ring, scraper A
1
52 Handle
E
08-108B 1
15 Pin, piston dia. 12 mm A
30-003 1
53 Washer, flat, copper, 10 mm
F
46-029 2
16 Ring, snap 12 mm A
46-005 2
54 Nut, hex, compression, G3/8
F
44-003 2
17 Eccentric A
12-004 1
55 Tube, outlet, OD10 mm
F
43-017C 1
18 Rod, connecting A
03-032 1
56 Fin, ID 10 mm
F
1
19 Bolt, SHCS, M8×22–LH A
45-154 1
57 Tube, relief OD 6 mm
G
43-017F 1
20 Bolt, SHCS, M5×0.8×15
6
58 Nut, hex, compression, G1/8
G
44-001A 1
21 Oil fill cap M16×1.5
26-004C 1
59 Switch, pressure, 95–125 PSI 21-011A 1
22 Oil sight gauge D
33-002 1
60
Pressure gauge, 200 PSI, 1/8 in.
NPT
23-018 1
23 Seal, oil sight gauge D
1
61
Pressure gauge, 200 PSI, 1/4 in.
NPT
23-038 1
24 Cover, crankcase
03-101B 1
62 Nipple,1/4 in. NPT×48 mm 42-028 1
25 Baffle, rubber
36-015 1
63
V
alve, safety, 140 PSI, ASME, 1/4
in. NPT
24-010 1
26 Motor, assy.
1
64 Nipple, 1/4 in. NPT×30 mm 42-026E 1
27
Capacitor, running, 120 μF
27-031 1
65 Regulator, 1/8 in. NPT×1/4 in. NPT 25-053 1
28 Washer, lock 3 mm
2
66
Quick connect, one-touch, 1/4
in.NPT
42-080 1
29 Screw, M3×6
2
67 Isolator, rubber
K
15-014 2
30 Washer, tooth lock, 8 mm
1
68 Bolt, hex head. M8×20
K
2
31 Nut, M8×1.25 K
7
69 Nut, hex head, M10
H
2
32 Plug, oil, M12×16
45-051B 1
70 Washer, lock, 10 mm
H
2
33 Valve, relief
40-018B 1
71 Wheel 6 in.
H
15-070 2
34 Fan, AL alloy
03-109 1
72 Shoulder bolt, OD15,5×36.5×M10
H
46-041 2
35 Nut, M6
1
73 Cord, power, SJT14/3
I
22-005 1
36 Bolt, SHCS, M6×16
1
74 Terminal, Y type 1.5–40
I
2
37 Ring, snap. 14 mm
1
75 Terminal, O type 1.5–40
I
1
38 Screw, ST4. 2×12
2
* Items with a kit number are only available as part of a kit. Items without a part number or kit letter are not available.

Questions, problems, missing parts? Before returning to the store,
call Husky Customer Service
8 a.m. - 6 p.m., EST, Monday-Friday
1-888-43-HUSKY
HUSKYTOOLS.COM
Retain this manual for future use.
/