17 18
When time zone adjustment cannot be performed, the time difference can be set (selected) manually.
Using “List of time differences around the world (for reference)” P.11 as a guide, the watch can be matched to the time and
date of your location by setting the time difference (including the date).
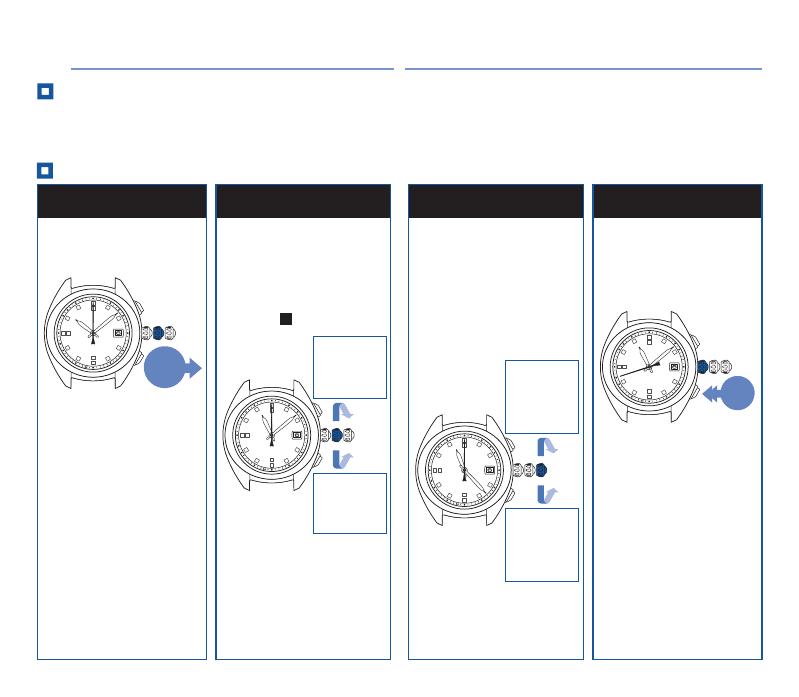
Pull out the crown to the first
click
1
The seconds hand will
move to the 0-second
position.
Push the crown back in
4
The seconds hand returns
to the time display mode.
The buttons cannot be
operated while the hour,
minute, and seconds hands
and the date are moving.
When in-flight mode is set, the
seconds hand will move to the
42-second position.
How to perform manual time difference setting (selection)
8
About manual time difference setting (selection)
8.
Setting the destination time zone while in flight, etc.
(manual time difference setting), and setting/resetting
DST (daylight saving time or “summer time”)
Setting the destination time zone
while in flight, etc. (manual time difference
setting), and setting/resetting DST
(daylight saving time or “summer time”)
3
Pull out the crown to the
second click
Turn the crown to set the watch
to the time at the destination
2
Each turn of the crown changes
the time in 1-hour increments.
When the time has been set
in 1-hour increments, go to
operation
4
.
When setting the time in
1-hour increments does not
set the correct time, continue
with setting the time in 15-
minute increments.
Take note of which way you
turn the crown.
By making adjustments 4
times, an adjustment of 1 hour
can be made.
Take note of which way you
turn the crown.
When in-flight mode is set, the
seconds hand will move to the
0-second position.
To set the watch to the time at the
destination, the time and date must
be set. If you turn the crown in the
wrong direction, change direction
and reset the date and time.
A date up to about 2 weeks later
(or earlier) can be displayed.
Note that changing the date
too far will result in a date two
weeks earlier (or later).
Turning the
crown to the
right moves
the time 1
hour forward.
Turning the
crown to the
left moves the
time 1 hour
backward.
Turning the
crown to the
right moves
the time
15 minutes
forward.
Turning the
crown to the
left moves
the time
15 minutes
backward.
210
Pull out
to the first
click
210
Push
back in


