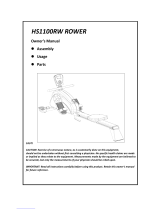
Training with the Seattle Wooden Rower
1. As with any piece of fitness equipment, consult a
physician before starting your exercise program.
2. Follow instructions provided in this manual for correct foot
position and basic rowing techniques.
CAUTION
1. The Seattle Wooden Rower can stand vertically for storage. When doing so,
please choose a secure location, such as the corner of a room.
CAUTION
2. Keep hands away from moving parts, as indicated by the warning
sticker on the main frame of your machine.
Contents
1. Carton contents of the Seattle Wooden Rower.
2. Assembly.
3. Tank filling and water treatment.
4. Operational instructions.
5. The Seattle Wooden Rower Computer.
6. Replacing Rower belt.
7. Replacing Bungee cord.
8. Maintenance and Troubleshooting.
9. Parts list.
10. Warranty.
1

2
Contents of the Carton: Inside the parts kit, you will have the following items:
1.Main Frame.(1)
2.Seat Rail L.(1)
3.Seat Rail R. (1)
4.Bungee.(1)
5.Seat.(1)
6.Bracket For Pedal.(1)
7.Pedal. (1)
8.Bolt 5/16"-24UNF*60L.(2)
9.Nut 5/16*24-UNF*28. (2)
10.Front Stabilizer Roller.(1)
11.Nut 1/4"*28-UNF*28.(14)
12.Bolt 1/4"*28-UNF*25.(10)
13.Row Belt. (1)
14.Bungee Cord.(1)
15. .(1)
16.Hex Key Wrench 3/16” L Shape.(1)
17.Funnel. (1)
18.Siphon.(1)
19.Owner Manual. (1)
20.Water Treatment Pack..(1)
Display Computer
1
2
3
4
5
6
7
8
9
10
11
12
13
14
15
16
17
18
19
20
Owner Manual

3
Assembly Instructions:
Step 1:
Remove both seat rails from packaging.
Step 2:
Attaching seat rails. Attach rear wooden bungee support (4)
to rails in the rear with bolt (11).
Step 3:
Putting the wheels on. Attach front stabilizer wheels (10) to
the outside of the rails with nut and bolt (8 & 9).
Step 4:
Putting the Seat on. Take out the seat (5) from packaging.
Slide seat onto rails from the front, make sure the seat slides
easily back and forth.

Assembly Instructions:
Step 5:
Attaching main frame to the rails. Place the main frame (1)
between the rails (2 & 3), aligning the iron plates on the front
left and right side of the main frame as well as the four holes
from the front and back. Make sure the metal plates line up with
the holes on the rails. Use 8 bolts (12) and 8 nuts (11) to secure
the main frame to the rails.
Step 6:
Securing footplate to the main frame. There are two holes on
the pedal bracket (6),This bracket should be placed on the
underside of the wooden footplate. Secure the bracket and
footplates to mainframe using provided hardware (nut and bolt 11 & 12).
4

5
Assembly Instructions:
Step 7:
Attaching Bungee Cord. Attach bungee cord (14) to the rowing belt (13)
by stretching bungee and clipping them together.

6
Adding and treating water.
Tank filling and water treatment procedures.
Note: 17 liters or 4.5 gals of water is required for maximum filling.
1. Remove the rubber fill plug from the top of the tank.
2. Place a large bucket of water next to the rower and position siphon with the rigid hose in the bucket and the flexible hose into the tank as shown.
Note: Make sure small breather valve on the top of the siphon is closed before filling.
3. Begin filling tank by squeezing siphon. Use Water Level Gauge decal on side of tank to measure volume of water in tank.
Note: The amount of resistance is dictated by the amount of water in the tank; for example, 9 liters of water equals light resistance,
4.5 gallons or 17 liters of water creates the heaviest resistance. Important: Do not overfill tank!
4. After filling tank the to the desired water level, to open the valve on the top of the siphon to allow excess water to escape.
5. Ensure that the tank plug is replaced once filling and water treatment procedures is complete.
Tips on Siphon use: Putting the fill bucket higher than the tank will allow the siphon to "self-pump" when adding water to the tank. .

Operational Instructions: Seattle Wooden Rower
CAUTION
Always row with your feet secured in the foot straps.
1. Foot Adjustment. Use the Velcro straps to secure your feet on the footplates (7).
Simply loosen the footplate knob and slide the adjuster up or down to the required position. This should place the ball of your foot directly under the
horizontal foot straps. Tighten knob and secure foot straps. The heel support allows the user to row without shoes if desired.
2. Resistance: The level of resistance is determined by the amount of water in the tank. Any amount between 2.5 - 4.5 gallons or 9 - 17 liters is acceptable,
with more water providing greater resistance.
Important: Do not fill past the 4.5 gal / 17 liter mark on the Level Gauge! Refer to Tank Filling Procedures for details.
7

Basic Rowing
1.Begin the stroke comfortably forward and push strongly back with your legs while keeping your arms and back straight.
2.Begin to pull your arms back as they pass over your knees and continue the stroke through to completion rocking slightly back over your pelvis.
3.Return to the starting position and repeat.
How often should I row ?
Begin with a 5 minute training sessions once a day and aim for around 2:30 to 2:45 for 500m time and around 18-25SPM
Progress a few minutes more each day until you are comfortable with 30-45 minutes training time 3 or 4 times a week.
This is sufficient to provide aerobic endurance benefits, muscle toning and sufficient calorie burning to form part of a weight loss program.
CAUTION Always consult a doctor before beginning an exercise program.
Stop immediately if you feel faint or dizzy.
Catch Comfortably forward with straight back and arms.
Drive Push with the legs while arms remain straight.
Finish Pull through with arms and legs rocking slightly back on your pelvis.
Recovery Upper body tips forward over your pelvis and move forward.
Catch Catch and begin again.
How to Row like a Pro!
8

Removing Water:
Removing Tank water.
1. Remove the tank plug.
2. Insert rigid end of siphon into the tank, and flexible hose into a large bucket. Note: If the siphon hose hits the impeller blades,
you can rotate the blades slightly by pulling on the rower handle to allow the siphon to reach the bottom of the tank.
3. Drain tank and then refill following directions for tank filling.
Note: The valve on top of the siphon must be closed to allow proper drainage.
Note: Water treatment will preclude the need to change tank water if the treatment schedule is maintained. Additional chlorine is required only when discoloration appears
in the water.
Note: Exposure to sunlight affects the water. Moving the rower away from direct sunlight extend time between water treatments.
9

Display Computer Instructions
The Seattle Wooden Rower Computer:
TIME: Auto start, shows elapsed time.
500M TIME: Time to row 500 meters, updated at the completion of
each stroke.
DISTANCE: Distance rowed measured in meters
PULSE: Requires optional chest strap.
SPM: Strokes per minute updated each stroke.
CAL : Updated each stroke.
Auto Scan: Press the mode button until scan appears. Display computer
automatically cycles through all read-outs
Note: Computer will reset and begin to count up after 10 seconds of inactivity
10

A. FEATURES
1. 500M
2. Timer (Count up/ Count down)
3. SPM
4. Distance
5. Calorie/hour
6. Heart Rate
7. Alarm above Maximum Heart Rate
B. SPECIFICATIONS
Timer for rowing 500 meters
0:00~99:59 (minutes: seconds)
0:00~99:59 (Count up) minute: second
99:00~0:00 (Count down)
Strokes per minutes 0~199
0~9999 meter (0~32805 feet) (Count up)
9990~0 meter (32775~0 feet) (Count down)
00~286 Kcal/ hour
30~240 BPM
50~200 BPM
DISPLAY USER'S MANUAL
500M
Time
SPM
Distance
Calories/hour
Range of Heart Rate
Range of Maximum Heart Rate
Alarm will sound when the user exceeds his or her's Maximum Heart Rate
*Optional Chest Strap Heart Rate Transmitter must be worn for this function
Scan Display: Display the data of the 500M, Time, Spm, Distance,
Calorie/hour and Heart Rate every 5-seconds sequentially.
Power
1.5V*2 (size AA*2)
11

D.KEYS AND FUNCTIONS
Mode Key: Pressing the “Mode” key to cycle through the functions and display each consecutively. To press and hold “ MODE” key down for 2 second to go into
distance unit model (Metric M or English ML), and then to press “SET” key to select the unit you preferred. To activate the automatic scan function,
the scan symbol will appear on the display, when the scan function has been activated, the data for each function will be updated in 5-second interval
throughout your exercise session.
Set Key: Pressing “SET” key to the data will flash to show the computer in setting mode to program your Row time, Row distance and Heart Rate High Limit.
a.) PROGRAMMING EXERCISE TIME:
Pressing '' MODE” key to enter Time function, and pressing “SET” key to set up the time you desired. You can adjust the time by pressing and holding “SET” key.
The time set symbol ” ((.))” will appear on display. When you start to rowing, the timer will start to count down, the computer will beep for 4 seconds after the
timer counts down to 0:00.
b.) PROGRAMMING EXERCISE DISTANCE:
Pressing '' MODE” key to enter Distance function, and pressing “SET” key to set up the distance you desired. You can adjust the distance by pressing and
holding “SET” key. The distance set symbol” ((.))” will appear on display. When you start to row, the exercise distance will start to count down, The computer
will beep for 4 seconds after the exercise distance counts down to 0 meter/feet.
c.) PROGRAMMING MAXIMUM HEART RATE: Optional with Chest Belt Transmitter.
The range of Maximum Heart Rate is between 50 and 200. Press the “MODE” key to enter maximum heart rate function, and pressing “SET” key to set up your
maximum heart rate. You can adjust the maximum heart rate by pressing and holding the “SET” key. The pulse rate limit set the symbol” ((.))” will appear on
display. When your heart rate is above maximum heart rate during exercise, the computer will beep to warn you to stop exercise.
Reset Key: The reset key will clear data for Time, Distance, and Heart Rate High Limit individually. When you press and hold “Reset” key for 2 seconds,
all data will be cleared simultaneously.
12

Note:
.
1. The computer will start automatically when receiving signal from the optional chest belt or pressing any key.
2. The display will turn off automatically after 3 minutes without any activity.
3. The computer will clear data of 500M, Time, SPM, Distance and Calories/hour automatically without receiving any speed signal after 40 seconds.
4. Under normal condition, make sure the symbol appear on the display before measuring your heart rate. The symbol will disappear automatically when the
computer does not receive any signal from transmitter after 30 seconds. Press “SET” or “RESET” to wake up heart rate function, the symbol will turn on again.
Tips: Moisten Transmitter Contacts (for dry skin user)
Before wearing the transmitter chest strap, moisten the 2 rectangular rubber pads (electrodes) located on the inside surface of the chest transmitter.
Use water or saliva to moisten these pads.
Adjusting the strap
The strap should be worn tight enough to prevent the transmitter from bouncing or sliding, but not so tight as to be uncomfortable.
Positioning the Transmitter
The transmitter should be positioned below the breast or pectoral muscles with the middle centered on the chest, and fasten. The transmitter starts to send a
signal after worn.
13

Troubleshooting:
14
Troubleshooting:
Fault
Probable Cause
Solution
Rower is in direct sunlight or has
not had water treatment.
Bungee not under enough tension.
Batteries installed incorrectly or
need replacing.
Loose or failed connection.
Water changes color or
becomes cloudy.
Rower belt slipping off
belt/bungee pulley.
The display computer does
not illuminate after battery
installation.
Display computer screen illuminates
but does not register when rowing.
Change rower location to reduce direct exposure to sunlight.
Add water treatment change tank water as directed in the manual.
Tighten bungee cord following the instructions in
“Replacing the bungee/shock” section of this manual.
Reinstall batteries in correct position and try again.
If the LCD screen fails to illuminate, try rotating the batteries
slightly in the computer. If this fails contact your local service
center.
Check that the computer lead is connected properly.
If it is connected then contact your local service center.

Seattle Wooden Rower Parts List
15
01
02
03
04
05
06
07
08
09
10
11
12
13
14
15
16
17
18
19
20
21
22
23
24
25
26
NO.
Description
Qty
NO. NO.
Description Description
Qty Qty
27
28
29
30
31
32
33
34
35
36
37
38
39
40
41
42
43
44
45
46
47
48
49
50
51
52
53
54
55
56
57
58
59
60
61
62
63
64
65
66
67
68
69
70
71
72
73
74
75
76
77
78
Upper Main Frame
Base Main Frame
Seat Rail
Row Handle Bar Holder
Row Handle Bar
Display Computer Stand
Display Computer Mounting plate
Shaft for Flywheel Impeller
Flywheel Impeller
Spacer for Belt Pulley
Belt/Bungee Pulley
Plastic Spacer
Magnet Ring includes 6 magnets
Spring Pin
Upper Tank
Lower Tank
Belt Pulley
Ball Bearing
Belt Pulley Spacer
Belt Pulley Spacer
C Clip S10
Belt Pulley
Bungee Cord Pulley
Bungee Cord Pulley Spacer
Belt Pulley Spacer
Bungee Cord Pulley Spacer
Bolt (M8*65L)
Bolt (M8*95L)
Bolt (M10*95L)
Nut Dome Head M8
Nut Dome Head M10
Bolt (M10*100L)
Spring Washer M10
Flat Washer M10
Row Belt
Bungee Cord
Bolt (3/8"X178L)
Plastic Spacer D
Extra Spacer for Display Computer Bracket
Spacer for Display Computer Stand
Nut Dome Head 3/8"
Screw (M3*20L)
Flywheel Impeller oil Busing
Cross Screw (M6*7L)
Nylon Nut M3
End Cap
End Cap
Sponge for Row Handle Bar
End Cap for Row Handle Bar
Shaft for Foot Padel
Foot padel including straps
Seat Rail End Cap
Rubber Bumper Stop
Cross Screw (M6*10L)
Seat
Seat Wheel
Seat Wheel Long Spacer
Seat Wheel Short Spacer
Bolt (M6*15L)
Seat Mounting Plate
Bolt (M8*118L)
Flat Washer M8
Nylon Nut M8
Self-drilled Screw (M4*25L)
Display Computer
Sensor Wire
Stopper
Bolt (M10*55L)
Flat Washer M6
Stainless Washer
FemaleVelcro
Tank Outer Rubber Ring
Tank Internal Rubber Ring Seal
Sticker for Rx750
Sticker for PROROWER H2O
Water Level Gauge Decal
Siphon
Funnel
1
1
1
1
1
1
1
1
1
2
1
2
1
1
1
1
1
4
1
1
2
1
2
2
2
2
1
1
1
2
6
5
5
5
1
1
1
1
1
4
1
24
2
4
24
4
2
2
2
1
2
1
2
4
1
6
3
6
4
2
3
3
3
2
1
1
2
1
4
1
1
1
1
2
2
1
1
1

Parts Illustration
GR-4000
16

H O Fitness warrants that the Seattle Wooden Rower , purchased from an authorized agent, are free from defects in materials and workmanship.
2
H O Fitness or its agent's will, at their discretion, repair or replace parts that become defective within the warranty period.
2
Wood Frame Life Time Warranty
H O Fitness will repair or replace the Wood Frame of the Rower should it fail due to any defect in materials or workmanship.
2
Polycarbonate Tank & Seals 3 year Limited Warranty
H O Fitness will repair or replace the polycarbonate tank or seals should they fail due to any defect in materials or workmanship within 3 years of the original purchase.
2
Mechanical Components (of a non-wearing nature) 2 Year Limited Warranty
H O Fitness will repair or replace the polycarbonate tank or seals should they fail due to any defect in materials or workmanship within 2 years of the original purchase.
2
All Other Components (of a wearing nature 2 year Limited Warranty
H O Fitness will repair or replace any component should it fail due to any defect in materials or workmanship within 2 years of the original purchase.
2
Specific Inclusions
- Bungee recoil cord
- Hand grips & foot straps
- Polyester rowing belt
- Seat
- Seat rollers & bearings
- All rubber components
- Computer & speed sensor (excluding replaceable batteries)
- All pulleys, bushings & bearings
FITNESS
LIMITED WARRANTY
17

Seattle Wooden Rower
www.hcifitness.com
Info@hcifitness.com
18
General Exclusions
- Damage to the finish of any part of the machine
- Damage due to neglect, abuse or incorrect use of the machine
- Any charges for freight or customs clearance associated with the return or dispatch of parts
- Any damage to or loss of goods during transport of any kind
- Any labor cost associated with a warranty claim
General Conditions
- The serial number of the machine must be correctly registered with the H O Fitness or one of its appointed distributors
2
- H O Fitness reserves the right to examine any part where replacement is claimed under warranty
2
- Warranty period applies only to the original purchaser from the date of purchase and is not transferable
- The product must be returned to your place of purchase in the original packaging with transportation, insurance and associated charges paid for by you and
risk of loss or damage assumed by you
- H O Fitness makes no other warranties except as stated here and expressly disclaims all warranties not stated on this page. Neither H O Fitness nor its
2 2
associates shall be responsible for incidental or consequential damages
/