Page is loading ...

Manual for use and maintenance
Farm Guard
Communication System
Ag/MIS-UmGB-2061-02/13 Rev 3.9
P/N: 110098
Farm
Guard

© Munters AB, 2013 2
Farm Guard
Manual for use and maintenance
Revision: N.3.9 of 09.2014
Product Software: Version 3.05
This manual for use and maintenance is an integral part of the apparatus together with the attached
technical documentation.
This document is destined for the user of the apparatus: it may not be reproduced in whole or in part,
committed to computer memory as a file or delivered to third parties without the prior authorization of the
assembler of the system.
Munters reserves the right to effect modifications to the apparatus in accordance with technical and legal
developments.

© Munters AB, 2013 3
Index
Chapter page
1 INTRODUCTION ....................................................................................................... 7
1.1 Disclaimer ............................................................................................................................ 7
1.2 Introduction.......................................................................................................................... 7
1.3 Notes ................................................................................................................................... 7
2 SAFETY ASPECTS ....................................................................................................... 8
2.1 Grounding ........................................................................................................................... 8
2.2 Checking the battery level ................................................................................................... 8
3 BEFORE USING ......................................................................................................... 9
4 INTRODUCTION TO THE FARM GUARD................................................................... 10
4.1 Main features .................................................................................................................... 10
4.2 What’s new in Version 3.04 .................................................. Error! Bookmark not defined.
4.3 Choosing communication cards ........................................................................................ 10
4.4 User interface .................................................................................................................... 10
4.4.1 Front panel ......................................................................................................... 11
4.4.2 Menu tree ........................................................................................................... 12
5 INITIAL CONFIGURATION ....................................................................................... 13
5.1 Communication recommendations .................................................................................... 13
5.2 Setting the test schedule .................................................................................................... 14
5.3 Setting the language ......................................................................................................... 14
5.4 Setting the farm site name ................................................................................................. 14
5.5 Identifying the controllers ................................................................................................... 15
5.6 Setting the time & date ...................................................................................................... 15
5.7 Adding names to the Address Book .................................................................................. 15
5.7.1 Phone number structure ...................................................................................... 16
5.8 Setting the password ......................................................................................................... 16
6 FARM GUARD TO USER FUNCTIONS ...................................................................... 17
6.1 Voice functions .................................................................................................................. 17
6.1.1 Basic voice functions ........................................................................................... 17
6.1.1.1 Setting the voice parameters .......................................................................... 17
6.1.1.2 Testing voice quality....................................................................................... 18

© Munters AB, 2013 4
6.1.1.3 Testing the voice call service .......................................................................... 18
6.1.1.4 Testing the cellular signal strength.................................................................. 18
6.1.1.5 Receiving a status report ................................................................................ 18
6.1.2 Advanced voice functions ................................................................................... 19
6.1.2.1 Configuring the telephone modem................................................................. 19
6.1.2.2 Defining when Farm Guard answers incoming calls ...................................... 20
6.1.3 Responding to an audio alarm message ............................................................ 20
6.2 Pager functions .................................................................................................................. 21
6.2.1 Basic pager functions.......................................................................................... 21
6.2.1.1 Pager setup .................................................................................................... 21
6.2.1.2 Pager test ....................................................................................................... 22
6.2.2 Advanced pager functions .................................................................................. 22
6.2.2.1 Configuring the dial delay ............................................................................. 22
6.3 Text functions ..................................................................................................................... 22
6.3.1 Basic text functions ............................................................................................. 22
6.3.1.1 Testing the text function .................................................................................. 22
6.3.1.2 Testing the SMS ringtone ............................................................................... 23
6.3.1.3 Status report ................................................................................................... 23
6.3.2 Advanced text functions...................................................................................... 24
6.3.2.1 Defining who can text Farm Guard................................................................ 24
6.3.2.2 Configuring an SMS ringtone ........................................................................ 24
6.3.3 Text message responses ..................................................................................... 25
6.3.3.1 Resetting the siren .......................................................................................... 25
6.3.3.2 Resetting the alarm ........................................................................................ 25
6.3.3.3 Acknowledging a message ............................................................................ 25
6.4 Technician tools ................................................................................................................. 26
6.4.1 Test ..................................................................................................................... 26
6.4.2 Hyper terminal .................................................................................................... 26
6.4.3 Monitor ............................................................................................................... 26
7 FARM GUARD TO CONTROLLER FUNCTIONS .......................................................... 27
7.1 Network connection configuration .................................................................................... 27
7.1.1 Routing methods ................................................................................................. 27
7.1.2 Configuring the channel settings ......................................................................... 28
7.1.3 Displaying the controllers.................................................................................... 29
7.1.4 Listing the network devices.................................................................................. 29
7.2 RS-232 connection ............................................................................................................ 30
7.2.1 Setting up the RS-232 connection ....................................................................... 30
7.2.2 RS-232 approximate distances and baud rate ................................................... 31

© Munters AB, 2013 5
7.3 RS-485 connection ............................................................................................................ 31
7.3.1 Setting up the RS-485 connection ....................................................................... 31
7.3.2 RS-485 approximate distances & baud rates ..................................................... 33
7.4 RF connection .................................................................................................................... 34
7.4.1 Option A with Farm Premium RF (RCLP-RF) ......................................................... 34
7.4.2 Option B with Farm Premium RF Remote ............................................................. 34
7.5 Channel/Signal tests ......................................................................................................... 35
7.5.1 Testing the RS-232/485 channel ....................................................................... 35
7.5.2 Testing the Radio RF signal ................................................................................. 35
8 FARM GUARD TO PC CONFIGURATION.................................................................. 36
8.1 Defining the communication speed with the local PC ........................................................ 36
8.2 Configuring the data connection ....................................................................................... 36
9 CONFIGURING THE DRY CONTACT CARD .............................................................. 37
10 FARM GUARD FUNCTIONS ..................................................................................... 38
10.1 Saving and restoring system settings ................................................................................. 38
10.2 Test functions ..................................................................................................................... 38
10.2.1 Testing the CPU battery ...................................................................................... 38
10.2.2 Viewing device status ......................................................................................... 39
10.2.3 Viewing the software and hardware version ...................................................... 39
10.3 Viewing relay settings ........................................................................................................ 39
11 ALARMS 40
11.1 Introduction to alarms and responses ................................................................................ 40
11.2 Event codes ....................................................................................................................... 41
11.3 Advanced alarm settings ................................................................................................... 41
11.3.1 Reseting the alarms ............................................................................................. 41
11.3.2 Disabling alarms ................................................................................................. 42
11.3.3 Defining the message delay ............................................................................... 42
11.3.4 Defining the message repeat parameter ............................................................. 42
11.3.5 Defining the internal alarms ................................................................................ 43
11.3.6 Defining the battery alarm .................................................................................. 43
11.4 Alarm and events history ................................................................................................... 43
11.4.1 Displaying the alarm history ............................................................................... 43
11.4.2 Displaying the user events .................................................................................. 44
11.4.3 Displaying the system events .............................................................................. 44
11.5 Testing the alarm backup batteries .................................................................................... 44
11.5.1 Dial-Up test ......................................................................................................... 46
11.5.2 Voltage test ......................................................................................................... 46

© Munters AB, 2013 6
12 INSTALLATION ........................................................................................................ 47
12.1 Hardware installation ........................................................................................................ 47
12.1.1 Preliminary steps ................................................................................................. 47
12.1.2 Connecting the unit to external components ....................................................... 50
12.1.3 Additional details ................................................................................................ 51
12.1.4 USB driver installation......................................................................................... 52
12.2 Completing the installation ................................................................................................ 52
12.2.1 Configuring the communication to outside devices ............................................. 52
12.2.2 Setting Up an Internet connection ....................................................................... 52
12.2.3 Setting Up a Network using FarmNet................................................................. 54
12.2.3.1 Local network ................................................................................................. 54
12.2.3.2 Remote network ............................................................................................. 54
13 TROUBLESHOOTING .............................................................................................. 56
13.1 Hardware .......................................................................................................................... 56
13.2 Communication to controllers/PC ...................................................................................... 56
13.3 Cellular modem ................................................................................................................. 58
13.4 RF communication.............................................................................................................. 59
13.5 Voice card ......................................................................................................................... 60
13.6 Alarm ................................................................................................................................. 61
13.7 Line modem ....................................................................................................................... 61
14 TECHNICAL DATA ................................................................................................... 62
15 SPARE PARTS LIST .................................................................................................... 63
15.1 Standard components ....................................................................................................... 63
15.2 Additional components ...................................................................................................... 64
15.3 Ordering information ......................................................................................................... 65
16 APPENDIX A: REPLACING COMMUNICATION CARDS AND MODEMS ..................... 69
16.1 Replacing the RS-232 card................................................................................................ 69
16.2 Replacing the RS-485 card................................................................................................ 70
16.3 Replacing the RF-card ........................................................................................................ 71
16.4 Installing a GSM-S or GSM-W card ................................................................................. 72
17 APPENDIX B: FARM GUARD / CONTROLLER CONNECTIVITY .................................... 73
18 WARRANTY ............................................................................................................ 75

© Munters AB, 2013 7
1 Introduction
1.1 Disclaimer
Munters reserves the right to make alterations to specifications, quantities, dimensions etc. for production
or other reasons, subsequent to publication. The information contained herein has been prepared by
qualified experts within Munters. While we believe the information is accurate and complete, we make no
warranty or representation for any particular purposes. The information is offered in good faith and with
the understanding that any use of the units or accessories in breach of the directions and warnings in this
document is at the sole discretion and risk of the user.
1.2 Introduction
Congratulations on your excellent choice of purchasing an Farm Guard!
In order to realize the full benefit from this product it is important that it is installed, commissioned and
operated correctly. Before installation or using the fan, this manual should be studied carefully. It is also
recommended that it is kept safely for future reference. The manual is intended as a reference for
installation, commissioning and day-to-day operation of the Munters Controllers.
1.3 Notes
Date of release: May 2005
Munters cannot guarantee to inform users about the changes or to distribute new manuals to them.
All rights reserved. No part of this manual may be reproduced in any manner whatsoever without the
expressed written permission of Munters. The contents of this manual are subject to change without notice.

© Munters AB, 2013 8
2 Safety aspects
Observe the following precautions when using your unit.
• Grounding
• Checking the Battery Level
2.1 Grounding
CAUTION Always connect temperature and sensor shields to earth ground. Avoid mixing high voltage
wiring with sensor and low voltage wiring. Keep the controller as far as possible from heavy
contactor boxes and other sources of electrical interference.
CAUTION Do not connect communication wire shields, which go from one house to another at both
ends. Connect them at one end only. Connection at both ends can cause ground loop
currents to flow, which reduce reliability.
CAUTION The COM connection for communications is not the shield wire. The COM, RX and TX wires
must connect to each other at all controllers.
2.2 Checking the battery level
CAUTION Check the battery once a year. The output must be 2.7 volts (minimum). Authorized
personnel only must replace the battery if the output is below the minimum required level or
every five years.

© Munters AB, 2013 9
3 Before using
The Farm Guard is the central communication center and provides critical alarm warnings.
THEREFORE IT IS CRITICAL THAT YOU CARRY OUT THE FOLLOWING MAINTENANCE CHECKS
ACCORDING TO THE RECOMMENDED SCHEDULE:
1. Daily (minimum weekly) alarm tests. Refer to Setting the Test Schedule, page 13.
2. Monthly battery (minimum between flock) test.
a) Disconnect power to Farm Guard
b) Ensure Farm Guard transmits SMS and voice alarms.
c) Wait one hour, and confirm that Farm Guard continues to transmit alarms.
d) Restore power to Farm Guard.
3. Test the Alarm Backup Batteries monthly (refer to page 44).
WARNING!
Farm Guard does not support pre-paid SIM cards. Use a regular card only!
CAUTION Use an exclusive phone line for the Farm Guard!
NOTE: Sometimes using a phone line via private switchboard might interfere with communication.
Munters recommends using a different line to the Farm Guard.
CAUTION As a backup to the Farm Guard, Munters recommends installing an Emergency Light and
Siren system. If the Farm Guard is unable to transmit alarms via SMS or the telephone (for
example there is a complete power failure), the Emergency Light and Siren system sounds an
alarm.

© Munters AB, 2013 10
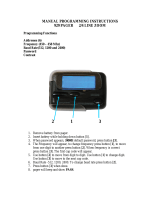
4 Introduction to the Farm Guard
Munters Farm Guard, Version 3.05 is a state-of-the-art alarm and communication center used by famers
to monitor and control their Munters Controllers and accessories.
The Farm Guard has a user friendly interface with an alfa-numeric keypad, 20 character by 4 line LCD
and indicative LED.
• Main Features • What’s New in Version 3.04
• Choosing Communication Cards • User Interface
4.1 Main features
• Supports connectivity of several contacts simultaneously on various communication devices
(such as dial-up, internet, GSM, USB)
• Voice Solution Plug-in: Supports incoming and outgoing phone calls for alarms and status
reports. Voice messages can be edited according to personal preference.
• Remote access via dial-up connection
• Send and receive functional text messages (GSM networks)
• Pager support • 8 digital inputs
• 3 dry contact, output relays 5 Amp • Battery backup
4.2 Choosing communication cards
The Farm Guard supports the following cards:
• Line modem: Supplies remote communication and voice alarms via a phone line.
• Ethernet: Supplies remote communication via Internet (does not support alarms).
• GSM-S/GSM-W: Supplies text alarms and text messages only.
NOTE: GSM cards do not support voice, but if equipped with a SIM card, they can support the Voice
Dial-In function (Configuring the telephone modem, page 19).
The Farm Guard has positions for two cards. Before ordering a unit, the user along with a dealer must
define which cards meet his needs and are supported by local infrastructure.
4.3 User interface
The following sections detail how to access and use the Farm Guard user interface.
• Front panel, page 11
• Menu tree, page 12

© Munters AB, 2013 11
4.3.1 Front panel
LED
Function
PC Com 1 TD/RD PC is transmitting/receiving data to/from the Farm Guard
Modem Com 2 TD/RD Modem is transmitting and receiving data
Modem Com 2 DTR/DCD
Data transmitter ready/Data carrier detect (technician
only)
Cellular Com 3 TD/RD Cellular modem is transmitting and receiving data
Controller Transmit Data Receive
Data
Controller relays are transmitting and receiving data
Output 1 Output 2 Non-functional

© Munters AB, 2013 12
4.3.2 Menu tree
MY FARM
1. FARM NAME
2. ADDRESS BOOK
3. STATUS REPORT
3. CONTROLLERS
4. PASSWORD
5. TIME & DATE
ALARM
1. RESET
2. TEST SCHEDULE
3. DISABLED ALARMS
4. OPTIONS
HISTORY
1. ALARM
2. USER EVENTS
3. SYSTEM EVENTS
SYSTEM
1. TEST
1. BATTERY
2. GSM/CDMA
SIGNAL
STRENGTH
SEND TEXT MSG
DIAL OUT
3. RADIO RF SIGNAL
4. HARDWARE PROFILE
5. WIRED RS232/485
6. NETWORK LIST
7. VOICE
8. PAGER
9. DIAL OUT
2. DIGITAL INPUT
3. RELAY
4. SAVE/RES SETTING
1. RESTORE
2. SAVE
5. LANGUAGE
6. ADVANCED SETUP
1. VOICE
2. RF/WIRED NETWORK
3. BATTERY
4. INTERNET
5. COM/USB
6. LINE MODEM
7. GSM/CDMA
8. PAGER
7. TECHNICIAN TOOLS

© Munters AB, 2013 13
5 Initial configuration
This section describes how to configure the Farm Guard’s initial settings.
• Communication recommendations, page 13
• Setting the test schedule, page 14
• Setting the language, page 14
• Setting the farm site name, page 14
• Identifying the controllers, page 15
• Setting the time & date, page 15
• Adding names to the Address Book, page 15
• Setting the password, page 16
CAUTION Many of these settings are critical in ensuring the safety and well-being of your stock. These
settings must be made as soon as Farm Guard is installed.
Refer to Installation, page 47 for complete installation instructions.
Refer to the sections listed below for information on other functions:
• Farm Guard to user functions, page 17
• Farm Guard to controller functions, page 27
• Farm Guard to PC configuration, page 36
• Configuring the dry contact card, page 37
• Farm Guard functions, page 38
• Alarms, page 40
NOTE: Before installing a SIM card, disable the PIN code (if the card has this code). Farm Guard text
functions are disabled if the SIM card has a PIN code.
5.1 Communication recommendations
Munters strongly recommends:
• enabling both the telephony and SMS functions to transmit alarms (via voice and SMS)
• enabling SMS alarm acknowledgment
• employing a secondary alarm system to act as a backup to Farm Guard's primary monitoring
and alarm system
WARNING!
Because of limitations built into SMS delivery systems, there may be delays in the actual
SMS delivery time. By default a reminder SMS is transmitted after two minutes. If the
message delivery is delayed for any reason, including delays caused by the
infrastructure, a reminder SMS is sent. Therefore increasing the delay time for a reminder
places your livestock at risk.

© Munters AB, 2013 14
5.2 Setting the test schedule
1. Select ALARM > Test Schedule.
2. Configure the parameters.
o FREQUENCY: Daily, weekly, disabled
o AT: Time of day to perform the alarm test
o DAY: Define the day of the week to perform the alarm test (this is required only when
FREQUENCY=WEEKLY)
WARNING!
Munters strongly recommends regular testing of the alarms. Do not disable this test
unless the house is empty!
5.3 Setting the language
1. Select SYSTEM > Language.
2. Configure the parameters.
o LANGUAGE: Select the required language for the user interface.
o REGION: Select the site location.
CAUTION Select the correct region! The modem functions correctly only when the correct region is
selected!
5.4 Setting the farm site name
• Select MY FARM > Farm /Site Name.
Define the site’s name and reference number. PC network software employs these parameters when
sending an alarm. In case several Farm Guards are present, this will help in identifying each one
separately.
CAUTION Each Farm Guard
must
have a
unique
name and number.
ALARM TEST
FREQUENCY DAILY
AT 12:00
LANGUAGE
LANGUAGE ENGLISH
REGION US
FARM/SITE NAME
NAME:
NUMBER:

© Munters AB, 2013 15
5.5 Identifying the controllers
1.Select MY FARM > Controllers.
2. Identify controllers that are present within the network.
• PRIMARY UNITS: Select the number of master controllers the site contains (for example Farm
Premium/Farm Pro)
• SECONDARY UNITS: Select the number of slave controllers the site contains (for example
Farm Master)
• FOUND-PRIMARY/SECONDARY: Displays the number of controllers the Farm Guard was
able to locate (read-only)
5.6 Setting the time & date
1. Select MY FARM > Time & Date.
2. Adjust the time and date in this menu.
• CLOCK: hh:mm: (24 hour format; for example 2:15 PM = 14:15)
• DATE: dd-mmm-yy: (for example 14-JAN-10)
5.7 Adding names to the Address Book
• Select MY FARM > Address Book.
The address book contains the contact information of up eight users. Farm Guard contacts these users in
the event of an alarm. Priority of contacts is defined by the user number (1-16). Top priority contacts
should be entered into the address book first.
CAUTION Munters strongly recommends entering contact information immediately.
CONTROLLERS
PRIMARY UNITS 1
SECONDARY 0
FOUND-PRIM 0 Sec 0
TIME&DATE
CLOCK: 12:18
DATE: 07-FEB-10
TEXT 9005555554
PAGER 9,555555,,,
Msg By idle
FROM 00:00
TO 0:00
LANG E lh
ADDRESS BOOK
===========USER-2=========
NAME John Smith
VOICE 9,555555

© Munters AB, 2013 16
Contact list fields:
• NAME: Enter the contact name using the keypad.
• VOICE: Enter the phone number for receiving the VOICE CALL service (refer to Setting the
voice , page 17 and Testing the voice call service, page 18 for advanced settings and testing).
• MOBILE NUMBER: Enter the mobile number for the text message service.
• PAGER: Enter the pager phone number. Refer to Pager setup, page 21 for options and testing.
In addition, refer to Configuring the dial delay, page 22.
NOTE: When entering the above numbers, refer to Phone number structure, page 16.
• MSG BY: Define which services the contact receives (Idle, Voice, Text, Voice+Text, Pager).
• FROM/TO: Time frame for receiving messages/calls (Default – FROM: 0:00; TO: 00:00 –
time frame is 24 hours, meaning always receiving messages).
• LANGUAGE: Select the language in which SMS messages are written: English, Turkish,
Russian, Spanish, Thai or Hebrew.
NOTE: Distribution of the alarm messages is according to the address book list, contact by contact.
Each user receives all forms of communication that are selected (Msg. By option) before
continuing to the next user.
The first user does NOT have a "FROM" or "TO" field to ensure there is always someone that
receives the notification from Farm Guard.
5.7.1 Phone number structure
When entering the voice, mobile and pager numbers the phone number structure is:
• 9 (outside line, if needed), # # # # # # #,,
The commas are the dial delay. Refer to Configuring the dial delay, page 22.
NOTE: To enter a comma, press and hold the “1” button.
5.8 Setting the password
1. Select MY FARM > Password.
2. Define a password and confirm it (to disable, type “0”).
If selected, a password is required for:
• Locally: Using the menu items
• Remotely: Acknowledge/disabling of alarms via phone
NOTE: If a password is defined, the Farm Guard locks the system when idle for five minutes or if you
press “9” from the main menu.
SECURITY
TYPE NEW PASSWORD:

© Munters AB, 2013 17
6 Farm Guard to user functions
The following sections detail how to use the:
• Voice, page 17
• Pager, page 21
• Text, page 22
• Technician tools , page 26
6.1 Voice functions
The following sections detail Farm Guard’s basic and advanced Voice functions.
• Basic voice functions, page 17
• Advanced voice functions, page 19
• Responding to an audio alarm message, page 20
6.1.1 Basic voice functions
This section details the basic Voice functions.
• Setting the voice parameters, page 17
• Testing voice quality, page 18
• Testing the voice call service, page 18
• Testing the cellular signal strength, page 18
• Receiving a status report, page 18
6.1.1.1 Setting the voice parameters
1. Select SYSTEM > Advanced Setup > Voice.
2. Define the speech VOLUME and SPEAKER volume and it’s SPEED (if using a TTS voice card).
3. Scroll down to TEST and press ENTER to hear the selected settings.
VOICE SETTING
VOLUME
SPEED

© Munters AB, 2013 18
6.1.1.2 Testing voice quality
1. Select SYSTEM > Test > Voice.
2. Define speech VOLUME and SPEED.
3. To test, press ENTER.
NOTE: Voice Setting and Test Voice perform the same functions.
6.1.1.3 Testing the voice call service
This menu tests the VOICE CALL service.
1. Select SYSTEM > Test > Dial Out.
2. Enter the required phone number to receive the “Test Call”.
3. Press ENTER.
6.1.1.4 Testing the cellular signal strength
• Select SYSTEM > Test > GSM/CDMA.
This screen displays the cellular service provider’s Received Signal Strength Indicator. This screen
displays the cellular service provider’s number, name, BER (Bit Error Rate (if available)), the reception bar
graph as well as the measured signal reading.
NOTE: Signal strength must be between -113 dBm to -51 dBm.
6.1.1.5 Receiving a status report
You can receive a status report over the phone. Refer to Status Report, page 23 for details on the
function.
To hear the status report:
1. Call the Farm Guard phone number.
2. When prompted, select Status report.
VOICE SETTING
VOLUME
ENTER NUMBER
23415
RED WIRELESS
<Ber=…>
-51 dBm

© Munters AB, 2013 19
6.1.2 Advanced voice functions
This section details Farm Guard’s advanced Voice functions.
CAUTION Munters recommends that only trained, authorized technicians configure these functions.
• Configuring the telephone modem, page 19
• Defining when Farm Guard answers incoming calls, page 20
6.1.2.1 Configuring the telephone modem
• Select SYSTEM > Advanced Setup > Line Modem.
This screen defines the line modem specifications.
• AUTO ANSWER: Number of rings before the Farm Guard automatically answers a dialed-in
call. For example: if set to 4 the Farm Guard answers a call after four rings.
• LINE TEST: Monitors the phone line and activates an alarm in case of disconnection.
Default: YES.
• INPUT GAIN: For factory use only. If your Farm Guard is unable to connect your voice dial in
phone line, consult your local dealer regarding this feature.
• VOICE DIAL-IN: This option enables the user to call in at any time and receive information
from the Farm Guard regarding alarms. To receive the information in voice mode only:
1. Call the controller, wait for one ring less than the AUTO ANSWER set parameter number
and hang up.
2. Wait at least five seconds (but no longer than 60 seconds) and then call again. Follow the
instructions given by the controller.
• If the AUTO ANSWER parameter is set to zero (0), then the Farm Guard answers in voice
mode.
• If the AUTO ANSWER parameter is set to zero and the VOICE DIAL IN parameter is set to
YES, the controller answers in voice mode every time.
LINE MODEM
AUTO ANSWER 4
LINE TEST YES
DIAL DELAY ( , ) 2
INPUT GAIN 70
VOICE DIAL-IN YES

© Munters AB, 2013 20
6.1.2.2 Defining when Farm Guard answers incoming calls
1. Select SYSTEM > Advanced Setup > GSM/CDMA.
2. In Auto Answer, define the number of rings until the Farm Guard answers through the cellular
modem.
6.1.3 Responding to an audio alarm message
The Voice Dial Out service transmits audio alarm message, via telephony, from Farm Guard to the
contacts entered in the Address Book (page 15). This section details the procedure to follow when an
audio alarm is received.
NOTE: This service is provided by the Farm Guard ONLY if the Address book is properly defined with
contacts and the "VOICE" service selected per contact.
CAUTION Farm Guard only broadcasts its alarm message AFTER someone speaks into the phone. Any
word or sound is sufficient.
The following illustrates the sequence of ALARM messages:
"Good <Morning / Afternoon / Evening> farm <#> active alarm.
Please, press 1 to listen."
"House <#> has <#> alarm message<s>."
• Alarm messages for the first house are played and then the following options are available:
Acknowledge
Replay house
message
Play next
house message
End call
• Enter password (if acknowledging for the first time this call) and press .
• "Please wait… Reset for house <#> successful. <Next Message / Goodbye>."
• Right after "Please wait" is heard,
press to access the ALARM OPTIONS MENU.
CELLULAR MODEM
TEXT FROM Addr. Book
Auto Answer 2
Operator STD
1
1
9
0
/