Gigaset smart care+Phone User guide
- Category
- Mobile phones
- Type
- User guide
This manual is also suitable for


Template Go, Version 1, 01.07.2014,
Contents
Gigaset E380A Care / LUG CH en / A31008-N2535-R102-1-4U19 / LUGIVZ.fm / 1/14/20
2
Contents
Overview . . . . . . . . . . . . . . . . . . . . . . . . . . . . . . . . . . . . . . . . . . . . . . . . . . . . . . . . . . . . . . . . . . . . . . . . . . . . . .6
Handset . . . . . . . . . . . . . . . . . . . . . . . . . . . . . . . . . . . . . . . . . . . . . . . . . . . . . . . . . . . . . . .
. . . . . . . . . . . . . . . . 6
Base . . . . . . . . . . . . . . . . . . . . . . . . . . . . . . . . . . . . . . . . . . . . . . . . . . . . . . . . . . . . .
. . . . . . . . . . . . . . . . . . . . . . 6
Setting up (overview) . . . . . . . . . . . . . . . . . . . . . . . . . . . . . . . . . . . . . . . . . . . . . . . . . . . . . . . .
. . . . . . . . . . 7
Illustration in the user guide . . . . . . . . . . . . . . . . . . . . . . . . . . . . . . . . . . . . . . . . . . . . . . . . . .
. . . . . . . . . . 9
Safety precautions . . . . . . . . . . . . . . . . . . . . . . . . . . . . . . . . . . . . . . . . . . . . . . . . . . . . . . .
. . . . . . . . . . . . 10
Getting started . . . . . . . . . . . . . . . . . . . . . . . . . . . . . . . . . . . . . . . . . . . . . . . . . . . . . . . .
. . . . . . . . . . . . . . 11
Handset . . . . . . . . . . . . . . . . . . . . . . . . . . . . . . . . . . . . . . . . . . . . . . . . . . . . . . . . . . . . . . .
. . . . . . . . . . . . . . . 11
Base station . . . . . . . . . . . . . . . . . . . . . . . . . . . . . . . . . . . . . . . . . . . . . . . . . . . . . . . . . . . .
. . . . . . . . . . . . . . . 13
Setting up an IP account . . . . . . . . . . . . . . . . . . . . . . . . . . . . . . . . . . . . . . . . . . . . . . . . . . . . . .
. . . . . . . . . 15
Using the telephone . . . . . . . . . . . . . . . . . . . . . . . . . . . . . . . . . . . . . . . . . . . . . . . . . . . . . .
. . . . . . . . . . . 19
Getting to know your telephone . . . . . . . . . . . . . . . . . . . . . . . . . . . . . . . . . . . . . . . . . . . . . . . . . . . . .
. . 19
Making calls . . . . . . . . . . . . . . . . . . . . . . . . . . . . . . . . . . . . . . . . . . . . . . . . . . . . . . . . . . .
. . . . . . . . . . . . . . . 23
Making calls via the Internet (VoIP) . . . . . . . . . . . . . . . . . . . . . . . . . . . . . . . . . . . . . . . . . . . . . . . . . .
. . 28
Provider-specific functions (network services) . . . . . . . . . . . . . . . . . . . . . . . . . . . . . . . . . . . . . . . . . .
31
Call lists . . . . . . . . . . . . . . . . . . . . . . . . . . . . . . . . . . . . . . . . . . . . . . . . . . . . . . . . . . .
. . . . . . . . . . . . . . . . . . . . 37
Message lists . . . . . . . . . . . . . . . . . . . . . . . . . . . . . . . . . . . . . . . . . . . . . . . . . . . . . . . . . . .
. . . . . . . . . . . . . . . 38
Directories . . . . . . . . . . . . . . . . . . . . . . . . . . . . . . . . . . . . . . . . . . . . . . . . . . . . . . . . . .
. . . . . . . . . . . . . . . . 40
Local handset directory . . . . . . . . . . . . . . . . . . . . . . . . . . . . . . . . . . . . . . . . . . . . . . . . . . . . . .
. . . . . . . . . 40
Network directories . . . . . . . . . . . . . . . . . . . . . . . . . . . . . . . . . . . . . . . . . . . . . . . . . . . . . .
. . . . . . . . . . . . . 44
Gigaset.net directory . . . . . . . . . . . . . . . . . . . . . . . . . . . . . . . . . . . . . . . . . . . . . . . . . . . . . . . . .
. . . . . . . . . 46
Answer machine . . . . . . . . . . . . . . . . . . . . . . . . . . . . . . . . . . . . . . . . . . . . . . . . . . . . . . . . .
. . . . . . . . . . . . 48
Local answer machine . . . . . . . . . . . . . . . . . . . . . . . . . . . . . . . . . . . . . . . . . . . . . . . . . . . . . . . .
. . . . . . . . . 48
Network mailbox . . . . . . . . . . . . . . . . . . . . . . . . . . . . . . . . . . . . . . . . . . . . . . . . . . . . . . . .
. . . . . . . . . . . . . . 53
Set fast access for the answer machine . . . . . . . . . . . . . . . . . . . . . . . . . . . . . . . . . . . . . . . . . . . . . .
. . 54
Additional functions . . . . . . . . . . . . . . . . . . . . . . . . . . . . . . . . . . . . . . . . . . . . . . . . . . . . .
. . . . . . . . . . . . 55
Automatic SOS alarm call . . . . . . . . . . . . . . . . . . . . . . . . . . . . . . . . . . . . . . . . . . . . . . . . . . . . .
. . . . . . . . . 55
Calendar . . . . . . . . . . . . . . . . . . . . . . . . . . . . . . . . . . . . . . . . . . . . . . . . . . . . . . . . . . . . . . .
. . . . . . . . . . . . . . . 57
Timer . . . . . . . . . . . . . . . . . . . . . . . . . . . . . . . . . . . . . . . . . . . . . . . . . . . . . . . . . . . . .
. . . . . . . . . . . . . . . . . . . . 59
Alarm clock . . . . . . . . . . . . . . . . . . . . . . . . . . . . . . . . . . . . . . . . . . . . . . . . . . . . . . . . . . . .
. . . . . . . . . . . . . . . 60
Room monitoring . . . . . . . . . . . . . . . . . . . . . . . . . . . . . . . . . . . . . . . . . . . . . . . . . . . . . . . . . . . .
. . . . . . . . . 60
ECO DECT . . . . . . . . . . . . . . . . . . . . . . . . . . . . . . . . . . . . . . . . . . . . . . . . . . . . . . . . . . . . . .
. . . . . . . . . . . . . . . 62
Protection against unwanted calls . . . . . . . . . . . . . . . . . . . . . . . . . . . . . . . . . . . . . . . . . . . . . . . . . . .
. . 63
SMS (text messages) . . . . . . . . . . . . . . . . . . . . . . . . . . . . . . . . . . . . . . . . . . . . . . . . . . . . . . . . .
. . . . . . . . . 66
E-Mail notifications . . . . . . . . . . . . . . . . . . . . . . . . . . . . . . . . . . . . . . . . . . . . . . . . . . . . . .
. . . . . . . . . . . . . . 73
Info Centre . . . . . . . . . . . . . . . . . . . . . . . . . . . . . . . . . . . . . . . . . . . . . . . . . . . . . . . . . . . . .
. . . . . . . . . . . . . . . 76
Expanding the functionality of the telephone . . . . . . . . . . . . . . . . . . . . . . . . . . . . . . . . . . . . . . . . . 81
Multiple handsets . . . . . . . . . . . . . . . . . . . . . . . . . . . . . . . . . . . . . . . . . . . . . . . . . . . . . . .
. . . . . . . . . . . . . . 81
Repeater . . . . . . . . . . . . . . . . . . . . . . . . . . . . . . . . . . . . . . . . . . . . . . . . . . . . . . . . . . . . . . .
. . . . . . . . . . . . . . . 83
Operation with a PABX . . . . . . . . . . . . . . . . . . . . . . . . . . . . . . . . . . . . . . . . . . . . . . . . . . . . . . .
. . . . . . . . . 84

Gigaset E380A Care / LUG CH en / A31008-N2535-R102-1-4U19 / LUGIVZ.fm / 1/14/20
Template Go, Version 1, 01.07.2014
Contents
3
Adjusting the telephone settings . . . . . . . . . . . . . . . . . . . . . . . . . . . . . . . . . . . . . . . . . . . . . . . . . . . . . 87
Handset . . . . . . . . . . . . . . . . . . . . . . . . . . . . . . . . . . . . . . . . . . . . . . . . . . . . . . . . . . . . . . .
. . . . . . . . . . . . . . . 87
System . . . . . . . . . . . . . . . . . . . . . . . . . . . . . . . . . . . . . . . . . . . . . . . . . . . . . . . . . . . . .
. . . . . . . . . . . . . . . . . . . 94
Internet telephony (VoIP) . . . . . . . . . . . . . . . . . . . . . . . . . . . . . . . . . . . . . . . . . . . . . . . . . . . . .
. . . . . . . . . 98
Web configurator . . . . . . . . . . . . . . . . . . . . . . . . . . . . . . . . . . . . . . . . . . . . . . . . . . . . . . .
. . . . . . . . . . . . . 101
Appendix . . . . . . . . . . . . . . . . . . . . . . . . . . . . . . . . . . . . . . . . . . . . . . . . . . . . . . . . . . . .
. . . . . . . . . . . . . . . 117
Questions and answers . . . . . . . . . . . . . . . . . . . . . . . . . . . . . . . . . . . . . . . . . . . . . . . . . . . . . . .
. . . . . . . . 117
Service (Customer Care) . . . . . . . . . . . . . . . . . . . . . . . . . . . . . . . . . . . . . . . . . . . . . . . . . . . . . . . . . . . . . .
121
Manufacturer's advice . . . . . . . . . . . . . . . . . . . . . . . . . . . . . . . . . . . . . . . . . . . . . . . . . . . . . . . .
. . . . . . . . 122
Technical data . . . . . . . . . . . . . . . . . . . . . . . . . . . . . . . . . . . . . . . . . . . . . . . . . . . . . . . . .
. . . . . . . . . . . . . . 125
Display icons . . . . . . . . . . . . . . . . . . . . . . . . . . . . . . . . . . . . . . . . . . . . . . . . . . . . . . . . . . .
. . . . . . . . . . . . . . 127
Menu overview . . . . . . . . . . . . . . . . . . . . . . . . . . . . . . . . . . . . . . . . . . . . . . . . . . . . . . . . .
. . . . . . . . . . . . . 129
Index . . . . . . . . . . . . . . . . . . . . . . . . . . . . . . . . . . . . . . . . . . . . . . . . . . . . . . . . . . . . . .
. . . . . . . . . . . . . . . . . 132
Open Source Software . . . . . . . . . . . . . . . . . . . . . . . . . . . . . . . . . . . . . . . . . . . . . . . . . . . . . . . . . . . . . .
139
Not all functions described in the user guide are a
vailable in all countries or from all
network providers.

Template Go, Version 1, 01.07.2014,
Gigaset E380A Care / LUG CH en / A31008-N2535-R102-1-4U19 / Smart_care_intro.fm / 1/10/20
4
Gigaset E380A Care: The automated alarm call
The Gigaset E380A Care phone adds the automated alarm call function to your Gigaset smart
care system. In the event the system detects an unusual situation, up to four individually defin-
able numbers are called automatically. When a call is accepted, the phone automatically
sw
itches to handsfree mode. In addition to this alarm call function, the popular phone functions
and the Gigaset GO functions are available on the E380A Care.
Making calls using the analogue fixed line network
Connect the phone to your analogue fixed line connection (PSTN). Plug the phone cable into the
fix
ed line connection. You can then
• use the analogue line to make phone calls
• use the integrated answer machine
• use the other functions of your Gigaset phone (directory, call lists etc.).
Making calls over the Internet
Connect the phone to a router. Plug the network cable into a LAN port on your router. Register
th
e phone with your internet telephony provider (IP). With this connection, you can
• use the alarm call function on the phone,
• make calls over the Internet,
• use the other functions on your Gigaset phone (directory, call lists etc.).
Making calls using the analogue fixed line ne
twork and over the Internet
If you have both an analogue fixed line connection and an Internet connection, you can use the
func
tions of both connections, e.g. register another handset and hold fixed line call and Internet
calls at the same time.
The functions on Gigaset GO phones
In addition to the functions of previous analogu
e or IP phones, Gigaset GO phones also offer
further new options:
• Make calls between Gigaset GO phones across the world free of charge via Gigaset.net
• Display online services information, e.g. weather tickers
• Use online directories (not available in all countries)
Further information about Gigaset GO can be found at
www.gigaset.com/go

Gigaset E380A Care / LUG CH en / A31008-N2535-R102-1-4U19 / overview_1_GO.fm / 1/14/20
Template Go, Version 1, 01.07.2014
5
2
4
10
1
6
9
8
5
11
12
13
7
INT 1
Calls
SOS
3
A
E380A Care

Template Go, Version 1, 01.07.2014,
Overview
Gigaset E380A Care / LUG CH en / A31008-N2535-R102-1-4U19 / overview_2_smartCare.fm / 1/14/20
6
Overview
Handset
Base
1 Display
2 Status bar ( p. 127)
Icons display current settings and
operating
status of the telephone
3 Emergency call display key
Triggering an alarm call
Alarm numbers are set up using the smart care
app
4 Display keys ( p. 20)
Various functions, depending on the operating
situa
tion
5 End call key / On/off key
End call; Cancel function; one
le
vel back
Press briefly
Back to idle mode;
Switch the handset on/off
Press and
hold
6 Hash key / Lock key
Lock/unlock the keypad; enter
a dialling pause
Press and
hold
Toggle between upper/lower
case
and digits
Press briefly
7 Recall key
Consultation call (flash) Press and
hold
8 Microphone
9 Star key
Switch the ringtone on/off Press and
hold
Open the table of special char-
acters; switch from pulse dial-
ling to tone dialling
Press br
iefly
10 Key 1
Select answer machine/
ne
twork mailbox
Press and
hold
11 Control key / Menu key ( p. 19)
Open a menu; navigate in menus and entry
fields
; access functions
12 Talk key / Han
dsfree key
Accept call; dial number displayed; switch
b
etween earpiece mode and handsfree mode;
Send SMS (when writing an SMS)
Open the redial list Press br
iefly
Start dialling Press and
hold
13 Message key ( p. 38)
Access to the call and message lists;
Flashes: ne
w message or new call
A Registration/paging key
Locate a handset (paging);
Show IP address on handset
Press briefly
Register a handset Press and
hold
Lights up: LAN connection active (phone is
co
nnected to router)
Flashes: Base station in registration mode
The colour and shape of your device
m
ay be different from the illustration.

Gigaset E380A Care / LUG CH en / A31008-N2535-R102-1-4U19 / installing_overview_smartCare.fm / 1/10/20
Template Go, Version 1, 01.07.2014
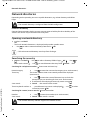
Setting up (overview)
7
Setting up (overview)
Fixed line network and Internet telephony
Setting up the handset for use Connecting the base to the mains
power supply
Fixed line network telephony
Connecting the base to the analogue telephone
network
Internet telephony (IP)
Connecting the base to a router
Setting up an IP account
¤ Press the Message key on the handset
or
¤ use the web configurator on a PC/tablet
www.gigaset-config.com
This connection is required to make automated alarm calls using the Gigaset E380A
Care.
Done!

Template Go, Version 1, 01.07.2014,
Setting up (overview)
Gigaset E380A Care / LUG CH en / A31008-N2535-R102-1-4U19 / installing_overview_smartCare.fm / 1/10/20
8
Gigaset smart care functions
¤ Connect the base to a router. Ensure the E380A Care phone base, the smart care base station
and your smartphone are in the same network.
¤ Load the Gigaset smart care app onto the smartphone From the screen menu of the smart
care app, select any alarm scenario In Notifica
tion channels, click the switch for Alarm
Call Follow the app instructions
Gigaset smart care operating instructions
Gigaset GO functions
¤ Connect the base to a router
¤ Download apps onto your smartphone (e.g. Gigaset elements)
¤ Register your phone with Gigaset elements

Gigaset E380A Care / LUG CH en / A31008-N2535-R102-1-4U19 / user_guide_operating_steps.fm / 1/10/20
Template Go, Version 1, 01.07.2014
Illustration in the user guide
9
Illustration in the user guide
Keys
Procedures
Example: Switching Auto answer on/off
Warnings, which, if not heeded, can result in i
njury to persons or damage to devices.
Important information regarding function and appropriate handling or functions
th
at could generate costs.
Prerequisite for being able to carry out the following action.
Additional helpful information.
or Talk key or Handsfree key
End call key to Number / letter keys
/ Control key rim / centre Message key
Recall key Star key
Hash key
OK, Back, Se
lect, Change, Save, . . . Display keys
¤ . . . use to select Settings OK Tele phony OK Auto Answer
Change ( = on)
Step Follow this procedure
¤ When in idle status press the centre of the control key.
The main menu opens.
¤
¤ OK
Navigate to the icon using the control key .
Select OK to confirm. The submenu Settings opens.
¤
Telephony
¤ OK
Select the Te
lephony entry using the control key .
Select OK
to confirm. The submenu Telephony opens.
¤ Auto Answer The function to switch Auto answer on/off appears as the first menu item.
¤ Change Select Change to activate or deactivate. Function is activated /
deactivated .

Template Go, Version 1, 01.07.2014,
Safety precautions
Gigaset E380A Care / LUG CH en / A31008-N2535-R102-1-4U19 / security.fm / 1/14/20
10
Safety precautions
Read the safety precautions and the user guide before use.
The device cannot be used in the event of a power failure. In case of a power failure it is also not
possible to make emergency calls.
If the LAN or Internet connection is down, functions that require an Internet connection are not
available, such as Internet telephony (VoIP), online directories and the Info Center. You are able to
make and receive calls if the phone is connected to an analogue landline.
Emergency numbers cannot be dialled if the keypad/display lock is activated!
Use only rechargeable batteries that correspond to the specification (see list of permitted
batteries www.gigaset.com/service
). Never use a conventional (non-rechargeable) battery or
other battery types as this could result in significant health risks and personal injury. Rechargeable
batteries, which are noticeably damaged, must be replaced.
The handset must not be operated if the battery cover is open.
Do not use the devices in environments with a potential explosion hazard (e.g. paint shops).
The devices are not splashproof. For this reason do not install them in a damp environment such
as bathrooms or shower rooms.
Use only the power adapter indicated on the device.
Whilst charging, the power socket must be easily accessible.
Use only the cables supplied for fixed line and LAN connection and connect these to the intended
ports only.
Remove faulty devices from use or have them repaired by our Service team, as these could inter-
fere with other wireless services.
Do not use the device if the display is cracked or broken. Broken glass or plastic can cause injury
to hands and face. Send the device to our Service department to be repaired.
Do not hold the rear of the handset to your ear when it is ringing or when speaker mode is acti-
vated. Otherwise you risk serious and permanent damage to your hearing.
The phone may cause interference in analogue hearing aids (humming or whistling) or cause
them to overload. If you require assistance, please contact the hearing aid supplier.
Keep small cells and batteries, which can be swallowed, out of the reach of children.
Swallowing a battery can lead to burns, perforation of soft tissue and death. Severe burns can
occur within 2 hours of swallowing.
In the case of a swallowed cell or battery, seek medical care immediately.
Using your telephone may affect nearby medical equipment. Be aware of the technical conditions
in your particular environment, e.g. doctor's surgery. If you use a medical device (e.g. a pace-
maker), please contact the device manufacturer. They will be able to advise you regarding the
susceptibility of the device to external sources of high frequency energy (for the specifications of
your Gigaset product see "Technical data").

Gigaset E380A Care / LUG CH en / A31008-N2535-R102-1-4U19 / starting_LUG.fm / 1/14/20
Template Go, Version 1, 01.07.2014
Getting started
11
Getting started
Parts of the phone Gigaset E380A Care
• One base (E380A Care),
• One power adapter for the base,
• One phone cable (for an analogue phone connector),
• One LAN cable (for connecting to your router),
• One handset (E380H Care),
• One battery cover
• Two batteries
• One charging cradle including power adapter
• A user guide
Handset
Connecting the charging cradle
¤ Connect the flat plug of the power adapter .
¤ Plug the mains unit into your power socket .
To remove the plug from the charging cradle again:
¤ Disconnect the power adapter from the mains
power supply.
¤ Press the release button .
¤ Pull out the plug .
The base station and charging cradle are desi
gned for use in closed, dry rooms within
a temperature range of +5 °C to +45 °C.
Position the base on a level, non-slip surface at
a central point in the flat or house. The
device's feet do not usually leave any marks on surfaces. However, due to the multi-
tude of different varnishes and polishes used on furniture, contact marks on the
s
urfaces cannot be completely ruled out.
Never expose the telephone to heat sources
, direct sunlight or other electrical
devices.
Protect your telephone from moisture, dust, corrosive liquids and vapours.
This device is only sui
table for a maximum installation height of 2 m.
2
1
3
4
1
2
3
4

Template Go, Version 1, 01.07.2014,
Handset
Gigaset E380A Care / LUG CH en / A31008-N2535-R102-1-4U19 / starting_LUG.fm / 1/14/20
12
Setting up the handset for use
The display is protected by a plastic film. Please remove the protective film!
Inserting the batteries
Charging the batteries
¤ Charge the batteries fully prior to first use in the
charging cradle.
The batteries are fully charged when the power icon
disappears from the display.
Only use rechargeable batteries, as this could otherwise result in significant health
risks and personal injury. For example,
the outer casing of the batteries could be
destroyed or the batteries could explode. The device could also malfunction or be
dama
ged as a result of using batteries that are not of the recommended type.
¤ Insert the batteries
(for correct +/- direction,
se
e diagram).
¤ Fit the battery cover from
the top.
¤ Press the cover until it
clicks into place.
To re-open the battery cover:
¤ Insert a fingernail behind
the notch at the top of the
cover and slide it
downwards.
8 h
Batteries may heat up during charging. This is not dangerous.
After a time, the charge capacity of the battery will decrease for technical reasons.
Handsets contained in the package have already been registered to the base. In the
ev
ent that a handset is not registered however (indicated by Please register handset),
register the handset manually.

Gigaset E380A Care / LUG CH en / A31008-N2535-R102-1-4U19 / starting_LUG.fm / 1/14/20
Template Go, Version 1, 01.07.2014
Base station
13
Changing the display language
You can change the display language, if the telephone has been set to an incomprehensible
language.
¤ Press the centre of the control key .
¤ Press the keys and slowly and successively . . . the
language settings display appears, the set language
(e. g. English) i
s highlighted ( = selected).
¤ To select a different language: Press the control key until
the desired language is highlighted on the display,
e. g. Francais press the key on the right directly underneath
the display to activate the language.
¤ To revert to idle status: Press and hold the End call key
Base station
Connecting to the mains power supply
¤ Insert the power cable of the power
adapter into the upper connection
socket at the rear of the base station.
¤ Push both cables into the appropriate cable
channels .
¤ Insert the power adapter into the power
socket .
Deutsch
English
Francais
Example
1
3
2
1
2
3
Only use the supplied network cable.
The network cable must always be connected in order to function, as the phone will
not operate without a power supply.

Template Go, Version 1, 01.07.2014,
Base station
Gigaset E380A Care / LUG CH en / A31008-N2535-R102-1-4U19 / starting_LUG.fm / 1/14/20
14
Connecting the phone cable and connecting to the Internet
¤ For the landline connection: Plug the phone cable into the socket and connect it to the
landline connector on your router .
¤ For Internet telephony and Internet connection: Connect one plug of the Ethernet cable
provided into the LAN socket on the side of the base . Insert the second jack of the
Ethernet cable into a LAN socket on the router .
¤ Push the cables into the cable channels provided.
As soon as the cable between the telephone and the router is
plugged in
and the router is switched on, the key on the front of
the base station lights up (paging key).
You can now make calls over the landl
ine or Internet, and you
can be called. The phone is connected to the Internet.
An answering machine in the base
station is set with a pre-
recorded announcement in answer and record mode.
For the Internet connection: A
router or connection in the home network and an IP
account with an Internet provider.
For Internet telephony: a br
oadband Internet connection (e.g. DSL) with a flat rate.
1
3
2
4
1
2
3
4
Only use the phone cable supplied. The pin connections on telephone cables can
vary.
In order to be able to use all Gigaset GO functions, you may need to install apps on your
smartphone and apply settings in the phone's web configurator, e.g. registering your
phone with Gigaset elements.
Further information about the settings Web configurator
Further information about Gigaset GO can be found at
www.gigaset.com/go

Gigaset E380A Care / LUG CH en / A31008-N2535-R102-1-4U19 / starting_LUG.fm / 1/14/20
Template Go, Version 1, 01.07.2014
Setting up an IP account
15
Setting up an IP account
For you to be able to make calls over the Internet (VoIP) and so establish a connection between
the phone and the Gigaset Cloud, you must have an IP account with an Internet telephony
provider. You can register using the access data that you receive from your provider (user name,
authentication name, password etc.).
To register the phone with your provider, please use:
• The VoIP wizard on the handset
• Or the web configurator on a PC or tablet ( p. 105)
Registering using the VoIP wizard on the handset
¤ Press the Message key Yes . . . the wizard starts . . . scroll through the
displayed text OK
Data protection notice
When the device is connected to the router, it will automatically contact the Gigaset Support Server. It will
send the following device-specific information daily:
• Serial number/item number
• MAC address
• Private IP address for the Gigaset in the LAN/its port numbers
• Device name
• Software version
On the support server, this information is linked to the existing device-specific information:
• Gigaset.net phone number
• System-related/device-specific passwords
Further information about the data stored in relation to the Gigaset.net Service can be found at:
www.gigaset.net/privacy-policy
You can configure up to six IP accounts.
As soon as the handset battery has sufficient charge, the
Message key on the handset will flash.
If the wizard does not start properly or you have terminated it: Start the VoIP wizard
using the handset menu
¤ . . . Use to select Settings OK Te le ph ony OK VoIP
Wizard
If New
firmware available is shown on the display, there is a firmware update available
for your phone.
To update firmware: Yes . . . the
new firmware is loaded (takes approx. 6 mins.)
The Message key will then flash again.
¤ To start configuration: Press the Message key .

Template Go, Version 1, 01.07.2014,
Setting up an IP account
Gigaset E380A Care / LUG CH en / A31008-N2535-R102-1-4U19 / starting_LUG.fm / 1/14/20
16
The display shows the possible IP accounts (IP 1 to IP 6). Accounts
that are already configured are marked with .
¤ . . . Use to select the required account OK
The wizard establishes a connection to the Gigaset
configuration server on the Internet. Various
profiles with general configuration data for different providers can be downloaded here.
Select provider
A list of countries is loaded.
¤ . . . Use to select the country in which you want to use the
phone OK . . . a list of providers in this country is displayed
. . . use to select provider OK . . . the general
configuration data for your provider is downloaded and stored
in the phone
Entering user data for your IP account
You are required to enter your personal access data for your IP account, e. g. Us
er ID, Password,
. . . (depending on the provider).
¤ Enter registration data confirm each entry using OK
Message on successful transfer: Y
our IP account is registered at your provider.
The fixed line network connection is assigned to the handsets as a send connection. Please
c
hange the send connection to make calls over the Internet.
Select IP Account
IP 1
IP 2
IP 3
IP 4
IP 5
Back OK
If no Internet connection can be established, a corresponding error message will be
generated. For more information, see "Questions and answers"
Appendix
¤ Terminate the VoIP wizard: OK . . . The VoIP wizard will close Troubleshoot if
necessary Open
the wizard again later via the menu to configure the IP account.
Select a Provider
Provider 1
Provider 2
Provider 3
Provider 4
Provider 5
Back OK
If your provider does not appear in the list:
Terminate the wizard: Press and hold the End call key . . . the handset returns to
idle status . . . set up the IP account using the web configurator
Pay attention when entering access data, as it is case sensitive.
¤ To switch between lowercase, uppercase and number entry mode: Press the
key
¤ To delete incorrectly entered characters: Press the display key
¤ To navigate within an entry field: Press right/left on the control key

Gigaset E380A Care / LUG CH en / A31008-N2535-R102-1-4U19 / starting_LUG.fm / 1/14/20
Template Go, Version 1, 01.07.2014
Setting up an IP account
17
Send and receive connections
Assign the available phone connections (fixed line network, Gigaset.net and up to six IP
connections) to the end devices as receive and, where necessary, send connections. End devices
are the registered handsets and the three base answer machines.
• Receive connection: Phone numbers you may be called on. Incoming calls are forwarded to
the end devices for which the relevant connection is assigned as receive connection.
• Send connection: A line that you use for an outgoing call. The corresponding number will be
transferred to the recipient. You can assign each end device a number or the associated
connection as a send connection.
Each connection (number) of your phone can be both a send as well as a receive connection and
c
an be assigned to several end devices. It may only be assigned to one answer machine as a
receive connection.
Default assignment
• All configured connections are assigned to the handsets and answer machine 1 as receive
connections on delivery.
• The fixed line network connection is assigned to the handsets as a send connection. If you
have no fixed line network connection, no send connection is assigned.
Change send connections
¤ . . . Use to select Settings OK Telephony OK Send
Connections OK
Select handset:
¤ . . . Use to select the handset on which you wish to change
the default assignment OK . . . the current connection for
outgoing calls assigned to the handset is displayed: Fi
xed Line
(if you have a fixed line network connection)
Change assignment:
¤ . . . use to select the desired connection or select Sel. at each
call Save
Sel. at each call:
For each call, the line on which the call is
established can be selected.
You can now change the default assignment one after the other for
al
l registered handsets.
INT 1
Connection for
outgoing calls:
< IP 1 >
Back Save

Template Go, Version 1, 01.07.2014,
Setting up an IP account
Gigaset E380A Care / LUG CH en / A31008-N2535-R102-1-4U19 / starting_LUG.fm / 1/14/20
18
Change receive connection
¤ . . . Use to select Settings OK Telephony OK Rec.
Connections OK
Select handset or answer machine:
¤ . . . Use to select the handset or answer machine on which
you wish to change the default assignment OK . . . the display
shows an entry for each available phone connection (IP
1– IP 6,
Gigaset.net, Fixed Line)
Change assignment:
¤ . . . Use to select the desired connection . . . use to
select Ye
s or No (Ye s = calls to this connection will be diverted to
the handset/answer machine) Save
Your phone is now ready for use.
INT 1
Receive calls for
IP 1:
< Yes >
Receive calls for
Gigaset.net:
Back Save
Only one receive connection can be assigned to one answer machine.
One connection can only be assigned to one answer machine as a receive connection.
If you assign a receive connection to an answer machine and this connection is already
assigned to another answer machine, the "old" assignment is deleted.

Gigaset E380A Care / LUG CH en / A31008-N2535-R102-1-4U19 / operating_smartCare.fm / 1/14/20
Template Go, Version 1, 01.07.2014
Getting to know your telephone
19
Using the telephone
Getting to know your telephone
Switch the handset on/off
Lock/unlock the keypad
The keypad lock prevents any accidental use of the telephone.
Lock/unlock the keypad: Press and hol
d
Keypad lock activated: the f
ollowing symbol appears
Control key
In the description below, the side of the control key (up, down, right, left) that you have to press
in the different operating situations is marked in black, e. g. for "press right on the control
key" or for "press the centre of the control key".
In idle status
In submenus, selection and entry fields
Switch on: ¤ When the handset is switched off, press and hold the End call key
Switch off:
¤ When the handset is in idle status, press and hold the End call key
If a call is indicated on the handset, the
keypad automatically unlocks and you can
accept the call. It then locks again when the call is finished.
It is not possible to call emergency numbers either when k
eypad lock is activated.
The control key enables you to navigate the menus and input fields, and also to
c
all up certain functions depending on the situation.
Open the directory Press briefly
Open the list of available online directories Press and ho
ld
Open the main menu or
Open the list of handsets
Confirm a function

Template Go, Version 1, 01.07.2014,
Getting to know your telephone
Gigaset E380A Care / LUG CH en / A31008-N2535-R102-1-4U19 / operating_smartCare.fm / 1/14/20
20
During a conversation
Extra-loud function
During a call or when listening to a message, make the volume for the handset or the
loudspeaker very loud.
¤ Press the control key Press the control key until
you reach the highest level.
The extra-loud setting only applies for the duration of the call.
Display keys
The display keys perform a range of functions depending on the operating situation.
Display key icons p. 128.
Open the directory
Open the list of available online directories Press and hold
Mute the microphone
Initiate an internal consultation call
Adjust the loudspeaker volume for receiver and handsfree mode
This setting can result in harm to health in persons with a normal hearing ability and
is only intended for persons with a hearing impairment or reduced hearing.
Disruptive noises on the phone line can be increased.
The right display key is always preset with the Emergency function in idle mode. You
can change the assignment of the left display key: p. 93
Back Save
Current display key
functions
Display keys
Back Save
Page is loading ...
Page is loading ...
Page is loading ...
Page is loading ...
Page is loading ...
Page is loading ...
Page is loading ...
Page is loading ...
Page is loading ...
Page is loading ...
Page is loading ...
Page is loading ...
Page is loading ...
Page is loading ...
Page is loading ...
Page is loading ...
Page is loading ...
Page is loading ...
Page is loading ...
Page is loading ...
Page is loading ...
Page is loading ...
Page is loading ...
Page is loading ...
Page is loading ...
Page is loading ...
Page is loading ...
Page is loading ...
Page is loading ...
Page is loading ...
Page is loading ...
Page is loading ...
Page is loading ...
Page is loading ...
Page is loading ...
Page is loading ...
Page is loading ...
Page is loading ...
Page is loading ...
Page is loading ...
Page is loading ...
Page is loading ...
Page is loading ...
Page is loading ...
Page is loading ...
Page is loading ...
Page is loading ...
Page is loading ...
Page is loading ...
Page is loading ...
Page is loading ...
Page is loading ...
Page is loading ...
Page is loading ...
Page is loading ...
Page is loading ...
Page is loading ...
Page is loading ...
Page is loading ...
Page is loading ...
Page is loading ...
Page is loading ...
Page is loading ...
Page is loading ...
Page is loading ...
Page is loading ...
Page is loading ...
Page is loading ...
Page is loading ...
Page is loading ...
Page is loading ...
Page is loading ...
Page is loading ...
Page is loading ...
Page is loading ...
Page is loading ...
Page is loading ...
Page is loading ...
Page is loading ...
Page is loading ...
Page is loading ...
Page is loading ...
Page is loading ...
Page is loading ...
Page is loading ...
Page is loading ...
Page is loading ...
Page is loading ...
Page is loading ...
Page is loading ...
Page is loading ...
Page is loading ...
Page is loading ...
Page is loading ...
Page is loading ...
Page is loading ...
Page is loading ...
Page is loading ...
Page is loading ...
Page is loading ...
Page is loading ...
Page is loading ...
Page is loading ...
Page is loading ...
Page is loading ...
Page is loading ...
Page is loading ...
Page is loading ...
Page is loading ...
Page is loading ...
Page is loading ...
Page is loading ...
Page is loading ...
Page is loading ...
Page is loading ...
Page is loading ...
Page is loading ...
Page is loading ...
Page is loading ...
Page is loading ...
Page is loading ...
Page is loading ...
Page is loading ...
Page is loading ...
Page is loading ...
-
 1
1
-
 2
2
-
 3
3
-
 4
4
-
 5
5
-
 6
6
-
 7
7
-
 8
8
-
 9
9
-
 10
10
-
 11
11
-
 12
12
-
 13
13
-
 14
14
-
 15
15
-
 16
16
-
 17
17
-
 18
18
-
 19
19
-
 20
20
-
 21
21
-
 22
22
-
 23
23
-
 24
24
-
 25
25
-
 26
26
-
 27
27
-
 28
28
-
 29
29
-
 30
30
-
 31
31
-
 32
32
-
 33
33
-
 34
34
-
 35
35
-
 36
36
-
 37
37
-
 38
38
-
 39
39
-
 40
40
-
 41
41
-
 42
42
-
 43
43
-
 44
44
-
 45
45
-
 46
46
-
 47
47
-
 48
48
-
 49
49
-
 50
50
-
 51
51
-
 52
52
-
 53
53
-
 54
54
-
 55
55
-
 56
56
-
 57
57
-
 58
58
-
 59
59
-
 60
60
-
 61
61
-
 62
62
-
 63
63
-
 64
64
-
 65
65
-
 66
66
-
 67
67
-
 68
68
-
 69
69
-
 70
70
-
 71
71
-
 72
72
-
 73
73
-
 74
74
-
 75
75
-
 76
76
-
 77
77
-
 78
78
-
 79
79
-
 80
80
-
 81
81
-
 82
82
-
 83
83
-
 84
84
-
 85
85
-
 86
86
-
 87
87
-
 88
88
-
 89
89
-
 90
90
-
 91
91
-
 92
92
-
 93
93
-
 94
94
-
 95
95
-
 96
96
-
 97
97
-
 98
98
-
 99
99
-
 100
100
-
 101
101
-
 102
102
-
 103
103
-
 104
104
-
 105
105
-
 106
106
-
 107
107
-
 108
108
-
 109
109
-
 110
110
-
 111
111
-
 112
112
-
 113
113
-
 114
114
-
 115
115
-
 116
116
-
 117
117
-
 118
118
-
 119
119
-
 120
120
-
 121
121
-
 122
122
-
 123
123
-
 124
124
-
 125
125
-
 126
126
-
 127
127
-
 128
128
-
 129
129
-
 130
130
-
 131
131
-
 132
132
-
 133
133
-
 134
134
-
 135
135
-
 136
136
-
 137
137
-
 138
138
-
 139
139
-
 140
140
-
 141
141
-
 142
142
-
 143
143
-
 144
144
-
 145
145


Gigaset smart care+Phone User guide
- Category
- Mobile phones
- Type
- User guide
- This manual is also suitable for
Ask a question and I''ll find the answer in the document
Finding information in a document is now easier with AI
Related papers
Other documents
-
Siemens Gigaset Optical LAN Adapter Duo Quick start guide
-
Olivetti Fax-Lab 95 Owner's manual
-
Olivetti Fax-Lab S100 Owner's manual
-
Deutsche Telekom 274 User manual
-
-
Panasonic KX-TPA60 User manual
-
Swisscom HD-Phone Gigaset Maxwell C HD-Phone Gigaset Maxwell C installation Installation guide
-
-
Philips DECT1111S/29 User manual
-
Huawei B686 User manual