Page is loading ...

Instruction Manual
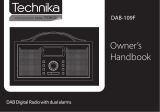
DIGITRADIO 306
DAB+ / FM / Radio

-
2
-
SAFETY PRECAUTIONS
- Read all the instructions carefully before using the unit and keep them for future reference.
- Check that the voltage marked on the rating label matches your mains voltage.
- The unit must be placed on a flat stable surface and should not be subjected to vibrations.
- Do not place the unit on sloped or unstable surfaces as the unit may fall off or tip over.
- The mains socket must be located near the unit and should be easily accessible.
- Avoid extreme degrees of temperature, either hot or cold. Place the unit well away from heat sources such as
radiators or gas/electric fires. Avoid exposure to direct sunlight and other sources of heat.
- Never place any type of candle or naked flame on the top of or near the unit.
- To reduce the risk of fire, electric shock or product damage, do not expose this unit to rain, moisture, dripping or
splashing. No objects filled with liquids, such as vases, should be placed on the unit.
- If you spill any liquid into the unit, it can cause serious damage. Switch it off at the mains immediately. Withdraw
the mains plug and consult your dealer.
- To prevent the risk of electric shock or fire hazard due to overheating, ensure that curtains and other materials
do not obstruct the ventilation vents.
- Do not install or place this unit in a bookcase, built-in cabinet or in another conned space, ensure that a
minimum of 10cm should be kept around the apparatus for ventilation.
Safety
- Always disconnect the unit from the mains supply before connecting/disconnecting other devices or moving
the unit.
- Unplug the unit from the mains socket during a lightning storm.
- This unit will become warm when used for a long period of time. This is normal and does not indicate a problem
with the unit.
CAUTION
RISK OF ELECTRIC SHOCK
DO NOT OPEN
The lightning flash with arrowhead symbol, within an equilateral triangle, is intended to alert the user
to the presence of uninsulated “dangerous voltage” within the unit’s enclosure that may be of sufficient
magnitude to constitute a risk of electric shock.
The exclamation point within an equilateral triangle is intended to alert the user to the presence of
important operating and maintenance (servicing) instructions in the manual accompanying the unit.
Mains Adapter
- Make sure the unit is not resting on top of the mains adapter cable, as the weight of the unit may damage the
mains cable and create a safety hazard.
- If the mains adapter is damaged it must be replaced by the manufacturer, its service agent, or similarly qualied
persons in order to avoid a hazard.
Interference
- Do not place the unit on or near appliances which may cause electromagnetic interference. If you do, it may
adversely affect the operating performance of the unit, and cause a distorted sound.
Supervision
- Children should be supervised to ensure that they do not play with the unit.
- Never let anyone especially children push anything into the holes, slots or any other openings in the case - this
could result in a fatal electric shock.
Service/Maintenance
- To reduce the risk of electric shock, do not remove screws. The unit does not contain any user serviceable parts.
Please leave all maintenance work to qualified personnel.
- Do not open any fixed covers as this may expose dangerous voltages.
- Ensure to unplug the unit from the mains socket before cleaning.
- Do not use any type of abrasive pad or abrasive cleaning solutions as these may damage the unit's surface.
- Do not use liquids to clean the unit.

-
3
-
product overview
Front View
1. Display
2. MENU/INFO Button
3. TUNE Button
4. STANDBY Button
5. MODE Button
6. VOLUME/SELECT Knob
7. ALARM Button
8. DIMMER/SNOOZE Button
9. PRESET Button
10. SLEEP Button
Rear View
11. Rod Antenna
12. Earphones Jack
13. AUX IN Jack
14. DC Input Socket

-
4
-
GETTING START
Powering ON/OFF
When you first connect the unit to the mains adapter cable, the unit will be in standby mode after
showing “Welcome to Digital Radio” (F.1)(F.2)
1. Press the Standby button to switch the unit on.
2. Press the Standby button to switch the unit back to standby mode.
F.1
Selecting Modes
Press the MODE button repeatedly to switch between FM, Auxiliary Input and DAB modes.
Navigating the Menu
1. Press and hold the MENU/INFO to access the menu.
2. Turn the VOLUME/SELECT Knob to select your choice.
3. Press the same knob to confirm your selection.
System Settings
Press and hold the MENU/INFO button to display the menu. Turn the VOLUME/SELECT Knob to
select System and then press the same knob to confirm.
Time
The Time can be automatically set once it has been received DAB+ or FM radio station with time
information. You may also adjust the Time manually.
During System mode, turn the VOLUME/SELECT Knob to select Time and press the same knob
to confirm. Turn the VOLUME/SELECT Knob to select Set Time/Date and press the sam
e knob to
confirm.
1. The hour digits will flash on the display.
2. Turn the VOLUME/SELECT Knob to adjust the hour and then press the same knob to confirm.
3. Repeat above Step (2) to set the Minute/Date/ Month/Year.
4. The time and date settings are now complete.
For the other settings under Time, turn the VOLUME/SELECT Knob to select from the following
options and then press the same knob to confirm.
Auto update
Update from Any / DAB / FM.
Set 12/24 hour
Set 12 / 24 hour format.
Set date format
DD-MM-YYYY or MM-DD-YYYY

-
5
-
Language
1. During System mode, turn the VOLUME/SELECT Knob to select Language and then press the
same knob to confirm.
2. Turn the VOLUME/SELECT Knob to change the display language of your choice.
3. Press the same knob to confirm.
Factory Reset
There may be times when you need to reset your unit back to the factory settings especially when
you have moved house. If you experience reception problems you may want to reset and try again.
If you move to another part of the country and pick up the local and national DAB+ stations in that
area, your previously tuned channels may no longer be available.
1. During System mode, turn the VOLUME/SELECT Knob to select “Factory reset”, and press the
same knob to confirm. (F.3)
2. Turn the VOLUME/SELECT Knob to select <Yes>, and press the same knob to confirm or select
<No> to cancel. (F.4)
F.3
F.4
SW version
1. During System mode, turn the VOLUME/SELECT Knob to select SW version and then press the
same knob to confirm.
2. The software version will show on the display.
Sleep
This function allows you to program the unit to turn to standby mode by itself after a set period of
time.
1. During System mode, turn the VOLUME/SELECT Knob to select Sleep and then press the same
knob to confirm.
2. Turn the VOLUME/SELECT Knob to change the sleep time from: Sleep Off /10/20/30/60/70/80/90
minutes.
3. Press the same knob to confirm.
Alternatively,
Press the SLEEP button repeatedly to set the sleep time from: Sleep Off /10/20/30/60/70/80/90
minutes.

-
6
-
DAB Operation
Press the MODE button repeatedly to select DAB. The unit will enter DAB mode and perform the
auto scan function. During the scan the display will show “Scanning… ” together with a slide bar that
indicates the progress of the scan and the amount of stations that have been found so far. Once the
scan has finished, the unit will select the first alpha numerically found station.
To explore the found stations, turn the VOLUME/SELECT Knob to select and press the same knob to
confirm.
Station List
1. During DAB mode, press the TUNE button to enter Station list.
2. Turn the VOLUME/SELECT Knob to explore the found DAB+ stations and then press the same
knob to confirm.
Full scan
Press and hold MENU/INFO button, and then turn the VOLUME/SELECT Knob to select Full scan.
Press the same knob to confirm.
1. The display will sh
ow “Scanning…” and a progress slide bar.
2. All the stations that have been found will be stored automatically. To explore and listen to the
found stations, turn the VOLUME/SELECT Knob to select and press the same knob to confirm.
Manual tune
As well as the full scan function, you can manually tune the receiver. This can help you when aligning
your aerial or when adding stations that were missed while auto tuning.
1. Press and hold MENU/INFO button.
2. Turn the VOLUME/SELECT Knob to select “Manual tune”, and press the same knob to confirm.
3. The display will show the multiplex 5A to 13F.
4. Turn the VOLUME/SELECT Knob to select the channel, and press the same knob to confirm.
DAB Display Modes
Every time you press the MENU/INFO button, the display will show the following display modes:
DLS – Signal Strength – Programme Type – Ensemble – Frequency – Signal error – Bit Rate –
Time – Date
Prune Invalid
You may remove all unavailable stations from the list.
1. During DAB mode, press and hold the MENU/INFO button and turn the VOLUME/SELECT Knob
to select Prune and Press Same knob to confirm.
2. Turn the VOLUME/SELECT Knob to select <YES> and press the same knob to confirm or select
<NO> to cancel.
Preset Stations
This function allows up to 10 stations to be programmed into the memory and stored in both DAB
and FM mode.
1. Select your desired station, press and hold the PRESET button until the display shows "Preset
Store <#: (Empty) >".

-
7
-
2. Turn the VOLUME/SELECT Knob to select preset number and press the same knob to confirm.
Recalling a Stored Station
1. To select a preset, press the PRESET button, and then turn the VOLUME/SELECT Knob to select
one of the listed preset stations.
2. Press the same knob to confirm the selection.
Operation of Preset and Recall stations are same for DAB and FM.
FM Operation
Switching from DAB to FM Mode
To switch the unit to FM mode, press the MODE button repeatedly to switch to FM mode. The display
will show the frequency.
Auto Scan
1. During FM mode, press the TUNE button to enter <Tuning>.
2. If briefly turn the knob at clockwise, Press the Volume/Select knob it will auto search up.
3. If briefly turn the knob at counter clockwise, Press the Volume/Select knob it auto search down.
4. Once a station has been found, the scanning will stop automatically.
The search may not stop at a station with a very week signal.
Manual Tuning
To search for FM stations manually, press the TUNE button to enter <Tuning>, and turn the
VOLUME/SELECT Knob until your desired frequency is reached.
With FM radio, it may be necessary to fine tune each station by turning the Volume
+/- dial repeatedly. Each turn will adjust the frequency by 0.05 MHz. If reception
is still poor, adjust the position of the aerial or try moving the radio to another
location.
FM Display Modes
Every time you press the MENU/INFO button, the display will show the following display modes:
Radio Text - Programme Type - Frequency - Audio Type - Time - Date
Scan setting
1. Press and hold the MENU/INFO button to access FM menu.
2. Turn the VOLUME/SELECT Knob to select “Scan setting” and then press the same knob to
confirm.
3.
Turn the VOLUME/SELECT Knob to select “Strong stations only” or “All stations” and then press
the same knob to confirm.

-
8
-
Audio setting
1. Press and hold the MENU/INFO button to access FM menu.
2. Turn the VOLUME/SELECT Knob to select “Audio setting” and then press the same knob to
confirm.
3. Turn the VOLUME/SELECT Knob to select “Stereo allowed” or “Forced mono” and then press the
same knob to confirm.
AUX operation
There is an “AUX IN” socket located at the back of the unit. Analogue audio sound signals from other
sources can be input to the unit through this socket.
1. Connect the input to another audio device via an AUX
cable (not included) with an “AUX IN” socket.
2. Press the MODE button repeatedly to select “Auxiliary
Input” mode. (F.5)
3. Turn the VOLUME/SELECT Knob to adjust the volume
control for your desired sound output level.
4. In AUX mode, operate your audio device directly for
playback features.
Setting the Alarm
This function allows you to program 2 individual Alarm in
a set period of time.
Press the ALARM button once or twice to select the Alarm
number (1 or 2) and then press Same knob to start the
setting of the alarm. (F.6)
Turn the VOLUME/SELECT Knob to select then press the
same knob to confirm.
F.5
F.6
On time
Alarm On time ##:##
Duration
15/30/45/60/90
Source
Buzzer/DAB/FM (DAB/FM: Last listened / Preset station)
Enable
Once/Weekends/Weekdays/Daily
Volume
Volume Bar
Alarm
On / Off
When the alarm is set, the alarm icon will appear on the display. To turn off the alarm when it sounds,
press the Standby or ALARM button.
During Standby mode, press the ALARM button repeatedly to turn the saved Alarm on or off. (F.7)

-
9
-
Snooze
Snooze allows you to temporarily silence a sounding alarm. The radio returns to standby for the set
time period with Snooze countdown displayed. When the countdown reaches 0(zero) the alarm
triggered again.
1. When the alarm is sounding, press the DIMMER/SNOOZE button once.
2. You can change the snooze period by repeatedly pressing the DIMMER/SNOOZE button, Snooze
periods are 5,10, 15 or 30 minutes.
Dimmer
The display has a dimmer setting with four brightness - Off / Low / Medium / High. You can press the
DIMMER/SNOOZE button repeatedly to switch the dimmer level.
Headphones (Not included)
A headphone jack has been provided so that the radio can be used without disturbing others. Plug in
the headphones at the point marked and adjust the listening volume to your chosen level.
Excessive sound pressure from earphones and headphones can cause hearing loss. The speakers will
not operate when ear
phones are fitted.
Specification
Rated voltage (Adapter): AC 100-240V ~50/60Hz
Adaptor output: DC 9V 1.6A
Power consumption : 14.5W
Audio output : 1 X 5W RMS
Frequency Range : DAB 174-240MHz
FM 87.5-108MHz
Unit dimension : 221 mm (W ) x 159 mm (D) x 137 mm (H)
Weight : ~1.3 kg
***SPECIFICATION SUBJECT TO CHANGE WITHOUT FURTHER NOTICE.***
/