
PORTUGUÊS
ENGLISH
P/N : MMBB0188424 (1.0) w
LG Electronics Inc.
M6100 Manual do Utilizador
M6100 MANUAL DO UTILIZADOR
Alguns conteúdos deste manual poderão diferir do seu telemóvel,
dependendo do respectivo software ou do seu fornecedor de serviços.
M6100 MANUAL DO UTILIZADOR
LG Electronics Inc.
http://www.lge.com
Page is loading ...
Page is loading ...
Page is loading ...
Page is loading ...
Page is loading ...
Page is loading ...
Page is loading ...
Page is loading ...
Page is loading ...
Page is loading ...
Page is loading ...
Page is loading ...
Page is loading ...
Page is loading ...
Page is loading ...
Page is loading ...
Page is loading ...
Page is loading ...
Page is loading ...
Page is loading ...
Page is loading ...
Page is loading ...
Page is loading ...
Page is loading ...
Page is loading ...
Page is loading ...
Page is loading ...
Page is loading ...
Page is loading ...
Page is loading ...
Page is loading ...
Page is loading ...
Page is loading ...
Page is loading ...
Page is loading ...
Page is loading ...
Page is loading ...
Page is loading ...
Page is loading ...
Page is loading ...
Page is loading ...
Page is loading ...
Page is loading ...
Page is loading ...
Page is loading ...
Page is loading ...
Page is loading ...
Page is loading ...
Page is loading ...
Page is loading ...
Page is loading ...
Page is loading ...
Page is loading ...
Page is loading ...
Page is loading ...
Page is loading ...
Page is loading ...
Page is loading ...
Page is loading ...
Page is loading ...
Page is loading ...
Page is loading ...
Page is loading ...
Page is loading ...
Page is loading ...
Page is loading ...
Page is loading ...
Page is loading ...
Page is loading ...
Page is loading ...
Page is loading ...
Page is loading ...
Page is loading ...
Page is loading ...
Page is loading ...
Page is loading ...
Page is loading ...
Page is loading ...
Page is loading ...
Page is loading ...
Page is loading ...
Page is loading ...

83
Name
Address
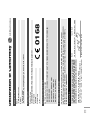
I hereby declare under our sole responsibility
that the product mentioned above to which
this declaration relates complies with the above
mentioned standards and Directives
Signature of representative
Name Issued Date
Product Name
Model Name
Trade Name
LG Electronics Inc
GSM 900 / DCS 1800 / PCS 1900 Tri-Band Terminal Equipment
M6100
LG
Suppliers Details
R&TTE Directive 1999/5/EC
EN 301 489-1 V1.5.1( 2004-11), EN 301 489-7 V1.2.1(2002-08), EN 301 489-17 V1.2.1(2002-08)
EN 60950 : 2000
EN 50360 2001, EN50361 2001
EN 300 328 V1.4.1(2003-04)
EN 301 511 V.9.0.2(2003-03)
Jin Seog, Kim / Director
7. November . 2005
Product Details
Applicable Standards Details
The conformity to above standards is verified by BABT with Certificate No.(NC/12584)
and GSM test report (no.WG614666/01 Issue 1), Bluetooth RF test report (no. TCMD0432545)
EMC test report(no. HCT-C05-1006), Safety test report (no. ITYA0131625;ITYA0131625M1),
SAR test report (no. TCMA0822545).
Declaration
Supplementary Information
LG Electronics Inc. Amsterdam Office
Veluwezoom 15, 1327 AE Almere, The Netherlands
Tel : +31 - 36- 547 - 8940, e-mail : seokim @ lge.com
LG Twin Tower
20,Yeouido-dong, Yeongdeungpo-gu Seoul, Korea 150-721
0168
Page is loading ...

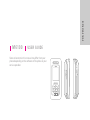
M6100
USER GUIDE
Some of contents in this manual may differ from your
phone depending on the software of the phone or your
service provider.
ENGLISH

INTRODUCTION 4
GUIDELINES FOR SAFE AND EFFICIENT USE
5
M6100 FEATURES 9
Parts of the phone 9
Display Information 13
GETTING STARTED 15
Installing the SIM card and battery 15
Charging the Battery 16
Disconnecting the adapter 17
Turning your phone on and off 18
Access codes 18
GENERAL FUNCTIONS 20
Making and answering calls 20
Adjusting the volume 21
Answering a call 21
Entering text 22
In-call menu 24
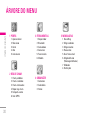
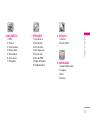
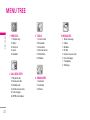
MENU TREE 28
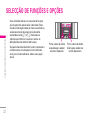
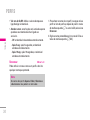
SELECTING FUNCTIONS AND OPTIONS 30
PROFILES 31
Activate 31
Personalise 31
Rename 32
CALL REGISTER 33
Missed calls 33
Received calls 33
Dialled calls 33
Delete recent calls 34
Call charges 34
GPRS information 35
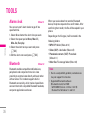
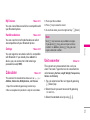
TOOLS 36
Alarm clock 36
Bluetooth 36
Calculator 37
Unit converter 37
World time 38
Modem 38
2
TABLE OF CONTENTS
\TableofContents

3
|TableofContents
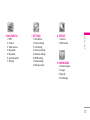
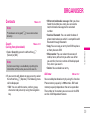
ORGANISER 39
Contacts 39
Calendar 42
Memo 43
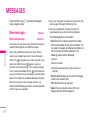
MESSAGES 44
New message 44
Inbox 47
Outbox 48
Drafts 49
Listen to voice mail 49
Info message 50
Templates 50
Settings 51
MULTIMEDIA 54
MP3 54
Camera 56
Video camera 57
My photos 57
My Videos 58
Voice Recorder 58
Settings 59
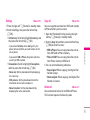
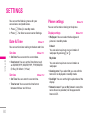
SETTINGS 60
Date & Time 60
Phone settings 60
Call settings 61
Security settings 63
Network settings 65
GPRS setting 66
Reset settings 66
Memory status 66
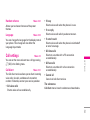
SERVICE 67
Internet 68
SIM service 71
DOWNLOADS 72
Games & Apps 72
Images 73
Sounds 73
File Storage 74
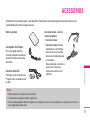
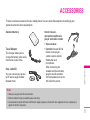
ACCESSORIES 77
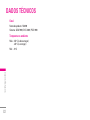
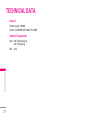
TECHNICAL DATA 78

4
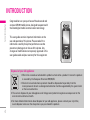
INTRODUCTION
\Introduction
Congratulations on your purchase of the advanced and
compact M6100 mobile phone, designed to operate with
the latest digital mobile communication technology.
This user guide contains important information on the
use and operation of this phone. Please read all the
information carefully for optimal performance and to
prevent any damage to or misuse of the phone. Any
changes or modifications not expressly approved in this
user guide could void your warranty for this equipment.
Disposal of your old appliance
1. When this crossed-out wheeled bin symbol is attached to a product it means the product
is covered by the European Directive 2002/96/EC.
2. All electrical and electronic products should be disposed of separately from the
municipal waste stream via designated collection facilities appointed by the government
or the local authorities.
3. The correct disposal of your old appliance will help prevent potential negative consequences for the
environment and human health.
4. For more detailed information about disposal of your old appliance, please contact your city office,
waste disposal service or the shop where you purchased the product.

5
GUIDELINES FOR SAFE AND EFFICIENT USE
|Guidelinesforsafeandefficientuse
Please read these simple guidelines. Not following
these guidelines may be dangerous or illegal.
Further detailed information is given in this manual.
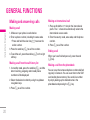
Exposure to radio frequency
energy
Radio wave exposure and Specific Absorption Rate
(SAR) information
This mobile phone model M6100 has been designed
to comply with applicable safety requirement for
exposure to radio waves. This requirement is based
on scientific guidelines that include safety margins
designed to assure the safety of all persons,
regardless of age and health.
• The radio wave exposure guidelines employ a unit
of measurement known as the Specific
Absorption Rate, or SAR. Tests for SAR are
conducted using standardized methods with the
phone transmitting at its highest certified power
level in all used frequency bands.
• While there may be differences between the SAR
levels of various LG phone models, they are all
designed to meet the relevant guidelines for
exposure to radio waves.
• The SAR limit recommended by the international
Commission on Non-Ionizing Radiation Protection
(ICNIRP), which is 2W/kg averaged over ten (10)
gram of tissue.
• The highest SAR value for this model phone tested
by DASY4 for use at the ear is 0.19 W/kg (10g).
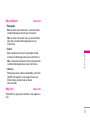
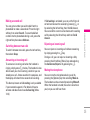
Product care and maintenance
WARNING! Only use batteries, chargers and
accessories approved for use with this particular
phone model. The use of any other types may
invalidate any approval or warranty applying to
the phone, and may be dangerous.
• Do not disassemble this unit. Take it to a qualified
service technician when repair work is required.
• Keep away from electrical appliances such as a
TV, radio or personal computer.

6
GUIDELINES FOR SAFE AND EFFICIENT USE
\Guidelinesforsafeandefficientuse
• The unit should be kept away from heat sources
such as radiators or cookers.
• Do not drop.
• Do not subject this unit to mechanical vibration or
shock.
• The coating of the phone may be damaged if
covered with wrap or vinyl wrapper.
• Use dry cloth to clean the exterior of the unit.
(Do not use solvent such as benzene, thinner or
alcohol.)
• Do not subject this unit to excessive smoke or
dust.
• Do not keep the phone next to credit cards or
transport tickets; it can affect the information on
the magnetic strips.
• Do not tap the screen with a sharp object as it
may damage the phone.
• Do not expose the phone to liquid or moisture.
• Use the accessories like an earphone cautiously.
Electronics devices
All mobile phones may get interference, which
could affect performance.
• Do not use your mobile phone near medical
equipment without requesting permission. Avoid
placing the phone over pacemakers (i.e. in your
breast pocket.)
• Some hearing aids might be disturbed by mobile
phones.
• Minor interference may affect TVs, radios, PCs,
etc.
Road safety
Check the laws and regulations on the use of mobile
phones in the areas when you drive.
• Do not use a hand-held phone while driving.
• Give full attention to driving.
• Use a hands-free kit, if available.
• Pull off the road and park before making or
answering a call if driving conditions so require.

7
|Guidelinesforsafeandefficientuse
• RF energy may affect some electronic systems in
your motor vehicle such as car stereo or safety
equipment.
• When your vehicle is equipped with an air bag, do
not obstruct with installed or portable wireless
equipment. It can cause serious injury due to
improper performance.
Blasting area
Do not use the phone where blasting is in progress.
Observe restrictions, and follow any regulations or
rules.
Potentially explosive
atmospheres
• Do not use the phone at a refueling point. Don’t
use near fuel or chemicals.
• Do not transport or store flammable gas, liquid, or
explosives in the compartment of your vehicle,
which contains your mobile phone and
accessories.
In aircraft
Wireless devices can cause interference in aircraft.
• Turn off your mobile phone before boarding any
aircraft.
• Do not use it on the ground without crew
permission.
Children
Keep the phone in a safe place out of small
children’s reach. It includes small parts which if
detached may cause a choking hazard.
Emergency calls
Emergency calls may not be available under all
cellular networks. Therefore, you should never
depend solely on the phone for emergency calls.
Check with your local service provider.

Battery information and care
• You do not need to completely discharge the
battery before recharging. Unlike other battery
systems, there is no memory effect that could
compromise the battery’s performance.
• Use only LG batteries and chargers. LG chargers
are designed to maximize the battery life.
• Do not disassemble or short-circuit the battery
pack.
• Keep the metal contacts of the battery pack clean.
• Replace the battery when it no longer provides
acceptable performance. The battery pack may
be recharged hundreds of times until it needs
replacing.
• Recharge the battery if it has not been used for a
long time to maximize usability.
• Do not expose the battery charger to direct
sunlight or use it in high humidity, such as the
bathroom.
• Do not leave the battery in hot or cold places, this
may deteriorate the battery performance.
8
GUIDELINES FOR SAFE AND EFFICIENT USE
\Guidelinesforsafeandefficientuse

9
M6100 FEATURES
|M6100features
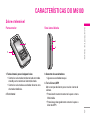
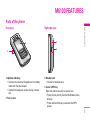
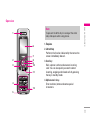
Parts of the phone
Front view
1. Up/down side keys
• Controls the volume of keypad tone in standby
mode with the phone open.
• Controls the earpiece volume during a phone
call.
2. Front screen
Right side view
3. Headset jack
• Connect a headset here.
4. Camera/MP3 key
Open the slide to reveal the camera lens.
• Press this key shortly to enter Multimedia menu
directly.
• Press and hold this key to activate the MP3
player.
3
4
1
2

10
M6100 FEATURES
\M6100features
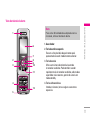
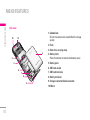
Rear view
1. Camera lens
Dirt on the camera lens could affect the image
quality.
2. Flash
3. Holes for a carrying strap
4. Battery latch
Press this button to remove the battery cover.
5. Battery pack
6. SIM card socket
7. SIM card terminals
8. Battery terminals
9. Charger connector/Cable connector
10. Mirror
3
12
4
6
5
10
7
8
9

11
|M6100features
Open view
1. Earpiece
2. Left soft key
Performs the function indicated by the text on the
screen immediately above it.
3. Send key
Dials a phone number and answers incoming
calls. You can also quickly access the latest
incoming, outgoing and missed calls by pressing
the key in standby mode.
4. Alphanumeric keys
Enter numbers, letters and some special
characters.
6
8
7
10
11
1
2
12
9
3
4
5
Note
To prevent the difficulty in hearing of the other
side, slide open while using phone.

12
M6100 FEATURES
\M6100features
5. Microphone
Can be muted during a call for privacy.
6. Main screen
Displays phone status icons, menu items, Web
information, pictures and more in full colour.
7. Navigation keys
Use to scroll through menus and move the
cursor.
•
In standby mode:
U Briefly: List of Favorites
D Briefly: List of Contact
R Briefly: List of Messages
L Briefly: List of Profiles
Hold down: Activate/
Deactivate Vibrate mode
•
In menu: scroll up & down
8. Right soft key
Performs the function indicated by the text on
the screen immediately above it.
9. Confirm key
Selects menu options and confirms actions.
10. End/Power key
Used to end a call or reject a call and also to go
back to standby mode. Hold this key down to turn
the phone on/off.
11. Clear key
Deletes a character with each press. Hold the
key down to clear all input. Use this key to go
back to a previous screen.
12. Special function keys
• 0: A long press of this key enters the
international call character “+”.
•
#: While keying in a phone number, a long
press of this key enters a pause.
Activates camera flash.
•
*: Activates camera timer.

13
|M6100features
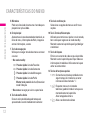
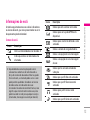
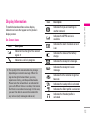
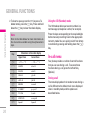
Display Information
The table below describes various display
indicators or icons that appear on the phone’s
display screen.
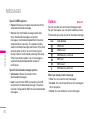
On-Screen Icons
Icon Description
Indicates the strength of the network
signal. ❈
Indicates a call is in progress.
Icon Description
Indicates that you are roaming on
another network.
Indicates that GPRS service is
available.
Indicates the alarm has been set and
is on.
Indicates the status of the battery
charge.
Indicates the receipt of a message.
Indicates the receipt of a voice
message.
Indicates that the vibration ringer has
been set.
Indicates the Loud profile is activated.
Indicates the Silent profile is activated.
Indicates the Headset profile is
activated.
❈
The quality of the conversation may change
depending on network coverage. When the
signal strength is below 2 bars, you may
experience muting, call drop and bad audio.
Please take the network bars as indicator for
your calls. When there are no bars, that means
that there is no network coverage: in this case,
you won’t be able to access the network for
any service (call, messages and so on).

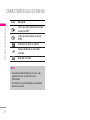
14
M6100 FEATURES
\M6100features
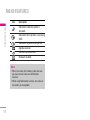
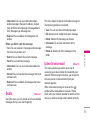
Icon Description
Indicates the General profile is
activated.
Indicates that the phones is accessing
WAP.
Indicates that you are using GPRS.
Agenda event set
Call divert service active
Bluetooth enabled
Note
• When the status of the battery indicates low,
you may not use Camera or Multimedia
function.
• While using Multimedia function, the status of
the battery is changeable.

15
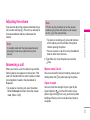
GETTING STARTED
|Gettingstarted
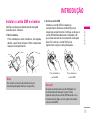
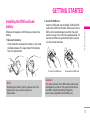
Installing the SIM card and
battery
Make sure the power is off before you remove the
battery.
1. Remove the battery.
Press the button to release the battery, then slide
the battery down till it stops. Now lift the battery
from its compartment.
2. Install the SIM card.
Insert the SIM card into the holder. Slide the SIM
card into the SIM card holder. Make sure that the
SIM card is inserted properly and that the gold
contact area on the card is facing downwards. To
remove the SIM card, press down lightly and pull
it in the reverse direction.
Note
Removing the battery from the phone when the
power is on may cause the phone to
malfunction.
To insert the SIM card To remove the SIM card
Caution!
The metal contact of the SIM card can be easily
damaged by scratches. Pay special attention to
the SIM card while handling. Follow the
instructions supplied with the SIM card.

16
GETTING STARTED
\Gettingstarted
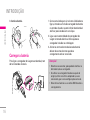
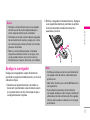
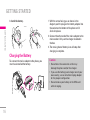
3. Install the battery.
Charging the Battery
To connect the mains adapter to the phone, you
must have installed the battery.
1. With the arrow facing you as shown in the
diagram push the plug on the battery adapter into
the socket on the bottom of the phone until it
clicks into place.
2. Connect the other end of the mains adapter to the
mains socket. Only use the charger included in
the box.
3. The moving bars of battery icon will stop after
charging is complete.
Caution
• Do not force the connector as this may
damage the phone and/or the charger.
• If you use the battery pack charger out of your
own country, use an attachment plug adapter
for the proper configuration.
• Do not remove your battery or the SIM card
while charging.

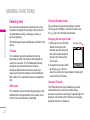
17
|Gettingstarted
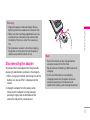
Disconnecting the adapter
Disconnect the travel adapter from the phone by
pressing its side buttons as shown in the diagram.
1. When charging is finished, the moving bars of the
battery icon stop and ‘Full’ is displayed on the
screen.
2. Unplug the adapter from the power outlet.
Disconnect the adapter from the phone by
pressing the grey tabs on both sides of the
connector and pull the connector out.
Warning
• Unplug the power cord and charger during
lightning storms to avoid electric shock or fire.
• Make sure that no sharp-edged items such as
animal teeth or nails come into contact with
the battery. There is a risk of this causing a
fire.
• Do not place or answer calls while charging
the phone as it may short-circuit the phone
and/or cause electric shock or fire.
Note
• Ensure the battery is fully charged before
using the phone for the first time.
• Do not remove the battery or SIM card while
charging.
• In the case the battery is not properly
charged, please turn the phone off and on
using the power key. Then detach and
reattach the battery, and recharge the phone.

18
GETTING STARTED
\Gettingstarted
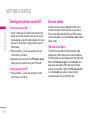
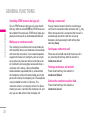
Turning your phone on and off
Turning your phone ON
1. Install a battery to the handset and connect the
phone to an external power source such as the
travel adapter, cigarette lighter adapter or hands-
free car kit. Or install a charged battery pack to
the handset.
2. Press and hold
Efor a few seconds until the
LCD screen is turned on.
3. Depending on the status of the
PIN code request
setting you may need to enter your PIN code.
Turning your phone OFF
1. Press and hold Efor a few seconds until the
LCD screen is turned off.
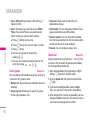
Access codes
You can use the access codes described in this
section to avoid unauthorised use of your phone.
The access codes (except PUK and PUK2 codes)
can be changed by using the
Change codes feature
[Menu 7.4.6].
PIN code (4 to 8 digits)
The PIN (Personal Identification Number) code
protects your SIM card against unauthorised use.
The PIN code is usually supplied with the SIM card.
When the
PIN code request is set to Enable, your
phone will request the PIN code every time the
phone is switched on. When the
PIN code request
is set to Disable, your phone connects to the
network directly without the PIN code.
Page is loading ...
Page is loading ...
Page is loading ...
Page is loading ...
Page is loading ...
Page is loading ...
Page is loading ...
Page is loading ...
Page is loading ...
Page is loading ...
Page is loading ...
Page is loading ...
Page is loading ...
Page is loading ...
Page is loading ...
Page is loading ...
Page is loading ...
Page is loading ...
Page is loading ...
Page is loading ...
Page is loading ...
Page is loading ...
Page is loading ...
Page is loading ...
Page is loading ...
Page is loading ...
Page is loading ...
Page is loading ...
Page is loading ...
Page is loading ...
Page is loading ...
Page is loading ...
Page is loading ...
Page is loading ...
Page is loading ...
Page is loading ...
Page is loading ...
Page is loading ...
Page is loading ...
Page is loading ...
Page is loading ...
Page is loading ...
Page is loading ...
Page is loading ...
Page is loading ...
Page is loading ...
Page is loading ...
Page is loading ...
Page is loading ...
Page is loading ...
Page is loading ...
Page is loading ...
Page is loading ...
Page is loading ...
Page is loading ...
Page is loading ...
Page is loading ...
Page is loading ...
Page is loading ...
Page is loading ...
Page is loading ...
Page is loading ...
-
 1
1
-
 2
2
-
 3
3
-
 4
4
-
 5
5
-
 6
6
-
 7
7
-
 8
8
-
 9
9
-
 10
10
-
 11
11
-
 12
12
-
 13
13
-
 14
14
-
 15
15
-
 16
16
-
 17
17
-
 18
18
-
 19
19
-
 20
20
-
 21
21
-
 22
22
-
 23
23
-
 24
24
-
 25
25
-
 26
26
-
 27
27
-
 28
28
-
 29
29
-
 30
30
-
 31
31
-
 32
32
-
 33
33
-
 34
34
-
 35
35
-
 36
36
-
 37
37
-
 38
38
-
 39
39
-
 40
40
-
 41
41
-
 42
42
-
 43
43
-
 44
44
-
 45
45
-
 46
46
-
 47
47
-
 48
48
-
 49
49
-
 50
50
-
 51
51
-
 52
52
-
 53
53
-
 54
54
-
 55
55
-
 56
56
-
 57
57
-
 58
58
-
 59
59
-
 60
60
-
 61
61
-
 62
62
-
 63
63
-
 64
64
-
 65
65
-
 66
66
-
 67
67
-
 68
68
-
 69
69
-
 70
70
-
 71
71
-
 72
72
-
 73
73
-
 74
74
-
 75
75
-
 76
76
-
 77
77
-
 78
78
-
 79
79
-
 80
80
-
 81
81
-
 82
82
-
 83
83
-
 84
84
-
 85
85
-
 86
86
-
 87
87
-
 88
88
-
 89
89
-
 90
90
-
 91
91
-
 92
92
-
 93
93
-
 94
94
-
 95
95
-
 96
96
-
 97
97
-
 98
98
-
 99
99
-
 100
100
-
 101
101
-
 102
102
-
 103
103
-
 104
104
-
 105
105
-
 106
106
-
 107
107
-
 108
108
-
 109
109
-
 110
110
-
 111
111
-
 112
112
-
 113
113
-
 114
114
-
 115
115
-
 116
116
-
 117
117
-
 118
118
-
 119
119
-
 120
120
-
 121
121
-
 122
122
-
 123
123
-
 124
124
-
 125
125
-
 126
126
-
 127
127
-
 128
128
-
 129
129
-
 130
130
-
 131
131
-
 132
132
-
 133
133
-
 134
134
-
 135
135
-
 136
136
-
 137
137
-
 138
138
-
 139
139
-
 140
140
-
 141
141
-
 142
142
-
 143
143
-
 144
144
-
 145
145
-
 146
146
-
 147
147
-
 148
148
-
 149
149
-
 150
150
-
 151
151
-
 152
152
-
 153
153
-
 154
154
-
 155
155
-
 156
156
-
 157
157
-
 158
158
-
 159
159
-
 160
160
-
 161
161
-
 162
162
-
 163
163
-
 164
164
-
 165
165


Ask a question and I''ll find the answer in the document
Finding information in a document is now easier with AI
in other languages
- português: LG M6100.AITABK Manual do usuário
