Page is loading ...

1
Your BeoVision MX 4002 is the first
TV dedicated to the BeoLink system.
Through BeoVision MX 4002, you can
listen to any source of music from the
main audio system and view any
source available in your main video
system; video recorder, satellite or any
other Bang & Olufsen audio/video
product.
You can place the TV in various
positions in whatever room you
prefer, wall mounted in the kitchen,
on the floor of the study or on a
motorised stand in the bedroom.
No matter the circumstance, just use
your Beo4 remote control as you use
it with your main audio/video system.
This guide explains how!
User’s guide
INTRODUCING BEOVISION MX 4002

2

LIST OF CONTENTS
3
4 Sound and pictures in link rooms…
5 PRINCIPLES OF OPERATION
Beo4 remote control, 5
6 Using this guide…
7 On-screen menus
Help to start using on-screen menus, 7
8 TUNING
Tuning in TV stations, 8
10 PROGRAM LIST
Calling up the program list, 10
11 TV CHANNEL/FREQUENCY CONVERSION
LIST
12 CLOCK
How to set the clock, 12
14 STAND
Presetting a stand position, 14
15 TIMER SOUND
Switching Timer sound to on or off, 15
16 DAILY OPERATIONS
Using your Link TV, 16
Main room system and link room system,
17
18 TELETEXT
How to call up Teletext pages, 18
Presetting your own favourite Teletext
pages, 18
Using the basic Teletext functions, 19
Teletext subtitles, 20
Making the subtitles appear automatically,
20
Page update Teletext function, 21
“Fastext” or FLOF, 22
23 PICTURE AND SOUND
Adjusting the picture, 23
Adjusting the sound, 24
Switching sound, 26
28 BEOVISION MX 4002 CONNECTIONS
Sockets on the rear panel, 28
Sockets and buttons on the front, 29
30 REGISTERING EXTRA EQUIPMENT
TV setup for connected equipment, 30
32 MENUS FOR OTHER SOURCES
34 QUICK GUIDE TO MX MENUS
Before you start…
The separate Setting-up guide enclosed with the
MX 4002 describes in detail how to place, install
and maintain your TV.
This guide explains how to operate your main
Bang & Olufsen system from the room where you
have placed your BeoVision MX 4002, using the
Beo4 remote control.
For instructions regarding equipment connected
to MX 4002, please refer to pages 28-31.
Note: Your MX 4002 and your main Bang &
Olufsen system must be interconnected by a Bang
& Olufsen BeoLink installation.

SOUND AND PICTURES IN LINK ROOMS…
4
Your BeoVision MX 4002 gives your
main Bang & Olufsen system an extra
dimension:
• On your TV, you can watch any source
you like from your main system.
• Via the speakers in your TV, you can
listen to any audio source you like
from your main system.
• You can control a number of daily
functions in your main system from
the room where your MX 4002 is
placed.
• And, you can use your MX 4002 on its
own.
All you need is the Beo4 remote control
for the TV, and your main system can
be used in your link room as well*.
*Note: Your main Bang & Olufsen audio-,
video-, or AV system and your BeoVision MX 4002
must be interconnected by a BeoLink installation.
Link room system
Main room system
You can operate your MX 4002 TV as usual using
the Beo4 remote control. But your MX 4002 is also
your interface with your main system: Your
remote control commands are received by the TV,
and – via your BeoLink installation – the TV
communicates your instructions to your main
Bang & Olufsen system.

5
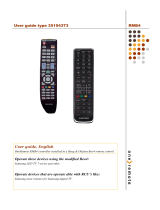
Beo4 remote control
The Beo4 remote control is the key to
all the functions in your BeoVision MX
4002.
Apart from operating your MX 4002 TV,
Beo4 also enables you to switch on any
source you like in your main Bang &
Olufsen system and watch or listen to it
on the TV and include your MX 4002
TV speakers in a Timer Play
programming of your main system.
Via your MX 4002, you can then
control the daily playback functions for
the source you have chosen – just
as if you were operating your main
system directly, using the Beo4 remote
control.
Please note: The extra Beo4 functions that you call
up via the LIST button appear in a preset order.
You can change this order in which they appear
on the Beo4 display, if you wish. Please refer to
Beo4’s own User’s guide and the chapter
‘Rearrange the Beo4 LIST functions’ for further
information.
The Beo4 remote control
Nice to know about Beo4 buttons…
In the step-by-step operating sequences shown in
this guide, the buttons on the Beo4 and cues in
the Beo4 display will be illustrated like this:
Rectangular buttons for source
control, numbers and dedicated
functions
Buttons within the star-shaped
button for stepping and winding,
and operation of on-screen menus
The circular GO button in the
middle of the star-shaped button for
accepting and storing instructions
The coloured buttons in the star-
shaped button are used for
specialfunctions, it will be explained
in this guide when and how to use
them
The LIST button always requires that
you press it repeatedly to reveal
more functions or cues from the
Beo4 list of functions on the Beo4
display
Cues or functions in the Beo4 display
appear when LIST is pressed
repeatedly, they represent extra
functions. The display also shows a
cue for the source buttons you press
STAND
GO
LIST
TV
TV LIGHT RADIO
SAT DVD CD
V TAPE RECORD A TAPE
789
456
TEXT
0
MENU
123
LIST EXIT
STOP
GO
PRINCIPLES OF OPERATION

6
This guide explains how to operate
your BeoVision MX 4002 using the
Beo4 remote control.
In the column to either the far left or
right of the page, the operation in
question is shown as a sequence of
buttons which correspond to the
buttons on your Beo4 remote control.
This sequence is accompanied by a
short instruction.
In most cases, the instructions in the
button sequences are supported by
illustrations of the menus on the TV
screen.
The operation in question is described
in the main text.
The remarks e.g. ‘Note:…’; which are
differentiated from the main text have
various functions which include:
• Troubleshooting; describing specific
circumstances which may occur
during an operation
• Providing additional information,
such as detailed information about
the contents of the menus
• Informing about procedures which
may need to be fulfilled before an
operation is commenced.
Freq Fine System Decoder
210 +1 B/G Off
USING THIS GUIDE
The first item in the MX 4002 Setup
menu, Tuning, calls up the menu
which enables you to tune in to TV
stations and store them on program
numbers of your own choice. …
Note: See the next page for further
Information about the items in the tuning
menu. …
Switch on the TV
Call up the Main menu
Press repeatedly to light up Setup
in red
Press to call up the Setup menu
The Setup menu appears, then...
MENU
TV
GO
then
then
Example of a sequence of buttons
Example of a fill-in menu
Example of a Main text
Example of a remark or ‘Note’ text

Brillance Colour Contrast
32 32 44
ON-SCREEN MENUS
7
Operation of the more advanced
functions in your MX 4002 is guided
by on-screen menus. The main TV
menu introduces you to all these
functions. The main menu must
always be called up first, before you
can access the other menus.
Each item in the main menu represents
another menu/function:
• TV program list… calls up the
program list
• Sound… calls up the sound
adjustment menu
• Picture… calls up the picture
adjustment menu
• Setup… calls up the Setup menu for
the MX 4002, where you can choose
menus for tuning as well as menus
where you must preset the system,
such as setting the clock or a stand
position
Fill-in menus…
Some of the menus you call up are
menus in which you must fill in
information.
In fill-in menus, you must enter the
information required for the
operation, in e.g. the Tuning menu, it
is, among other things, required that
you search for a station.
Switch on the TV
Call up the main menu
The main menu appears…
Press to move the red text/cursor
to the other items in the menu
Make sure that the item/function
you want is lit up in red, then…
Press to call up the menu for that
particular function
A fill-in menu appears…
Using fill-in menus…
Press to reveal options for the
individual items
Or
Key in the information, using the
number buttons
Press to move from item to item
in the menu
When you have entered all the
relevant information…
Press to store the information
Press to return to the previous
menu without storing what you
entered
Press to remove the menus from
the screen
Help to start using the on-screen menus
TV
MENU
then
GO
or
or
0
9
through to
STOP
EXIT
GO
tt
ss
Menu
• TV program list
• Sound
• Picture
• Setup
The main menu – when you call up the main
menu, the first item in the menu is lit up in red.
The items are lit up in red when you select them.
Example of a fill-in menu – the menu is for picture
adjustment. You change a preset setting or fill in
the necessary information.

8
Tuning in TV stations
Before you start…
Make sure that you select the appropriate
broadcast system in the Tuning menu before you
start tuning in channels. Please note that the TV’s
are equipped to receive the appropriate broadcast
system, only some TV’s offer more than one
broadcast system.
To be able to watch any programmes
on your MX 4002 TV, you must tune in
to the stations you want that are
available in your area. You must call up
the Tuning menu to access the tuning
function.
The tuning function consists of two
menus. A menu for the actual tuning in
and a second menu where you must fill
in the required information regarding
your station, such as program number
as well as choose any other
characteristics you want for the
individual station. Repeat this
procedure for all the stations you want
to tune in.
See the following page for further
information about the individual items
on the two Tuning menus…
Press to call up the main menu
The main menu appears…
Press until Setup is lit up
Press to call up the menu
The Setup menu appears…
Press to call up Tuning
The Tuning menu appears, Freq is lit
up already …
Press to let the system search for
TV stations
Or use the number keys to key in an
exact frequency, e.g. 210 Mhz
Fill in the necessary information in
this first menu…
Press to move to the other items
in the menu
Press to reveal options for the items
in the menu;
Press GO to store and move to the
second Tuning menu
The second Tuning menu appears…
Fill in the characteristics you want
for your station and move to
Store…
Press GO to store your station
Press to remove the menus
TUNING
Freq Fine System Decoder
210 +1 B/G Off
Menu
• TV program list
• Sound
• Picture
• Setup
Setup
• Tuning
• Timer
• Clock
• Sockets
• Stand
MENU
then
then
GO
or
or
or
2
1
0
EXIT
GO
GO
tt
ss
then
GO
then
then
The main menu
The Setup menu – provides access to functions
such as, Timer sound, setting the clock, registering
TV setup and presetting positions for the stand as
well as Tuning.
The first Tuning menu – is mainly for the actual
tuning of stations. Decoder only appears, if a
decoder has been registered for your TV.
Pg Name Sound
11 . . . . . . . . . . Stereo Store
The second Tuning menu – allows you to add
characteristics to your station such as a program
number and name.

9
What’s on the first Tuning menu…
Freq
The frequency of the stations. You prompt the TV
to search for a station. The tuning stops at the
first station producing an acceptable signal. If you
wish to continue searching, press
▲ or ▼ again. If
you know the exact frequency, you can key it in
directly*.
*Note: See the list on page 11 for a conversion of
TV channel numbers to frequencies.
Fine
Fine tuning of a station. The TV automatically
tunes to the best possible picture. If
neighbouring channels blur the picture slightly,
fine tuning may be necessary.
You fine tune by 1 step below or above the
standard frequency.
System
TV broadcast system – select the TV broadcast
system which is available or most appropriate.
For example:
B/G PAL/SECAM B/G system
L SECAM L system
I PAL I system
Note: Not all TVs are equipped to receive all
systems.
Decoder
If you need a decoder for a station – the TV can
cut in a decoder automatically for the station in
question. On indicates cutting the decoder in
and Off no decoder. In order for Decoder to
appear on the menu, however, you must
register your Decoder, see Registering extra
equipment, pages 34-35 for further instruction.
What’s on the second Tuning menu…
Pg
Program number – you can use the program
numbers 1-59. The indication -- shows that the
frequency has not already been tuned in to.
If the station/frequency has already been stored, a
program number appears under Pg when you call
up the second tuning menu.
Name
A name may contain 10 characters (indicated by
the 10 dots in the menu), including the letters
from A to Z, numbers and full stop. The first of
the 10 dots blinks, indicating that you can start
“writing” a name.
You must reveal the characters for the positions
you wish to fill in. Press
▲ until the letter you
want is revealed, press
tt to move to next
position and press
▲ or ▼ to reveal letters. To
switch from upper to lower case, or vice versa,
press 0.
When you start “writing” a name, the dots
disappear. The name is automatically transferred
to the program list. See the next page for further
details of the program list.
Every time you select a station you have named,
the name appears briefly on the screen.
Sound
Several types of sound may be available for a TV
station e.g. both stereo and mono sound, or two
or three different languages. You can choose to
store a specific type of sound or language with
your station.
The options are…
Mono Mono sound
Stereo Stereo sound
Mono-1 Language 1 – mono
Mono-2 Language 2 – mono
Mono-3 Language 3 – mono
Stereo-2 Language 2 – stereo
Store
Finally, accepting Store stores your station and
returns you to Tuning in the Setup menu. You still
have an opportunity, though, to remove all the
data you have entered by revealing Clear instead
of Store in the menu. Use
▲ or ▼ to reveal Clear
instead of Store and then press GO.
Clearing a stored station…
If you want to clear a station, you have tuned
in already, switch on to the program number
you want to clear, then call up the second
Tuning menu as explained on these two pages.
Once the menu appears, make sure the correct
program number is displayed, move to Store
and press
▼ to reveal Clear instead of Store
and press GO.

PROGRAM LIST
10
Press to call up the main menu
The main menu appears, TV Program
list is lit up already
Press to see the TV program list
The TV program list appears…
Press to see the pages of the list
Key in the number of the station you
want to watch,
for example 5
The program number you selected is
indicated on the menu…
Press to leave the program list and
return to the station you were
originally watching
Press to leave the program list
5
EXIT
GO
MENU
Calling up the program list
All the stations stored in your TV
appear in a program list.
There are three pages with the
numbers 1-19, 20-39 and 40-59, listing
the program numbers and their
names*, if any such exist. You will
always see the page where the station
you are currently on is listed.
If you want to see one of the stations,
currently listed on the screen, simply
key in the appropriate number, or,
press TV to return to your current
station.
*Note: If you want to see the name of the
station you are currently watching without
calling up the program list, press TV.
Or
TV
or
or
then
tt
ss
TV Program list, the program numbers 1-19 are
listed on-screen.
A light blue dotted line indicates that a station
has been stored on the particular number, but it
has not been named.
A dark blue dotted line indicates that the
particular program number is not in use and
cannot be selected.
10 . . . . . . . . .
1 BBC 1 11 . . . . . . . . .
2 BBC 2 12 Eurosport
3 ITV 13 . . . . . . . . .
4 Sky 14 . . . . . . . . .
5 Super Ch 15 MTV
6 ZDF 16 . . . . . . . . .
7 Children 17 . . . . . . . . .
8 CNN 18 . . . . . . . . .
9 . . . . . . . . . . 19 . . . . . . . . .
Menu
• TV program list
• Sound
• Picture
• Setup
The main menu

11
TV CHANNEL/FREQUENCY CONVERSION LIST
Italy
Channel
designation
number
On-screen
display
MHz
A
B
C
D
E
F
G
H
H1
H2
53
62
82
175
183
197
201
210
217
224
Australia
Channel
designation
number
On-screen
display
MHz
0
1
2
3
4
5
5A
6
7
8
9
10
11
46
57
64
86
95
102
138
175
182
189
196
209
216
France
Channel
designation
number
On-screen
display
MHz
FA
FB
FC1
FC
F1
F2
F3
F4
F5
F6
47
55
60
63
176
184
192
200
208
216
VHF
Channel
designation
number
On-screen
display
MHz
E2
E3
E4
E5
E6
E7
E8
E9
E10
E11
E12
S01
S02
S03
S1
S2
S3
S4
S5
S6
S7
S8
S9
S10
S11
S12
S13
S14
48
55
62
175
182
189
196
203
210
217
224
69
76
83
105
112
119
126
133
140
147
154
161
168
231
238
245
252
S15
S16
S17
S18
S19
S20
S21
S22
S23
S24
S25
S26
S27
S28
S29
S30
S31
S32
S33
S34
S35
S36
S37
S38
S39
S40
S41
259
266
273
280
287
294
303
311
319
327
335
343
351
359
367
375
383
391
399
407
415
423
431
439
447
455
463
Channel
designation
number
On-screen
display
MHz
UHF
Channel
designation
number
On-screen
display
MHz
21
22
23
24
25
26
27
28
29
30
31
32
33
34
35
36
37
38
39
40
41
42
43
44
45
46
47
48
471
479
487
495
503
511
519
527
535
543
551
559
567
575
583
591
599
607
615
623
631
639
647
655
663
671
679
687
49
50
51
52
53
54
55
56
57
58
59
60
61
62
63
64
65
66
67
68
69
695
703
711
719
727
735
743
751
759
767
775
783
791
799
807
815
823
831
839
847
855
Channel
designation
number
On-screen
display
MHz
This list of frequencies gives you the usual
channel designations and their corresponding
frequencies.

CLOCK
12
How to set the clock…
MENU
0
9
through
then
then
You have to set the 24-hour clock in
your MX 4002 TV to the correct time.
If the station you are on transmits
Teletext, you can synchronise with
Teletext time. This means that the TV
clock is always in exact accordance with
the Teletext time*.
To do so, call up the station or program
number whose Teletext time you want
synchronise with before you call up any
of the menus.
If the TV station does not transmit
Teletext, use the number buttons on
Beo4 to set the clock manually.
Likewise, you must set the clock
manually if you choose to disable
Teletext time.
See the following page for information
of the individual items on the menu…
*Note: The clock in your TV will automatically be
set to the correct time when, for example, the
official time changes from Winter to Summer
time. Even if power failures occur, or if the TV has
been unplugged from the mains, you don’t have
to set it again.
tt
GO
then
GO
then
then
then
GO
then
GO
then
GO
To set the clock yourself without using Teletext,
see the button sequence on the following page…
Menu
• TV program list
• Sound
• Picture
• Setup
Time Text time
12:00 TV program 1
Setup
• Tuning
• Timer
• Clock
• Sockets
• Stand
The main menu
The Setup menu
The Clock menu – on the menu, the time is now
12 o’clock pm, and it is synchronised with your TV
program 1.
Press to call up the main menu
The main menu appears…
Press until Setup is lit up
Press to call up the Setup menu
The Setup menu appears…
Press until Clock is lit up
Press to call up the Clock menu
The Clock menu appears…
If Teletext is currently transmitted,
you can synchronise with Teletext
time…
Press to move to Text time
Press to display the current program
number
The program number appears under
Text time…
Press GO to synchronise the time
The Clock menu appears again…
Press GO to store the time
If no Teletext time is available, No
Text time appears under the item
Text time…
Use the number keys to key in the
correct time
Press GO to store the time

13
Note: If you, after having synchronised the time
and stored your clock, switch over to another
station and call up the Clock menu again, the
displays will include an indication of the station
you are currently watching and the station you
synchronised with previously.
Press to move back to Time
Use the number keys to set the time
yourself
Press GO to store it
Press the remove the menus
What’s on the Clock menu…
Time
The time is indicated in hours and
minutes, for example 17:55 for five
minutes to six pm.
Text time
This indicates whether the clock is
synchronised with Teletext time or
not. The first time you call up the
Clock menu, the following displays are
possible for this item:
TV program 1… appears if you choose
to synchronise with Teletext and
indicates the station, e.g. TV program
1, whose Teletext you are
synchronising with.
No Text time… appears if no Teletext
time is available from the station you
are currently watching.
Off… indicates that you have chosen
not to synchronise with Teletext time.
EXIT
Checking the time…
You can also use the TV clock to check and
display the time when you are watching TV.
Press LIST on Beo4 until CLOCK is displayed
on the Beo4 display and then press GO to
display the time on the TV screen
permanently, press GO again to remove the
clock display again.
Alternatively,
if you choose not to use the Teletext time…
0
9
through
then
then
GO
ss

STAND
14
Presetting a stand position
If your MX 4002 is mounted on a
motorised stand or base, the TV will
turn to a preset position when you
switch it on.
You can, however, preset a position
yourself so that the TV automatically
turns to a position which suits your
favourite viewing angle.
To do so, call up the Stand menu, turn
the TV and choose the On position you
want the TV to turn to and store it.
To check that it turns to the correct
position, switch the TV to standby and
switch it back on again.
Press to call up the main menu
The main menu appears…
Press until Setup is lit up
Press to call up the Setup menu
The Setup menu appears…
Press until Stand is lit up
Press to call up the Stand menu
The Stand menu appears…
Press to turn the TV to your
preferred position
Use the number keys 1-9 to select
a preset stand position, 1 is the
utmost left position and 9 the
utmost right position
Press GO to store it
Press to remove the menus
MENU
1
9
EXIT
GO
then
through
Menu
• TV program list
• Sound
• Picture
• Setup
Turn TV to preferred position
Setup
• Tuning
• Timer
• Clock
• Sockets
• Stand
The main menu
The Setup menu
The Stand menu – prompts you to turn the TV
to your desired position
To preset an On position yourself…
GO
then
then
Or
GO
then
or
tt
ss

15
TIMER SOUND
Switching Timer sound to on or off…
If your MX 4002 is a part of a BeoLink
system, you can choose to include your
MX 4002 in a Timer play programming,
made on your main room system. On
MX 4002, you get sound only.
To do so, call up the Timer menu –
choosing On means that the TV
speakers will be cut in when the Timer
Play programming is being executed.
Choosing Off means not cutting them
in.
*Note: Please contact your Bang & Olufsen dealer
for further information about BeoLink systems.
Press to call up the main menu
The main menu appears…
Press until Setup is lit up
Press to call up the Setup menu
The Setup menu appears…
Press until Timer is lit up
Press to call up the Timer menu
The Timer menu appears…
Press to set to On or Off
Press GO to store it
Press to remove the menus
GO
GO
then
MENU
EXIT
Menu
• TV program list
• Sound
• Picture
• Setup
Timer sound
Off
Setup
• Tuning
• Timer
• Clock
• Sockets
• Stand
The main menu
The Setup menu
The Timer menu – the Off or On options decide
whether sound is to be distributed to the TV
speakers from a Timer play that you have made
on your main room system.
GO
then
then
or

16
Using your link TV
Switches on your TV
Then operate the TV as usual
Main video sources…
Switches on to satellite TV
Starts the video tape recorder
To watch TV programmes from
e.g.decoded TV program numbers
Press until LINK* is displayed
Press to start watching TV from the
main system
Main audio sources…
Switches on the radio
Starts the CD player
Starts the audio tape recorder
Press to step through your program
numbers or tracks on a CD or on a
video- or audio tape
Alternatively, key in the exact
program or track number you want
Press to pause your CD player, audio
or video tape recorder
Rewinds a tape; searches backwards
on a CD
Fast forwards a tape; searches
forwards on a CD
Press to resume playing
Press to switch off your TV
Press for 2 seconds to switch off your
main system
The operations described on this page
are primary functions which you will be
using daily, either from your MX 4002
or from your main Bang & Olufsen
system.
You can watch TV in your Link room,
or you can switch on any source you
like (audio/video) from your main
system and watch it on your MX 4002
TV, or listen to it via the speakers in
your TV.
To carry out these operations just press
the appropriate buttons on the Beo4
remote control.
If, for some reason, you want to watch
a TV programme from your main TV
for example a decoded programme,
press LIST until LINK* is displayed, then
TV.
For details of how to use Teletext,
please refer to Teletext, pages 18-22.
*Note: In order to display LINK on Beo4, you must
add the function to the Beo4 list of functions,
please refer to Beo4’s own User’s guide and the
chapter, Customizing your Beo4, for further
instruction.
Adjusting sound…
While you are watching or listening to a source
from your main system on your MX 4002, you can
adjust the sound in your TV speakers, without
interfering with your main system:
•
∧ or ∨ raises or lowers the volume level
• Press the volume button right on the middle to
silence the speakers immediately.
Press again to recall the sound.
To make any further adjustments to the sound
(or to the picture) in your TV, please refer to
Picture and sound, pages 23-26.
Adjusting the position of your MX 4002…
If your TV is mounted on a motorised stand or
base, the TV will turn to a preset position when
you switch it on. You can preset such a position
yourself, see page 14 for further instruction.
You can turn the TV yourself by pressing LIST until
STAND is displayed on Beo4, now press
ss or tt
to turn. The TV can be turned by up to 35 degrees
to either side.
You can, furthermore, turn the TV to 9 different
preset positions, use the numbers 1-9 on Beo4, 1 is
the utmost left position and 9 is the utmost right
position. Pressing 0 will return the TV to the
preset On position.
TV
SAT
V TAPE
TV
RADIO
CD
A TAPE
DAILY OPERATIONS
LIST
GO
then
or
tt
ss
0
9
STOP
through
•
or

17
Main room system and link room system
• To be able to start a DVD or CDV player
connected to your main video system, press
DVD on Beo4, then GO. Now operate your DVD
or CDV player as usual.
*Note: In order to display PHONO, A.TAPE2,
V.TAPE2 and AV on Beo4, you must add the
functions to the Beo4 list of functions, please
refer to Beo4’s own User’s guide and the chapter,
Customising your Beo4, for further information.
Link room system
Main room system
• If your main Bang & Olufsen system is in
standby when you switch it on via your TV, you
will only get sound and pictures on your TV –
neither the speakers, nor the TV screen in your
main system will be cut in.
• If you try to switch on a source in your main
Bang & Olufsen system, and you get the
pictures and/or the sound from a different
source on your TV, it may be because a
recording (audio or video) is progressing in your
main system.
• When you watch a video source from your main
system, for example a satellite programme, you
will get pictures and mono sound on your MX
4002 TV.
To obtain pictures and stereo sound (if any is
available), you must use the AV* LIST button:
press, for example, SAT, LIST until AV* appears,
then SAT. (To obtain the stereo sound alone,
just press LIST until AV* appears, then SAT, you
must do it from standby, though).
• To start playback on a Bang & Olufsen record
player in your main system, press LIST until
PHONO* is displayed, then GO. Pressing ▲ or ▼
while you are listening to a record makes the
record player step through the music in 8 mm
steps.
• To start playback on a secondary Bang &
Olufsen audio- or video tape recorder in your
main system, press LIST until either A.TAPE2* or
V.TAPE2* are displayed, then GO.

TELETEXT
18
Press to switch to Teletext
Press to step to the next favourite
Teletext page
Press to step to the previous page
Press to select a specific page,
for example page 302
Press to step to the next page
Press to step to the previous page
Calls up the page you have just left
How to call up Teletext pages
Presetting your own favourite Teletext pages…
If the station you are currently
watching transmits Teletext, press TEXT
on Beo4 to call up Teletext*.
The first page which appears is a
preset favourite Teletext page, the cue
MEM 1 in the upper left-hand corner of
the screen indicates this status.
A favourite page is a specific page
which has been preset in your TV. Four
favourite Teletext, MEM 1, 2, 3 and 4,
are available in your MX 4002 TV for
each station which transmits Teletext.
You can change this setup and preset
the pages you use most often as your
favourite Teletext pages.
Note: The facilities offered by Teletext differ
from country to country, and even from one
Teletext broadcaster to the other. For details
about special facilities we recommend that
you consult the information distributed on-
screen or on paper by your Teletext
broadcaster.
then
The Index page, page 100 (preset as
MEM 1), provides a list of content for
the Teletext pages, it can help you find
the Teletext page you want.
See the following pages for
information about the facilities
Teletext offers…
*Note: If you get a blank page when you press
TEXT, the TV station does not currently transmit
Teletext. Press EXIT or e.g. TV to leave Teletext.
Teletext page 100 is preset as MEM 1,
200, 300, and 400 as MEM 2 till 4.
or
GO
LIST
then
GO
TEXT
3
0
0
EXIT
2
1
Alternatively...
or
tt
ss
Press until STORE is displayed
Press to preset the current page,
as for example, your favourite page
number 1
Press to leave Teletext
To preset the current Teletext page as a favourite
Teletext page...

19
Once you have found the Teletext
page you want to read, there are
various facilities at your disposal which
make it easier for you to read the
page.
To use each of these functions, listed
below, follow the instructions shown
to the left…
*Note: In order to display REVEAL on Beo4, you
must add the function to the Beo4 list of
functions, see Beo4’s own User’s guide and the
chapter, Customizing your Beo4, for further
instructions.
STOP/SUBPAGE
Before you use this function, you must call up the
Teletext page of which you want a subpage. A
Teletext page can have a large number of
subpages which turn successively. The subpages
are identified by a 4-digit subcode.
To retain subpages which would otherwise “turn”
automatically, press STOP. The pages you have
retained will not be released until you press STOP
again.
LARGE
You can enlarge the text so that it is easier to
read from a distance. When you have chosen to
enlarge the Teletext, the upper half of the page
appears first, then you must press GO to see the
lower half of the page. You decide when you
want to return to normal page size by pressing
GO.
MIX
You can also superimpose the Teletext page on
the TV picture so that you can see both
simultaneously. You decide when you want to see
just the Teletext page again by pressing GO.
REVEAL*
If a Teletext page contains concealed text, for
example the answer to a riddle, you can use the
reveal function to reveal the concealed text.
When you want to conceal the text again, press
GO.
Retaining subpages…
Call up the Teletext page with
subpages…
Press to retain any subpage
Press to see subpages
Alternatively,
Key in the four digits for the
subpage you wish to see, for
example subpage 0005
Press STOP to release the page
Press until LARGE is displayed
Press to enlarge the text
Press GO again to enlarge the
remaining part of the text; and press
GO again to return to normal
Teletext size
Press until MIX is displayed
Press to superimpose the Teletext
page on the TV picture
Press GO again to see only the
Teletext page
Press until REVEAL* is displayed
Press to reveal concealed text
Press GO again to conceal the text
then
GO
Using the basic Teletext functions
LIST
then
GO
LIST
then
GO
LIST
STOP
STOP
then
then
0
0
0
5
or

GO
> Teletext
20
Select the program number for
which you want subtitles, e.g. 6,
and switch to Teletext
Find the subtitles page…
Call up the subtitles page,
for example 333
The subtitles appear on the screen
Press until LARGE is displayed
Press to enlarge the subtitles
Some Teletext broadcasters provide
subtitles for their TV or SAT
programmes. Such subtitles are
transmitted on a specific Teletext page,
for example 333. Use the Index page
(100) to find the subtitles page.
If you want subtitles for a station, find
the Teletext page with subtitles, the
subtitles will then be inserted at the
bottom of the screen on the TV picture
of e.g. the current TV programme.
You can enlarge the subtitles on the
screen to make them easier to read.
Press LIST to display LARGE and then
press GO.
Teletext subtitles
You can make the TV insert subtitles
automatically whenever you select a
specific station or program number.
The procedure involves calling up the
program number you want subtitles for
and Teletext. Now you just have to find
the subtitles Teletext page and then
store it on you favourite Teletext page
4*.
*Note: The Teletext page with the subtitles must
be preset on the favourite Teletext page number
4 (MEM 4). If you no longer want the subtitles to
appear automatically on the program number
concerned, you simply store another Teletext
page on MEM 4, see page 18 for further
instruction.
Making the subtitles appear automatically
LIST
then
GO
If it is not called up already, call up
the program e.g. 6
Press to call up Teletext
Call up the subtitles page, e.g. 333
Press LIST until STORE is displayed
Select favourite Teletext page 4
Press to preset the subtitles page on
favourite Teletext page 4
To make the subtitles appear whenever you select
a specific program number…
6
3
3
3
TEXT
then
6
TEXT
then
then
then
GO
then
then
3
3
3
4
LIST
/