Page is loading ...

User Guide
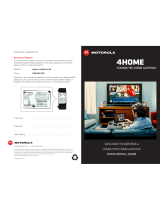
VT1000 Series
Voice Terminal
Important
This guide contains information related to
product warranty, regulatory matters, and
software licenses.

ii
License
Safety and Regulatory Information
WARNING: TO PREVENT FIRE OR SHOCK HAZARD, DO NOT EXPOSE THIS DEVICE TO RAIN OR MOISTURE. THE DEVICE SHALL NOT
BE EXPOSED TO DRIPPING OR SPLASHING AND NO OBJECTS FILLED WITH LIQUIDS, SUCH AS VASES, SHALL BE PLACED ON THE DEVICE.
CAUTION: TO ENSURE REGULATORY AND SAFETY COMPLIANCE, USE ONLY THE PROVIDED POWER AND INTERFACE CABLES. TO
PREVENT ELECTRICAL SHOCK, DO NOT USE THIS PLUG WITH AN EXTENSION CORD, RECEPTACLE, OR OTHER OUTLET UNLESS
THE BLADES CAN BE FULLY INSERTED TO PREVENT BLADE EXPOSURE.
CAUTION: DO NOT OPEN THE UNIT. DO NOT PERFORM ANY SERVICING OTHER THAN THAT CONTAINED IN THE INSTALLATION AND
TROUBLESHOOTING INSTRUCTIONS UNLESS YOU ARE QUALIFIED TO DO SO. REFER ALL SERVICING TO QUALIFIED SERVICE
PERSONNEL.
It is recommended that the customer install an AC surge arrestor in the AC outlet to which this device is connected. This is to avoid damaging the
equipment by local lightning strikes and other electrical surges.
This product was qualified under test conditions that included the use of the supplied cable between system components. To be in
compliance with regulations, the user must use this cable and install it properly.
Different types of cord sets may be used for connections to the main supply circuit. Use only a main line cord that complies with all
applicable product safety requirements of the country of use.
Installation of this product must be in accordance with national wiring codes.
To prevent overheating, do not block the ventilation holes on the sides of the Motorola voice terminal.
Wipe the Motorola voice terminal with a clean, dry cloth. Never use cleaning fluid or similar chemicals. Do not spray cleaners directly on the unit or
use forced air to remove dust.

iii
License
VT1000 Series Voice Terminal User Guide
Important VoIP Service Information
Any services provided through this equipment:
• Are not intended to replace or be a substitute for primary line voice services or Plain Old Telephone Service (POTS)
• Are not meant to provide guaranteed 911 or E911 services or to permit access to 411 directory assistance services
Your service provider, not Motorola, is responsible for the provision of VoIP telephony services through this equipment. Motorola shall not be liable
for, and expressly disclaims, any direct or indirect liabilities, damages, losses, claims, demands, actions, causes of action, risks or harms arising
from or related to the services provided through this equipment.
IMPORTANT: You CANNOT make any calls using this VoIP device if your broadband connection is not functioning properly or if you lose
electrical power.
FCC Compliance
This equipment has been tested and found to comply with the limits for a Class B digital device, pursuant to Part 15 of the FCC Rules. These limits are designed to provide reasonable
protection against harmful interference when the equipment is operated in a residential environment. This equipment generates, uses, and can radiate radio frequency energy and, if not
installed and used in accordance with the instructions, may cause harmful interference to radio communications. However, there is no guarantee that interference will not occur in a
particular installation. If this equipment does cause harmful interference to radio or television reception, which can be determined by turning the equipment off and on, the user is
encouraged to try to correct the interference by one of the following measures:
• Re-orient or relocate the receiving antenna
• Increase the separation between the equipment and receiver
• Connect the equipment into an outlet on a circuit different from that to which the receiver is connected.
• Consult the dealer or an experienced radio/TV technician for help.
Changes or modification not expressly approved by the party responsible
for compliance could void the user’s authority to operate the equipment.
Canadian Compliance
This Class B digital device complies with Canadian ICES-003. Cet appareil numérique de la classe B est conforme à la norme NMB-003 du Canada.

iv
License
FCC Declaration of Conformity
According to 47CFR, Parts 2 and 15 for Class B Personal Computers and Peripherals; and/or CPU Boards and Power Supplies used with Class B
Personal Computers, Motorola BCS,
101 Tournament Drive, Horsham, PA
19044, 1-215-323-1000, declares under sole responsibility
that the product
identifies with 47CFR Part 2 and 15 of the FCC Rules as a Class B digital
device.
Each product marketed is identical to the
representative unit tested and found to be compliant with the standards
. Records maintained continue to reflect the equipment being produced can
be expected to be within the variation accepted, due to quantity
production and testing on a statistical basis as required by 47CFR 2.909
. Operation is subject to the following condition: This
device must accept any interference received, including interference that may cause undesired operation. The above named party is responsible for ensuring that the equipment complies
with the standards of 47CFR, Paragraph 15.101 to 15.109.
International Declaration of Conformity
We, Motorola, Inc. Broadband Communications Sector
101 Tournament Drive
Horsham, PA, U.S.A.
declare under our sole responsibility that the:
Motorola VT1003, VT1005, VT1003v, and VT1005v voice terminals
to which this declaration relates is in conformity with one or more of the following standards:
the following provisions of the Directive(s) of the Council of the European Union:
EN55022 EN55024 CISPR-22 CISPR-24 ETSI EN300 386
EN60950 EN61000-3-2 EN61000-3-3 IEC 60950
EMC Directive 89/336/EEC Low Voltage Directive 73/23/EEC Directive 93/68/EEC
Copyright © 2005 by Motorola, Inc.
All rights reserved. No part of this publication may be reproduced in any form or by any means or used to make any derivative work (such as translation, transformation or adaptation)
without written permission from Motorola, Inc.
Motorola reserves the right to revise this publication and to make changes in content from time to time without obligation on the part of Motorola to provide notification of such revision or
change. Motorola provides this guide without warranty of any kind, either implied or expressed, including, but not limited to, the implied warranties of merchantability and fitness for a
particular purpose. Motorola may make improvements or changes in the product(s) described in this manual at any time.
MOTOROLA, the Stylized M Logo, and SURFboard are registered in the US Patent & Trademark Office. Microsoft and Windows are registered trademarks of Microsoft Corporation.
Macintosh is a registered trademark of Apple Computer, Inc. Netscape Navigator is a registered trademark of Netscape Communications Corporation. UNIX is a registered trademark of the
Open Group in the United States and other countries. DOCSIS is a registered trademark of Cable Television Laboratories, Inc. All other
product or service names are the property of their
respective owners. © Motorola, Inc. 2005.

Contents
Introduction ..............................................................................................................................1
Sample Configuration Without A Home Network ............................................................................... 2
Sample Wired Network With Calls Prioritized .................................................................................... 3
Sample Wireless Network With Calls Prioritized ................................................................................ 4
Sample Wired Network Without Calls Prioritized ............................................................................... 5
Sample Wireless Network Without Calls Prioritized ........................................................................... 6
Front Panel ........................................................................................................................................ 7
Rear Panel ......................................................................................................................................... 8
Before You Begin .....................................................................................................................9
Precautions ...................................................................................................................................... 10
Signing Up for Service ..................................................................................................................... 10
Installation ..............................................................................................................................11
Installation With A Single Computer ................................................................................................ 12
Network Installation With Calls Prioritized ....................................................................................... 14
Network Installation With Calls Not Prioritized .................................................................................16
Connecting a Computer to Display the Configuration Pages ........................................................... 18
Basic Configuration .......................................................................................................................... 19
Advanced Configuration ................................................................................................................... 22
Status ............................................................................................................................................... 24
Help .................................................................................................................................................. 25
Troubleshooting .....................................................................................................................26

Frequently-Asked Questions ................................................................................................27
Glossary ..................................................................................................................................30
Software License and Warranty ............................................................................................34

1
VT1000 Series Voice Terminal User Guide
Introduction
A Motorola voice terminal (digital phone adapter) adds Voice over Internet Protocol
(VoIP) connections for one or two telephones to any broadband Internet connection. The
connection can be through either:
• A cable modem high-speed data service from a cable television company
• A digital subscriber line (DSL) service from a telephone company
• Other high-speed Internet connection
The VT1000 Series includes the following models, which collectively are referred to as a
“Motorola voice terminal” in this guide:
You can use a Motorola voice terminal with almost any:
• Cable modem or DSL modem (broadband modem)
• Microsoft Windows
®
, Macintosh
®
, or UNIX
®
computer with a 10Base-T or
10/100Base-T Ethernet adapter
• Ethernet router or wireless access point
VT1003
VT1003v
Provide one telephone line
VT1005
VT1005v
Provide two telephone lines

2
As shown in tn the illustrations on page 2 to page 6, the Motorola voice terminal can
prioritize calls only if you connect it directly to your broadband modem.
Sample Configuration Without A Home Network
You can connect a Motorola voice terminal to any cable modem or DSL modem.
Because the Motorola voice terminal is directly connected to your broadband modem,
the Motorola voice terminal can prioritize voice calls over data traffic. This helps ensure
high-quality phone service:
Motorola voice
terminal
For simplicity, not all cables are shown.
Broadband
modem
Internet

3
VT1000 Series Voice Terminal User Guide
Sample Wired Network With Calls Prioritized
You can connect any Ethernet router to your Motorola voice terminal. Because the
Motorola voice terminal is directly connected to your broadband modem, the Motorola
voice terminal can prioritize voice calls over data traffic. This helps ensure high-quality
phone service:
Broadband
modem
Internet
Motorola voice terminal
Ethernet
router

4
Sample Wireless Network With Calls Prioritized
You can connect any wireless router (access point) to your Motorola voice terminal.
Because the Motorola voice terminal is directly connected to your broadband modem,
the Motorola voice terminal can prioritize voice calls over data traffic. This helps ensure
high-quality phone service:
Broadband
modem
Internet
Motorola voice terminal
Wireless
access point

5
VT1000 Series Voice Terminal User Guide
Sample Wired Network Without Calls Prioritized
You can connect a Motorola voice terminal to any Ethernet router on a network having a
high-speed Internet connection. Because the Motorola voice terminal is not directly
connected to your broadband modem, the Motorola voice terminal cannot prioritize
voice calls over data traffic:
You may prefer this configuration if you already have a
home network.
You may need to connect a computer to the Motorola
voice terminal rear panel to configure the Motorola
voice terminal. See “Connecting a Computer to
Display the Configuration Pages” on page 18.
Motorola voice terminal
Broadband
modem
Router
Internet
Only if
necessary

6
Sample Wireless Network Without Calls Prioritized
You can connect a Motorola voice terminal to any wireless access point on a network
having a high-speed Internet connection. Because the Motorola voice terminal is not
directly connected to your broadband modem, the Motorola voice terminal cannot
prioritize voice calls over data traffic:
You may prefer this configuration if you already have a
wireless LAN.
You may need to connect a computer to the Motorola
voice terminal rear panel to configure the Motorola
voice terminal. See “Connecting a Computer to
Display the Configuration Pages” on page 18.
Motorola voice terminal
Broadband
modem
Wireless access point
Internet
Only if
necessary

7
VT1000 Series Voice Terminal User Guide
Front Panel
When your Motorola voice terminal is plugged in and operating normally, the POWER
light on the front panel lights solid green.
During start-up and image upgrades, as a Troubleshooting aid, the POWER light blinks:
Caution!
Blinks Voice Terminal is
Once Performing its initial boot sequence
Two Acquiring its network address
Three Downloading its configuration profile from your VoIP provider
Four Registering with your VoIP provider server
Continuous
Fast
Downloading an image upgrade initiated by your VoIP provider
Never unplug your Motorola voice terminal while its light is blinking
continuously. Instead, allow the image upgrade to finish. If you unplug the
Motorola voice terminal during an image upgrade, it may become inoperable.

8
Rear Panel
The rear panel provides the following connectors:
The WAN and PC connectors each have two adjacent lights:
• The green light is on when the Ethernet connection is available. It blinks during data
transfer over the port.
• The yellow light is on if there is a 100Base-T link and off for a 10Base-T link.
Item Type Connects To
LINE 2 RJ-11 Telephone line two (on the VT1005 or VT1005v only)
LINE 1 RJ-11 Telephone line one
POWER 12 V An adapter that you plug into an AC power outlet
WAN RJ-45 Ethernet connector to your broadband modem, router, switch, or hub.
(“WAN” means “wide area network”)
PC RJ-45 Ethernet connector to a computer
Your Motorola voice terminal may appear slightly
different than in the illustrations in this guide. Some
models do not have every connector illustrated.

9
VT1000 Series Voice Terminal User Guide
Before You Begin
Before you begin the installation, check that you received the following items with your
Motorola voice terminal:
You also need:
• DSL, cable modem, broadband gateway, or other high-speed Internet connection
• One or two touch-tone telephones
You may need an additional 10/100Base-T category 3 or better straight-through
Ethernet
cable with RJ-45 terminators.
Item Description
AC adapter
and line cord
Connects the Motorola voice terminal to an AC
electrical outlet
Ethernet
cable
Connects the WAN port on the Motorola voice terminal
to a broadband modem (cable or DSL), router,
or
wireless access point
Connects the LAN port on the Motorola voice terminal to
a computer, router, or wireless access point

10
Precautions
Caution!
Postpone installation until there is no risk of thunderstorm or lightning activity in the area.
To prevent overheating the Motorola voice terminal, do not block the ventilation holes on
its sides.
Do not open the Motorola voice terminal. Refer all service to your VoIP provider.
Wipe the Motorola voice terminal with a clean, dry cloth. Never use cleaning fluid or similar
chemicals. Do not spray cleaners directly on the unit or use forced air to remove dust.
Signing Up for Service
To activate voice service, you need to provide the MAC address printed on the bar code label
marked MTA MAC ID on the bottom of the Motorola voice terminal to your VoIP provider.
If you have a DSL modem, you need to obtain the Service Name, User Name, and
Password from your DSL provider.
Contact your VoIP provider before connecting your Motorola voice terminal to
your existing telephone wiring. Connect each LINE port to a telephone only;
never to a traditional telephone service.

11
VT1000 Series Voice Terminal User Guide
Installation
Depending on whether you have a single computer or a home network with multiple
computers and a router or wireless access point, perform one of:
• Installation With A Single Computer
• Network Installation With Calls Prioritized
• Network Installation With Calls Not Prioritized
Caution!
Contact your VoIP provider before connecting your Motorola voice terminal to
existing phone wiring. Connect each LINE port to a telephone only; never to a
traditional telephone service.
Be sure the LINE connectors are neither connected together nor connected to
wall jacks on the same network.
To modem or router
To computer
or router
To phone
To AC power

12
Installation With A Single Computer
To connect your Motorola voice terminal as shown in “Sample Configuration Without A
Home Network” on page 2:
1 Be sure the Motorola voice terminal is unplugged. Be sure power is off to your
broadband modem (cable or DSL) and computer.
2 Connect one end of an Ethernet cable (RJ-45) to the Ethernet connector on your
broadband modem. Connect the other end of this Ethernet cable to the WAN
connector on the Motorola voice terminal.
3 Connect one end of another Ethernet cable to the PC connector on the Motorola
voice terminal. Connect the other end of this Ethernet cable to the Ethernet
connector on the computer.
4
Connect a telephone to the
LINE 1
connector using a phone wire (RJ-11). For a VT1005
or VT1005v only, you can connect a second telephone to the LINE 2 connector.
5 Power on the broadband modem, following the instructions provided with your
modem. Wait about two minutes for it to start up.
6 Plug the AC power adapter to the POWER connector on your Motorola voice
terminal and the electrical outlet. This turns your Motorola voice terminal on. You do
not need to unplug it when not in use.
Wait about two minutes for the Motorola voice terminal to start up. The POWER light
blinks as described in “Front Panel” on page 7.
Motorola voice
terminal
Broadband
Modem
Computer
WAN
PC
Ethernet port
Ethernet port
Phone
LINE 1

13
VT1000 Series Voice Terminal User Guide
7
After the POWER light on your Motorola voice terminal turns on solid green, power
up your computer. If your broadband Internet service does not work as it did before
you installed your Motorola voice terminal, please refer to “Troubleshooting” on
page 26.
If you have a cable modem, skip to step 9.
8 If you have a DSL modem, enable PPPoE on your Motorola voice terminal as
described in “Basic Configuration” on page 19.
9 Pick up your telephone hand set and listen for a dial tone. If you hear a dial tone,
you can now call anyone as you would with any telephone.
If you have any problems, please refer to “Troubleshooting” on page 26 or call your
VoIP provider.

14
Network Installation With Calls Prioritized
To connect your Motorola voice terminal directly to your broadband router, as shown on
page 3 or page 4:
1 Be sure your Motorola voice terminal is unplugged. Be sure power is off to your
broadband modem (cable or DSL) and router.
2 Connect one end of an Ethernet cable (RJ-45) to an open Ethernet LAN port on
your broadband modem. Follow the instructions provided with the modem. Connect
the other end of this Ethernet cable to the WAN connector on your Motorola voice
terminal.
3 Connect a telephone to your LINE 1 connector using a phone wire (RJ-11). For a
VT1005 or VT1005v only, you can connect a second telephone to the
LINE 2
connector.
4 Connect your router or wireless access point, following the instructions provided
with the router or access point.
5 Power on your broadband modem, following the instructions provided with the
modem. Wait about two minutes for it to start up.
6 Plug the AC power adapter to the POWER connector on your Motorola voice
terminal and the electrical outlet. This turns your Motorola voice terminal on. You do
not need to unplug it when not in use.
Wait about two minutes for the Motorola voice terminal to start up. The POWER light
blinks as described in “Front Panel” on page 7.
Broadband
Modem
Motorola
voice
terminal
Router or
wireless
access point
Computer
WAN
PCLINE 1
Phone
Computer Computer
Ethernet or wireless
/