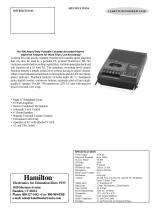
CAS1500

Califone CAS1500, CAS5272 User manual

  • Hello! I am an AI chatbot trained to assist you with the Califone CAS1500 User manual. I’ve already reviewed the document and can help you find the information you need or explain it in simple terms. Just ask your questions, and providing more details will help me assist you more effectively!
Model CAS1500 /
CAS3432IR / CAS5272
Cassette Players/Recorders
User Manual
califone.com
3
Model CAS1500 / CAS3432IR
/ CAS5272 Cassette Players/
Recorders
Thank you for purchasing the Califone
®
CAS-series Cassette Player/
Recorder.
We encourage you to visit our website www.califone.com to register your
product for its warranty coverage, to sign up to receive our
newsletter, download our catalog, and learn more about the complete
line of Califone
®
audio visual products, including portable and installed
wireless PA systems, multimedia players and recorders, headphones
and headsets, computer peripheral equipment, visual presentation
products and language learning materials.
califone.com
4
califone.com
5
1. IMPORTANT SAFETY INSTRUCTIONS
Before using this product, read the instruction manual for important safety
information. Please retain this manual for future reference and warranty
information.
Troubleshooting & Servicing
Do not attempt to service or repair the device yourself. Refer all servicing
to qualied service personnel. Do not attempt to modify the device in any
way. Doing so could invalidate your warranty.
Moisture and heat sources
Do not use this apparatus near water (for example, sinks, baths, pools) or
expose it to rain, moisture, dripping or splashing liquids. Do not expose
the unit to high temperatures, high humidity or direct sunlight.
Cleaning
When cleaning the device, please use a soft, dry cloth. Never use
benzene, paint-thinner, or other chemicals on the device.
Location
Place the device in stable location, so it will not fall causing damage to
the device or bodily harm.
Intended use
The product may only be used with the original parts intended for it. The
product may only be used in closed and dry rooms. The intended use
includes adherence to the specied installation instructions. The
manufacturer accepts no liability for damage arising due to improper use.
WARNING: Changes or modications to this unit not expressly approved
by the party responsible for compliance could void the user’s authority to
operate the equipment.
IMPORTANT
This device complies with Part 15 of the FCC Rules. Operation is subject
to the following two conditions:
(1) This device may not cause harmful interference, and (2) this device
must accept any interference received, including interference that may
cause undesired operation.
The unit’s circuitry may cause interference to nearby radios. To prevent
interference, either switch the unit off or move away from the affected
radio.
NOTE: This equipment has been tested and found to comply within the
limits for a class B digital device, pursuant to Part 15 of the FCC Rules.
These limits are designed to provide reasonable protection against
harmful interference in a residential installation. This equipment
generates, uses and can radiate radio frequency energy and, if not
installed and used in accordance with the instructions, may cause
harmful interference to radio communications. However, there is no
guarantee that interference will not occur in a particular installation. If this
equipment does cause harmful interference to radio or television
reception, which can be determined by turning the equipment off and on,
the user is encouraged to try to correct the interference by one or more of
the following measures:
Reorient or relocate the receiving antenna.
Increase the separation between the equipment and receiver.
Connect the equipment into an outlet on a circuit different from
that to which the receiver is connected.
Consult the dealer or an experienced radio / TV technician for
help.
NOTE: Shielded cables may be required to be used with this unit to en-
sure compliance with the Class B FCC limits.
califone.com
6
califone.com
7
2. PACKAGE CONTENTS
CAS1500 / CAS3432IR / CAS5272 Cassette Player/Recorder
Power Adapter
User Manual
3. PART NAMES AND FUNCTIONS
Top View
Side View
CAS1500
Top View
Side View
CAS3432IR
Rear View
CAS5272
califone.com
8
califone.com
9
4. SETUP AND INSTALLATION
4.1 AC OPERATION
1. Adjust the Volume control to the minimum position.
2. Before operation please be sure that the voltage on the power
adapter corresponds to the AC voltage of your local area. Unravel
the AC Line Cord, insert one end into the DC input jack on the unit
and the other end into a standard AC outlet.
4.2 BATTERY OPERATION
1. Adjust the Volume control to the minimum position.
2. IMPORTANT:DisconnectthepoweradapterfromtheACmain
power.
3. Open the BATTERY COMPARTMENT DOOR and insert batteries
(CAS1500 = four C size, CAS3432IR = six C size, CAS5272 = four D
size) (not included) making sure that the indicated battery polarity is
observed.
4.3 CONNECTING HEADPHONES
1. Decrease the volume to minimum.
2. Connect the headphones to one of the H/P jacks.
3. Increase the volume to the desired listening level.
CAUTION: Avoid excessive volume for long periods of time as this can
result in hearing damage.
5. BASIC OPERATION
5.1 CASSETTE OPERATION
1. Press the STOP/EJECT button to open the cassette door.
2. Insert a cassette tape into the CASSETTE COMPARTMENT and
push the cassette door to close.
3. Press the PLAY button. Adjust the VOLUME CONTROL KNOB
to your desired listening level.
4. To stop the tape, press the STOP/EJECT button.
FAST FORWARD AND REWIND
The tape can be fast FORWARDED or REWOUND by pressing the
FAST FORWARD button or REWIND button respectively.
PAUSE FUNCTION
During playback or recording, the tape can be stopped temporarily
by pressing the PAUSE button. To continue playback or recording,
press the PAUSE button once again.
FULL AUTO STOP SYSTEM
When the tape runs to its end during playback or recording, the
cassette operation will be stopped automatically.
CAUTION: To avoid damage to the cassette mechanism or to the
cassette tapes, always press the STOP/EJECT button between each
operation.
5.2 RECORDING
1. To record from an auxiliary source such as a computer, CD player,
etc., connect the source unit headphone/aux output to the Aux Input
on the cassette recorder.
2. Alternately, to record from an external microphone, skip step 1 above
and instead, connect the microphone to the microphone jack. Turn
the microphone ON if it has on ON/OFF switch.
3. Alternately, to record from the built-in microphone, simply skip step 1
and 2.
4. Insert a blank tape into the cassette deck.
5. Press the PAUSE key then the RECORD key to prepare for the
recording. As the RECORD key is pressed the PLAY key will follow.
6. Press PAUSE again to start recording.
7. Start the auxiliary audio source, or start speaking into the built-in or
external microphone as appropriate.
8. To stop recording, press the STOP/EJECT key to stop the cassette
transport or press the PAUSE key to momentarily stop the recording.
Press PAUSE key again to restart recording.
NOTES:
The CAS-series Cassette Recorders feature an ALC (Automatic
Level Control) circuit, which automatically adjusts the volume level
while recording to reduce distortion and overloading.
Every new cassette tape has erase prevention tabs. Commercially
pre-recorded tapes have the tabs removed to prevent recording over
the original material or accidental erasure. Cover the openings with
adhesive tape if you wish to record over such cassette tape.
5.2 REMOTE START/STOP & THE MICROPHONE JACK
The Remote Stop/Start jack can be used to start and stop
cassette tape playback or recording. The PLAY or RECORD key must be
depressed to use the Remote Stop/Start feature.
NOTE: The internal microphone is automatically disconnected when an
external microphone is plugged in.
5.3 QUEING
1. Rewind the tape to the beginning.
2. Press the RESET button to reset the counter to (000).
3. Use the Tape Counter Display to note song/track starting locations
during playback and to cue the tape to precise points using the
FAST-FORWARD or REWIND keys.
califone.com
10
califone.com
11
5.4 INFRARED (IR) TRANSMITTER OPERATION (CAS3432IR
ONLY)
Move the IR SIGNAL ON/OFF switch to the ON position
when using the CAS3432IR cassette player with HIR-series Infrared
headphones.
NOTE: The cassette player’s internal speaker output will be cut off when
using this feature.
5.5 CAS5272 PA FEATURE (CAS5272 ONLY)
You can use the CAS5272 as a PA System to broadcast speech
and/or recorded audio.
1. Connect an external microphone to the microphone jack.
2. Slide the PA switch to ON.
3. Turn the microphone ON if it has on ON/OFF switch.
4. Insert a blank tape or a tape with a recorded message or background
music and press play.
NOTES:
The PA feature only works when a tape is playing. A cassette tape in
the unit unless you want to broadcast a recorded message.
When using the PA Control, the Volume Control will increase or
decrease both microphone and audio cassette sound output.
The level of tape and microphone volume cannot be adjusted
independently.
To avoid acoustic feedback, position the microphone as far away as
possible from the speaker. An 8ohn speaker may be connected to
the Headphone/Speaker jack for addressing a larger audience. If an
external speaker is used, the internal speaker is disconnected.
HANDLING CASSETTE TAPES
If the tape is loose in its cassette, take up the slack by inserting a
pencil in one of the reels and rotating if the tape is loose it may get
stretched, cut, or caught in the cassette.
Do not touch the tape surface.
To prevent recording from being erased accidentally, remove the
tab(s) A and B.
To record after the tabs have been broken off reseal the slots A and
B with a piece of adhesive tape.
CASSETTE DECK MAINTENANCE
The heads, capstan and pinch roller should be cleaned from time to time
to prevent buildup of tape oxide, which degrades performance. We
recommend cleaning after every 20-30 hours of operation.
1. Press the Stop/Eject key to open the deck door.
2. Remove cassette tape before cleaning.
3. Clean the head of all visible, reddish-brown oxide with a cotton-
tipped swab moistened with a methyl alcohol or any solution
specically manufactured for this purpose.
CAUTION: DO NOT scrape the head surface with hard, sharp or
abrasive objects. This will permanently damage the heads.
4. Clean the pinch roller by scrubbing the surface of the roller with the
moistened swab. Rotate the roller by hand until the entire surface is
clean.
5. Clean external case surfaces with a moist, soft cloth. Use only a mild
detergent water solution.
HEAD DEMAGNETIZATION
It is recommended that the tape heads be demagnetized from time to
time. This eliminates residual magnetism which degrades sound
reproduction and the recording function.
1. After cleaning the heads and capstan, place the demagnetizer
several feet away from the cassette unit and plug it into an AC outlet.
2. Follow the manufacturer’s operating instructions supplied with the
demagnetizer.
6. TROUBLESHOOTING
No Sound /Low Volume Ensure the power is connected and the
volume control is up.
To play through the built-in speaker, ensure
there is nothing plugged into the External
Speaker Output.
califone.com
12
califone.com
13
7. SPECIFICATIONS & FEATURES
CAS1500
Features Auto Level Control Recording
Full Auto Stop
3-digit Tape Counter
Power Requirements 4 “C” size alkaline batteries OR 110-
240VAC -> 6VDC/800mA power adapter
(included)
Power Output 500 mW
Wow & Flutter < 0.35%
Microphone Built-in Electret
Output Jacks 1/4” Headphone + 1/4” Headphone/External
Speaker
Input Jacks 3.5mm Microphone + 2.5mm Remote
Product Dimensions 10.75” x 5.6” x 2”
Product Weight (incl.
accessories)
3 lbs
CAS3432IR
Features Auto Level Control Recording
Full Auto Stop
3-digit Tape Counter
Tone Control
LED Record Indicator
Power Requirements 6 “C” size alkaline batteries OR 110-
240VAC -> 12VDC/1A power adapter
(included)
Infrared Transmission Range > 15 feet (line-of-sight required)
Power Output 3 Watts
Wow & Flutter < 0.35%
Microphone Built-in Electret
Output Jacks 6 Headphone (1/4”)
1 Headphone/External Speaker (1/4”)
Input Jacks 3.5mm Microphone + 2.5mm Remote
Aux Input (1/4”)
Product Dimensions 13.5” x 6.7” x 2.5”
Product Weight (incl.
accessories)
4.5 lbs
CAS5272
Features Auto Level Control Recording
Full Auto Stop
3-digit Tape Counter
Tone Control
5-LED Record Level Indicator
PA Function
Power Requirements 4 “D” size alkaline batteries OR 110-
240VAC -> 15VDC/1.5A power adapter
(included)
Power Output 10 Watts
Wow & Flutter < 0.35%
Microphone Built-in Electret
Output Jacks 6 Headphone (1/4”)
1 Headphone/External Speaker (1/4”)
Input Jacks 3.5mm Microphone + 2.5mm Remote
Aux Input (1/4”)
Product Dimensions 11” x 11” x 3.3”
Product Weight (incl.
accessories)
6 lbs
califone.com
14
8. WARRANTY
Califone warrants this product to be free from defective material
and workmanship for one year from the purchase date. Our “Project
Intercept” Customer Satisfaction program will replace defective parts and
repair malfunctioning equipment under this warranty when the defect
occurs under normal use.
All Damage Claims Must Be Made With the Freight Carrier
Notify the freight carrier immediately if you observe any damage to the
shipping carton or product. Repack the unit in the carton and await
inspection by the carrier’s claim agent. Notify your dealer of the pending
freight claim.
Returning Your Unit for Service or Repairs
Should your unit require service, contact our Customer Service
Department online at califone.com/techsupport or via email warranty@
califone.com or by phone at 800-722-0500 / 818-407-2400 to rst obtain
an RA (Return Authorization) number before returning it to Califone. The
unit must be returned to our factory via prepaid transportation only after
the factory issues an RA number, which must be clearly written on the
outside of the box.
Califone
®
International, Inc.
1145 Arroyo Avenue, #A
San Fernando, CA 91340 USA
Toll Free 800.722.0500 | Toll Free Fax 877.402.2248
International Customers call 818.407.2400 or Fax 818.407.2405
califone.com
Califone CAS-series Rev 01 0810
/